This easy-to-make piano pop-up card is perfect for the music connoisseur in your life. Make it with the help of your trusty Cricut or Silhouette. This card makes for a great gift for any occasion!
It’s time to get crafty, my creative friends! Welcome back to Better Life Blog where we are all about a good cutting machine DIY. Today, I am thrilled to share with you my easy-to-follow tutorial to make your very own Piano Pop-Up Card.

Is It Easy To Make Pop-Up Cards With a Cricut or Silhouette?
Absolutely! In fact, we have tons of tutorials on our blog that shows you how to make a variety of pop-up cards. Check them out:
- 3D Tulip Gift Card Holder
- Dreidel Pop-Up Card Tutorial
- Hot Air Balloon Pop-Up Card
- Father’s Day BBQ Pop-Up Gift Card Holder
For Which Occasion Should I Use This Piano Pop-Up Card?
What’s great about this Cricut pop-up card is that it’s evergreen in nature. It’s not tied down to one specific season, so you can gift it at any time. We love using it for:
- Birthdays
- Anniversaries
- Recitals
- Congratulatory messages
…the possibilities are endless!
How Do I Get the File To Make This Pop-Up Card on My Cutting Machine?
Members of our VIP Crafters Club received this file in their monthly SVG bundle – so if you’re a member, take a look at your bundle from October 2022. All you have to do is sign onto your member dashboard and download it!

If you’re not yet a member of our VIP Crafters Club, be sure to sign up here. By becoming a member, you get full access to our archive of original SVG files. Plus, you’ll be automatically added to our exclusive online group where we do live crafting parties every month!
Otherwise, you can download the individual file here.

What Supplies Do I Need to Make My Own Piano Pop-Up Card?
To make this easy piano pop-up card, you’ll need the following supplies:
- Piano Pop-Up Card SVG file
- Cricut or your preferred cutting machine
- Black cardstock
- White cardstock
- Patterned paper
- Light grip mat
- Scoring tool attachment for your cutting machine
- Precision glue

How to Make An Easy Piano Pop-Up Card With Your Cricut or Silhouette Machine
Step 1: Download Your File
For all members of our VIP Crafters Club, be sure to log onto your members dashboard to download this file that was included in your October 2022 bundle. Otherwise, you can download the individual file here.
Step 2: Unzip Your File
Once you’ve downloaded your file, locate it on your computer. You will find a zipped file/folder. Extract/unzip the file.
Step 3: Open the Folder
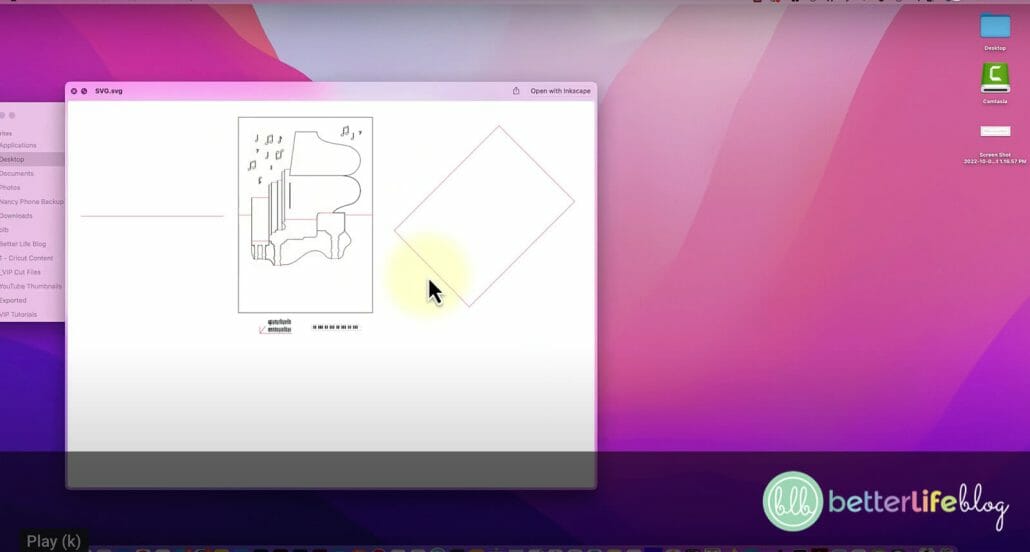
Once you extract the file, you will see a folder with 4 different file types. For most cutting programs, you will want to work with the SVG file (please see sample in the screenshot below). However, we provide different formats so that you have a range of choices and can use the file that works best for your program (for instance, the free Silhouette design program requires a .DXF file, which we’ve also included).
Step 4: Open Up Your Design Program
In this particular blog post, we’ll be working with Cricut Design Space – but you can also take a look at our YouTube channel for full video tutorials for both Cricut and Silhouette.
Open up Design Space so that you have a blank canvas to work with.
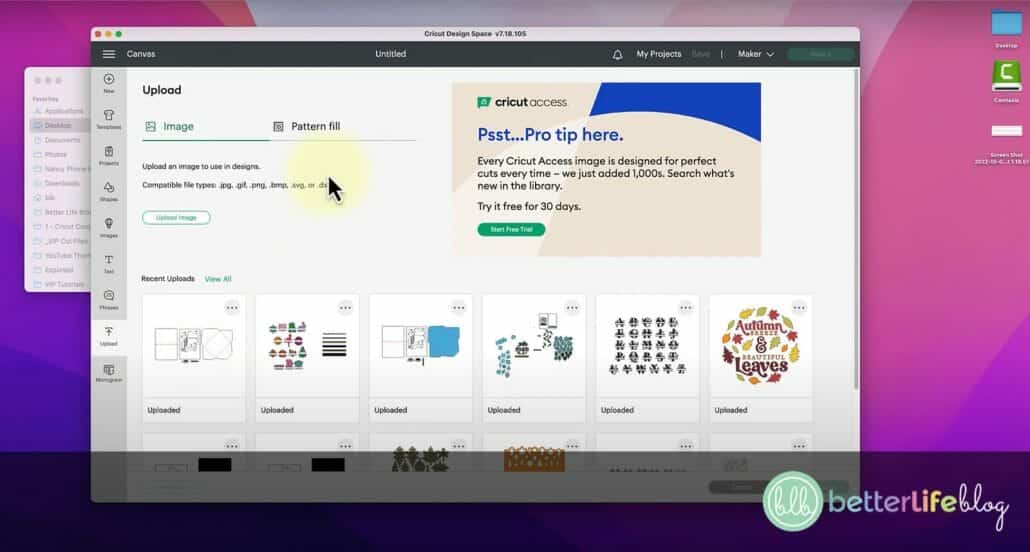
Step 5: Upload The File
To upload your file on Design Space, head over to the bottom left-hand side of your screen (left-hand menu) and click on the icon that says “Upload.”
You’ll be then taken to a screen where you will click on a button that says “Upload Image.” On the next screen, you can either click “Browse” to browse your computer for your file, or click and drag your file into the window.

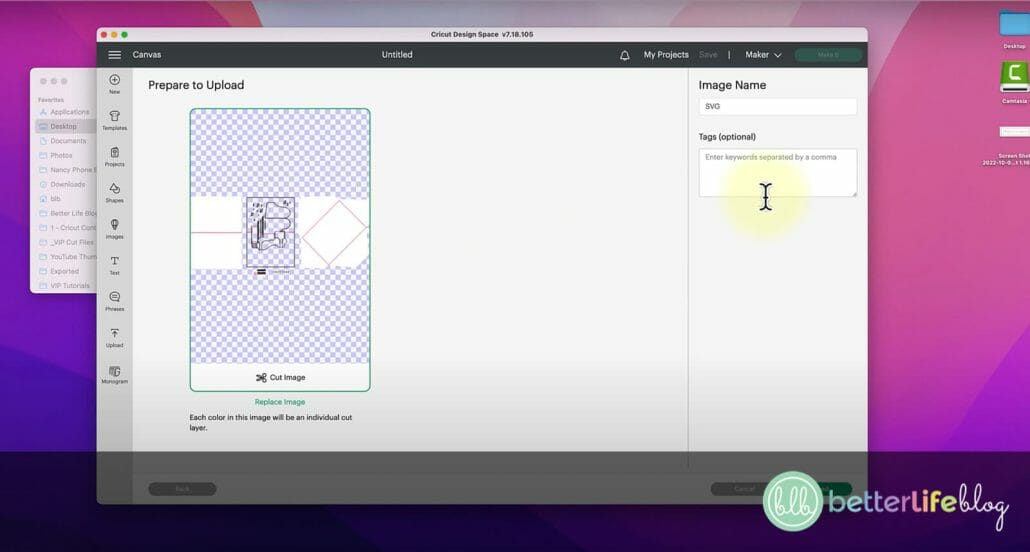
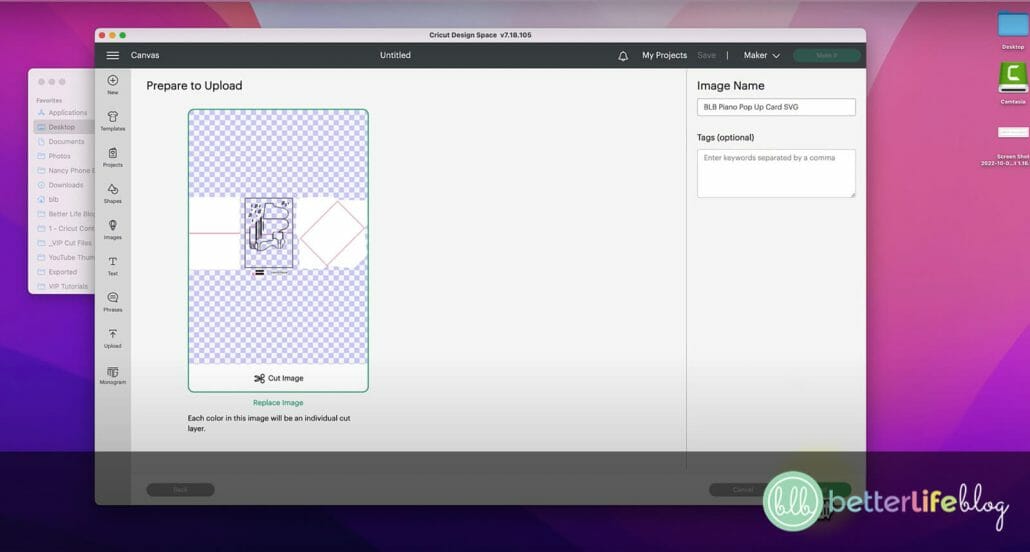
Step 6: Preview Then Upload
On the next screen, you will see a preview screen and you can add tags to your file (right-hand side), but it is completely optional. You can also change the image name. Again, it is completely optional.
Once you’ve entered the file name and tags, head over to the button on the bottom right-hand corner click “Upload.”
Then, on the next screen, select your file from the section called “Recent Uploads” and then click on the bottom right-hand corner button where it says “Add to Canvas.”
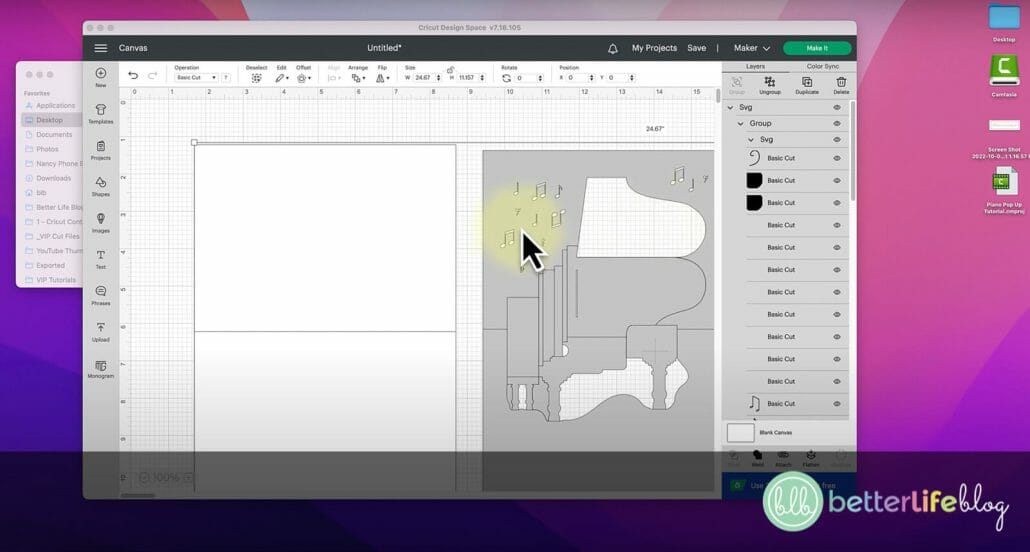
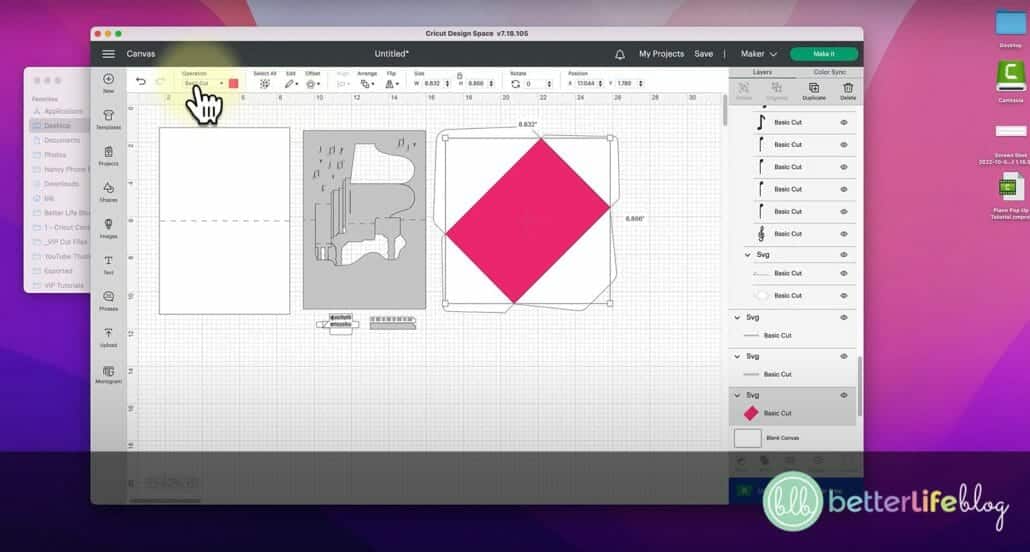
Step 7: Image on Canvas
The image/file should now be on your canvas. The first thing you’ll want to do is zoom out of your canvas (toggle on the + and – sign on the bottom left-hand corner), so that you can see your entire image on one screen.
Step 8: Ungroup
Next, you will want to ungroup the file. Go ahead and click on the image and you’ll see a box around the entire image.
Then, head over to right-hand side of the menu and click on the “Ungroup” icon. This ungroup function allows you to work with the different elements of the image and click on individual areas of the image itself.

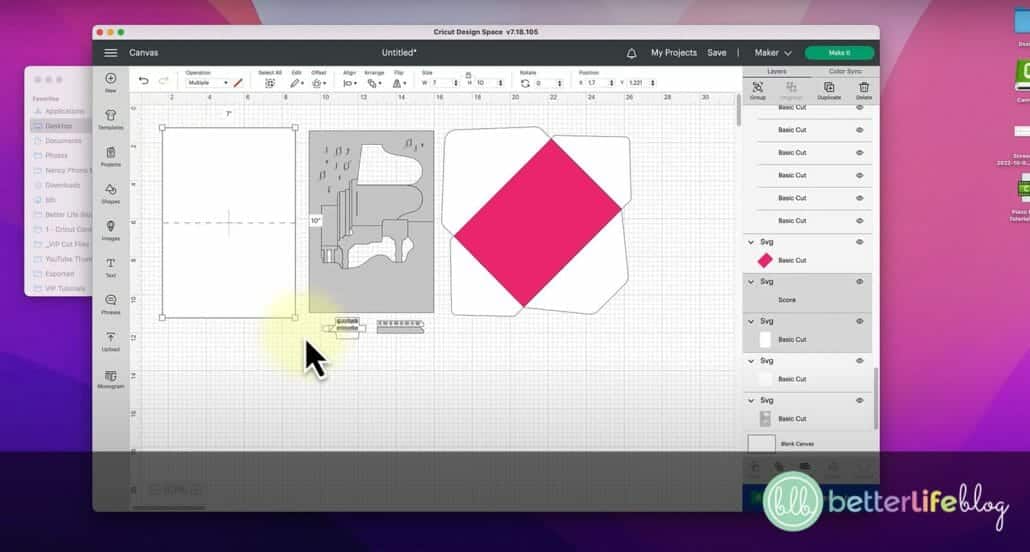
Step 9: Each Element of the Image
To understand each element of the file and what you’ll be working with, here are the details:
The image you see on the far left-hand side will be the outer card.
The middle portion is the actual pop-up.
On the right-hand side, you’ll see the envelope.
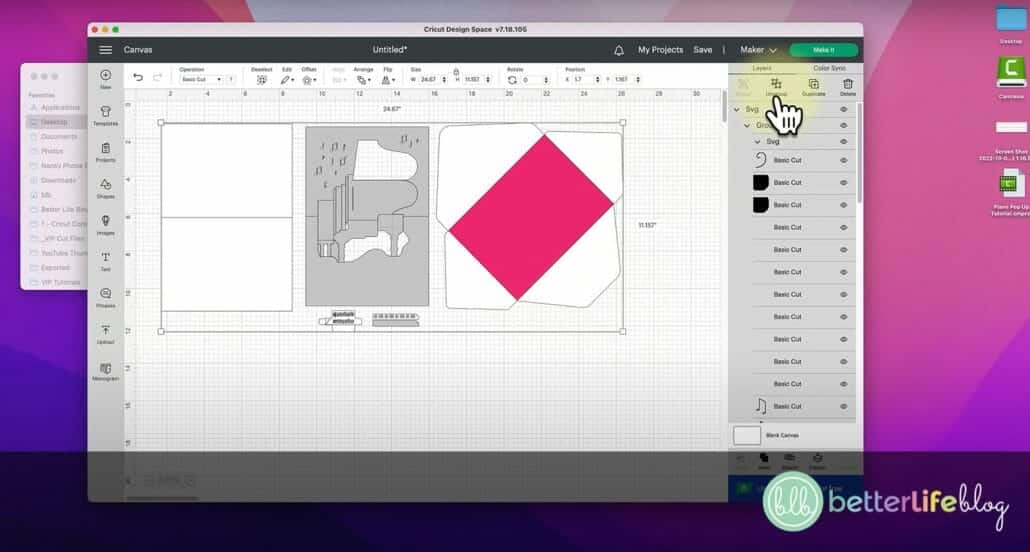
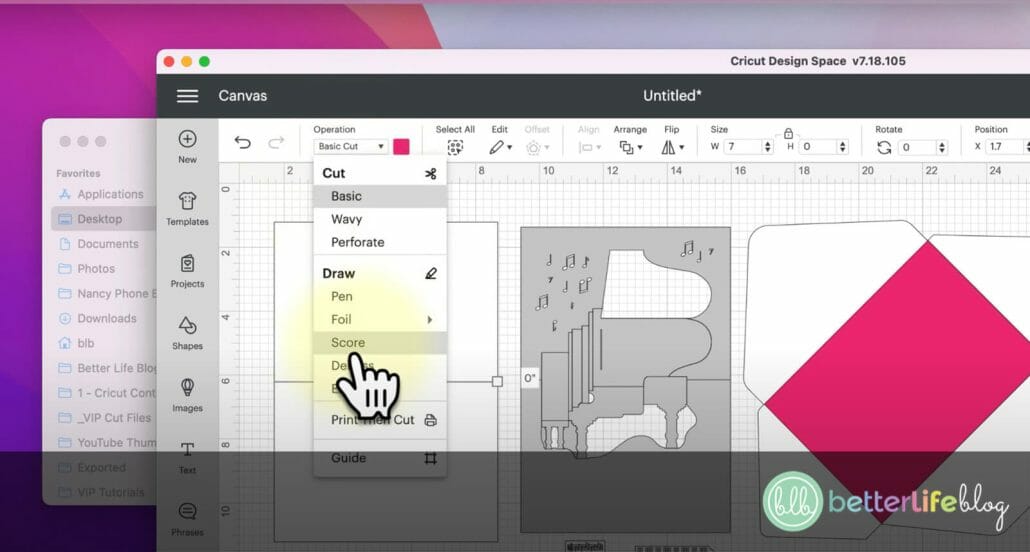
Step 10: Change Lines Into Score Lines
To begin, you will need to change all the lines into score lines.
Let’s start with the outer card: the center line will need to be changed into a score line. Click on the line and then head over to the canvas’ top menu where there’s a drop down that says “Operation.” Locate “Score” on the drop down and select. Once you click on any blank area on the canvas, you’ll see that the line has now turned into a dotted line, which means it is now a score line.
Once you’ve finished adding the score line on that particular element of the design (ie.: the outer card), you’ll want to select all of it and click on the “Attach” icon, located on the bottom right-hand of your screen.
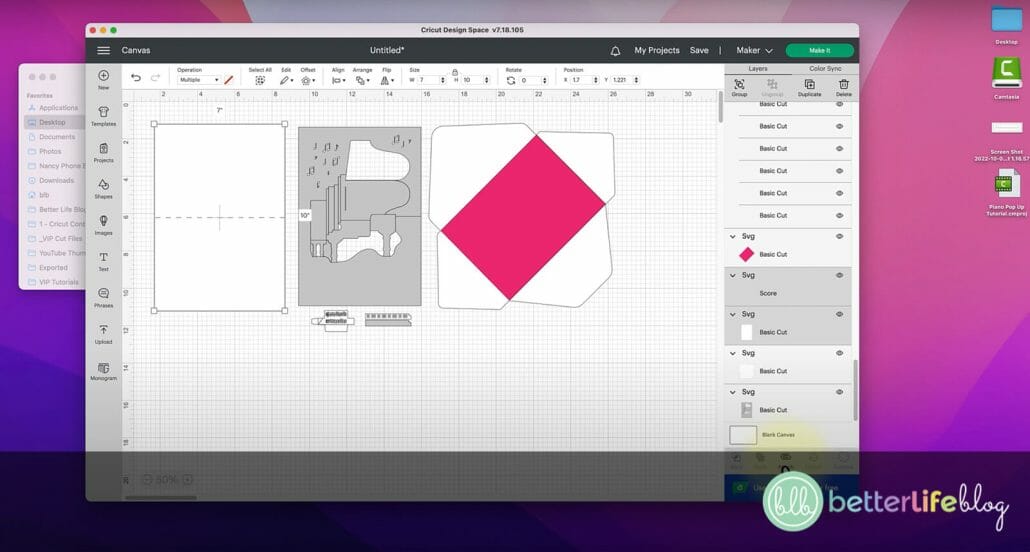
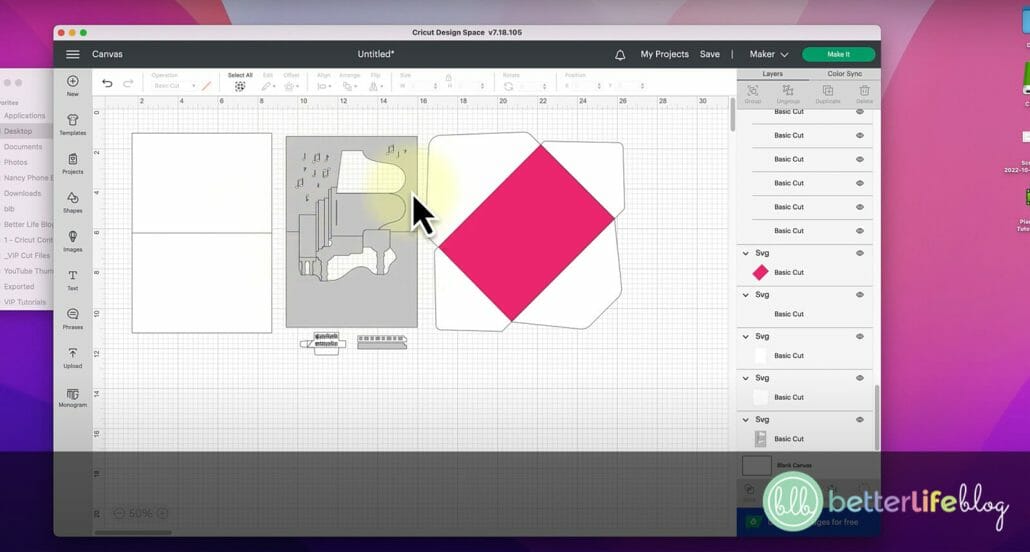
Step 11: Score Lines on the Pop-Up Element
Now that you’ve set up a score line on the outer card, it is time to set up the score line on the pop-up portion (the middle image).
Click on the center line, and once you do that, you should be able to grab all the score lines. Again, head over to the “Operation” drop-down menu and select “Score.”
Select the entire center image and click on the “Attach” icon on the bottom right-hand corner.
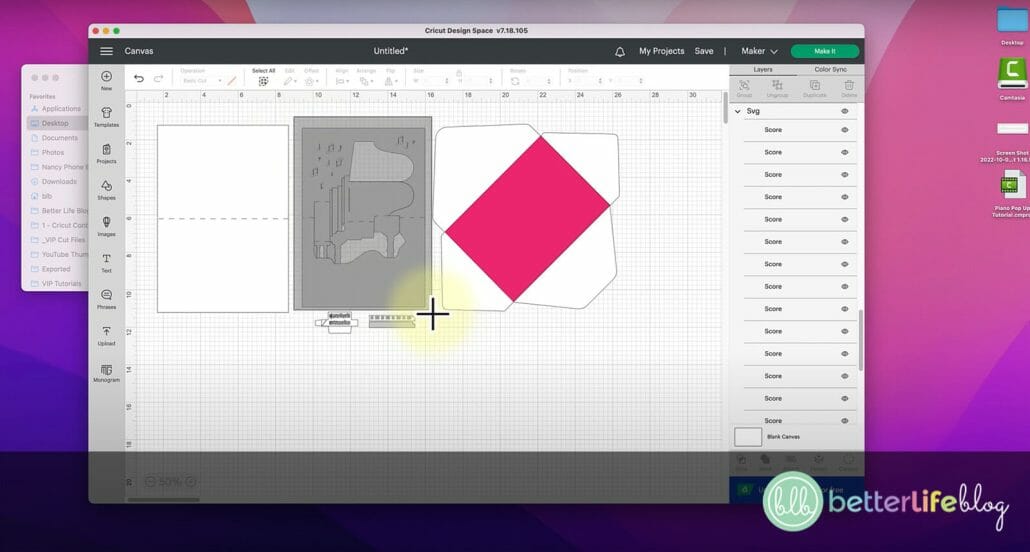
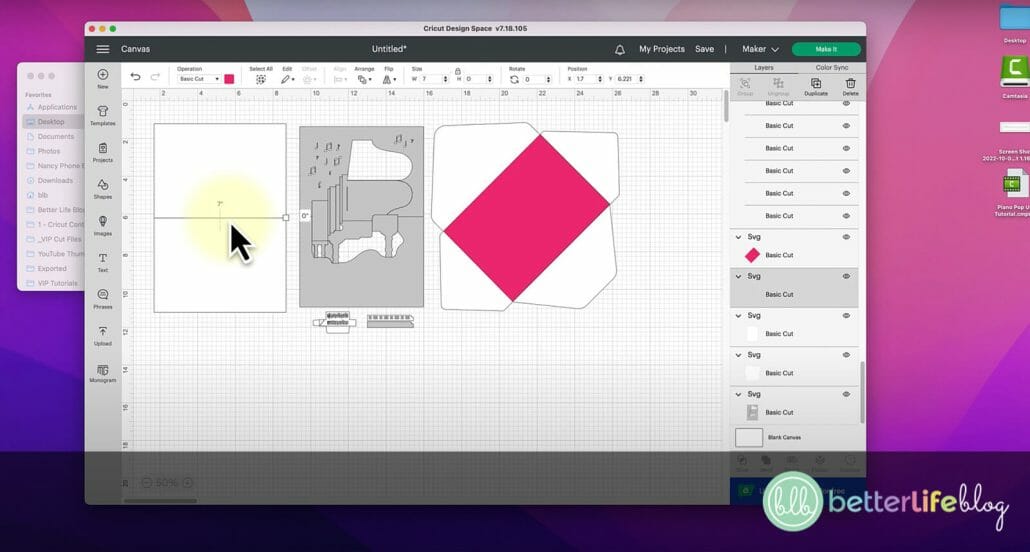
Step 12: Work With the Envelope Image
Select the envelope image (ie.: the image all the way to the right) and click on the operation drop down menu to select “Score.” Then select the entire image again and click on the “Attach” icon on the bottom right-hand screen.
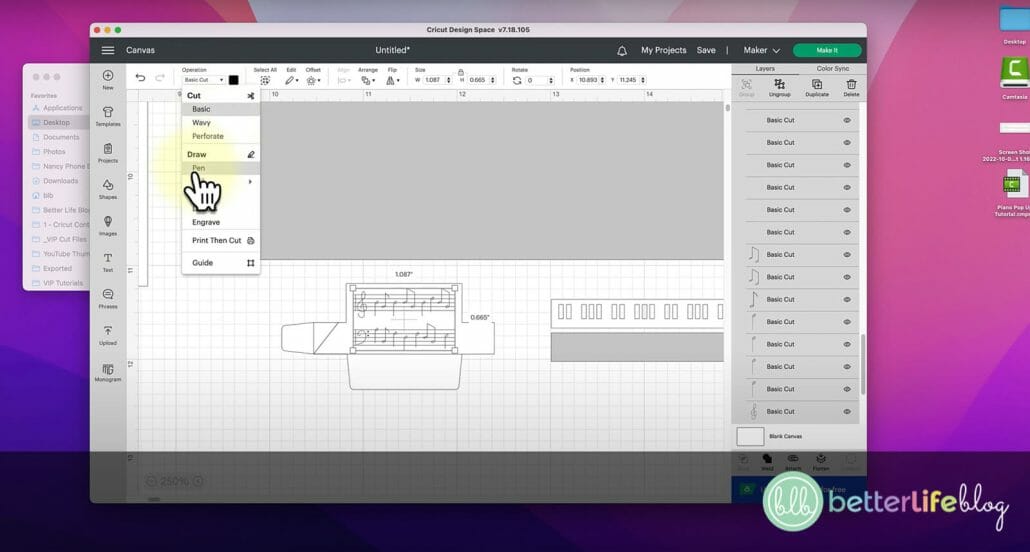
Step 13: Working With the Smaller Pieces
To work with the design’s smaller pieces, you will want to zoom into the canvas. Start with the small image to the left. Click on it and ungroup by clicking on the “Ungroup” icon on the top right-hand corner. (You can also right-click and select “Ungroup.”)
Next, click on the music notes and head over to the operations drop down on the top menu and select “Pen.” This means we’ll be using the pen tool when cutting that particular element of the design.
Once you have done this, go ahead and click on the diagonal line on the image and turn it into a score line. Now, click and drag over the image to select all of its elements and click on the “Attach” icon on the bottom right-hand corner.
The small image on the right will be a cut image, so there’s no need to make any changes on it.

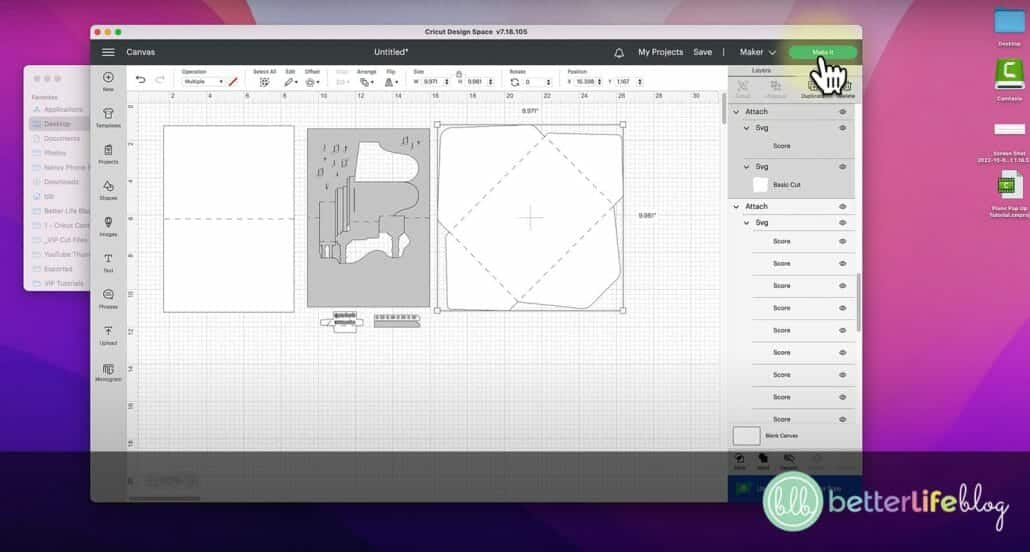
Step 14: It’s Time to Start Cutting!
It’s time to start the cutting process. Click on the “Make It” button on the top right-hand corner.
On the next screen, you’ll see the different images laid out on cutting mats.
The first images to cut you’ll see are the piano pop-up and the small image (piano keys). We highly recommend using black cardstock for this, but you can also use white for the piano pop-up portion. Because the small image are the piano keys, we recommend sticking to black for it.

Step 15: Continue the Cutting Process
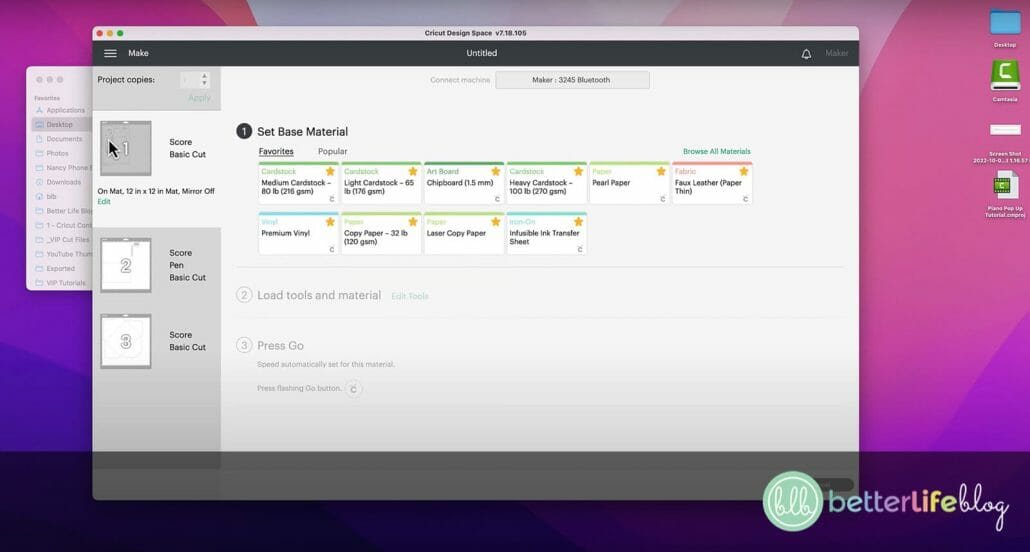
It’s time to start with the first cut-out. Select it and then press the “Continue” button.
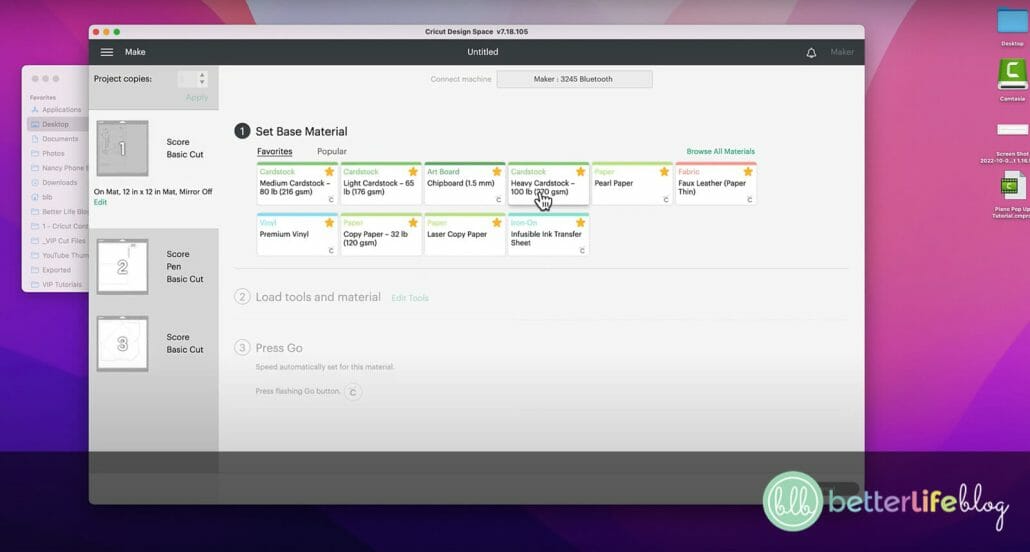
Next, choose you material. For the piano pop-up cutout, you will want to choose heavier cardstock. For the outer card, a standard cardstock will do. The envelope can be a thinner cardstock/paper.
Go ahead and select “Heavy Cardstock” for your first cut-out (ie.: piano pop-up).

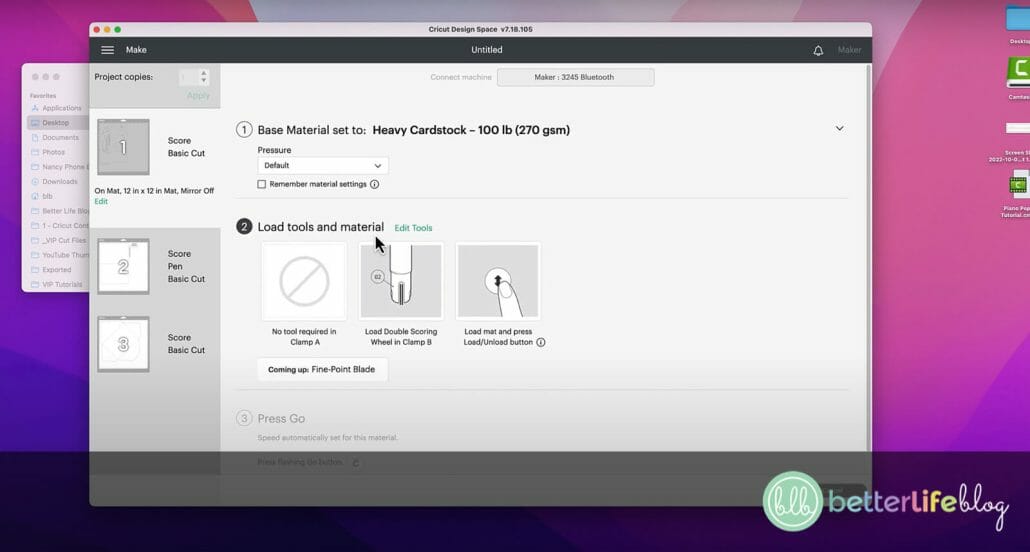
Step 16: Selecting the Right Tools
Once you select the material, it will tell you to load your tools.
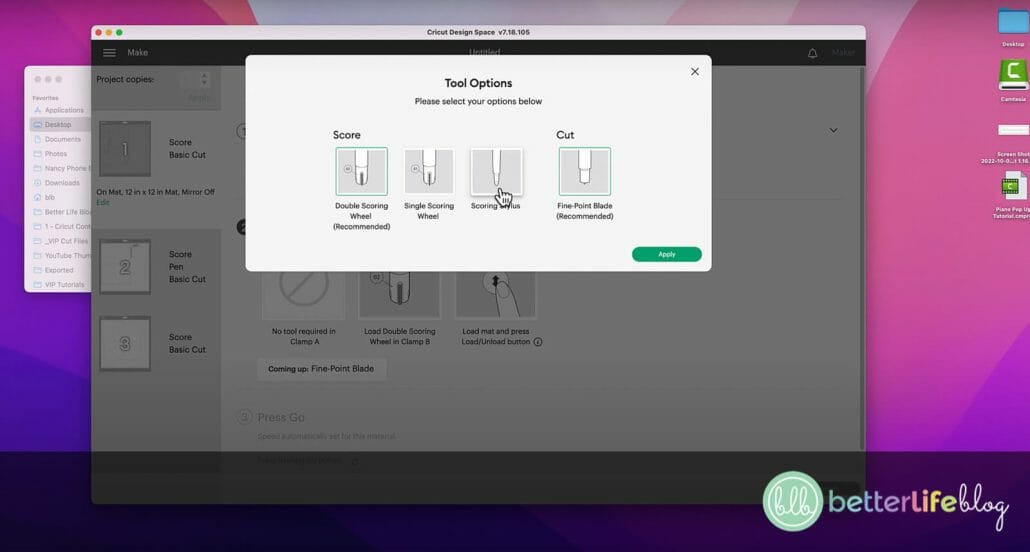
On our screen, you will see that it’s recommending a double scoring wheel – we’re using a Cricut Maker and this is why it’s recommending this scoring wheel. You can definitely use this project on a Cricut Explorer, but you can’t use the scoring wheel. We prefer using the scoring stylus, so go ahead and click to select that if you decide to use that too.
Once you’ve selected your preferred tools, you will see that the screen prompts you to load those tools into your machine into the appropriate clamp. You will have to do this each time for every separate cutout.
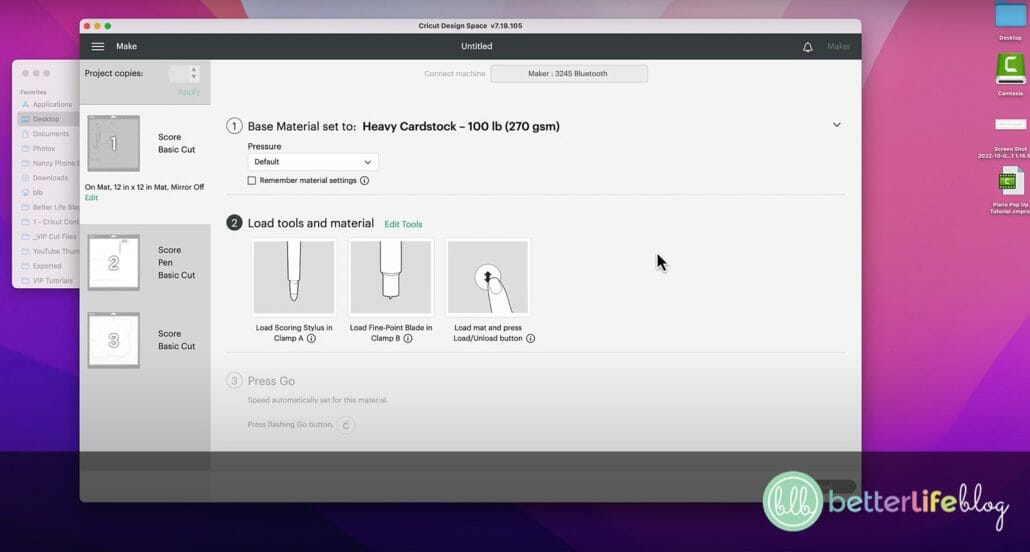
Step 17: Loading the Tools Into Your Machine + Loading Your Cutting Mat
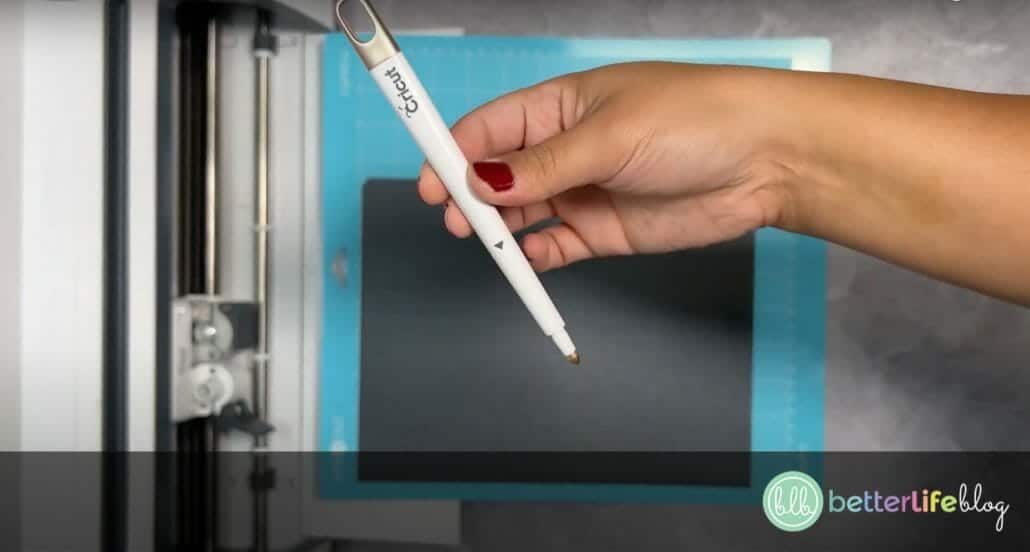
Take your stylus and put into the clamp that’s indicated “A” by opening the latch, inserting the stylus, and closing the latch once more.
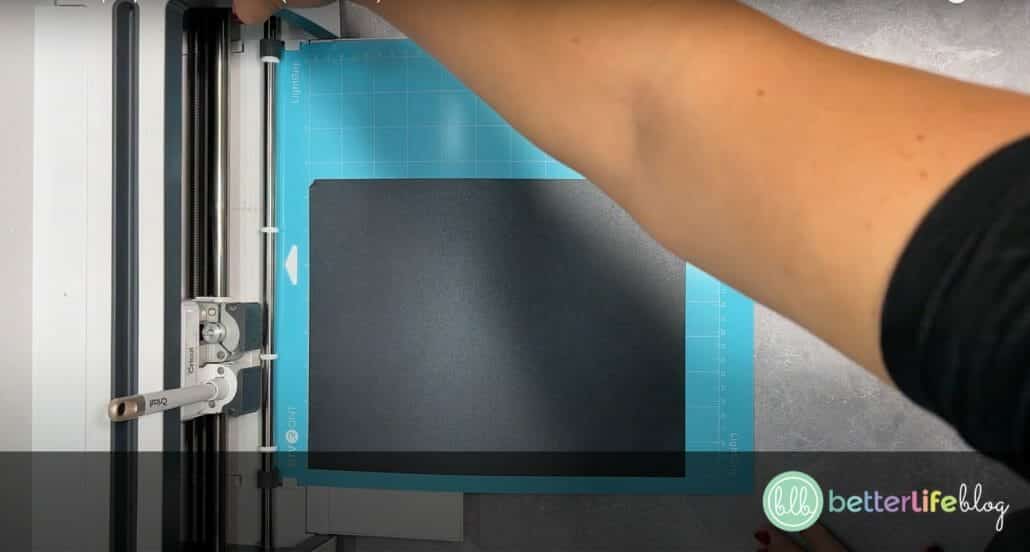
Place your cardstock on your light grip mat and load it into your machine. Press the flashing “Arrow” button and then the “C” to start cutting your design.
Repeat the steps for the next two cut-outs. Don’t forget the for your third cut out, you will need to use a Cricut pen, so be sure to select that for your tools!
Step 18: Time to Assemble!
Gather all of your pieces and start with your outer card (the second piece you cut out). Fold it in half. To do this, just follow along the crease in the center.
Step 19: Work With the Small Pieces
Grab the small piece with the two tabs on the sides. Fold it along the crease outwards. Once you fold it, unfold and then fold along the diagonal crease inwards. Next, fold in the tab at the bottom.
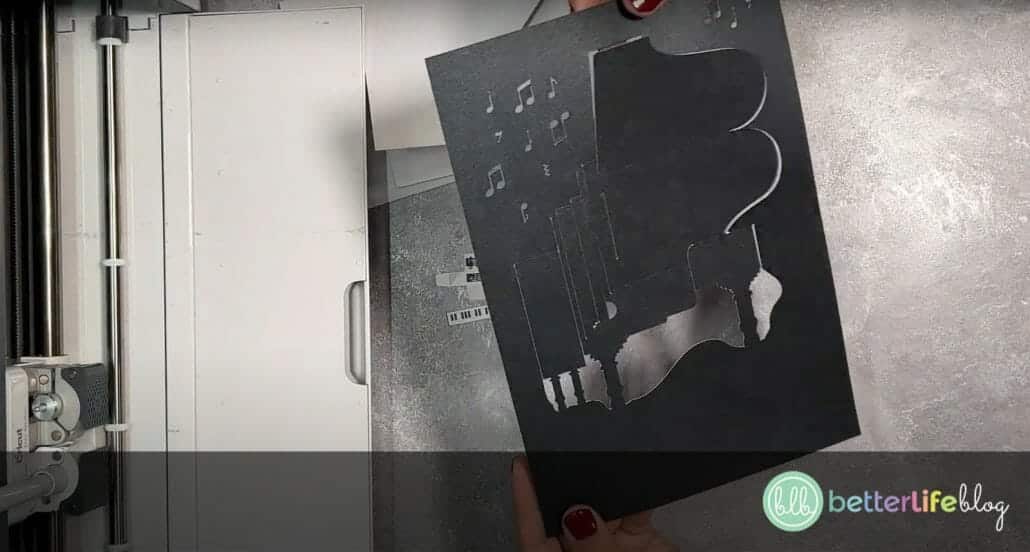
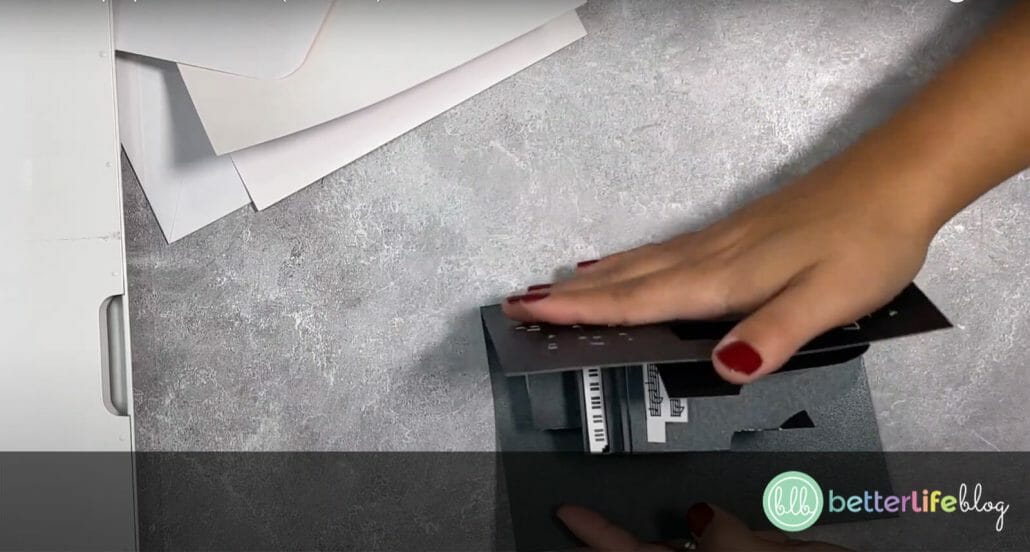
Step 20: Working With the Pop-Up Piano Portion
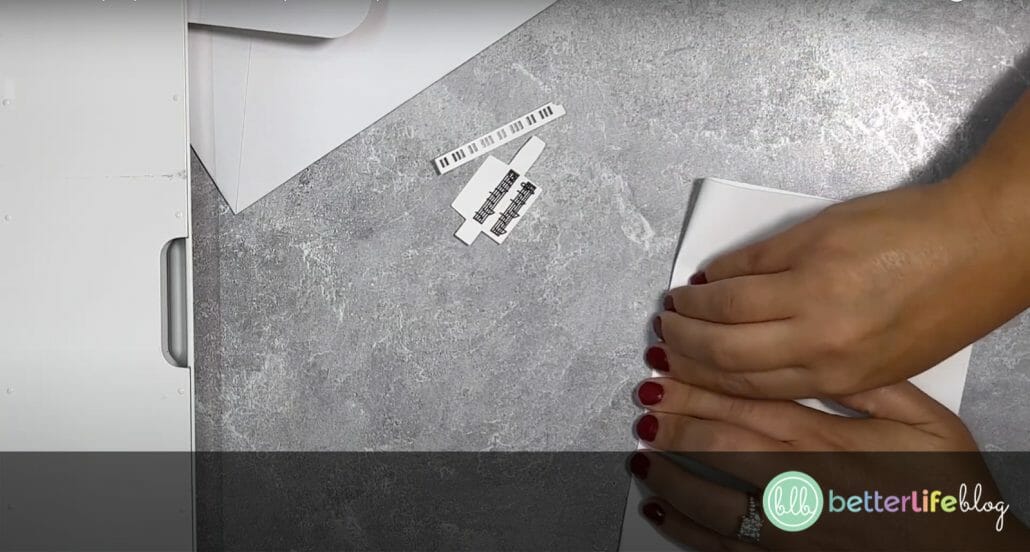
Now it’s time to work with the pop-up portion of the card. Don’t forget, on the same mat with the black cardstock, there should be a small black piece that will get glued on the back of the keyboard portion of the piano.
Working with the actual pop-out portion, you’re going to grab your scoring tool and go over all the score lines.
Step 21: Folding the Pop-Up Portion
Start with the scored lines on the extreme left and extreme right of the pop-up and fold those score lines inwards. As you fold those score line inwards, you can pop out the piano at the same time. Be sure to push out the legs of the piano so that it’s practically standing upright.
As you fold the card, you’ll see the score lines that need to be folded out so that the piano starts to take shape. Remember: take you time. Slow and steady wins the race! This way, you don’t fold any parts that don’t need to be folded and you come out with a nice, crisp and clean pop-up.
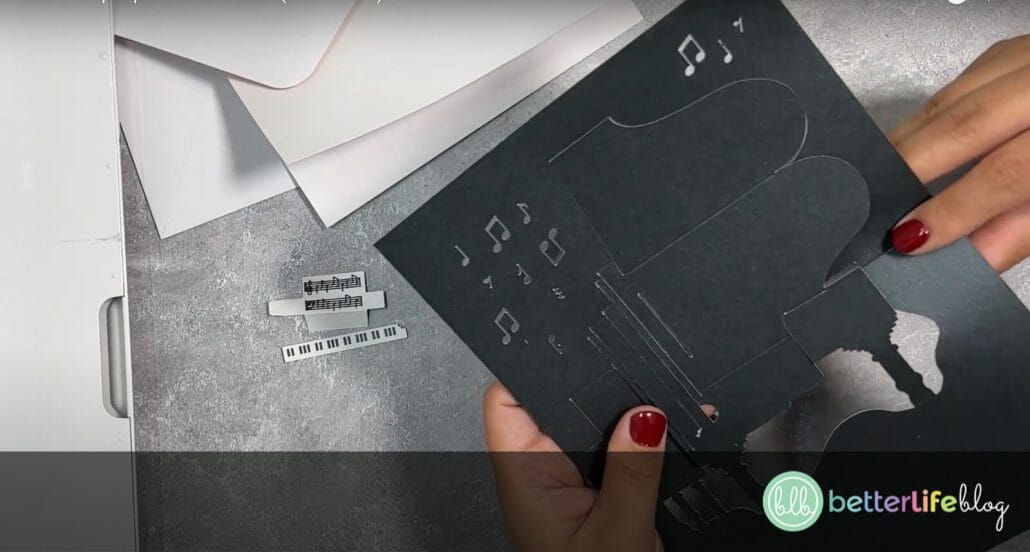

Step 22: Attach the Small Pieces
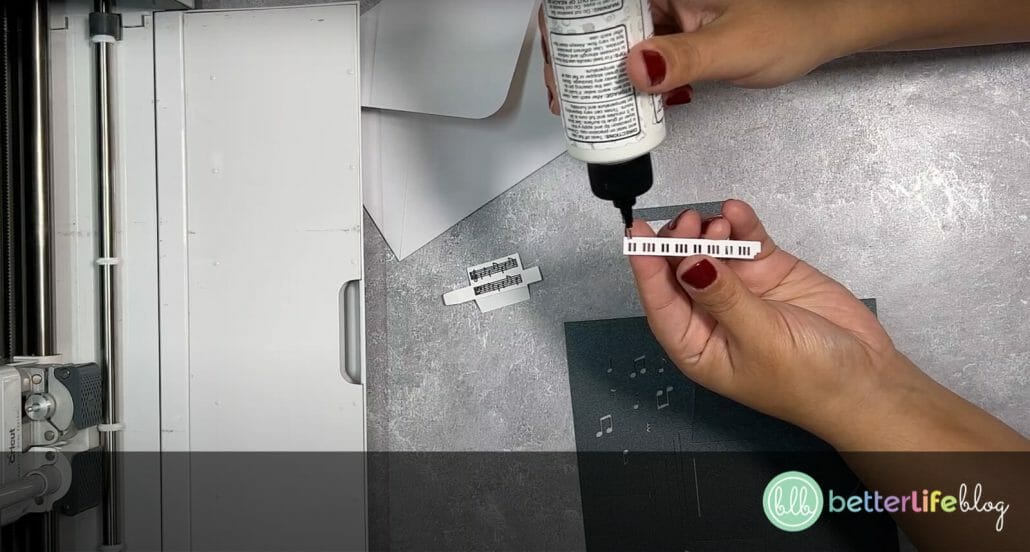
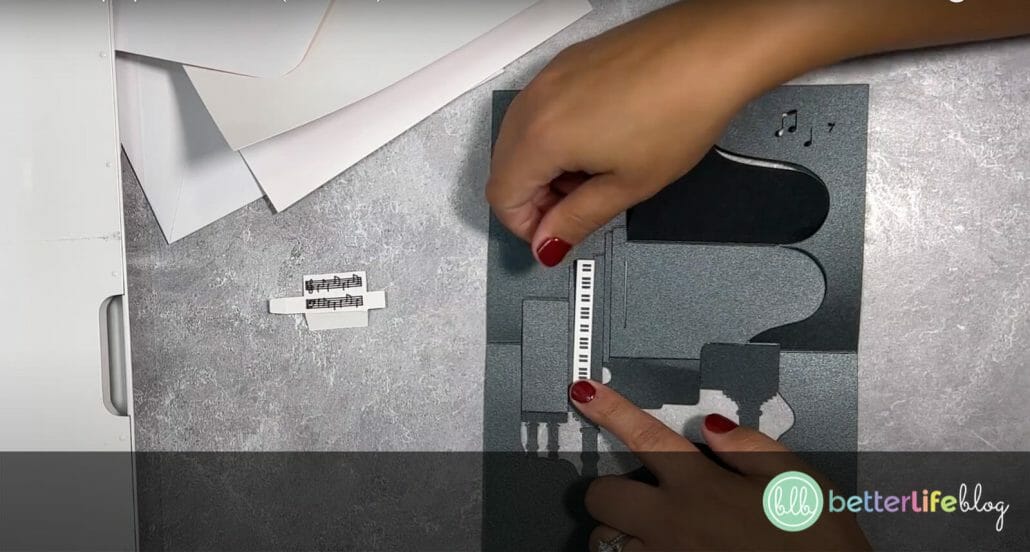
Start by gluing the keyboard piece on the pop-up portion of the card (the blank space right above the piano’s bench).
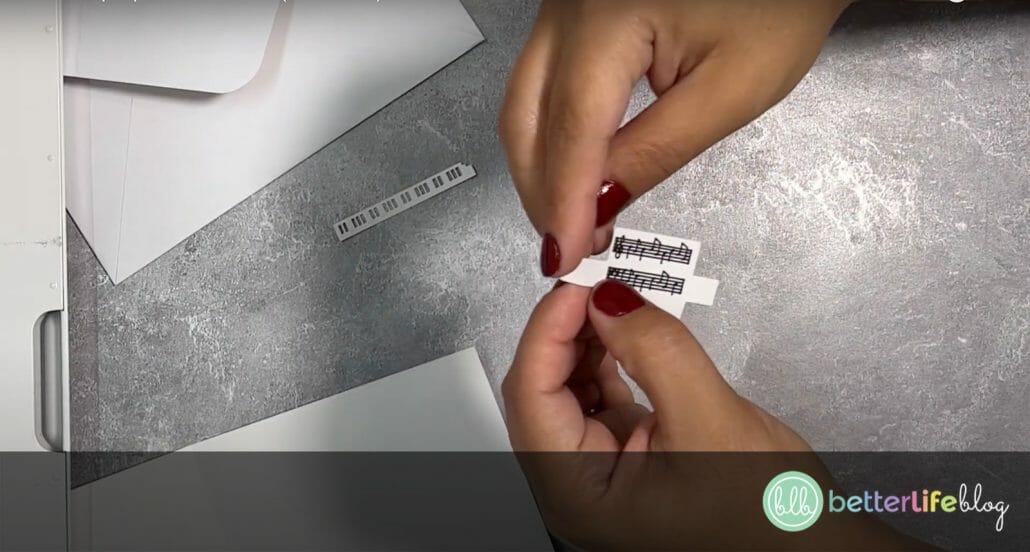
Next, add your miniature sheet music. You’ll notice that this particular piece has a bottom tab and a side tab. Place the side tab on the bottom portion of the piano’s lid, and then the bottom tab goes on the slit that’s on the top of the piano. Apply some glue on the back of the tabs to secure the piece.

Step 23: Test it Out!
Open and close your piece to make sure that it is folding as it should.
Step 24: Attach the Pop-Up to the Outer Card
Now it’s time to glue your pop-up portion to the outer card. When you do this, make sure that both centers line up. Apply glue to the back of the pop-up piece and glue onto the inside of the outer card.
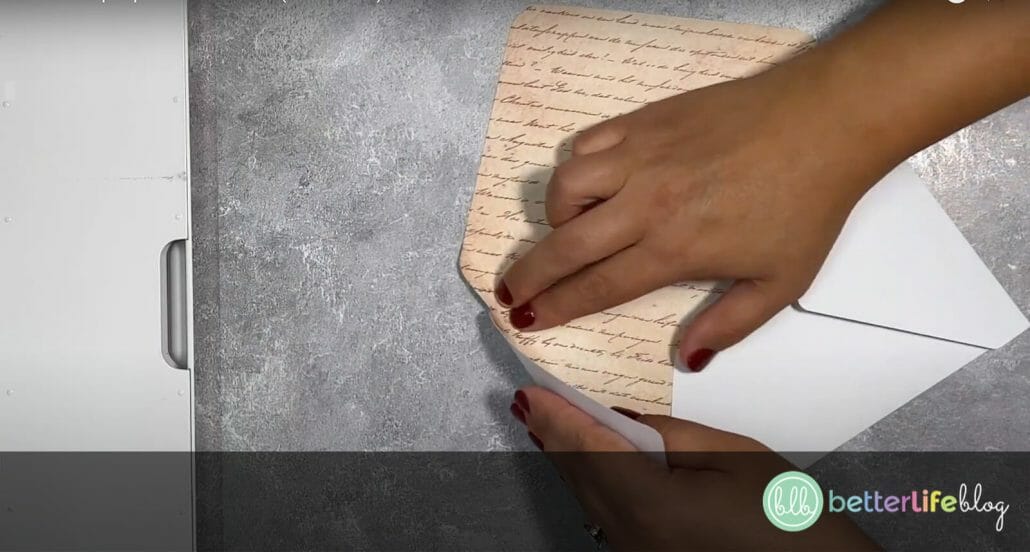
Step 25: Prepare the Envelope
Fold and glue the envelope according to the score lines.
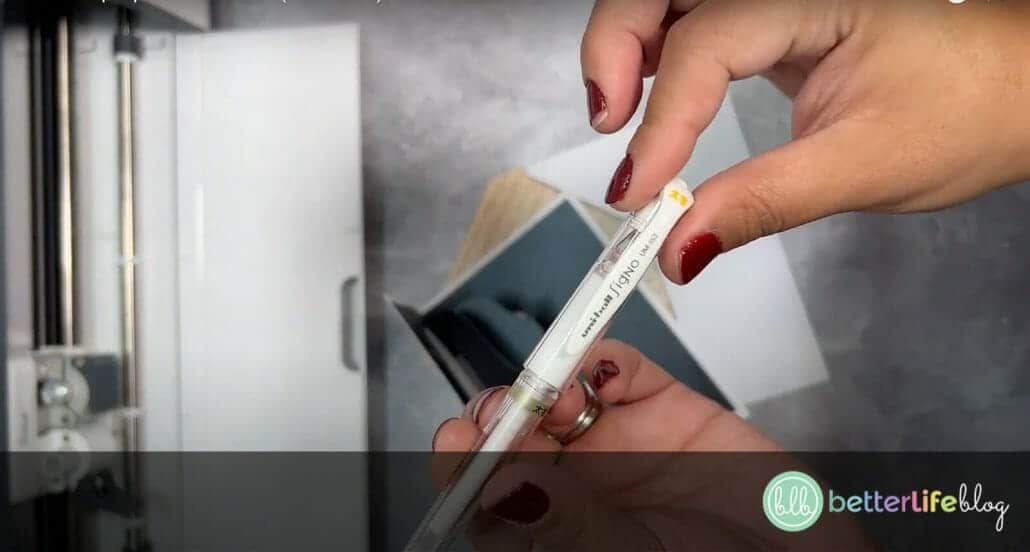
Step 26: Write a Sweet Note and Personalize!
Your card is now ready to use! Don’t forget to write a sweet message so that you can personalize it for your recipient! Hint: use a white gel pen to make your message pop if you used black cardstock!

Easy Piano Pop-Up Card with Cricut or Silhouette
This easy-to-make piano pop-up card is perfect for the music connoisseur in your life. Make it with the help of your
trusty Cricut or Silhouette. This card makes for a great gift for any occasion!
Materials
Instructions
- For all members of our VIP Crafters Club, be sure to log onto your members dashboard to download this file that was included in your October 2022 bundle. Otherwise, you can download the individual file here.
- Once you’ve downloaded your file, locate it on your computer. You will find a zipped file/folder. Extract/unzip the file.
- Once you extract the file, you will see a folder with 4 different file types. For most cutting programs, you will want to work with the SVG file (please see sample in the screenshot below). However, we provide different formats so that you have a range of choices and can use the file that works best for your program (for instance, the free Silhouette design program requires a .DXF file, which we’ve also included).
- In this particular blog post, we’ll be working with Cricut Design Space – but you can also take a look at our YouTube channel for full video tutorials for both Cricut and Silhouette.
- Open up Design Space so that you have a blank canvas to work with.
- To upload your file on Design Space, head over to the bottom left-hand side of your screen (left-hand menu) and click on the icon that says “Upload.”
- You’ll be then taken to a screen where you will click on a button that says “Upload Image.” On the next screen, you can either click “Browse” to browse your computer for your file, or click and drag your file into the window.
- On the next screen, you will see a preview screen and you can add tags to your file (right-hand side), but it is completely optional. You can also change the image name. Again, it is completely optional.
- Once you’ve entered the file name and tags, head over to the button on the bottom right-hand corner click “Upload.”
- Then, on the next screen, select your file from the section called “Recent Uploads” and then click on the bottom right-hand corner button where it says “Add to Canvas.”
- The image/file should now be on your canvas. The first thing you’ll want to do is zoom out of your canvas (toggle on the + and – sign on the bottom left-hand corner), so that you can see your entire image on one screen.
- Next, you will want to ungroup the file. Go ahead and click on the image and you’ll see a box around the entire image.
- Then, head over to right-hand side of the menu and click on the “Ungroup” icon. This ungroup function allows you to work with the different elements of the image and click on individual areas of the image itself.
- To understand each element of the file and what you’ll be working with, here are the details:
- The image you see on the far left-hand side will be the outer card.
- The middle portion is the actual pop up.
- On the right-hand side, you’ll see the envelope.
- To begin, you will need to change all the lines into score lines.
- Let’s start with the outer card: the center line will need to be changed into a score line. Click on the line and then head over to the canvas’ top menu where there’s a drop down that says “Operation.” Locate “Score” on the drop down and select. Once you click on any blank area on the canvas, you’ll see that the line has now turned into a dotted line, which means it is now a score line.
- Once you’ve finished adding the score line on that particular element of the design (ie.: the outer card), you’ll want to select all of it and click on the “Attach” icon, located on the bottom right-hand of your screen.
- Now that you’ve set up a score line on the outer card, it is time to set up the score line on the pop-up portion (the middle image).
- Click on the center line, and once you do that, you should be able to grab all the score lines. Again, head over to the “Operation” drop-down menu and select “Score.”
- Select the entire center image and click on the “Attach” icon on the bottom right-hand corner.
- Select the envelope image (ie.: the image all the way to the right) and click on the operation drop down menu to select “Score.” Then select the entire image again and click on the “Attach” icon on the bottom right-hand screen.
- To work with the design’s smaller pieces, you will want to zoom into the canvas. Start with the small image to the left. Click on it and ungroup by clicking on the “Ungroup” icon on the top right-hand corner. (You can also right-click and select “Ungroup.”)
- Next, click on the music notes and head over to the operations drop down on the top menu and select “Pen.” This means we’ll be using the pen tool when cutting that particular element of the design.
- Once you have done this, go ahead and click on the diagonal line on the image and turn it into a score line. Now, click and drag over the image to select all of its elements and click on the “Attach” icon on the bottom right-hand corner.
- The small image on the right will be a cut image, so there’s no need to make any changes on it.
- It’s time to start the cutting process. Click on the “Make It” button on the top right-hand corner.
- On the next screen, you’ll see the different images laid out on cutting mats.
- The first images to cut you’ll see are the piano pop-up and the small image (piano keys). We highly recommend using black cardstock for this, but you can also use white for the piano pop-up portion. Because the small image are the piano keys, we recommend sticking to black for it.
- It’s time to start with the first cut-out. Select it and then press the “Continue” button.
- Next, choose you material. For the piano pop-up cutout, you will want to choose heavier cardstock. For the outer card, a standard cardstock will do. The envelope can be a thinner cardstock/paper.
- Go ahead and select “Heavy Cardstock” for your first cut-out (ie.: piano pop-up).
- Once you select the material, it will tell you to load your tools.
- On our screen, you will see that it’s recommending a double scoring wheel – we’re using a Cricut Maker and this is why it’s recommending this scoring wheel. You can definitely use this project on a Cricut Explorer, but you can’t use the scoring wheel. We prefer using the scoring stylus, so go ahead and click to select that if you decide to use that too.
- Once you’ve selected your preferred tools, you will see that the screen prompts you to load those tools into your machine into the appropriate clamp. You will have to do this each time for every separate cutout.
- Take your stylus and put into the clamp that’s indicated “A” by opening the latch, inserting the stylus, and closing the latch once more.
- Place your cardstock on your light grip mat and load it into your machine. Press the flashing “Arrow” button and then the “C” to start cutting your design.
- Repeat the steps for the next two cut-outs. Don’t forget the for your third cut out, you will need to use a Cricut pen, so be sure to select that for your tools!
- Gather all of your pieces and start with your outer card (the second piece you cut out). Fold it in half. To do this, just follow along the crease in the center.
- Grab the small piece with the two tabs on the sides. Fold it along the crease outwards. Once you fold it, unfold and then fold along the diagonal crease inwards. Next, fold in the tab at the bottom.
- Now it’s time to work with the pop-up portion of the card. Don’t forget, on the same mat with the black cardstock, there should be a small black piece that will get glued on the back of the keyboard portion of the piano.
- Working with the actual pop-out portion, you’re going to grab your scoring tool and go over all the score lines.
- Start with the scored lines on the extreme left and extreme right of the pop-up and fold those score lines inwards. As you fold those score line inwards, you can pop out the piano at the same time. Be sure to push out the legs of the piano so that it’s practically standing upright.
- As you fold the card, you’ll see the score lines that need to be folded out so that the piano starts to take shape. Remember: take you time. Slow and steady wins the race! This way, you don’t fold any parts that don’t need to be folded and you come out with a nice, crisp and clean pop-up.
- Start by gluing the keyboard piece on the pop-up portion of the card (the blank space right above the piano’s bench).
- Next, add your miniature sheet music. You’ll notice that this particular piece has a bottom tab and a side tab. Place the side tab on the bottom portion of the piano’s lid, and then the bottom tab goes on the slit that’s on the top of the piano. Apply some glue on the back of the tabs to secure the piece.
- Open and close your piece to make sure that it is folding as it should.
- Now it’s time to glue your pop-up portion to the outer card. When you do this, make sure that both centers line up. Apply glue to the back of the pop-up piece and glue onto the inside of the outer card.
- Fold and glue the envelope according to the score lines.
- Your card is now ready to use! Don’t forget to write a sweet message so that you can personalize it for your recipient! Hint: use a white gel pen to make your message pop out if you used black cardstock!
Video Tutorial
If you’re more of a visual learner, we got you covered! Please see below our two video tutorials to make this easy pop-up card (one video is for Cricut users and the other, Silhouette users).
Who would you give this Piano Pop-Up Card to? Let us know in the comments below!