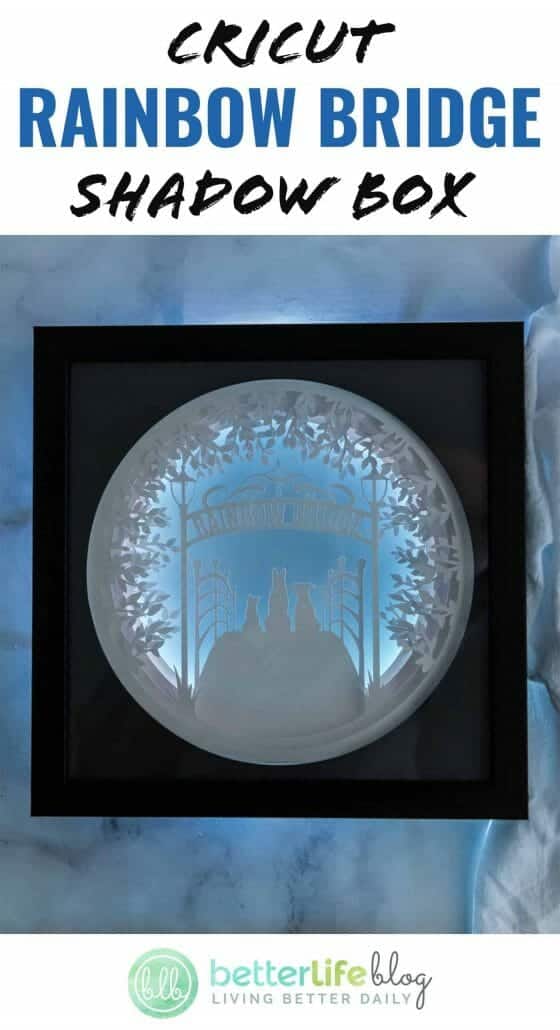
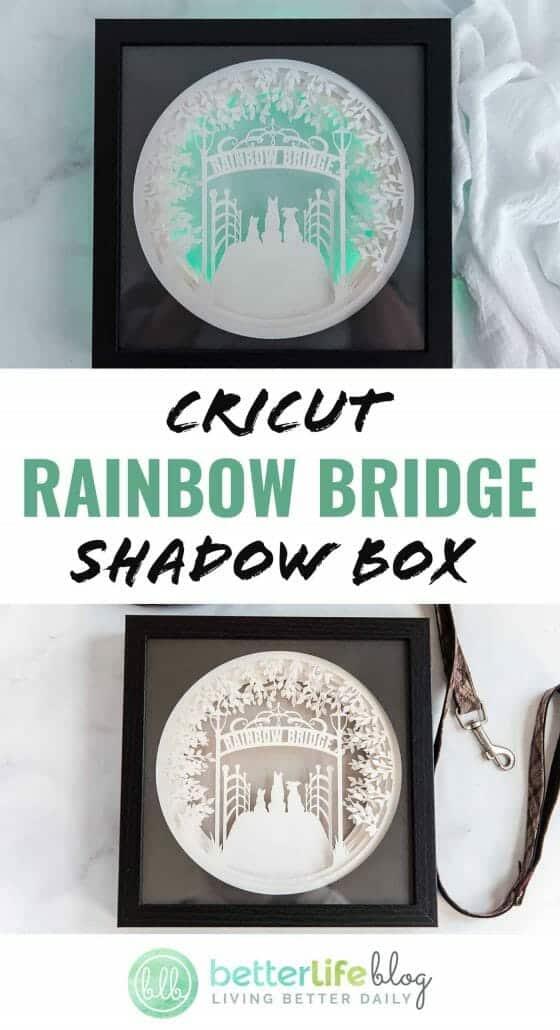
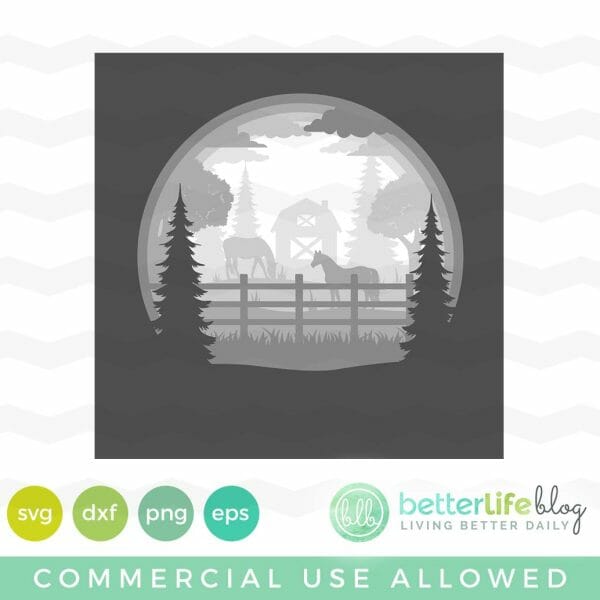
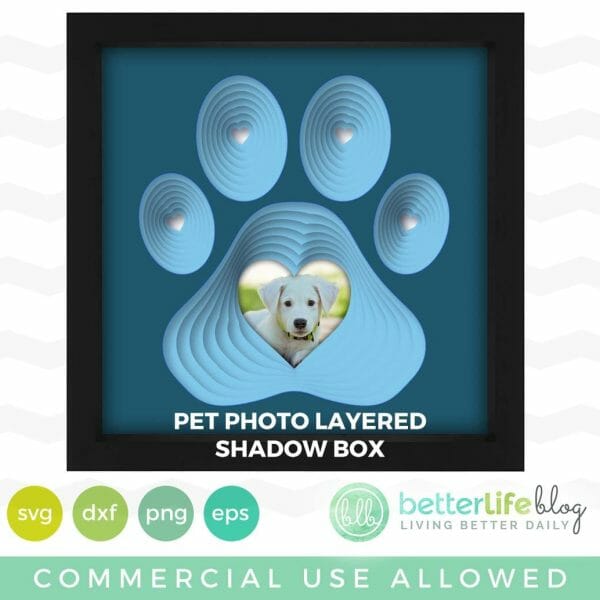
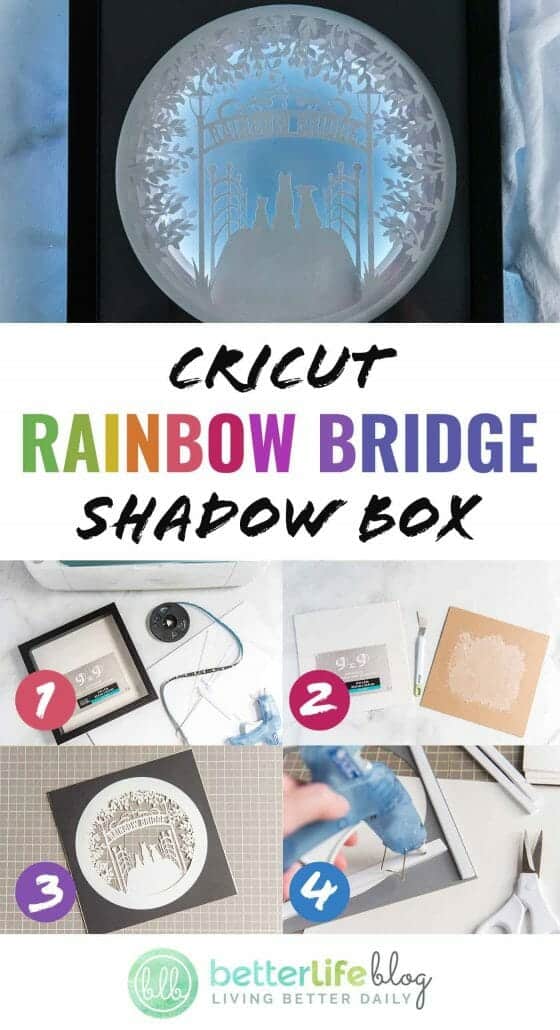
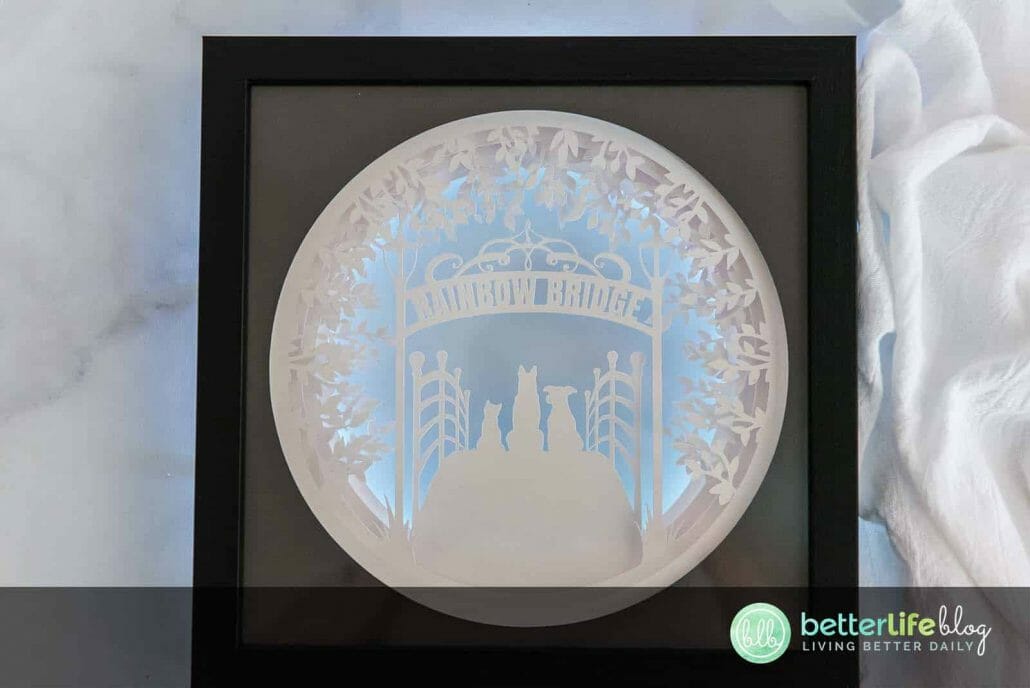
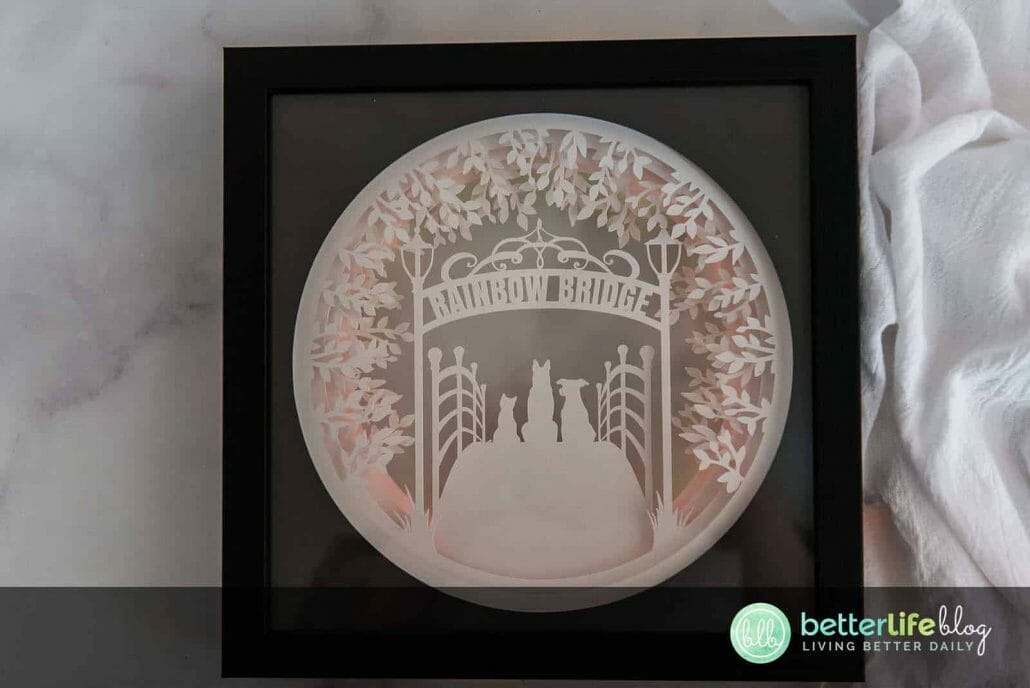
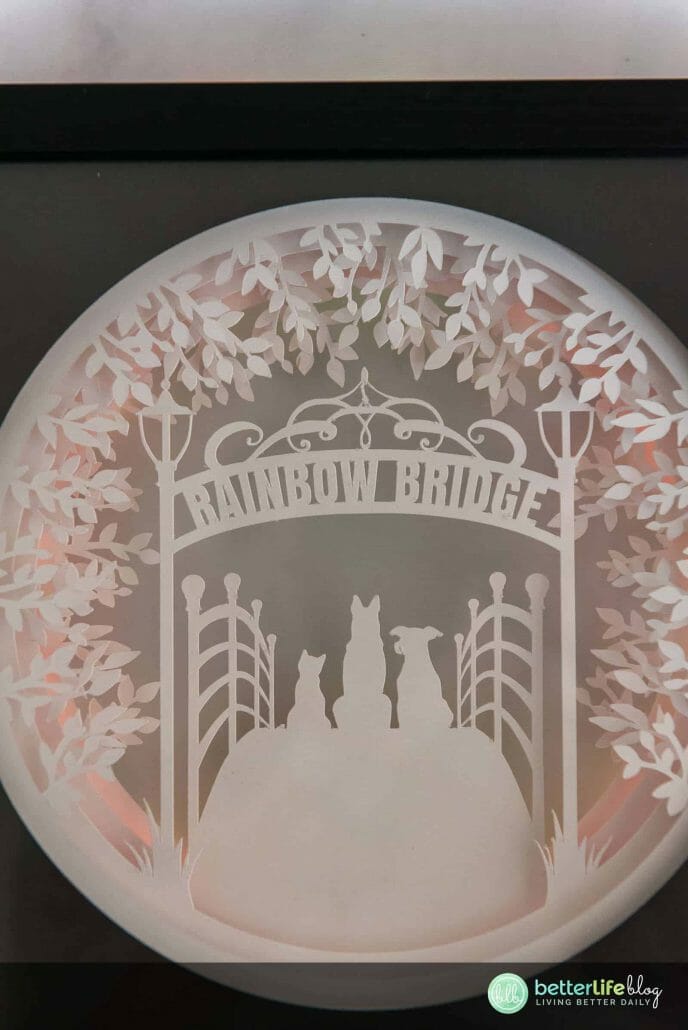
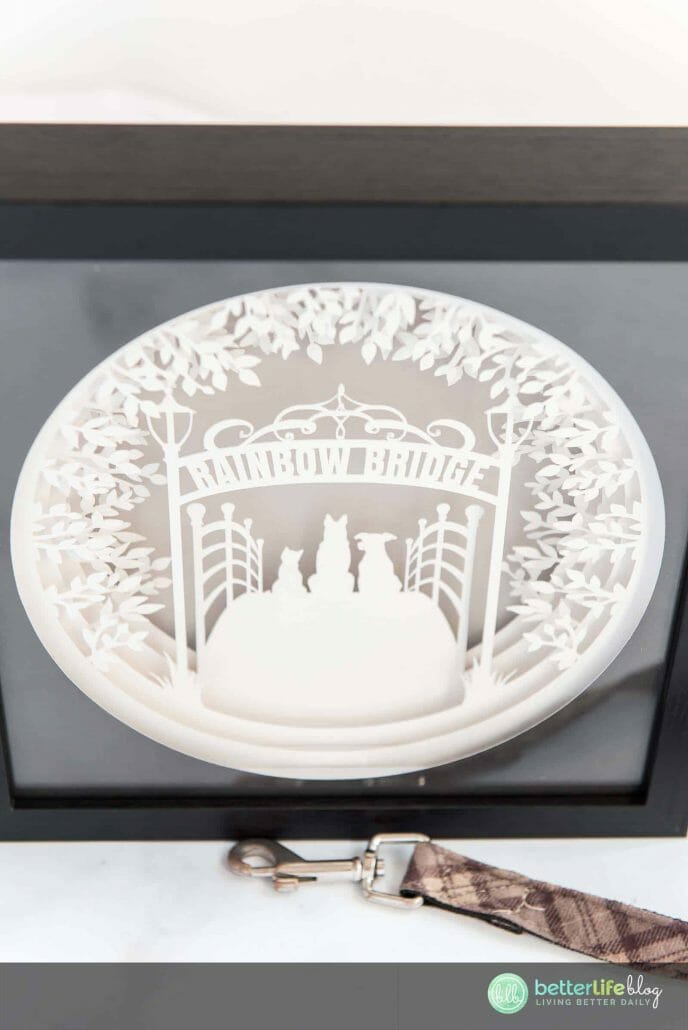
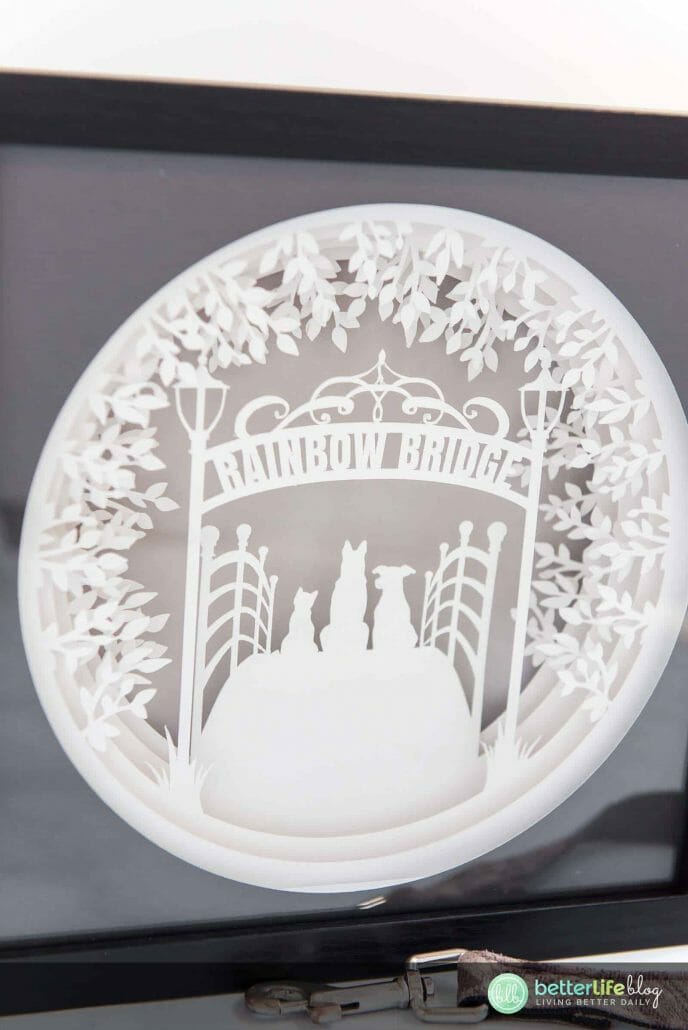
Commemorate the beloved pets that are no longer with us with this Cricut Rainbow Bridge Shadow Box. In this Cricut tutorial, I’ll show you how to put together an intricate design, backed by LED lighting. Scroll down to find out how you can get this and several other Pet-Themed SVG files for free!
Materials List:
- Cricut or Silhouette smart cutting machine
- Glue gun and glue sticks
- Weeding tools
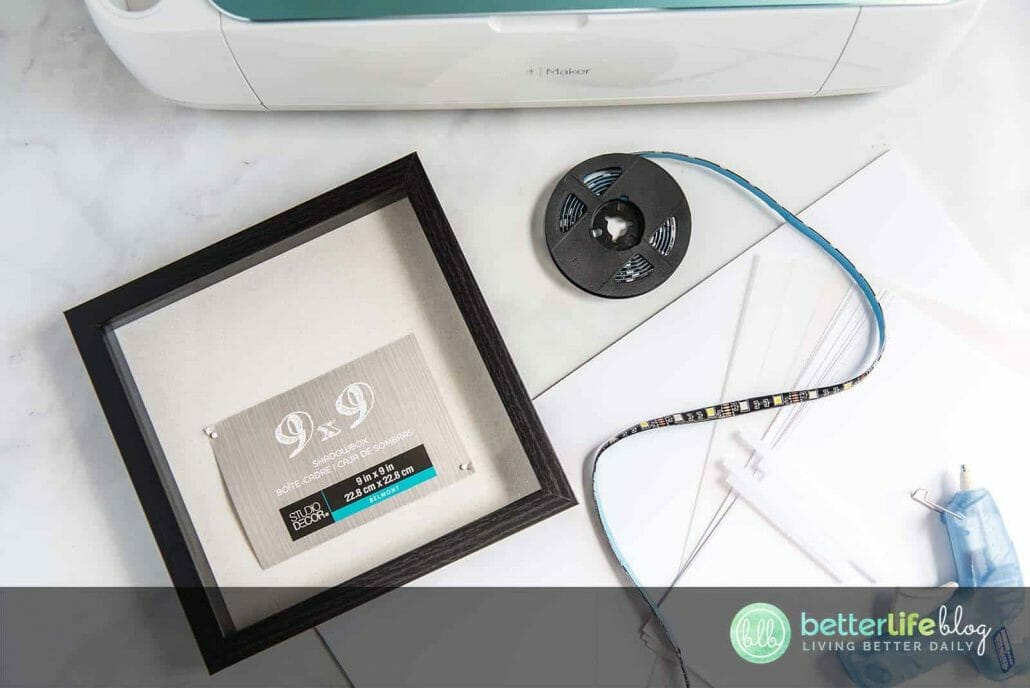
- 9×9” Black Shadow Box Frame
- Cutting mat
- Scissors
- LED light strip
- Clear vellum
- White cardstock or white posterboard
- Black cardstock (optional)
- White foam core
- Exacto knife
- FREE “Rainbow Bridge” Pet Memorial Shadow Box SVG file

Instructions:
Turn your shadow box over with the glass facing down. Open the back. Using your scraper, remove the canvas covered pad that is attached to the backing material. You can discard this pad or use it for a later project.

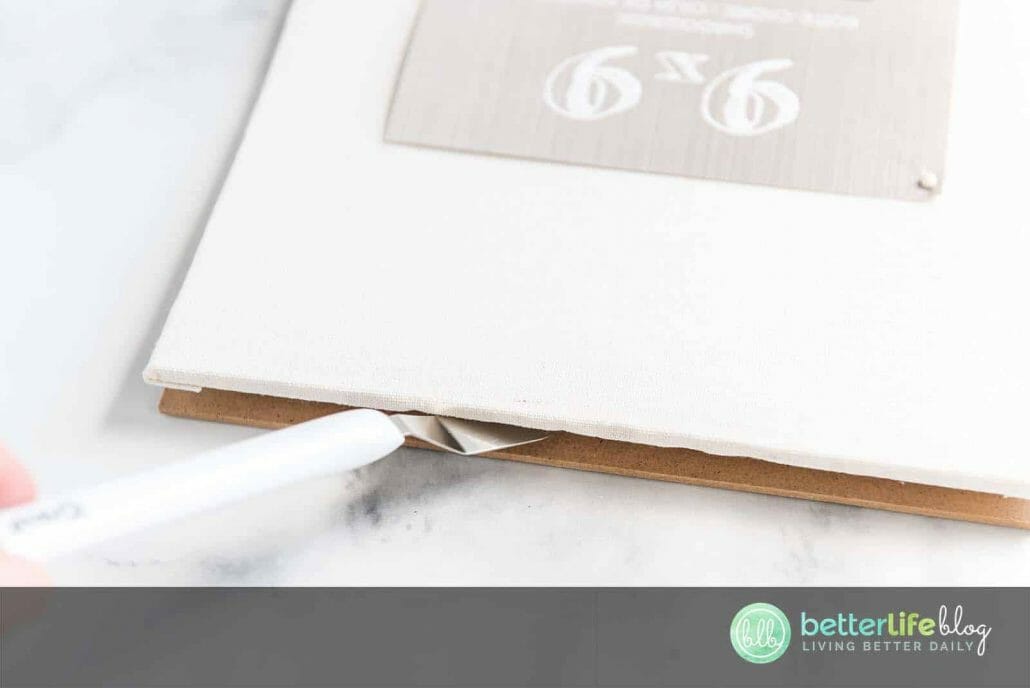
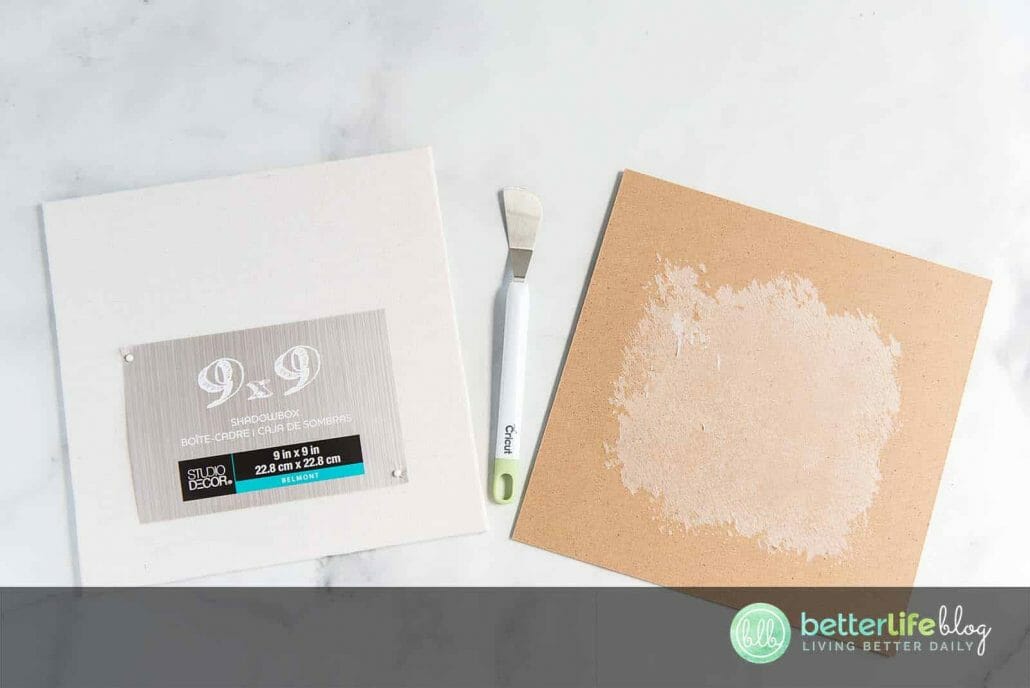
Next, if you are using posterboard, cut it down to sizes that you can cut on your mat.

Cut your foam core board into thin strips, about ½ inch wide(they do not need to be perfect for this since they will be in the back)

Gather your cardstock or posterboard. Load the “Rainbow bridge” file into Cricut Design Space. Adjust the width of each square to 9 inches. The first mat with just the circle in the middle can be cut using a black piece of cardstock to frame the image (this is optional). Select the Make it button.
Place your cardstock/posterboard on your mat and proceed to follow the directions in Design Space to cut.
Once all of your cardstock pieces are cut out, weed to remove the unnecessary pieces.
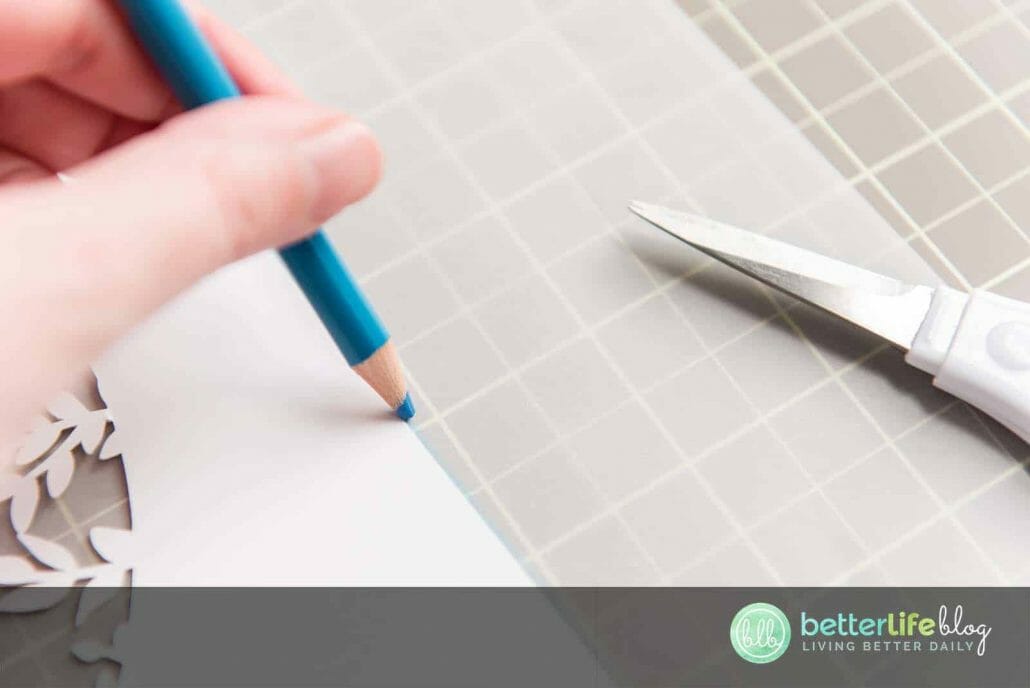
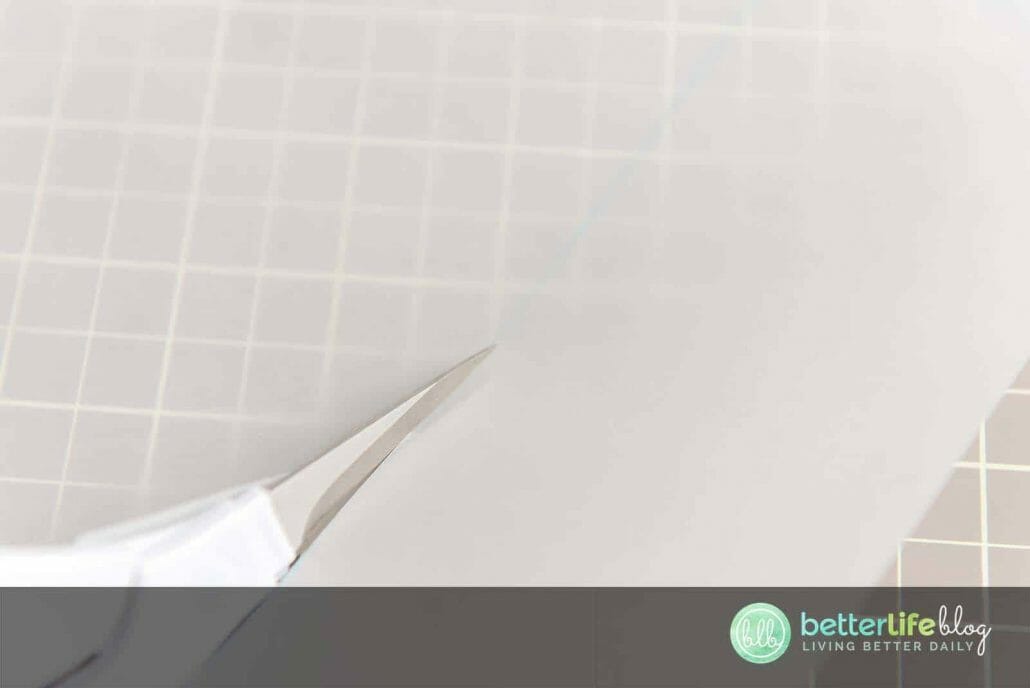
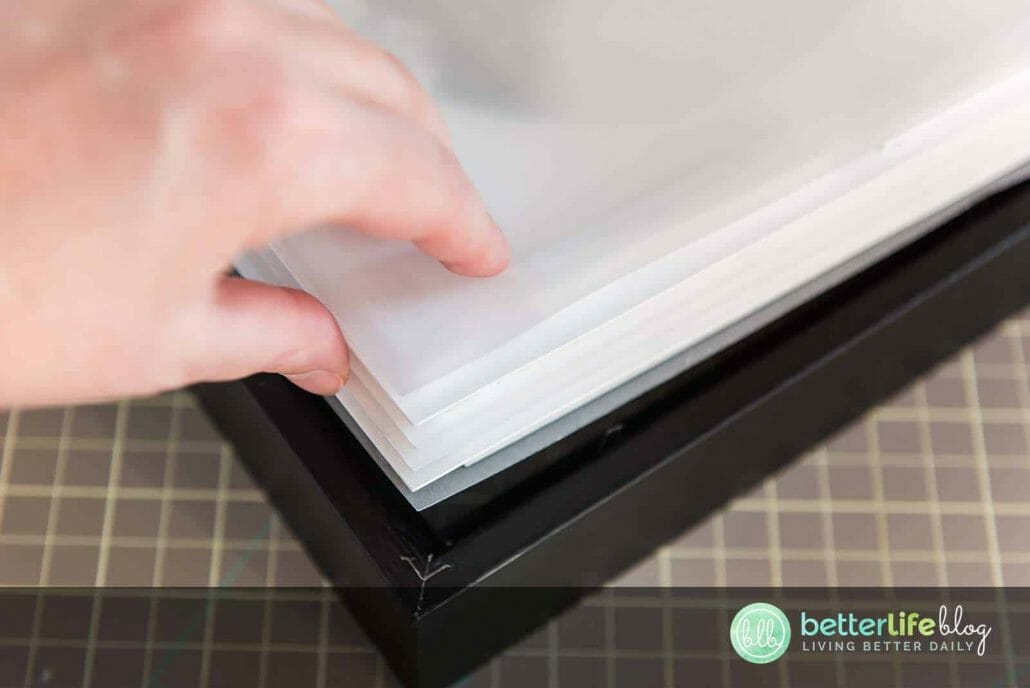
Trace one of your squares onto a piece of vellum and cut with scissors. Line up all of your pieces starting from the back. The vellum is in the back, and next come the image with the smallest circle, then a bigger circle, and so on until the last one is placed on top with the biggest circle.
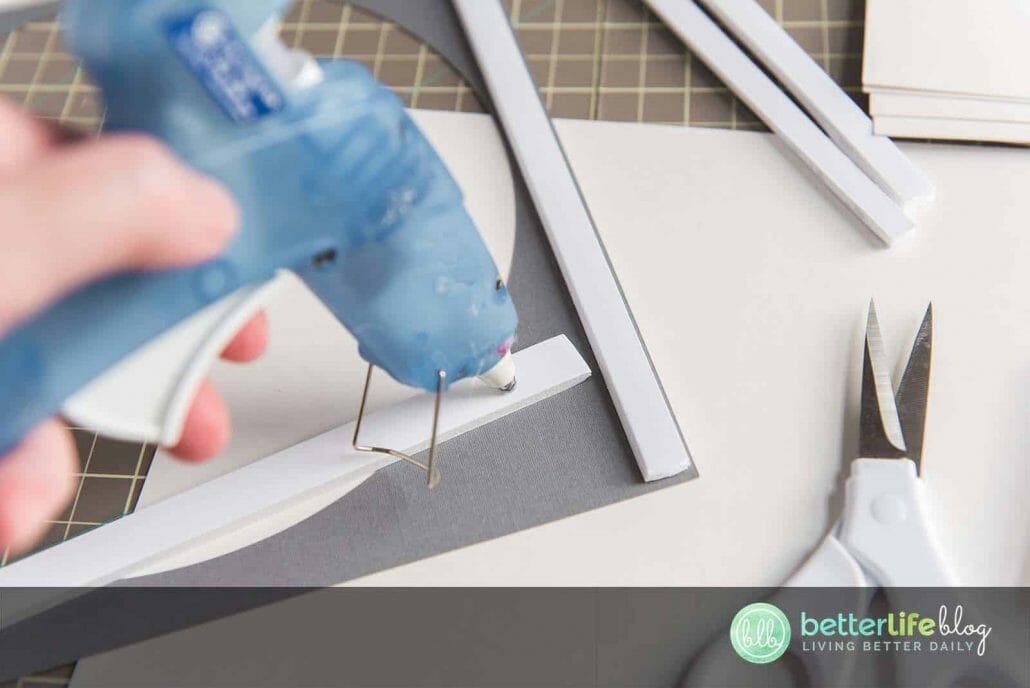
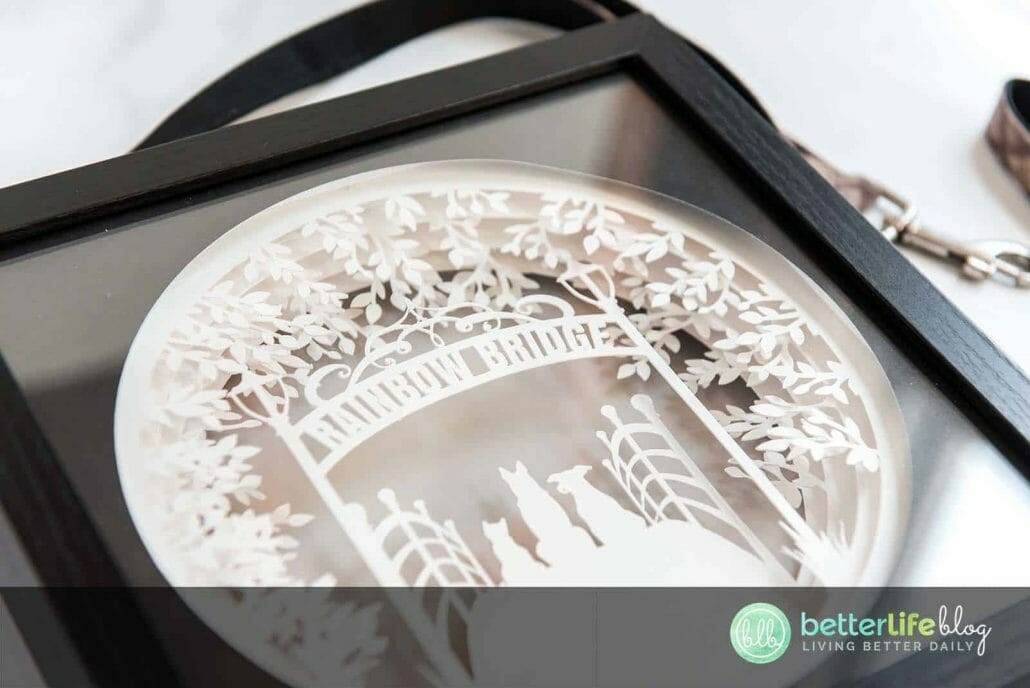
Turn each piece over onto its front and attach pieces of foam core to the back with hot glue. You will layer each piece and then foam core until you reach the back. Place your 3-D stack into your frame with the vellum towards the back.

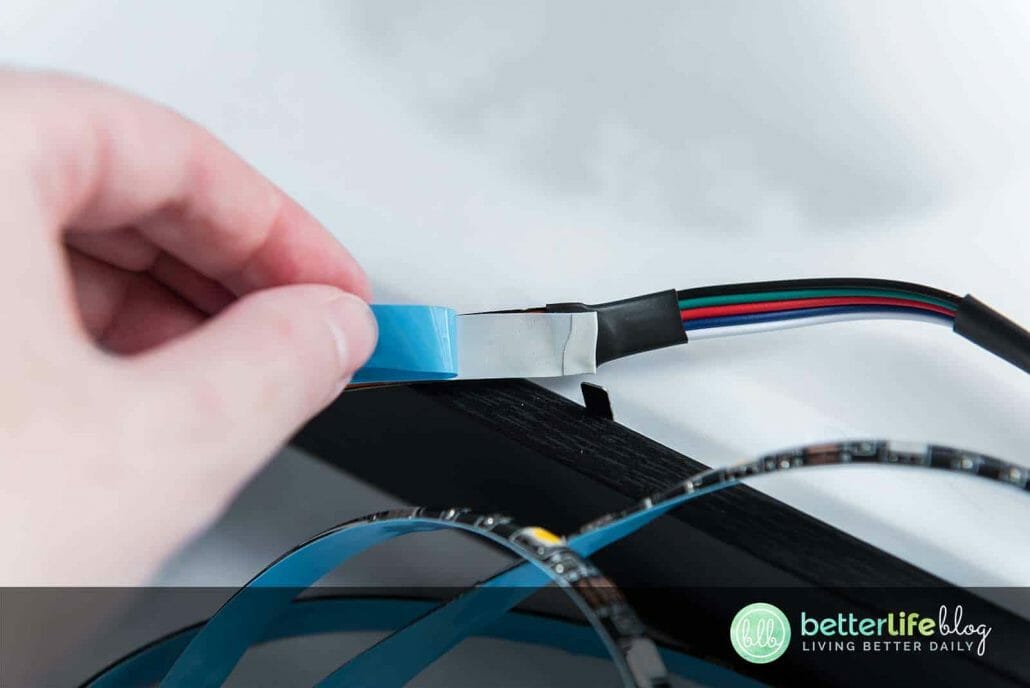
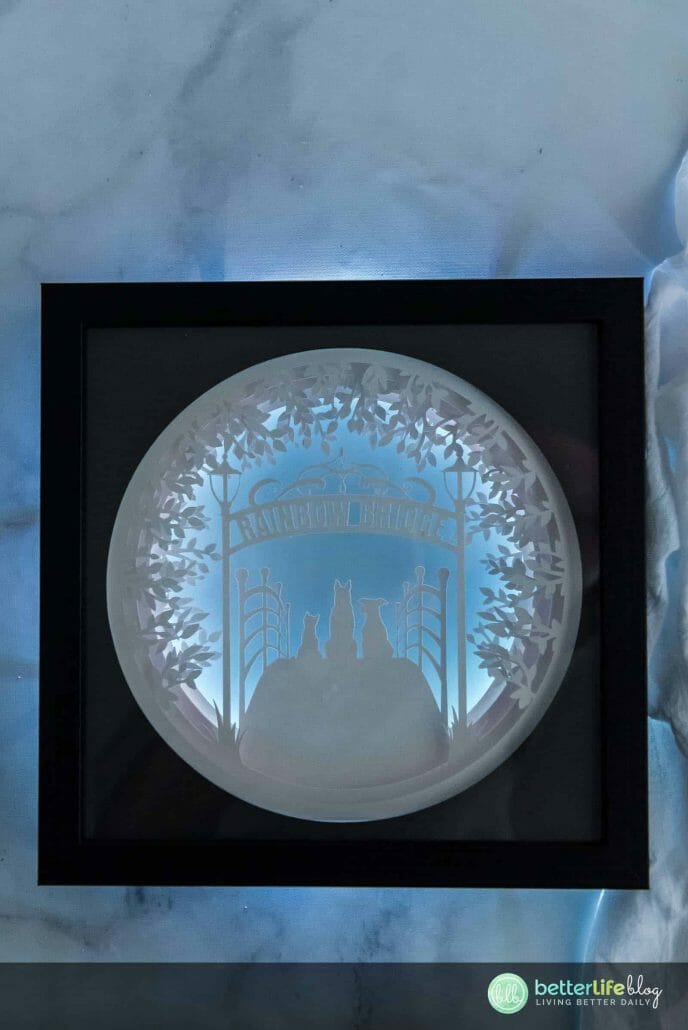
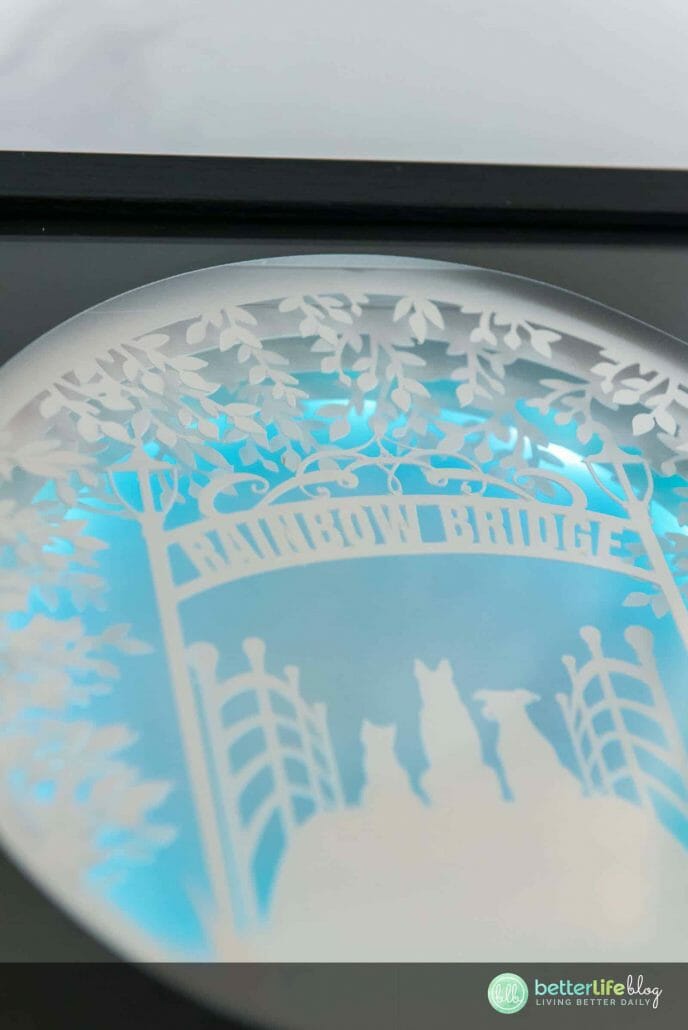
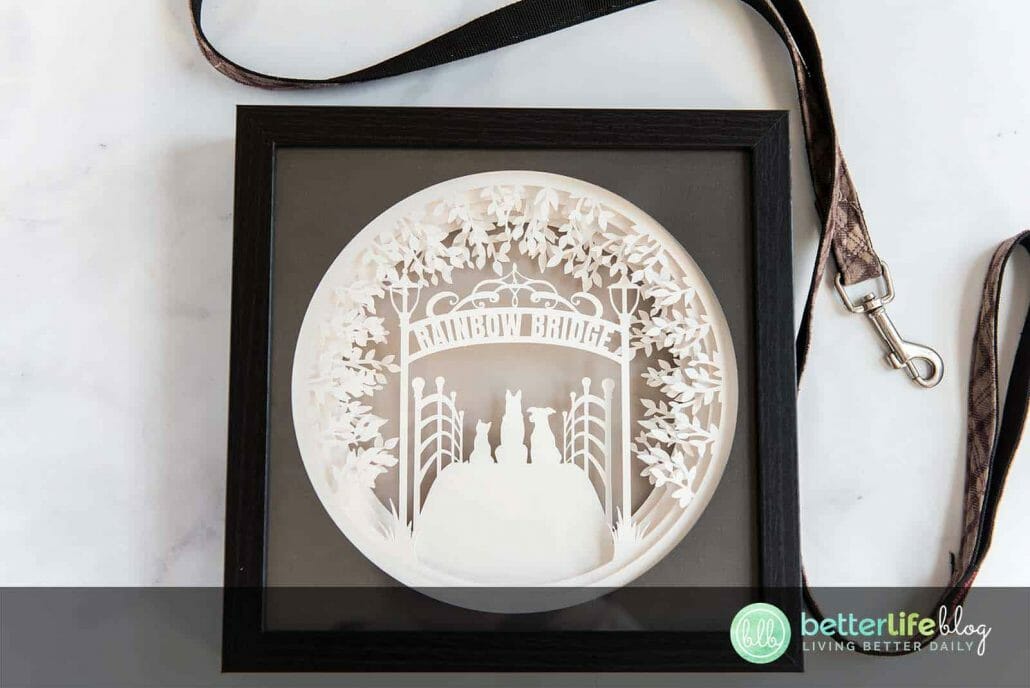
To add a light strip, simply remove the backing and attach the sticky side inside of your frame all the way around the edges. Place the back of your frame back on and press the tabs down to hold your project in place. Turn the lights on or leave them off. This project looks amazing either way!! Enjoy!


Notes:
Check to make sure your shadow box will fit all of your layers with the foam core between for the best fit. If it is too thick, leave off the layer of foam core on the vellum or the front piece of cardstock with just the plain circle on it.
If your lights aren’t showing up enough, pull them away from the edges of the frame, and closer to the opening of your circles.
This project has very intricate cuts. Make sure to use a fresh, sharp blade when cutting for the best result!
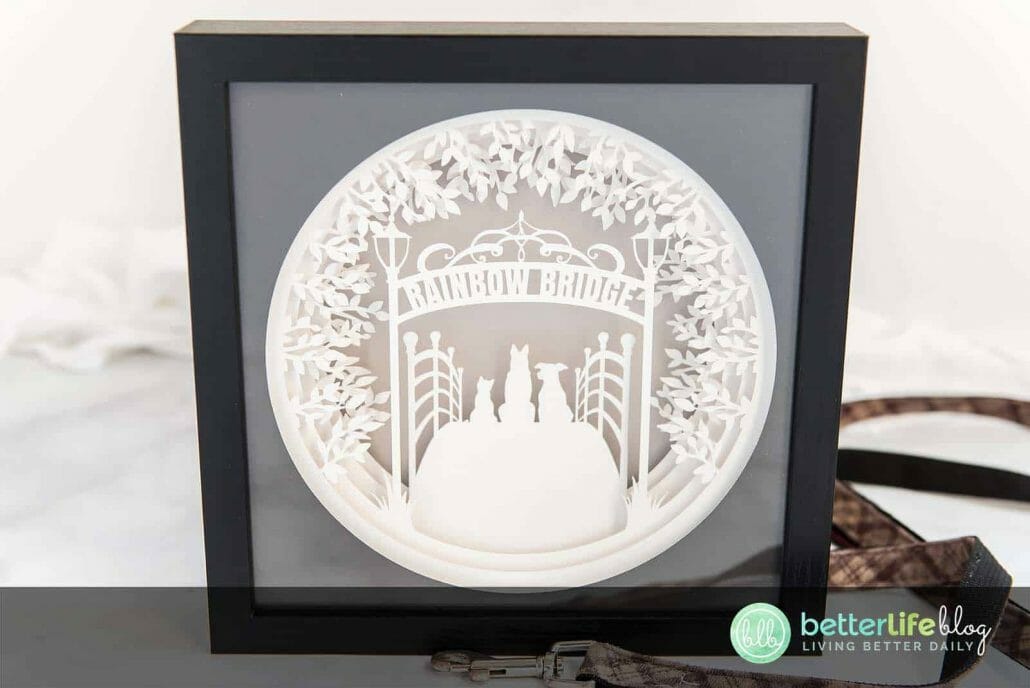


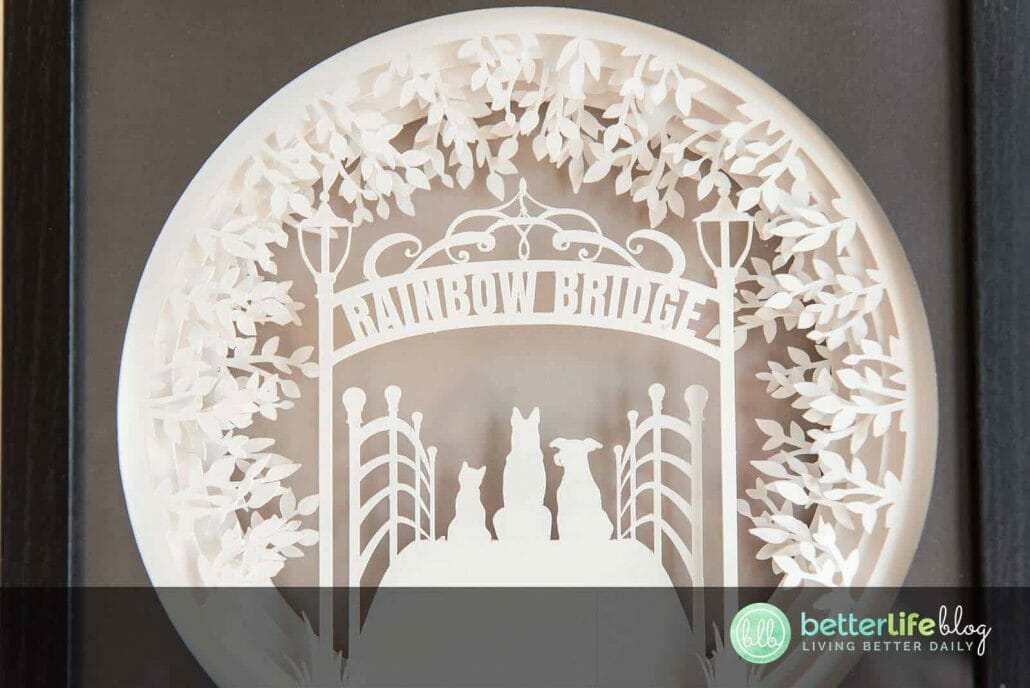
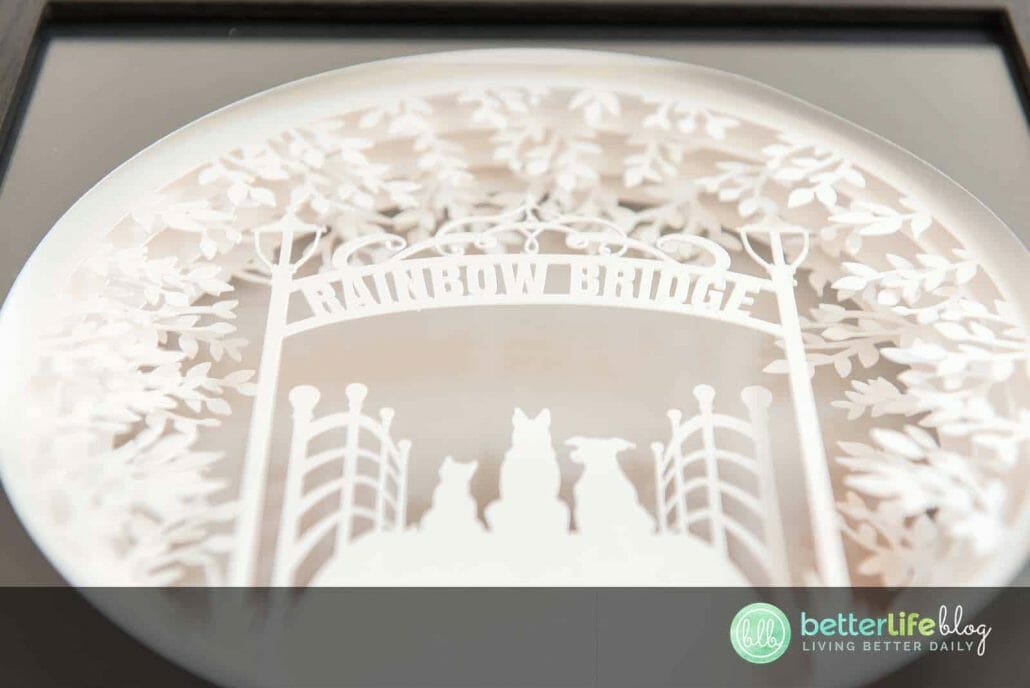
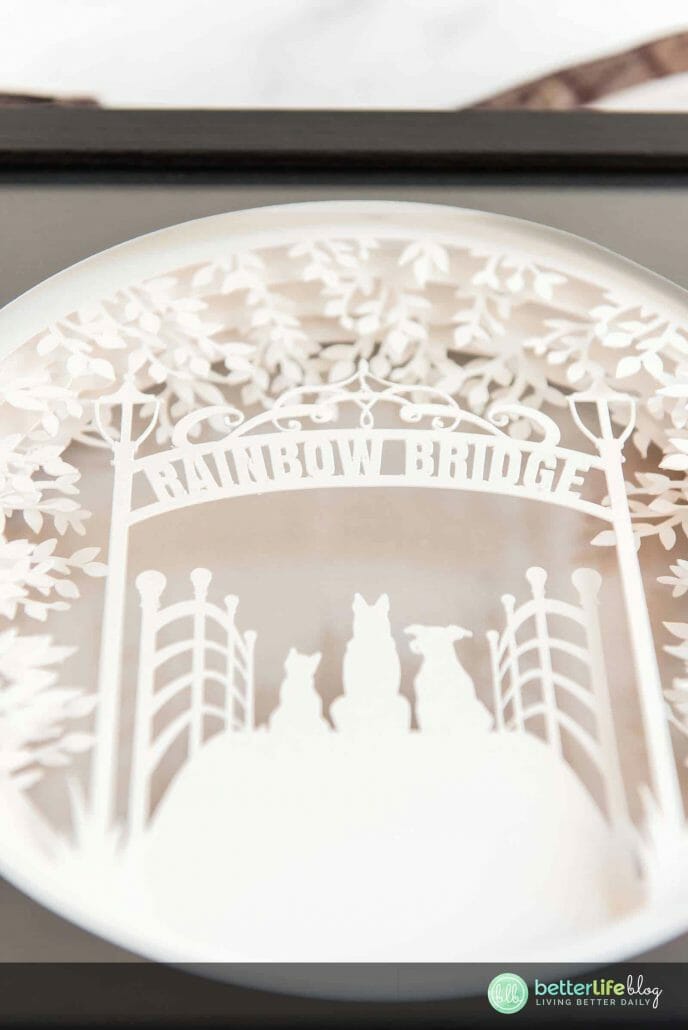

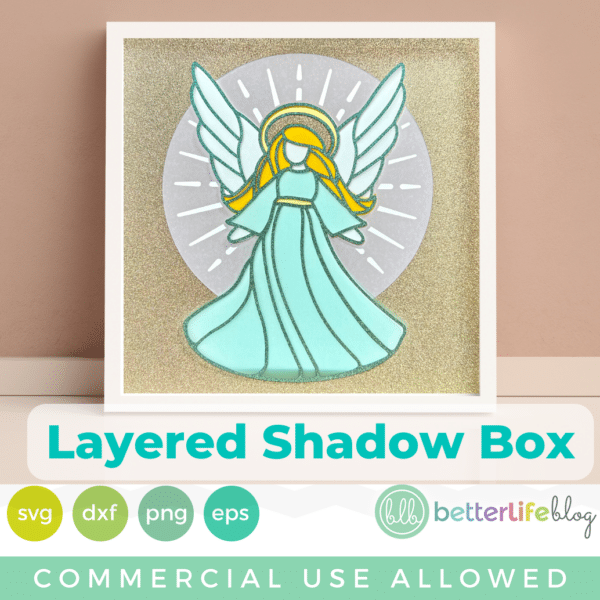
Cricut Rainbow Bridge Shadow Box
My Cricut Rainbow Bridge Shadow Box is a beautiful way to commemorate the pets that are no longer with us. My Cricut tutorial will show you how to put this gorgeous shadow box together - full of depth and intricate design.
Materials
Instructions
- Turn your shadow box over with the glass facing down. Open the back. Using your scraper, remove the canvas covered pad that is attached to the backing material. You can discard this pad or use it for a later project.
- Next, if you are using posterboard, cut it down to sizes that you can cut on your mat.
- Cut your foam core board into thin strips, about ½ inch wide(they do not need to be perfect for this since they will be in the back)
- Gather your cardstock or posterboard. Load the “Rainbow bridge” file into Cricut Design Space. Adjust the width of each square to 9 inches. The first mat with just the circle in the middle can be cut using a black piece of cardstock to frame the image (this is optional). Select the Make it button.
- Place your cardstock/posterboard on your mat and proceed to follow the directions in Design Space to cut.
- Once all of your cardstock pieces are cut out, weed to remove the unnecessary pieces.
- Trace one of your squares onto a piece of vellum and cut with scissors. Line up all of your pieces starting from the
back. The vellum is in the back, and next come the image with the smallest circle, then a bigger circle, and so on until the last one is placed on top with the biggest circle. - Turn each piece over onto its front and attach pieces of foam core to the back with hot glue. You will layer each piece and then foam core until you reach the back. Place your 3-D stack into your frame with the vellum towards the back.
- To add a light strip, simply remove the backing and attach the sticky side inside of your frame all the way around the
edges. Place the back of your frame back on and press the tabs down to hold your project in place. Turn the lights on or leave them off. This project looks amazing either way!! Enjoy!
Notes
Check to make sure your shadow box will fit all of your layers with the foam core between for the best fit. If it is too thick, leave off the layer of foam core on the vellum or the front piece of cardstock with just the plain circle on it.
If your lights aren’t showing up enough, pull them away from the edges of the frame, and closer to the opening of your circles.
This project has very intricate cuts. Make sure to use a fresh, sharp blade when cutting for the best result!
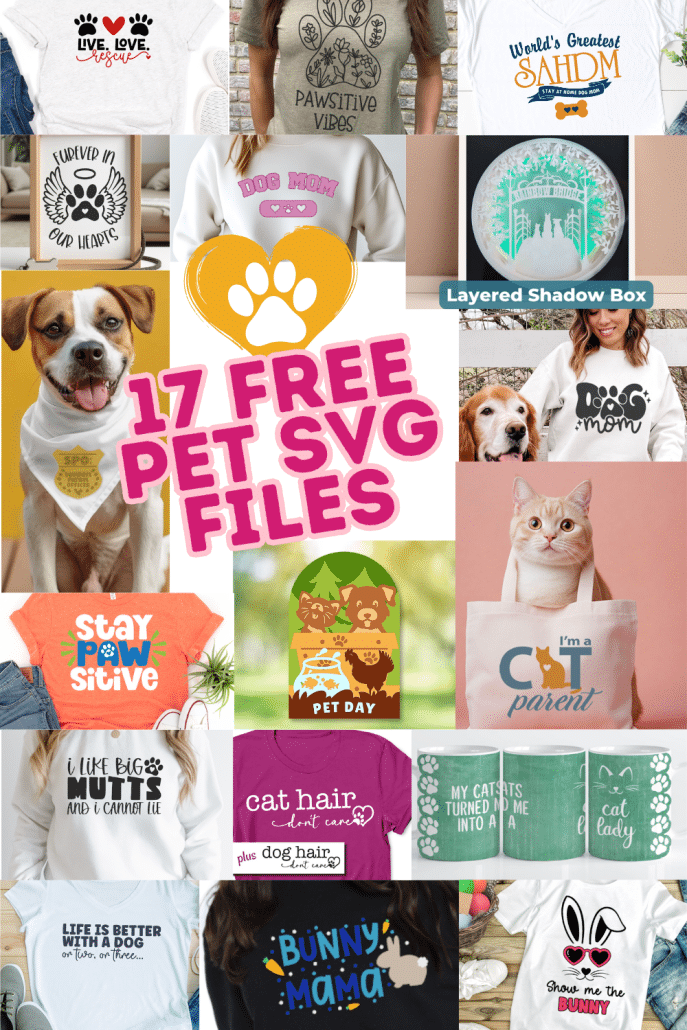
Get 17 Pet-Themed SVG Files {FREE}
I’ve collaborated with some of my crafty friends to bring you an amazing collection of FREE Pet-Themed SVG craft files! Check them out below:

Rainbow Bridge Layered Shadow Box Free Pet SVG

Cat Lady Mug Free Pet SVG

Dog/Cat Hair Don’t Care Free Pet SVG

Pawsitive Vibes Free Pet SVG
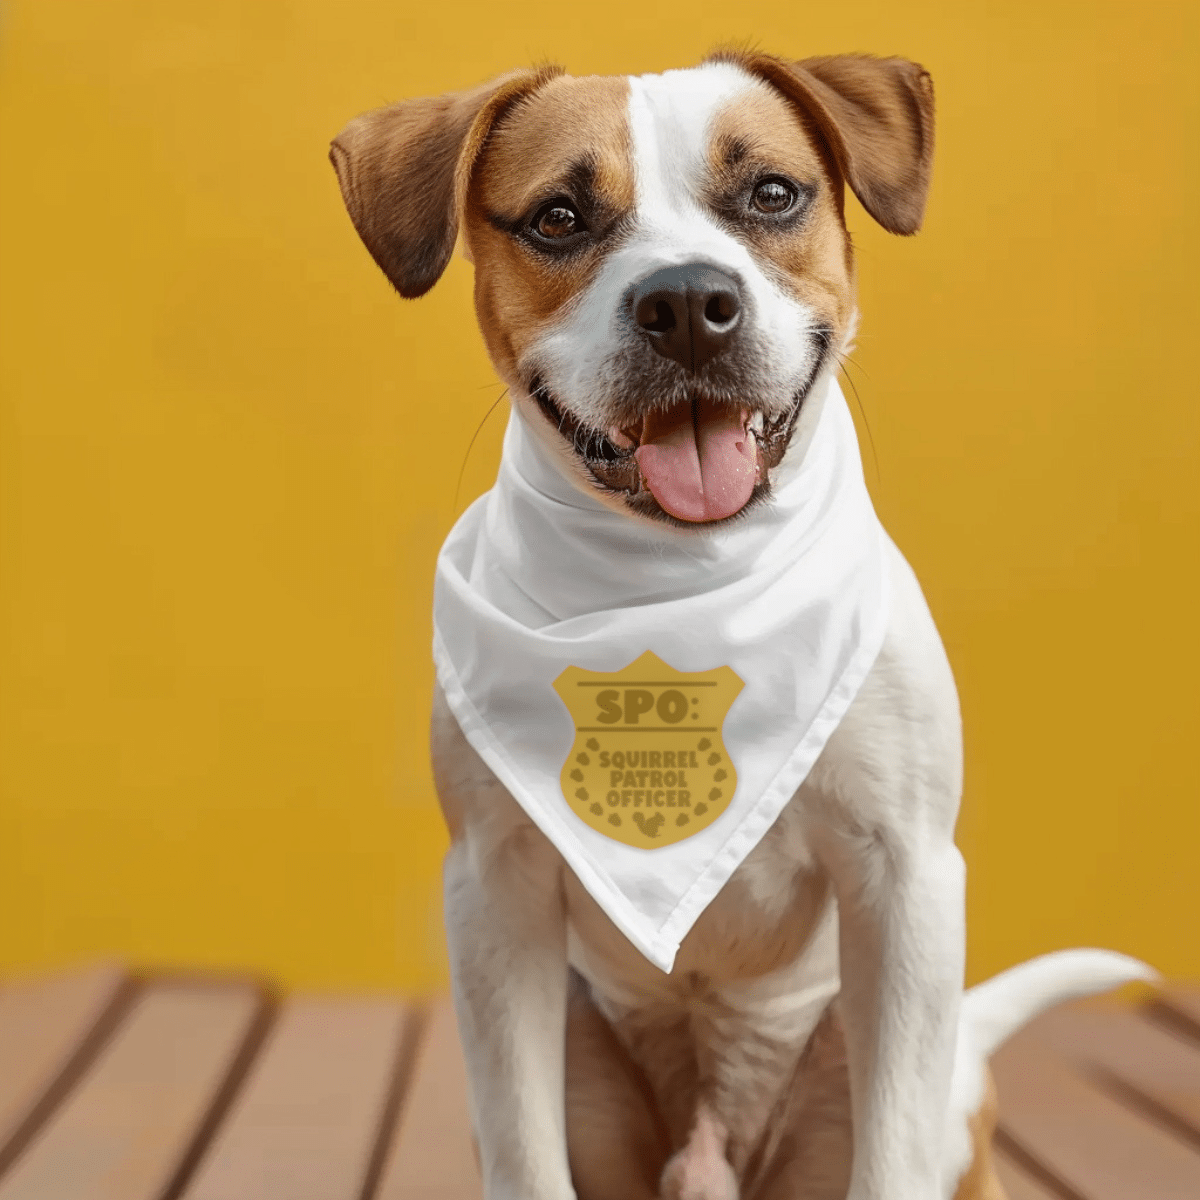
Squirrel Patrol Officer – dog bandana Free Pet SVG

Furever in our Hearts Free Pet SVG
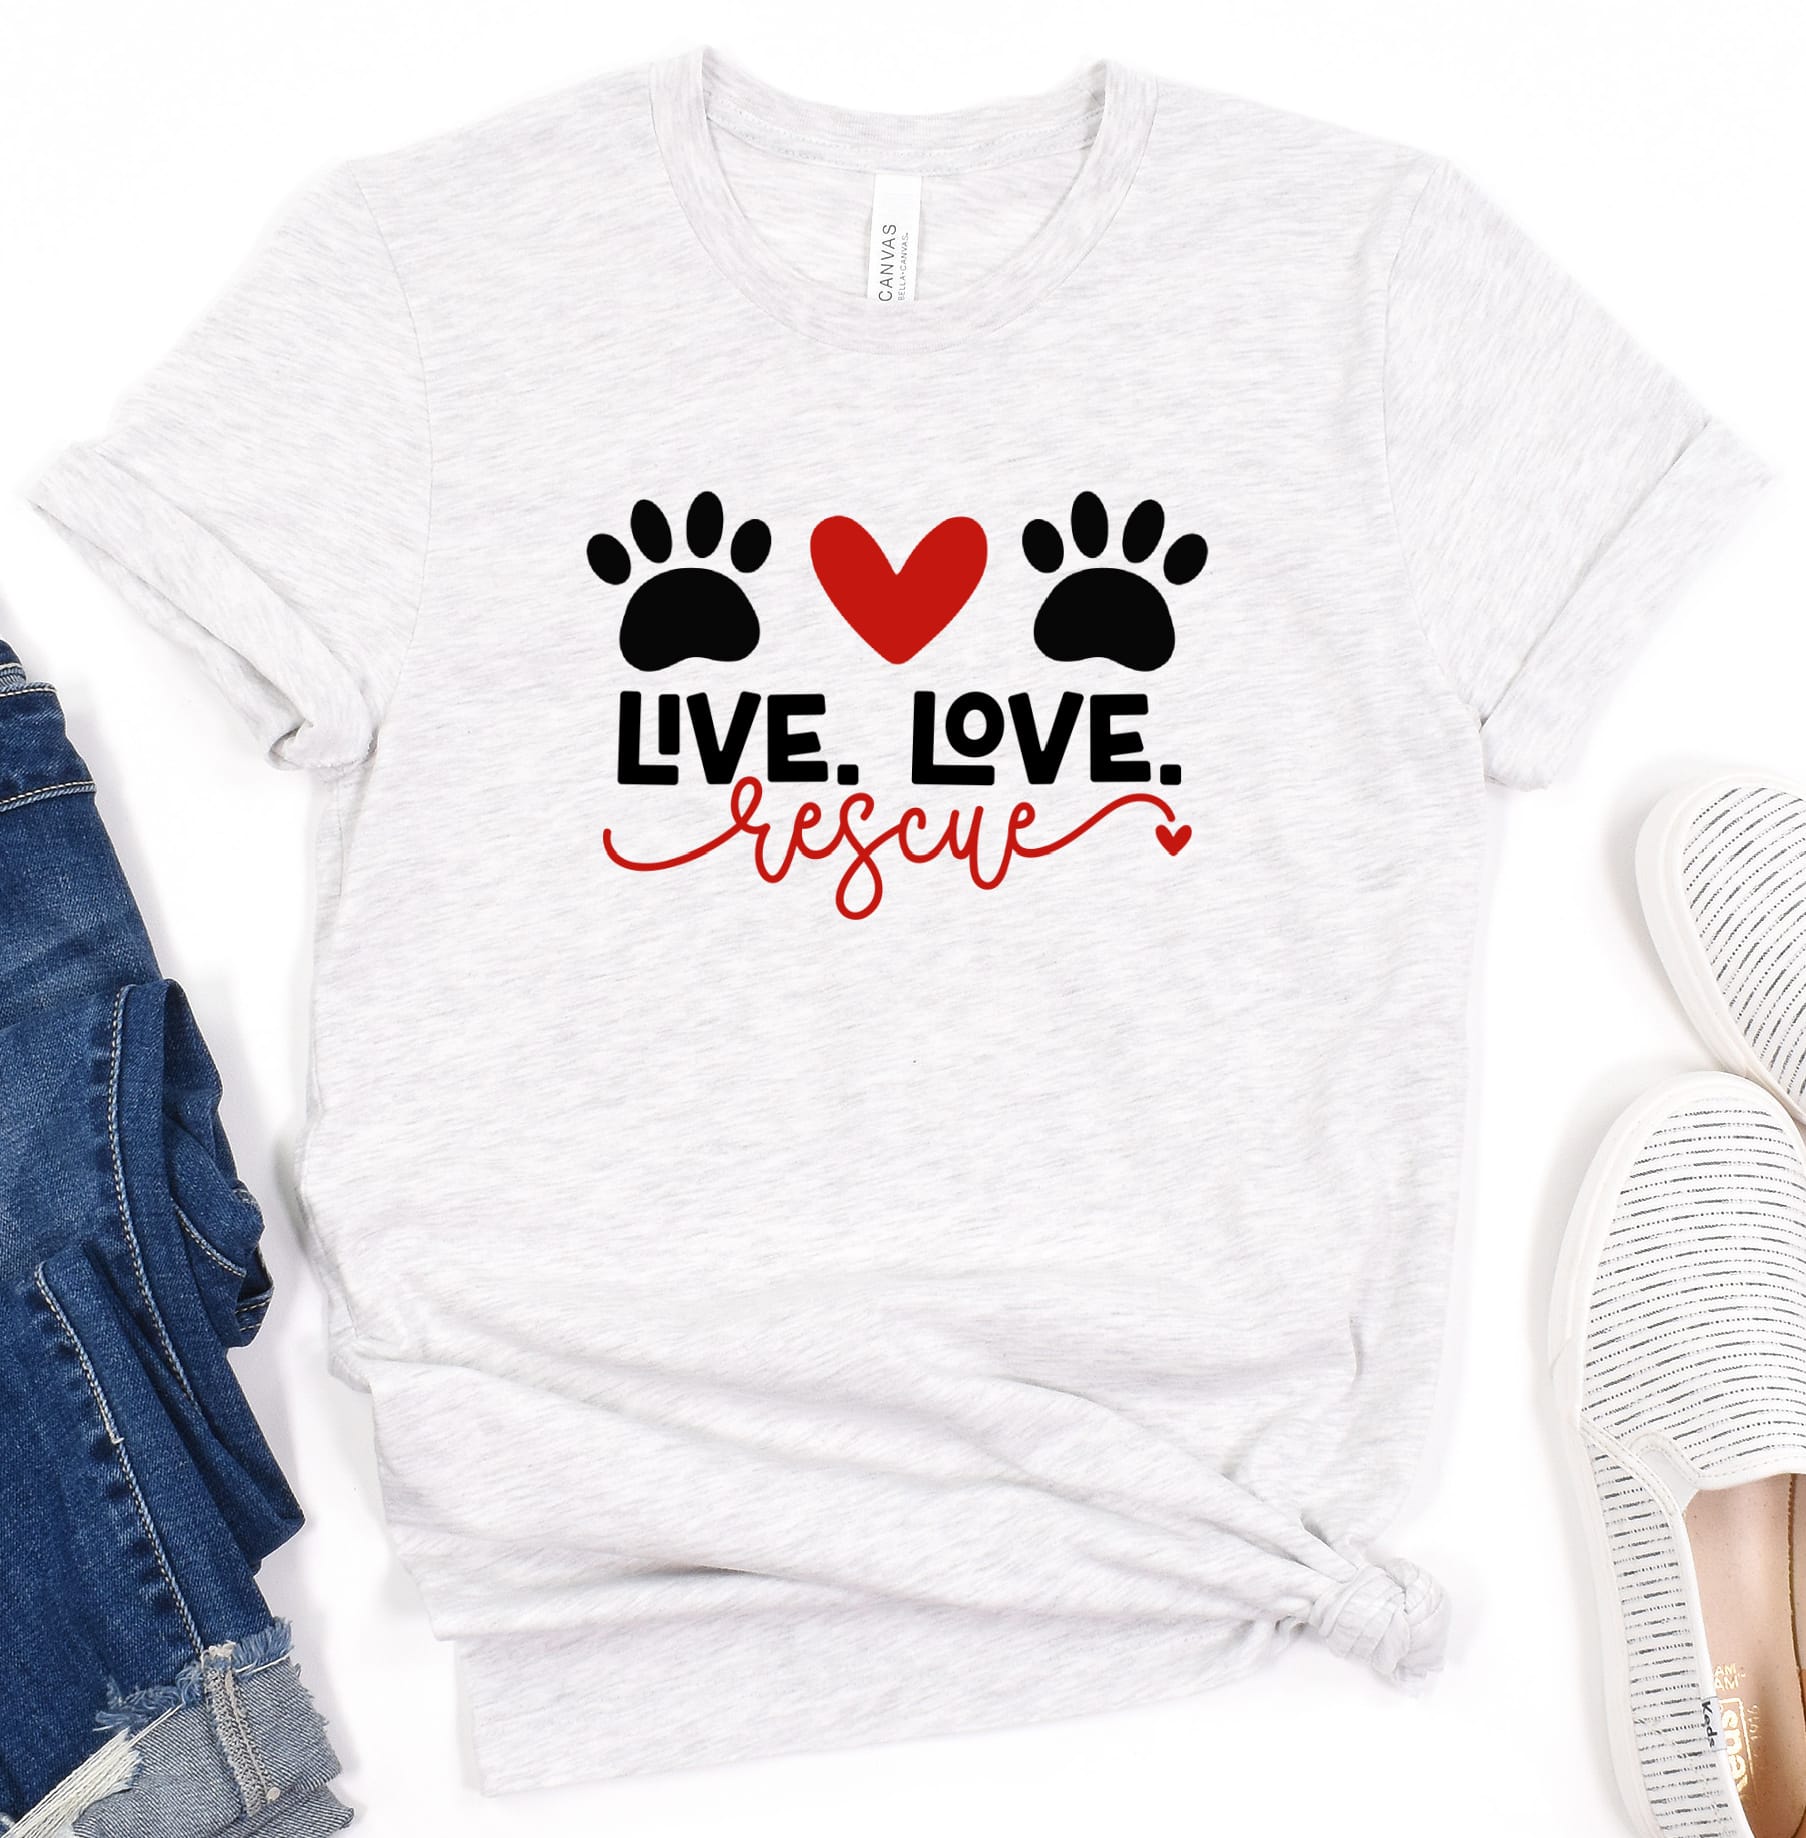
Live Love Rescue Free Pet SVG

Dog Mom Free Pet SVG
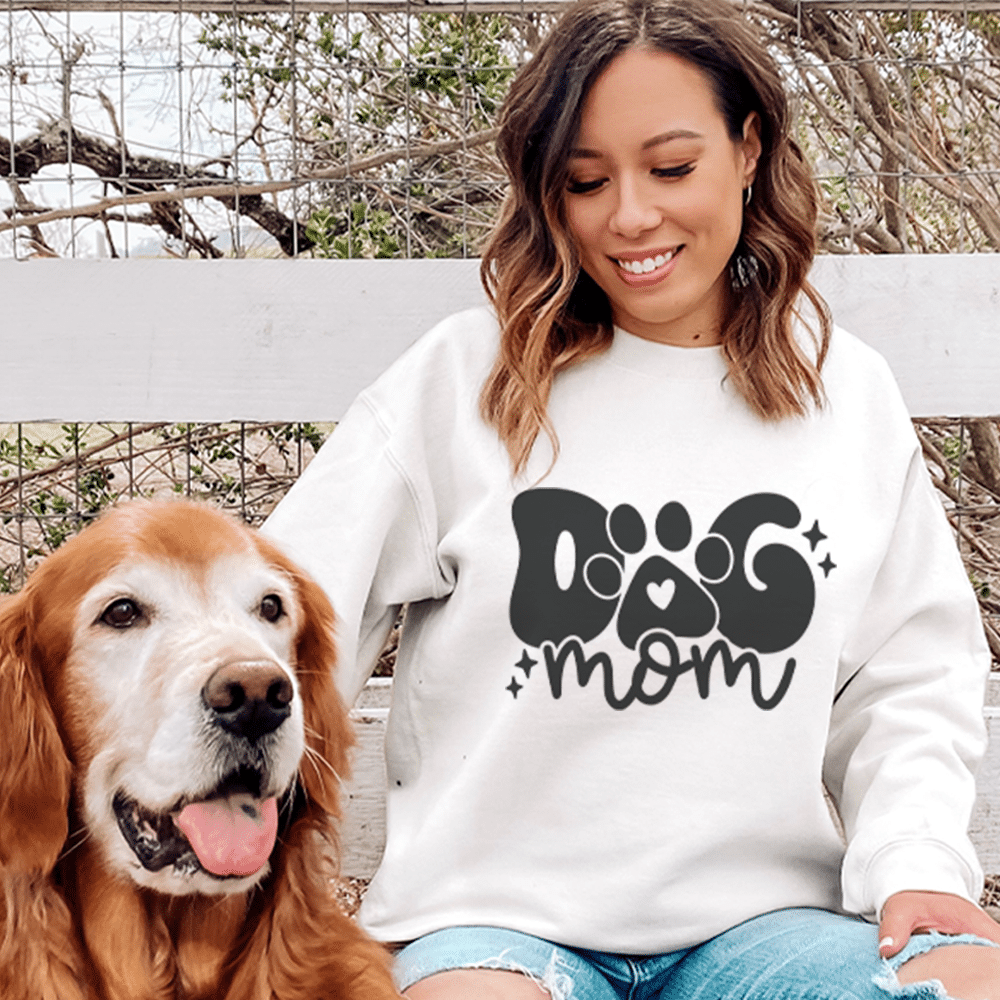
Dog Mom Free Pet SVG

I’m a Cat Parent Free Pet SVG

Stay at Home Dog Mom Free Pet SVG

Pet Day Box Card Free Pet SVG

Life is Better with a Dog Free Pet SVG

Show Me the Bunny Free Pet SVG

Stay Pawsitive Free Pet SVG

Bunny Mama Free Pet SVG

I Like Big MUTTS and I Cannot Lie Free Pet SVG