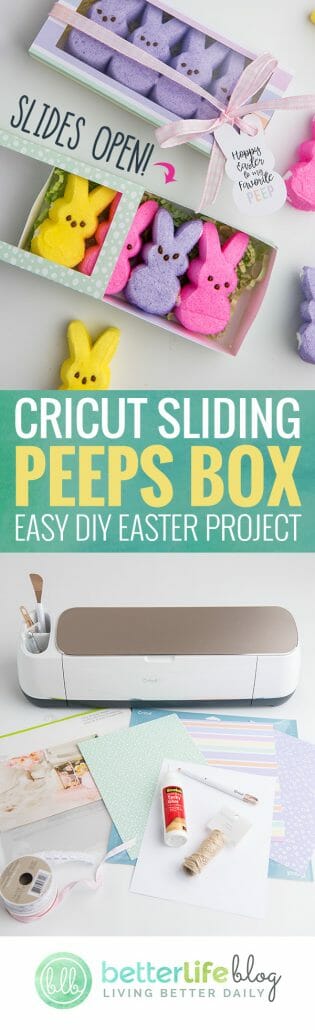
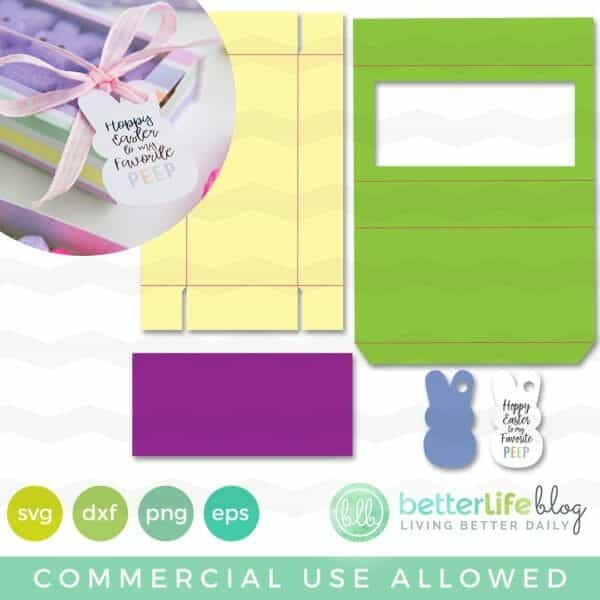
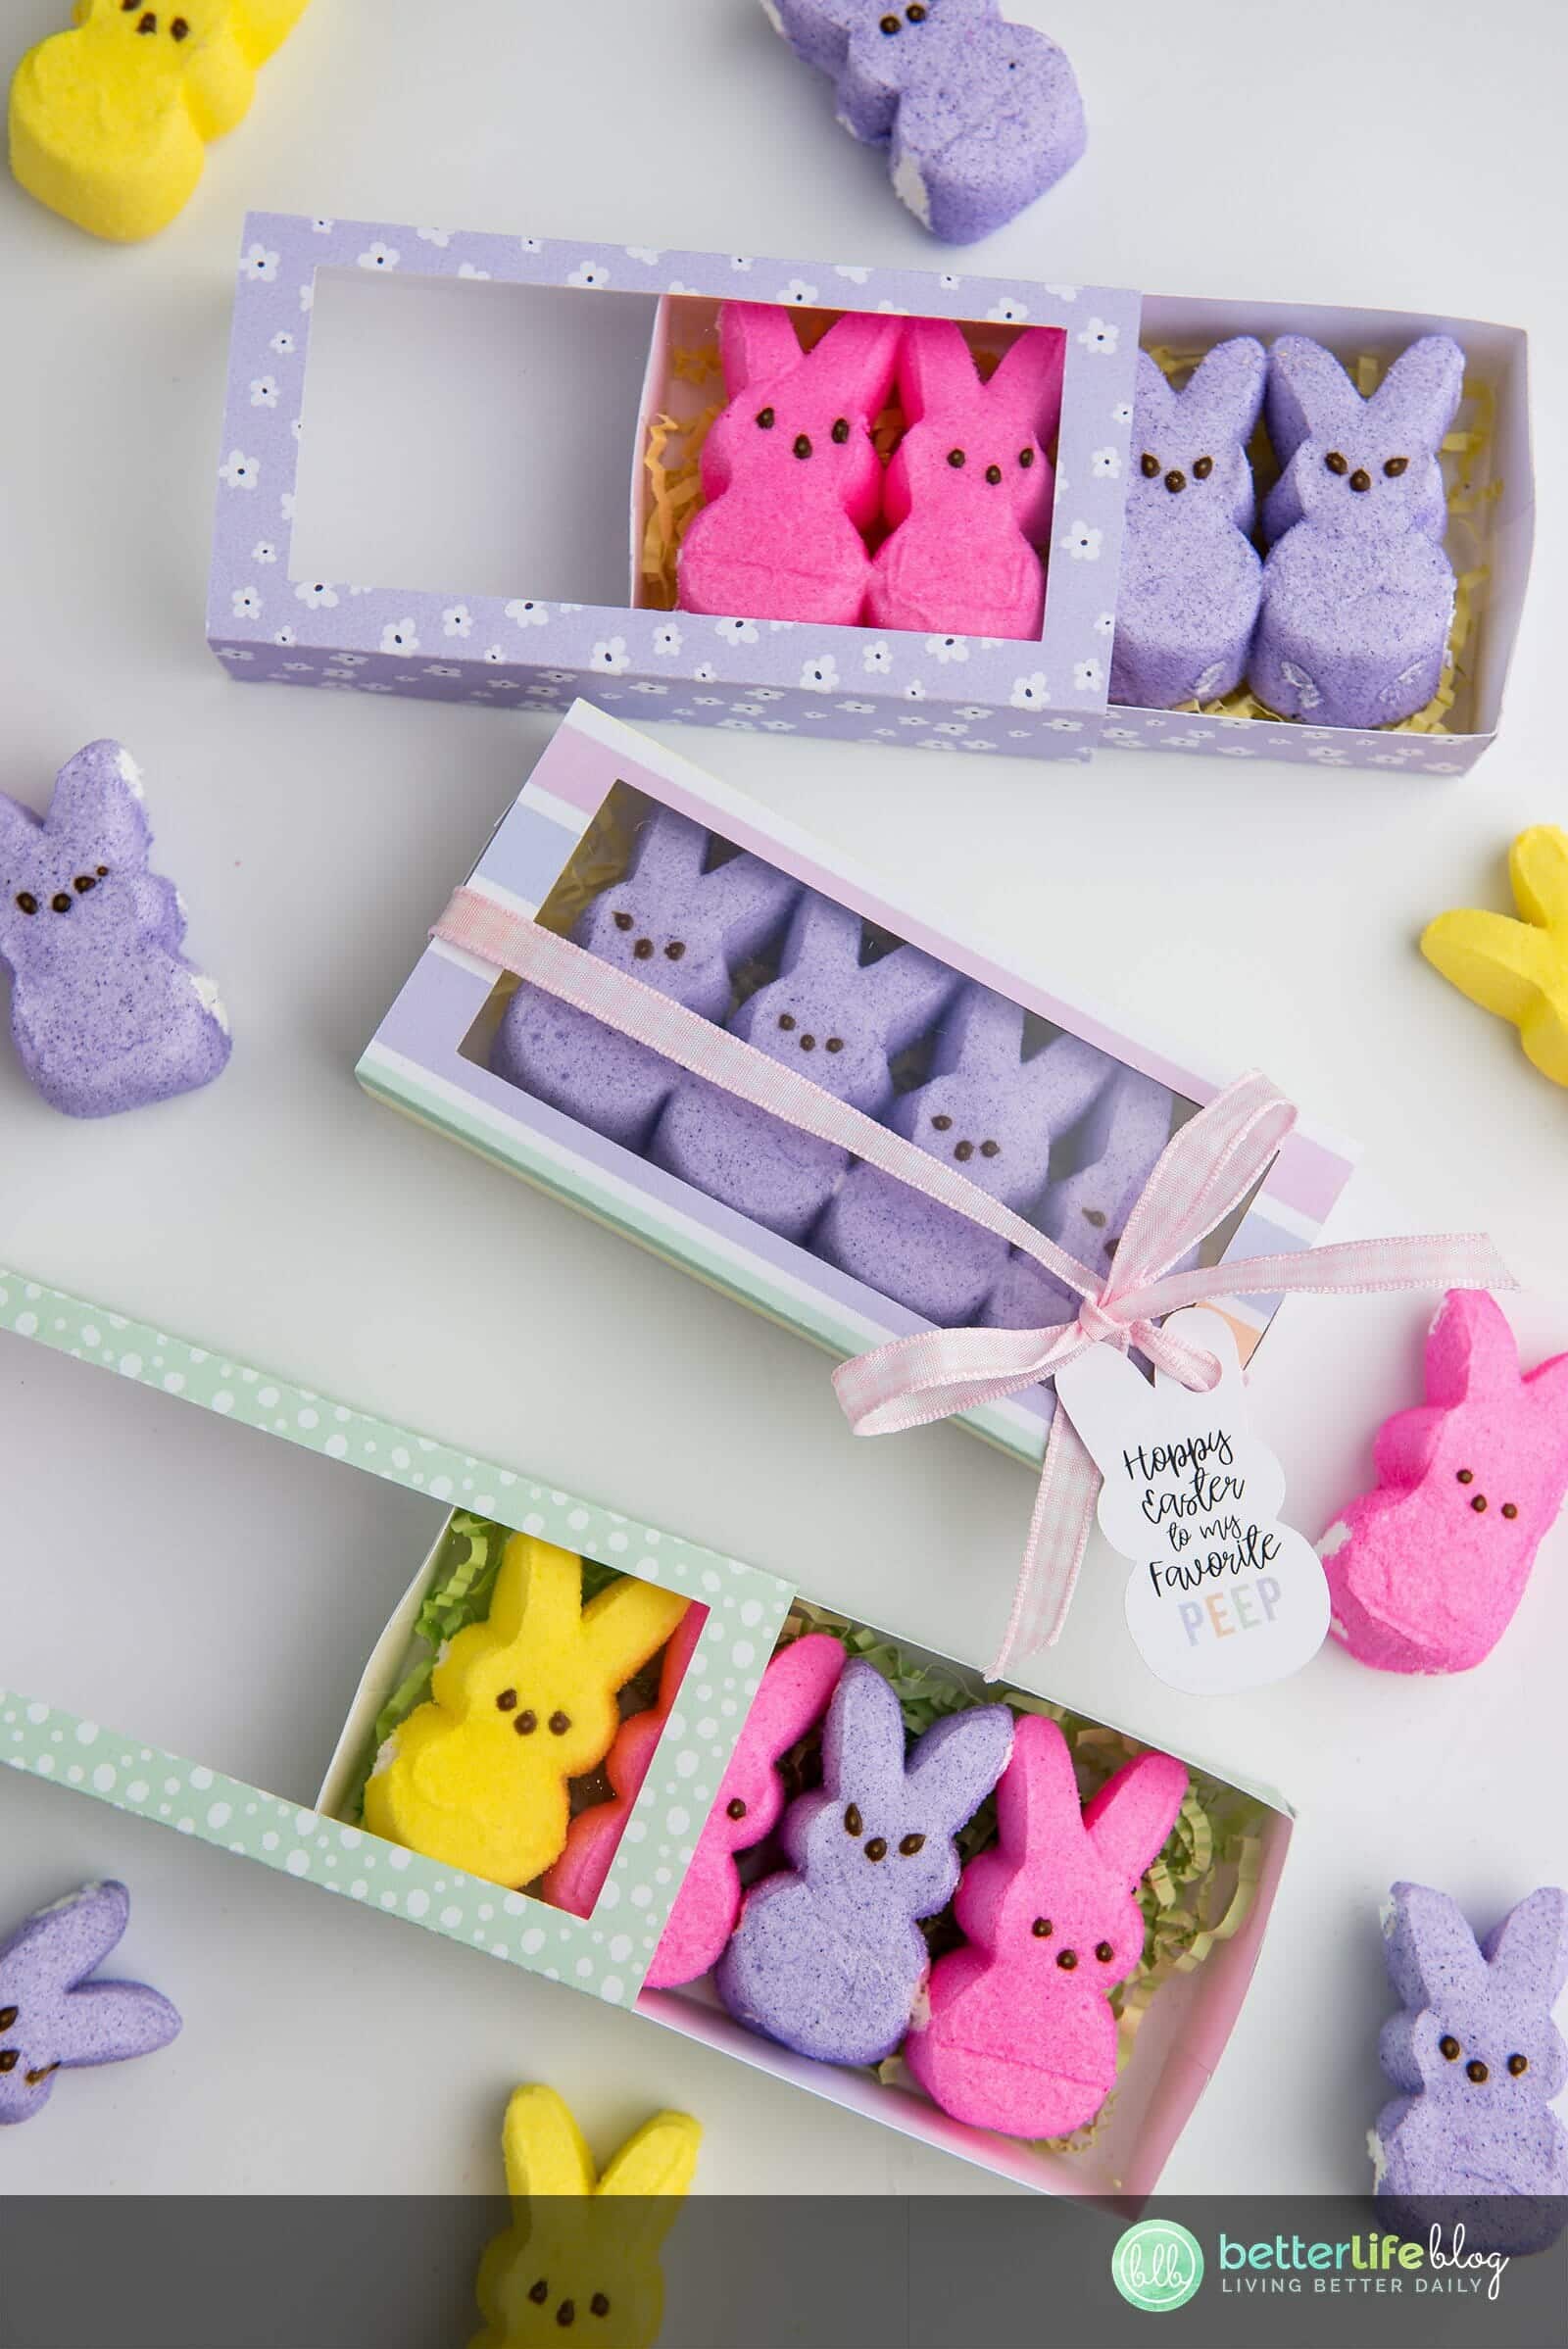
Here is an adorable and easy project to make this Easter to brighten someone’s day! This adorable box is the perfect size for Easter Peeps but it could be used for all sorts of gifts and trinkets! What I love about this box is that it slides open and it also includes an acetate window so that you can see what’s inside!
Included is an adorable bunny tag, but if you are using this for a different occasion you can use a different tag or skip it altogether.
I hope you’ll enjoy this project! Check out the instructions below and be sure to tag me on social media if you make one! I would LOVE to see how yours came out!
Easter Peeps Treat Box
Materials List:
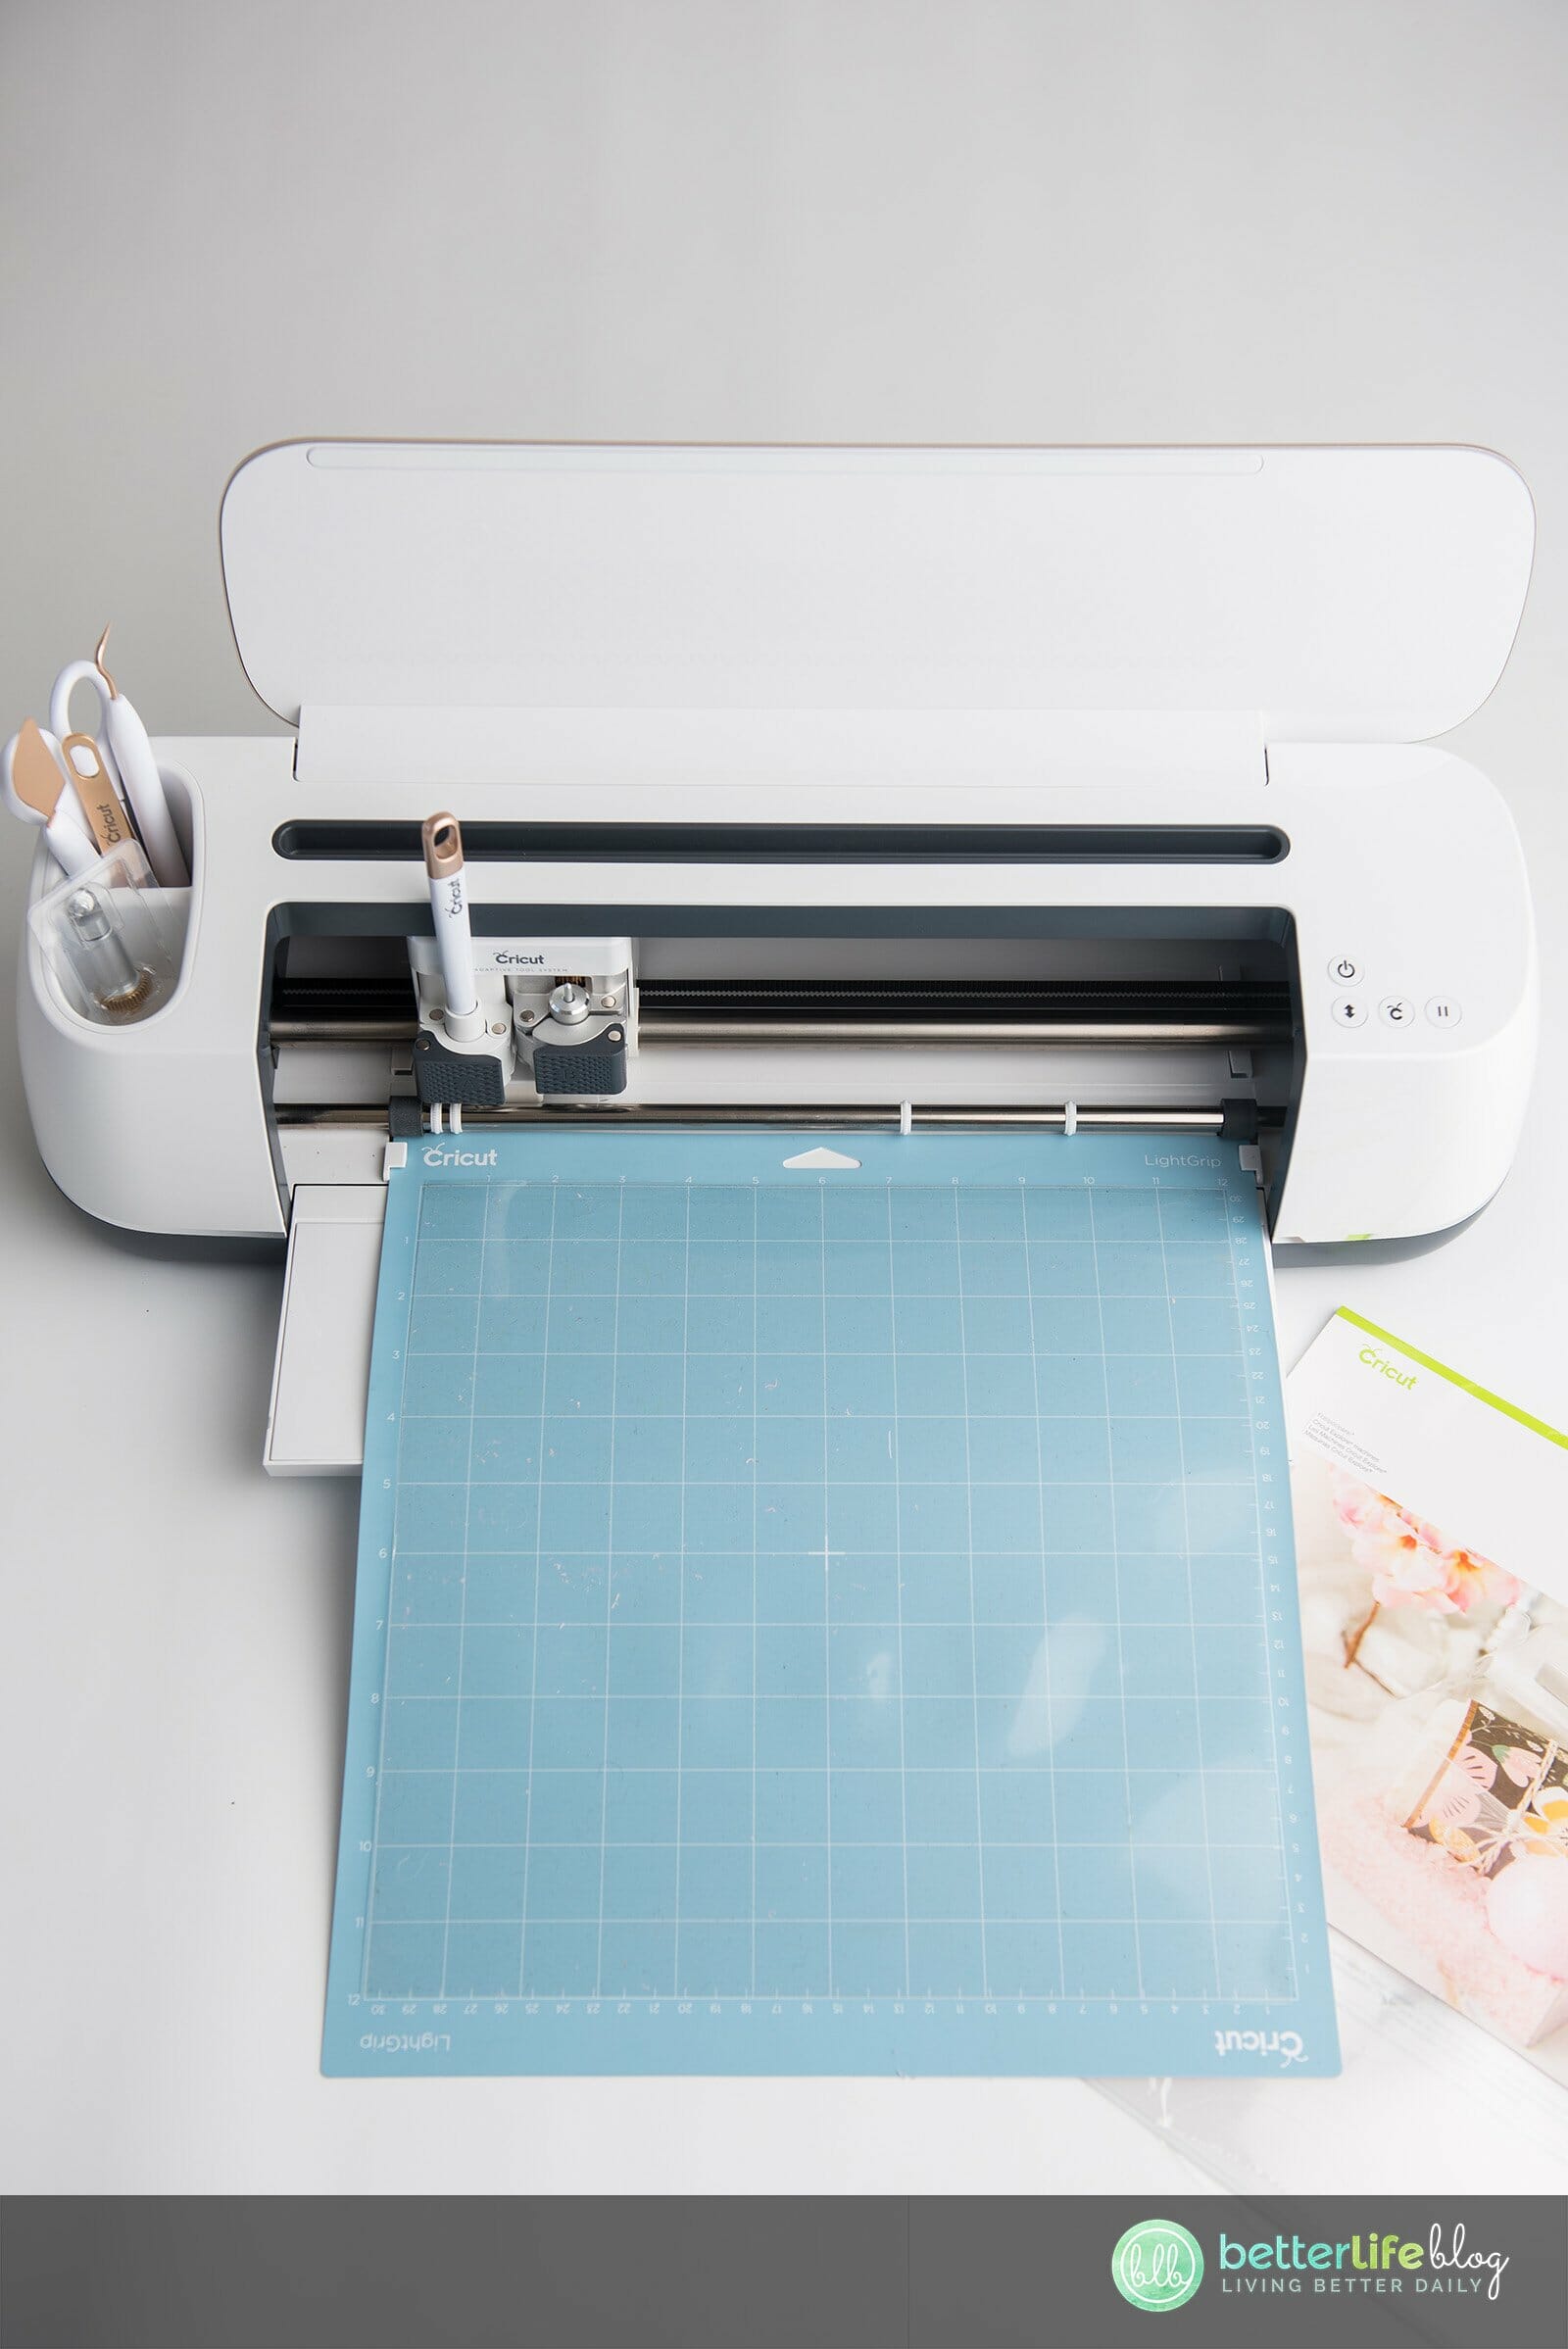
- Smart Cutting Machine, such as Cricut or Silhouette
- Card stock (8.5×11” 65-80lb) any color or pattern of your choice, 3 sheets total
- Scotch quick dry glue (this is a great glue for paper crafts)
- Acetate (Cricut brand is used here)
- Scoring stylus or scoring wheel
- Cricut blue light grip mat
- Printer
- Ribbon of your choice
- Easter Peeps Treat Box SVG Cut File (FREE)
Instructions:
Step 1:
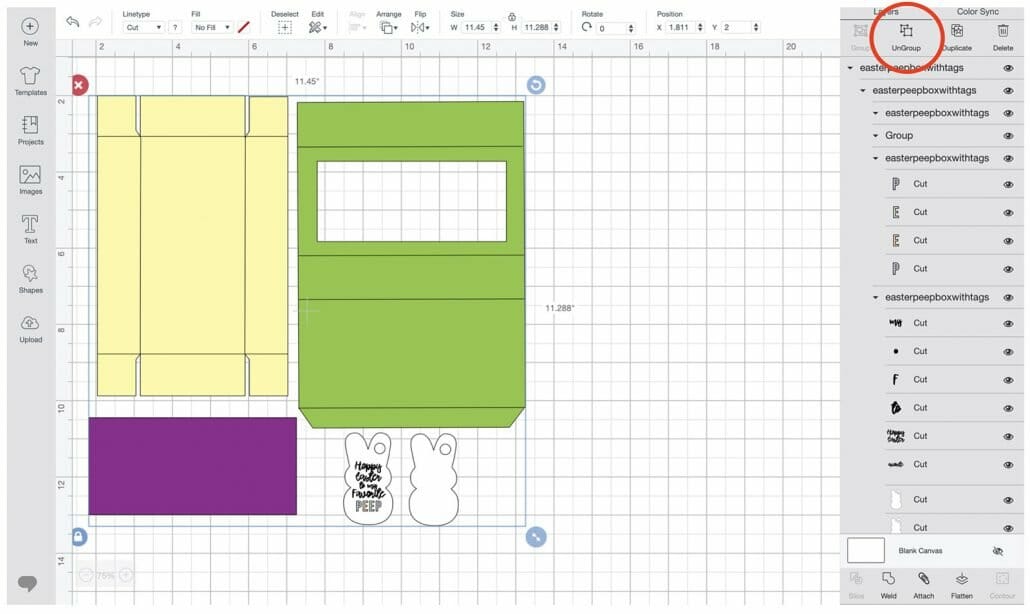
Upload the SVG file to design space. Select all layers, then right click and choose “ungroup” to work on each layer individually.

Step 2:
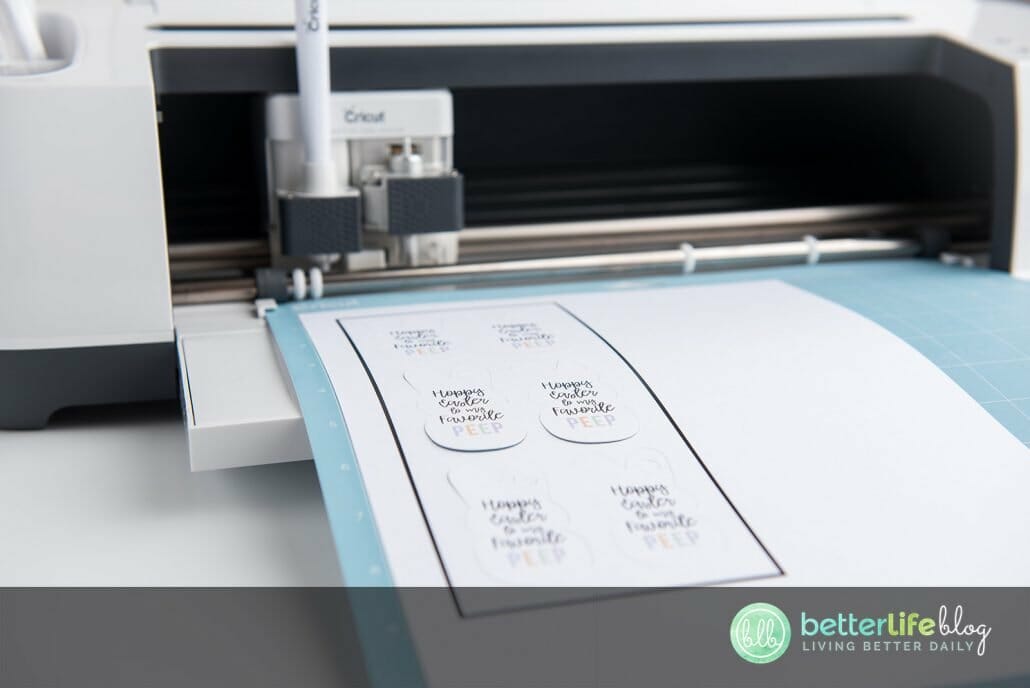
For this step you can either choose the bunny with the phrase already on it, then select the bunny along with the text inside of it and then choose “Flatten” in the lower right-hand corner of your screen. This will allow you to “Print then Cut” this layer.
Alternatively, you can select the blank bunny shape layer and add your favorite font and phrase using the text feature in design space. Make sure that the text is layered on top of the tag layer (use “align” and “arrange” buttons at the top of the screen). Select both layers and then hit “flatten” at the bottom right to create a “print then cut” layer.
The third option is you can just cut the bunny as a blank shape without having to print anything on it at all. This is perfect if you want to just write a handwritten note on the tag. This is totally up to you, so make it your own!
When you’re ready to print then cut (or just cut) the bunny layer, select “make it” to continue!
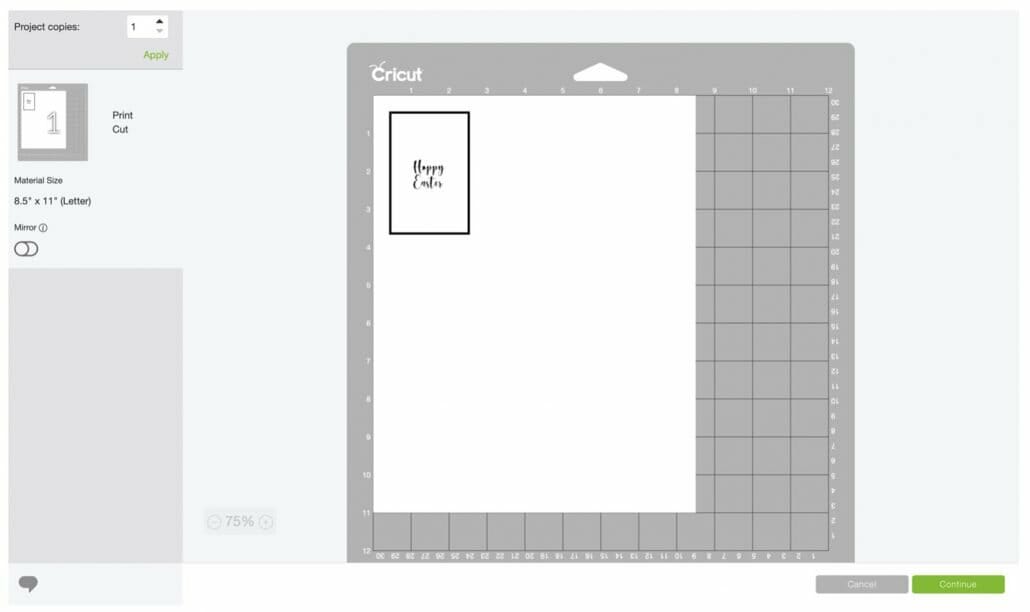
Now that you’ve hit “make it” your screen should look something like this. The black box is a registration line that your machine will read to help it detect where cuts should be made.
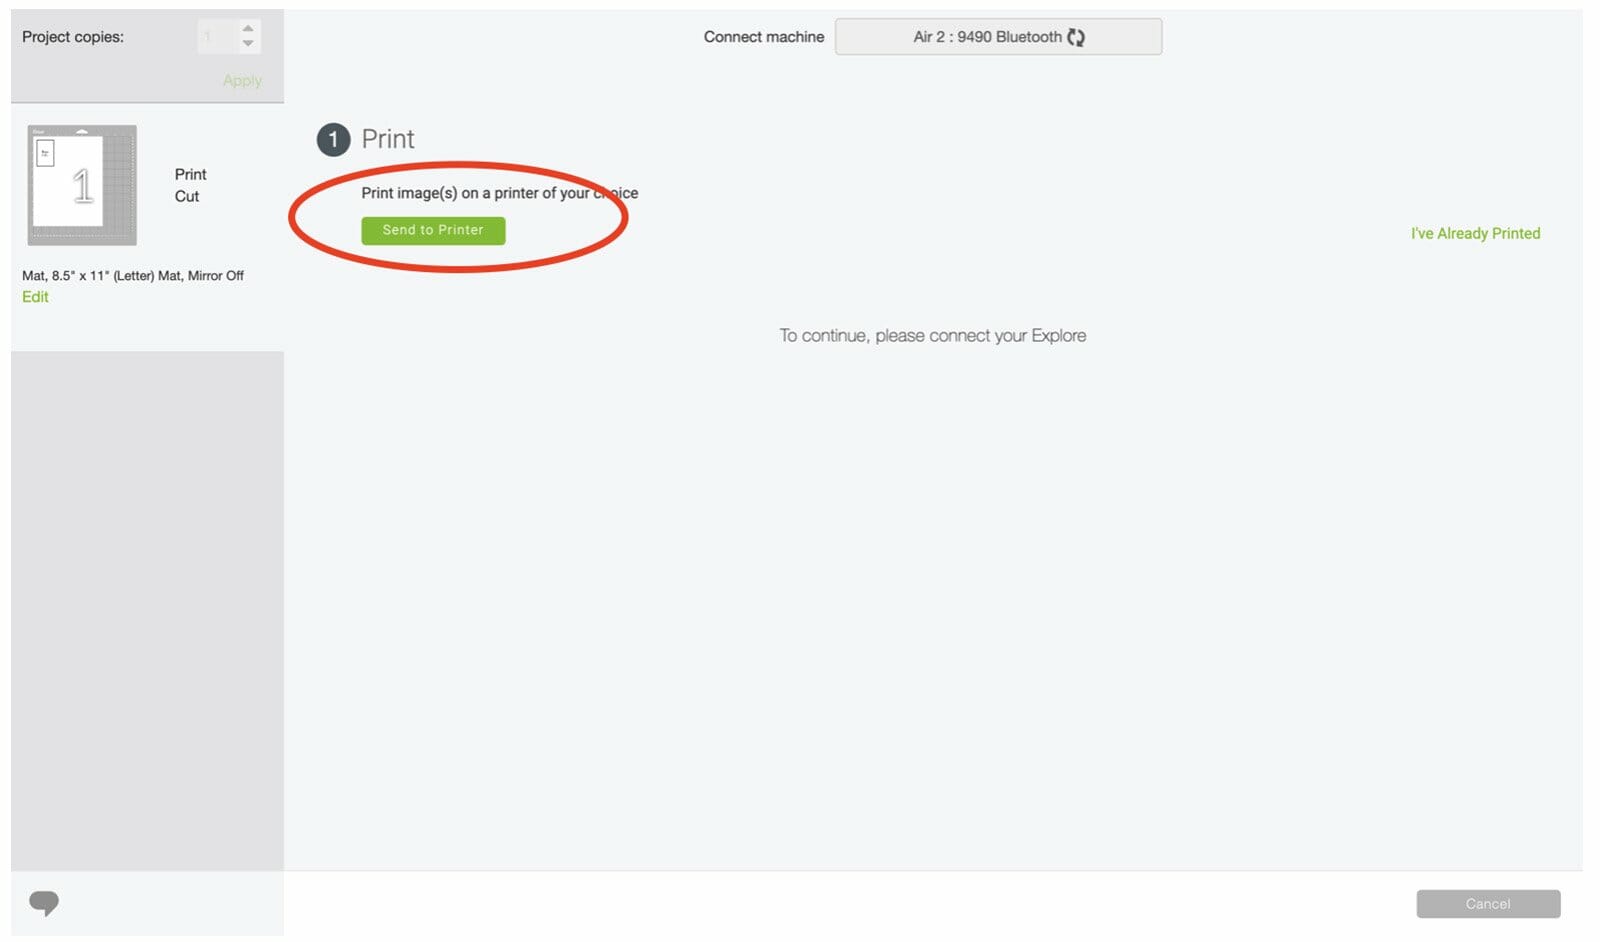
Next, click “Continue” then “Send to Printer” (only if printing. If you’re not printing, just skip to the next step).

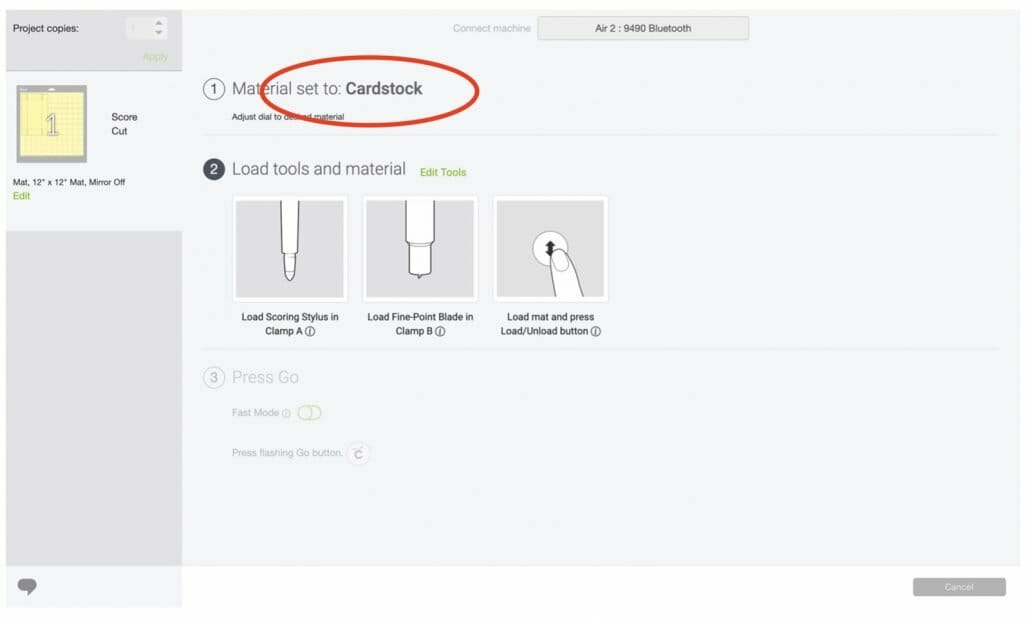
Once you’re done printing, adjust your material settings to medium cardstock, more pressure (either from the dial if you have a Cricut Explore or in the materials screen on Design Space if you have a Cricut Maker).
Note: Only Cricut Maker machines are able to “Print then Cut” on patterned paper. Cricut Explore machines will need to be printed first on white cardstock. Of course, whether or not you can print in color depends entirely on what kind of printer you are using.
Step 3:
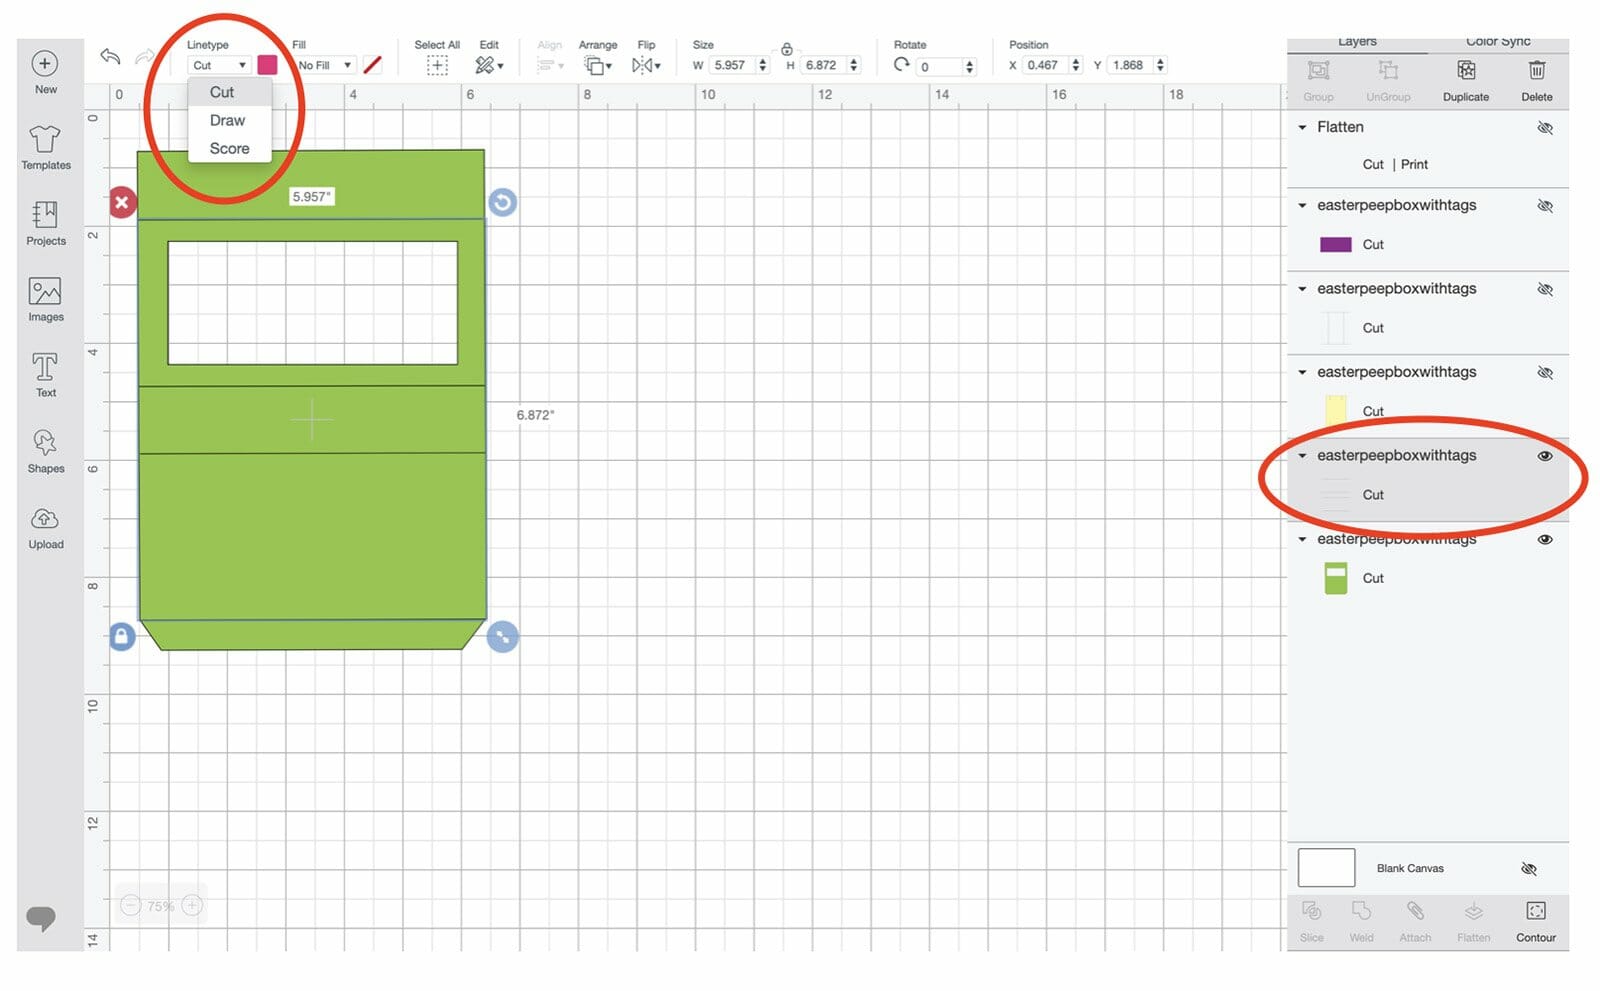
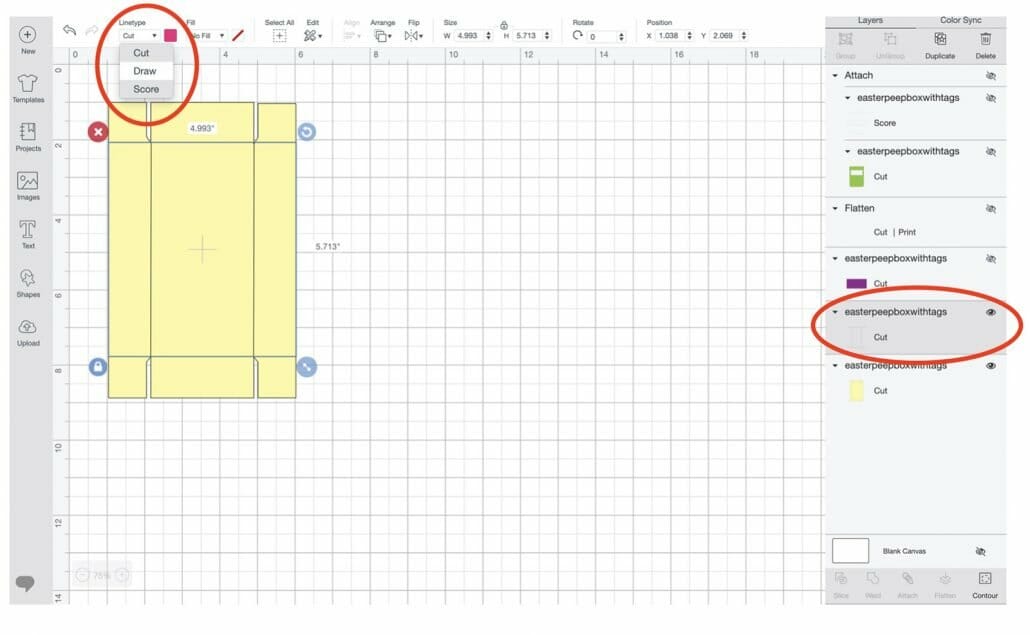
Locate the layer that contains all the scoring lines. This is the outer layer of the box.
Then, locate the “Linetype” option in the upper left-hand corner of your screen. From the drop-down options, select the “Score” option to indicate that these lines will not be cut but rather will use your scoring tool.
Step 4:
Next, select both the cut layer and score layer by clicking and dragging your cursor over both layers, or holding your “shift” key as you select each layer. Next, hit the “attach” icon at the lower right of your screen. Attaching will ensure that the scoring lines will be on the same mat as your cutting layer and keep both together.

Hit the green “Make it” button in the top right corner.

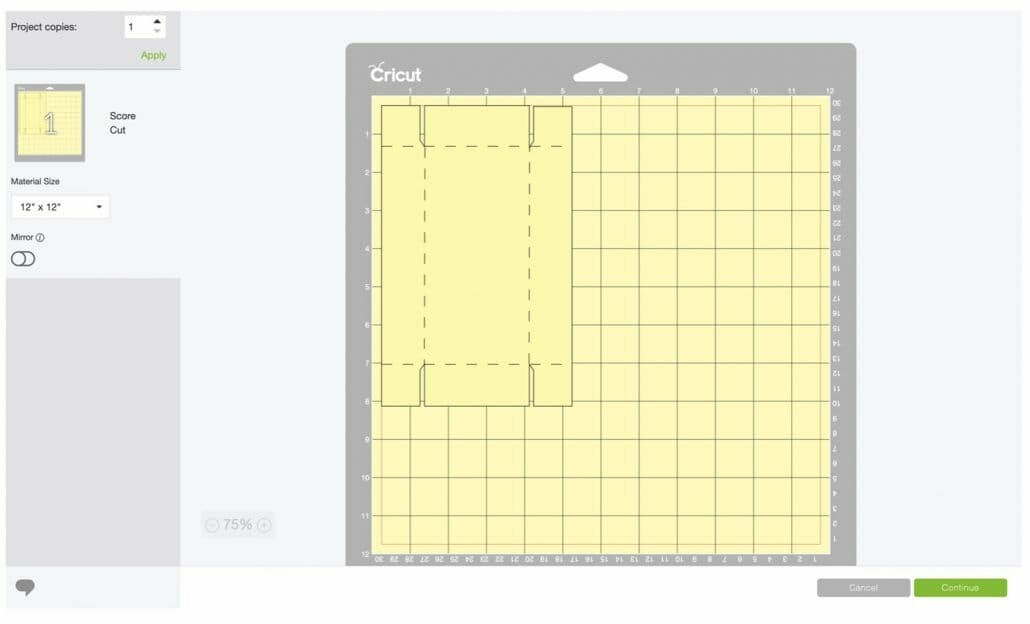
Step 5:
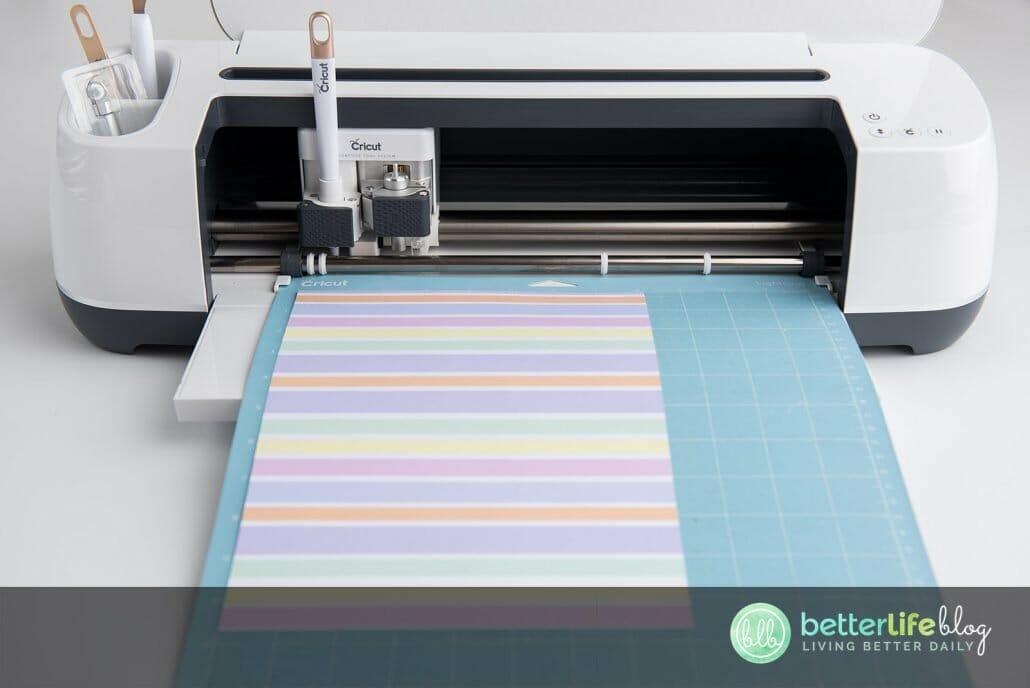
Now that you’ve hit “Make it” this is what your screen (and mat) should look like if lines have been properly attached. If everything looks the way it should, hit “Continue” and adjust your material dial or setting to “Medium Cardstock, More Pressure” (I like to use a little extra pressure for good measure). If you’re using your scoring stylus instead of a scoring wheel, be sure to adjust your settings under “edit tools”.

Next, place your cardstock onto your light grip cutting mat (blue) and hit “Go.”
Step 6:
For the next piece (the inside of the box), repeat each step as the first box. The yellow layer (this layer) is the box the treats will sit in vs. the green layer (first cut layer) is the sleeve. Find the layer that contains all the scoring lines. Under line type on the the top left toolbar, click the drop down and hit score.
Step 7:
Select both the cut layer and score layer (either by clicking and dragging to select both, or from the layers panel click each layer while holding down your “shift” key to select both) then hit the “attach” icon (shaped like a paperclip) at the bottom of the layers panel before hitting “Make It”. Attaching ensures that the scoring lines will be on the same mat as the cutting layer and keeps them both together.

Step 8:
Now that you’ve hit “Make It” this is what your screen will look like. It shows a diagram of your Cricut Mat if score lines have been properly attached.
If everything looks correct, hit “Continue,” then adjust your material dial or setting to “Medium Cardstock, More Pressure.”
If you are using a scoring stylus instead of scoring wheel, please remember to click “Edit Tools” and indicate that you are using a scoring stylus.
Place your cardstock onto your blue light grip mat, then load it into your machine and hit “Go.”

Step 9:
Next, return to the canvas and turn off visibility of all layers except for the small purple rectangle. You can turn off visibility in the layers panel on the far righthand side, simply by clicking on the “eyeball” for each layer to turn it off. The only layer visible should be the purple rectangle.
Click “Make it,” adjust placement as necessary, then click “Continue.”
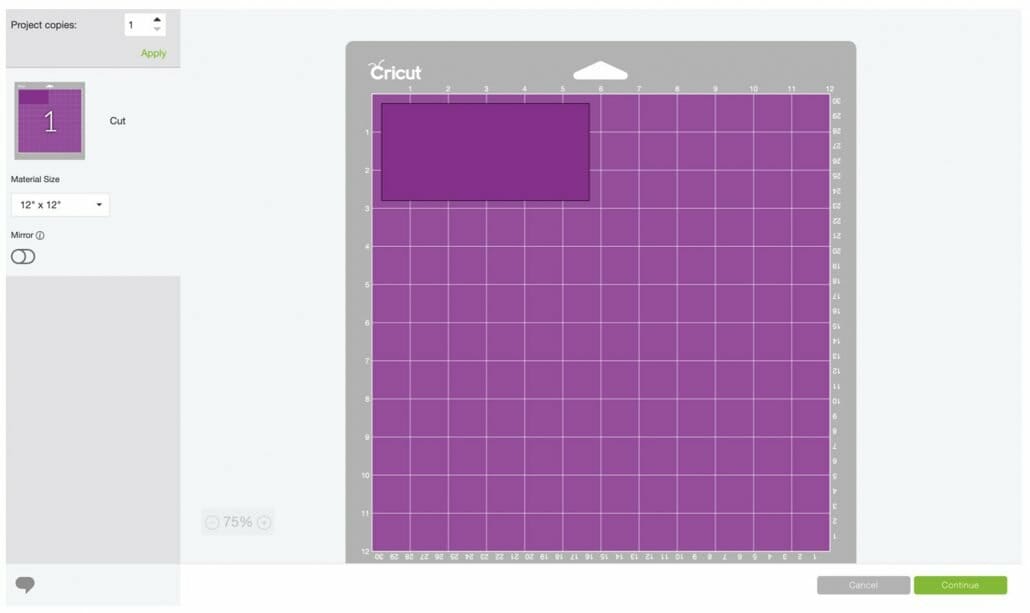
Set your materials dial (if you have one) to “Custom” then on your screen click “Browse All Materials” and search for “Acetate Material.” Use “More Pressure” to be sure it cuts all the way through the material.

Place your clear acetate sheet on your blue cutting mat and load it into your machine, then hit “Go.”
Step 10:
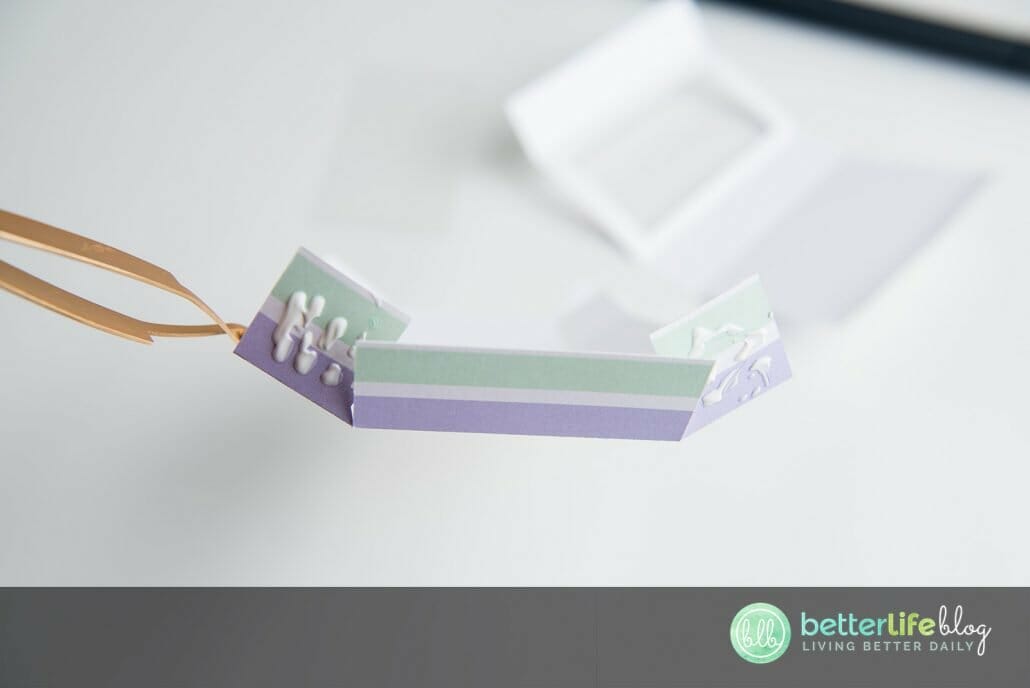
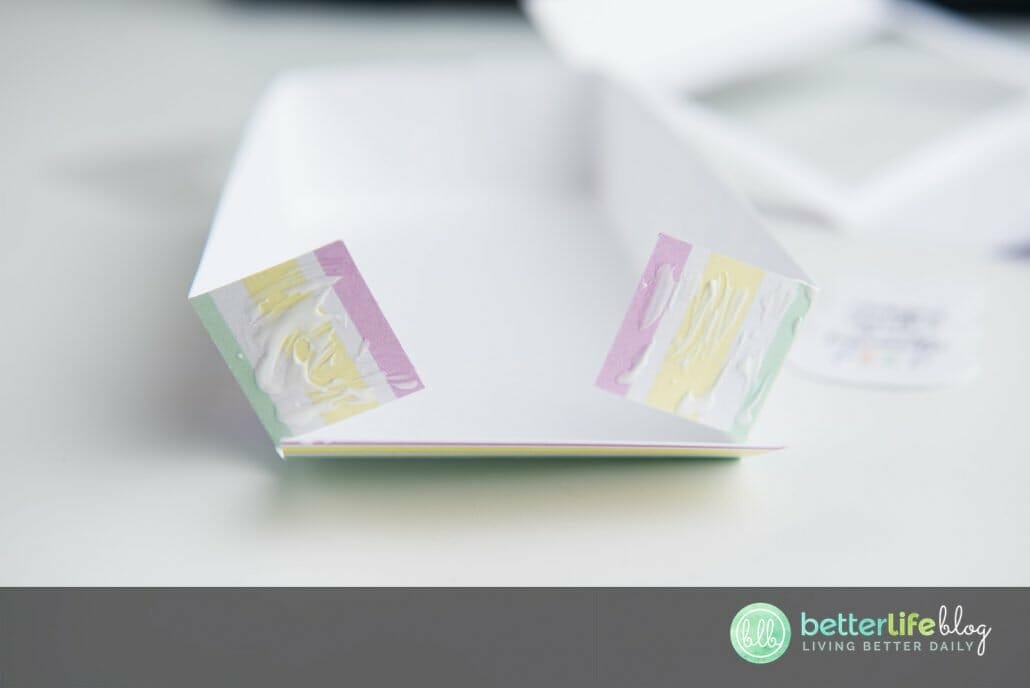
Once all pieces are cut, begin folding along the score lines before creating the box.

Step 11:
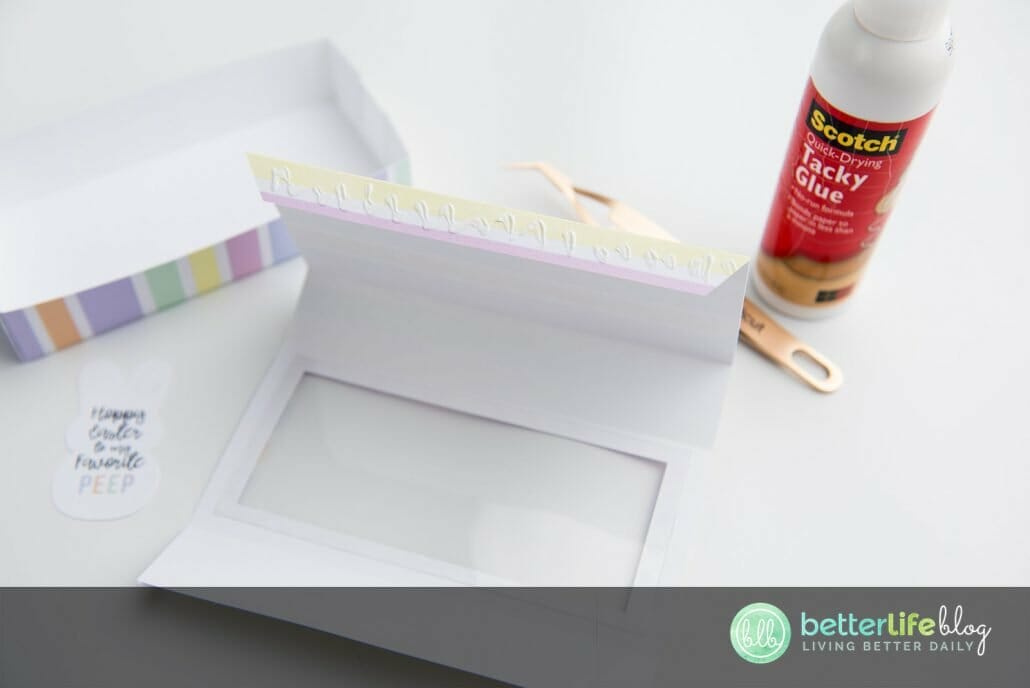
On the inner box, attach the two square side tabs using non-toxic glue to the longer tabs in order to form the walls of the box. Repeat on the opposite side. Once you are finished with this, you will have the inner box which will hold the peeps (or other treat of your choice).
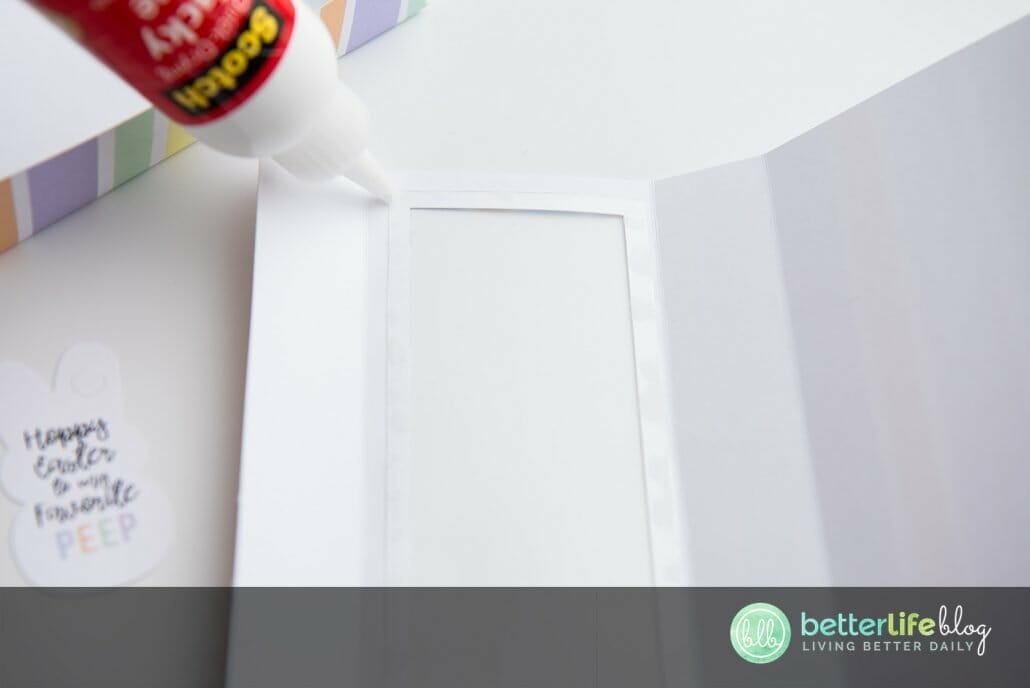
Step 12:
Attach the acetate window onto the inside of the opening of the outer sleeve. Be sure to allow some time for this glue on the window to dry completely before completing assembly of the sleeve.
Step 13:
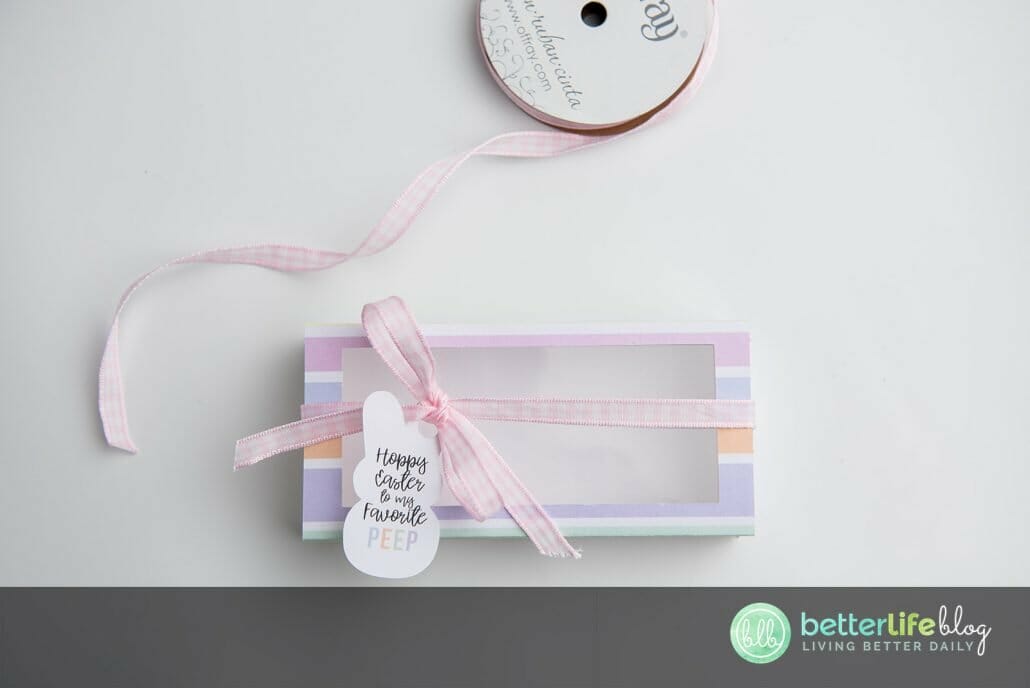
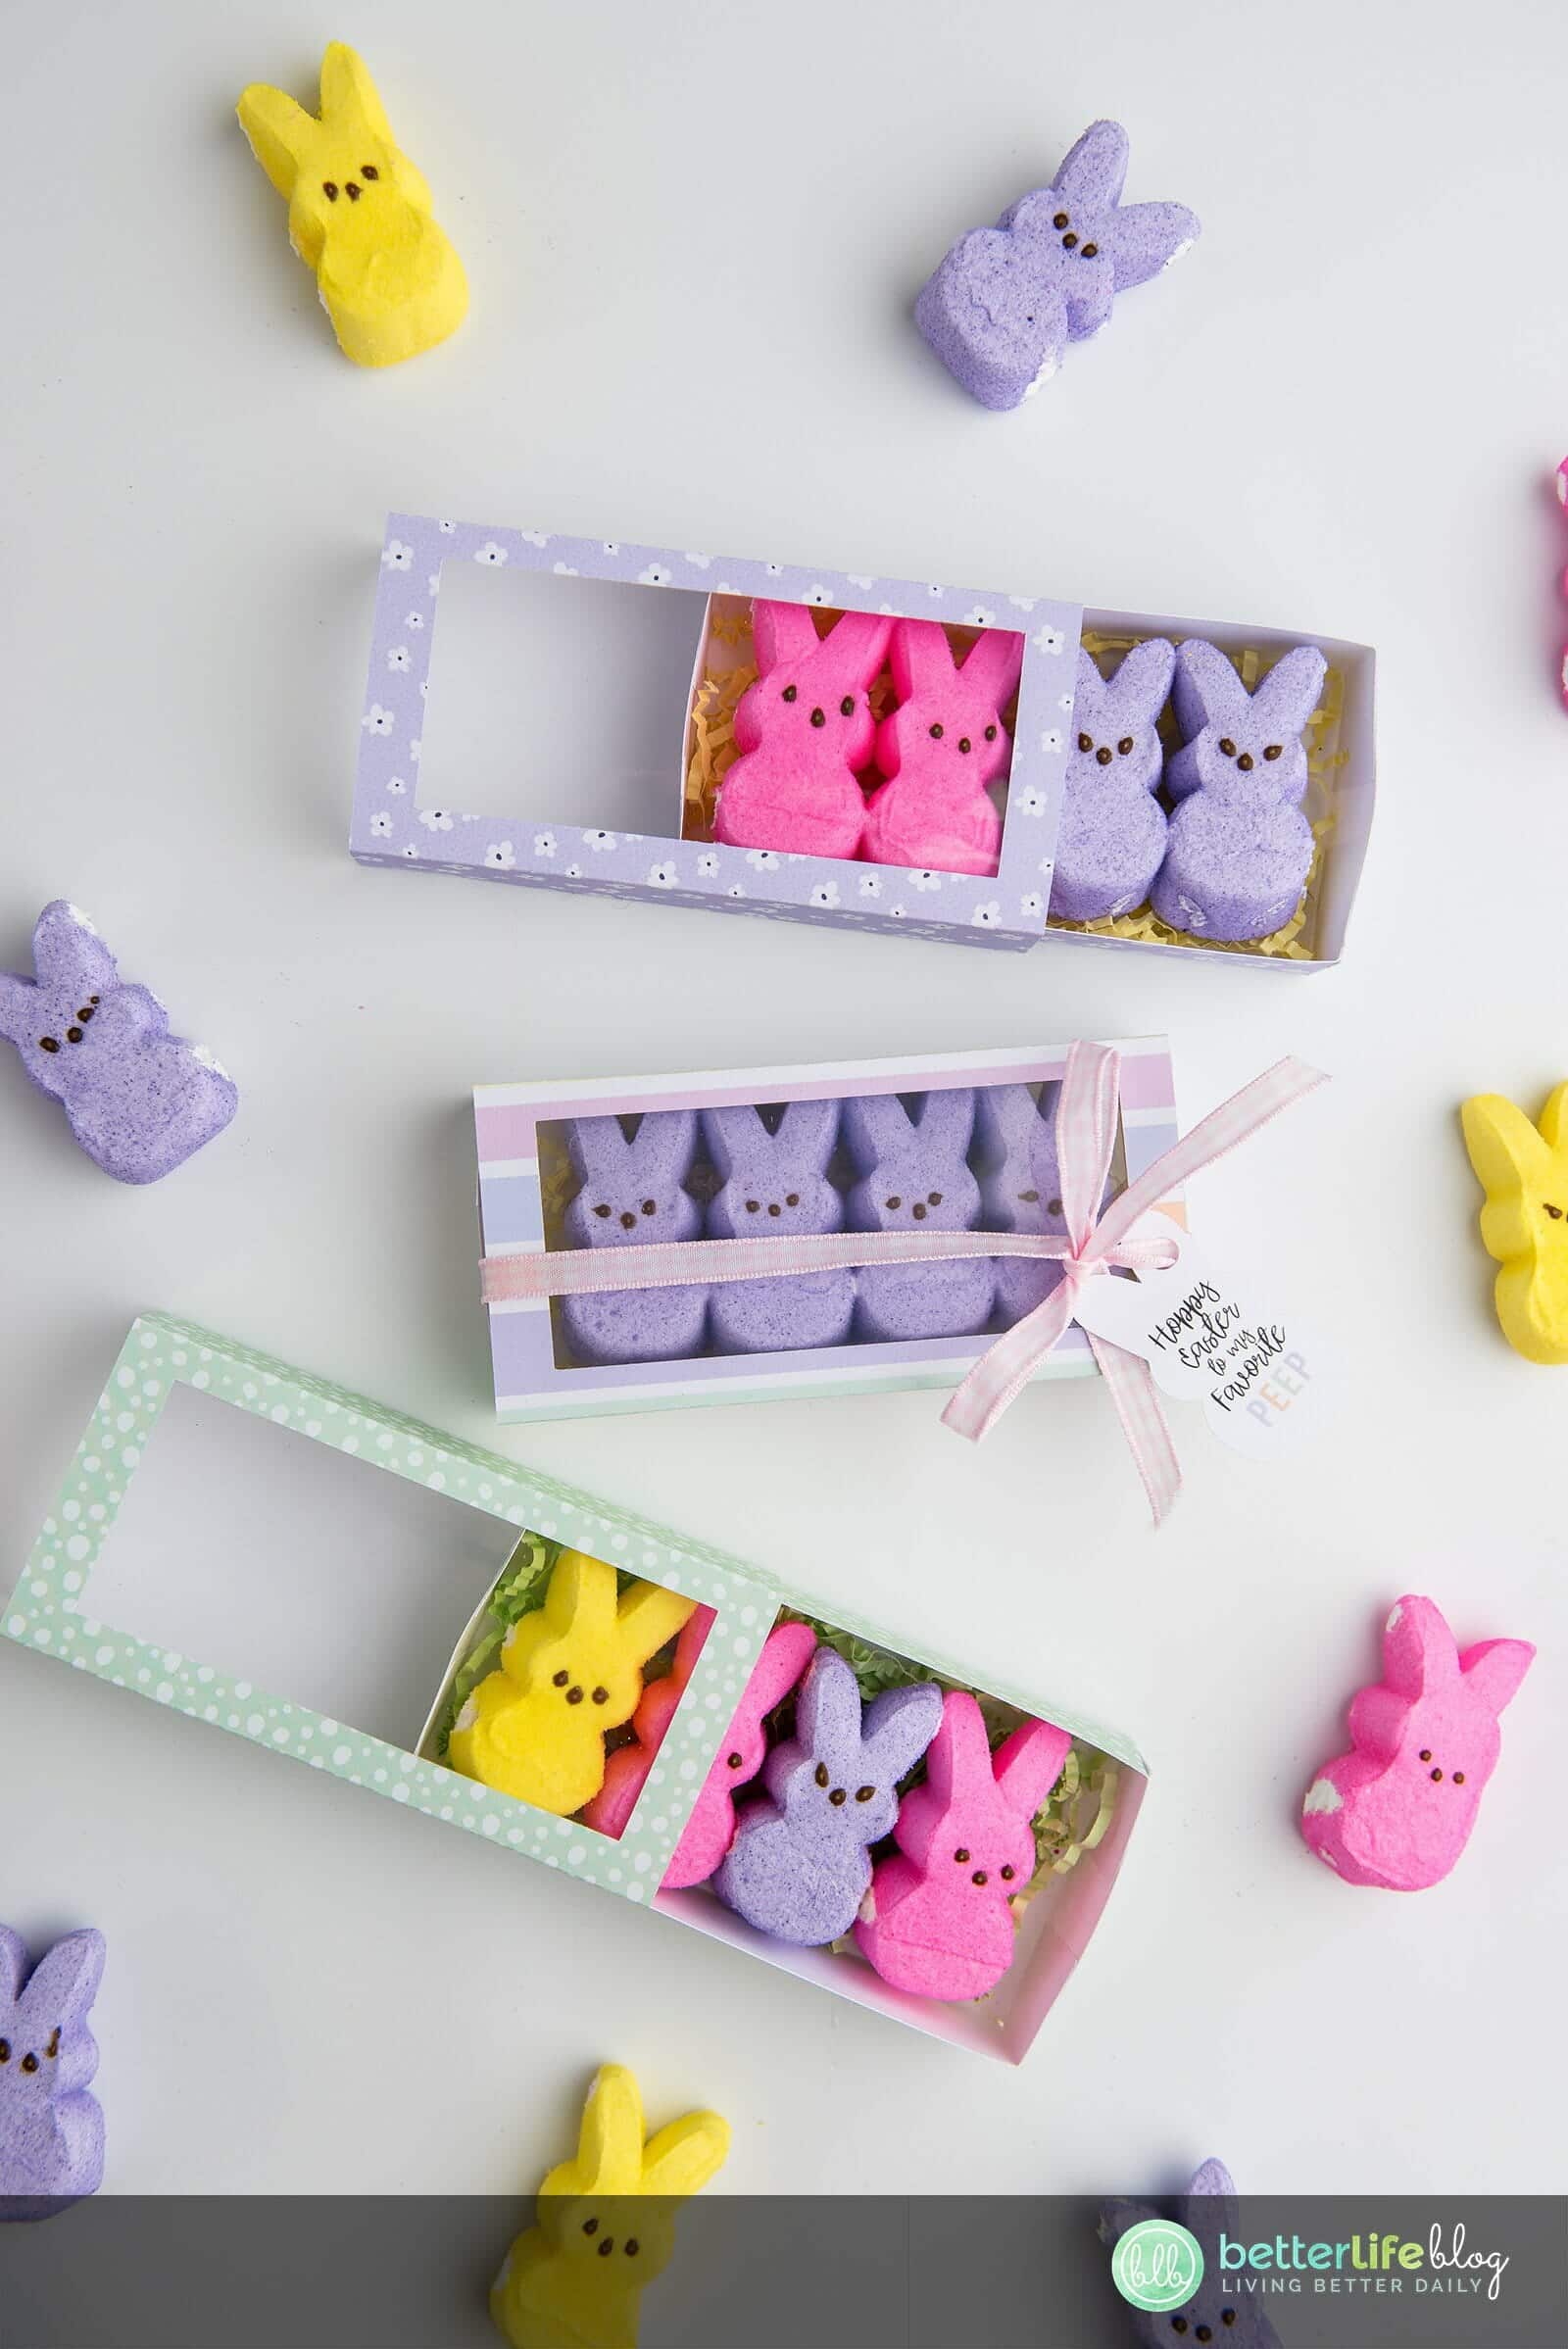
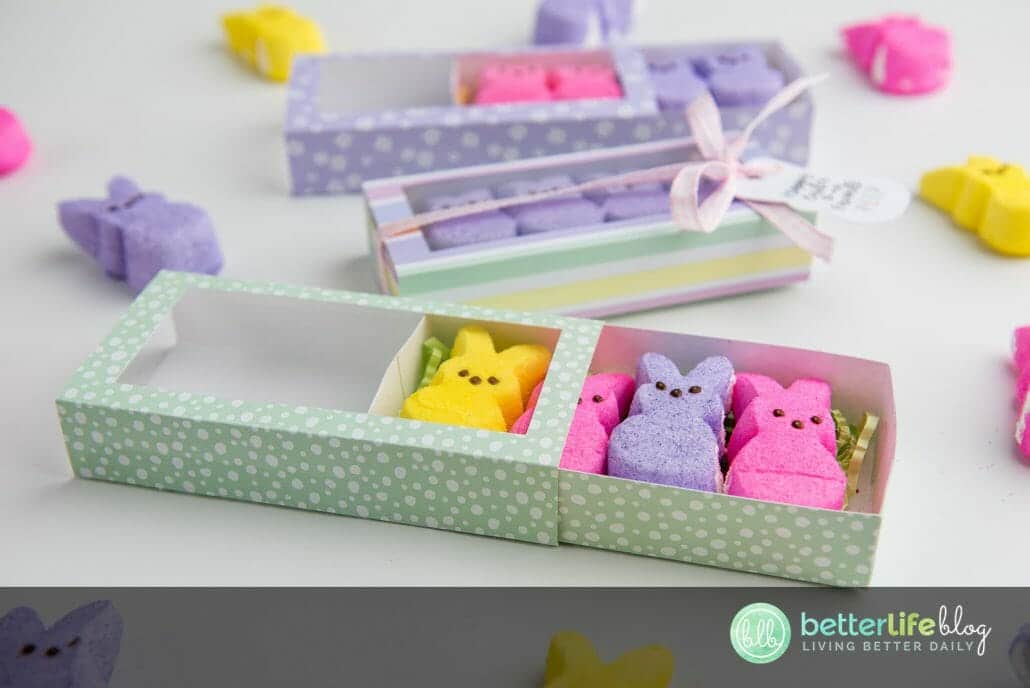
Add glue to the outer most tab and begin to close up the sleeve. Add your peeps into the treat housing box and slide it inside of the sleeve using the window as a guide to reveal the peeps.
Add a cute ribbon around the width of the box to secure the box in place and to prevent it from sliding, and also be sure to include the adorable bunny tag we created at the beginning!
Your peep treat box is complete! Enjoy giving it to someone special this Easter!


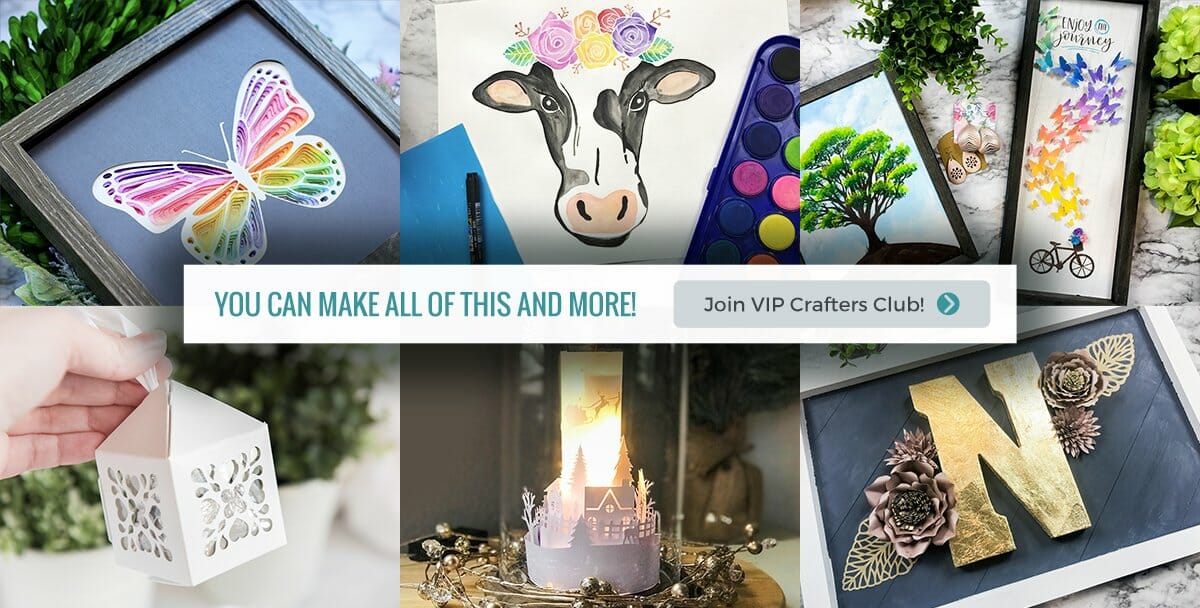
Join Our Monthly VIP Crafters Club and Save $29!
I hope you have enjoyed this fun project! If you love Cricut and Silhouette projects, please consider joining my monthly craft subscription, VIP Crafters Club! There are hundreds of cut files and projects available to members. And, if you’re a first time member, you can apply the coupon code BLBSPECIAL to get $29 off your membership! PLUS, you’ll get a bonus seasonal bundle or my trucks bundle as a bonus for joining! It’s an amazing value, so go check out the sign up page for VIP Crafters Club here.