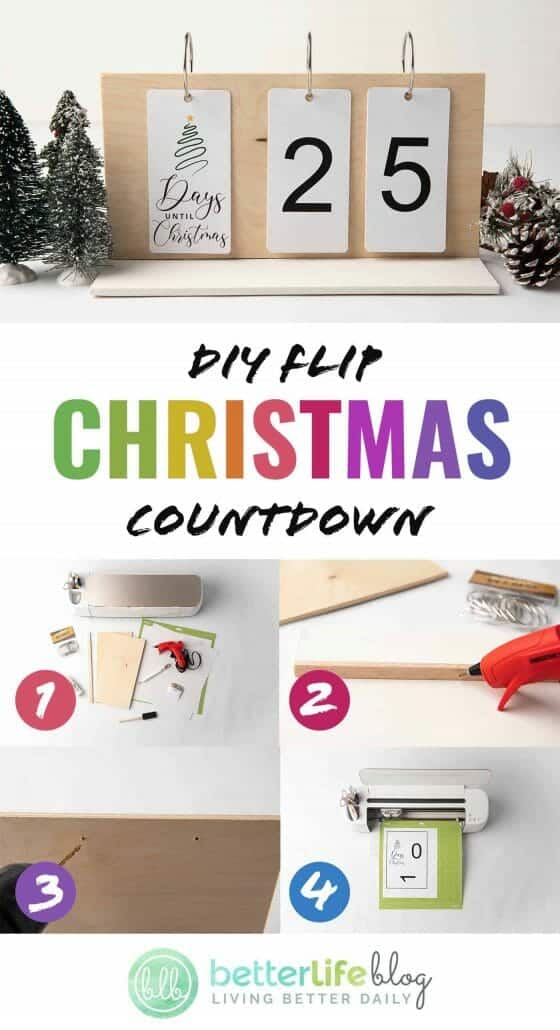
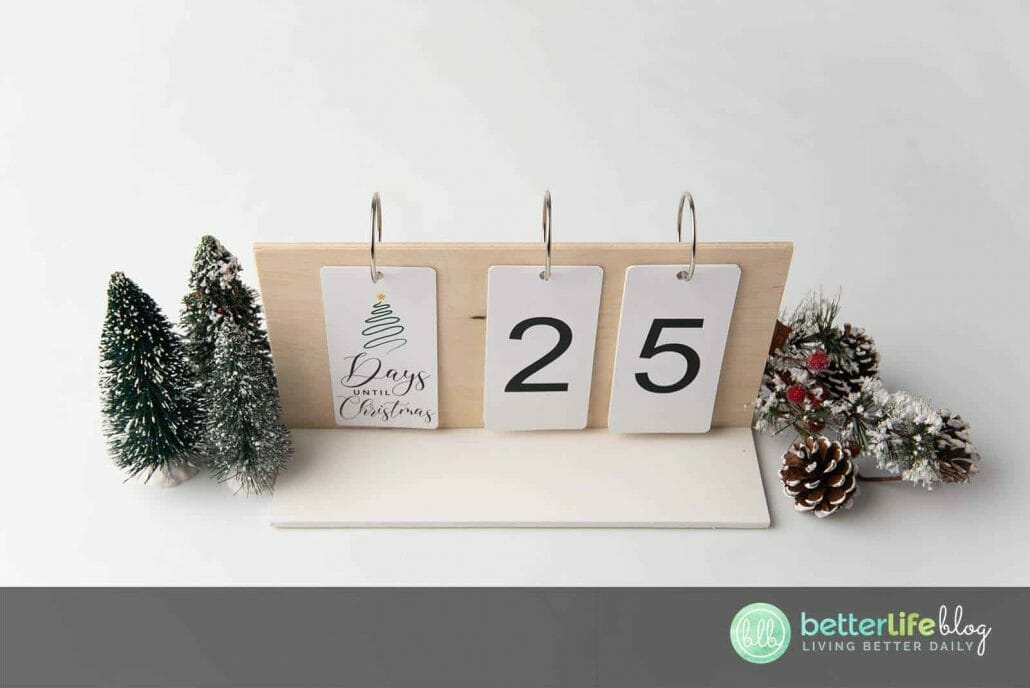
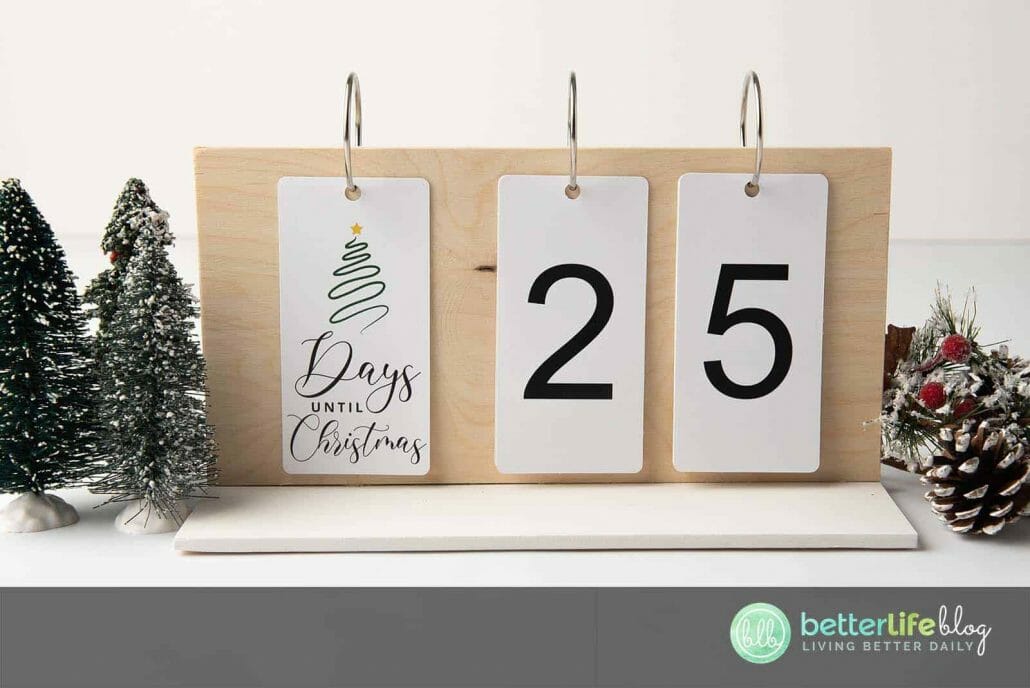
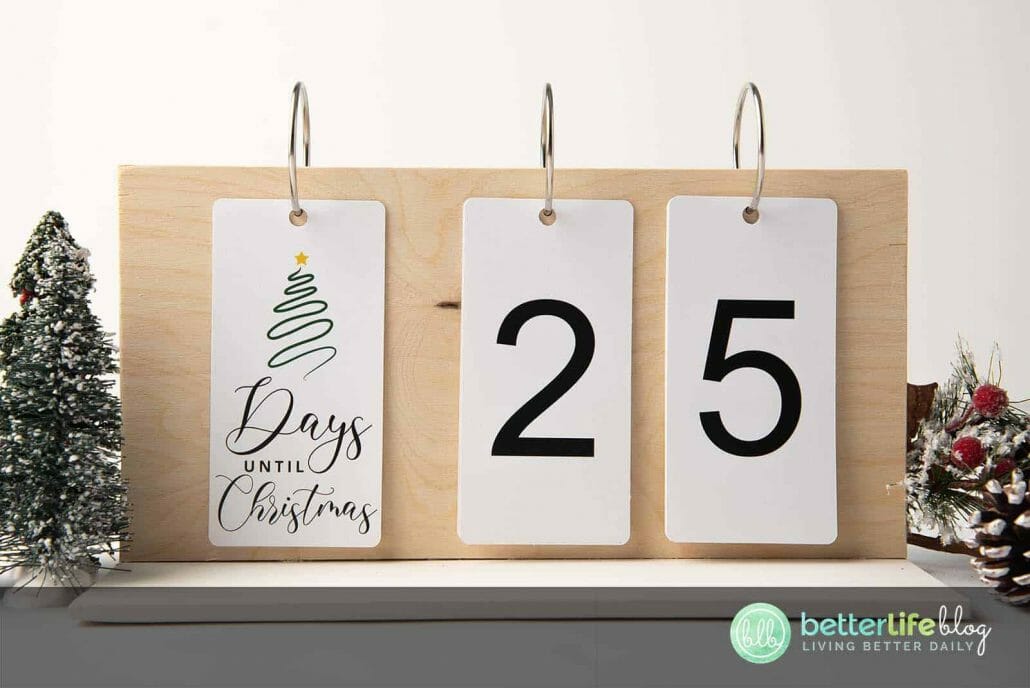
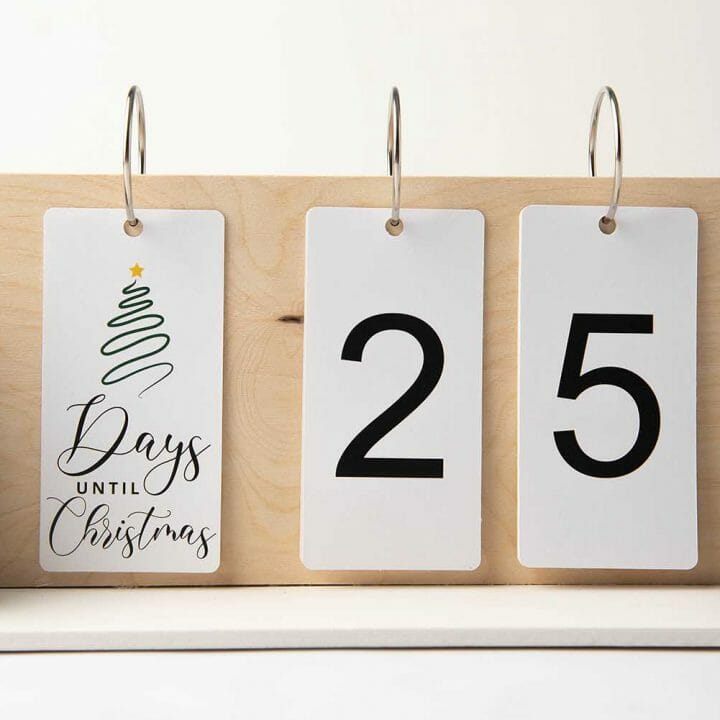
The official countdown to Christmas is one of the most exciting parts to the holidays. This Cricut Christmas craft will show you how to make your very own DIY Flip Christmas Countdown sign in a few simple steps.

Happy holidays, crafty comrades! Thank you for joining me for yet another wonderful Cricut Christmas craft. Today, we are going to make this gorgeous DIY Flip Christmas Countdown sign so that you and your loved ones can countdown to the 25th together!
I love the look of this Christmas Countdown board because it has a rustic, farmhouse feel to it. I opted to paint mine white, but it would also look great stained or painted in another color.
More Cricut Christmas Craft Ideas
This DIY Flip Christmas Countdown project is one of my personal holiday favorites. If you love it too, then I urge you to check out some of my other Cricut Christmas craft ideas:
Buffalo Plaid Christmas Ornaments
Wooden Christmas Countdown Sign
How Do I Find The SVG File To This DIY?
I am very happy that you asked! The SVG file for this beautiful DIY can be found here – and it’s free to download! Once you download it, just scroll down this blog post to get the full tutorial to make your very own DIY Flip Christmas Countdown Sign!

Where Can I Display This Christmas Flip Countdown Sign?
Because this Christmas countdown sign is so simple and elegant, it can go in any room – no matter what your aesthetic may be! I love displaying mine on our mantle. It would also look great on a kitchen counter, or as a holiday centerpiece for your dining table.
More Christmas SVG Files
If you want to make more holiday-themed crafts with your cutting machine, be sure to take a look at my other holiday SVG files:
Buck and Doe Plaid Christmas SVG
Santa Belt Christmas Countdown SVG
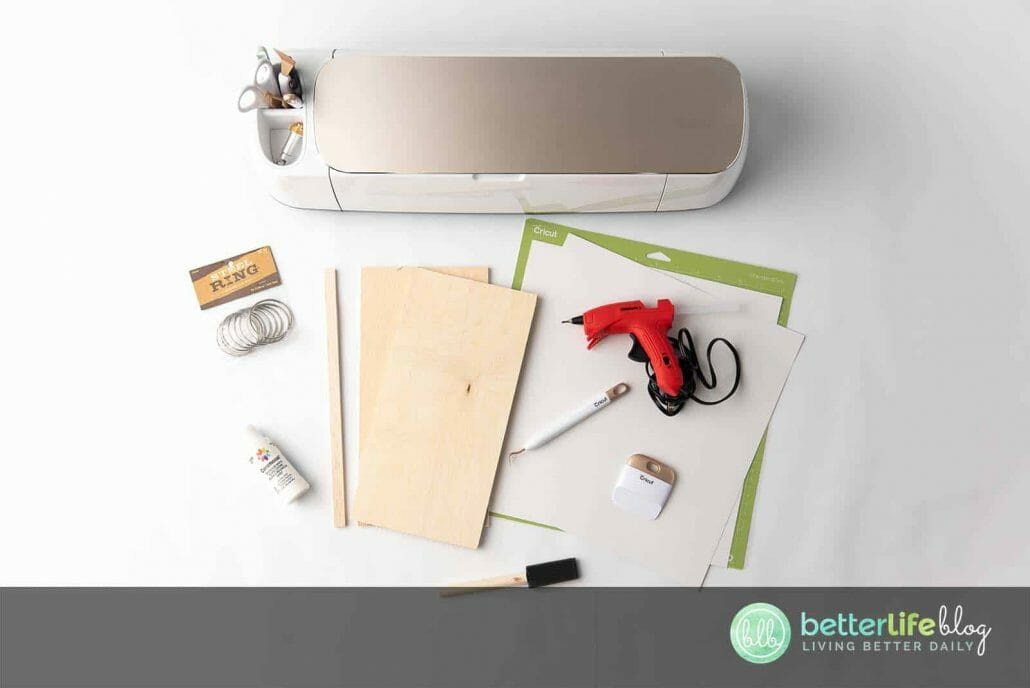
What Tools And Supplies Do I Need To Make This Cricut Christmas Sign?
- Christmas Flip Countdown Sign SVG
- Piece of wood (¼” x 6” x 36” in size)
- Dowel rod support (3/32” x 3/8” x 36” in size)
- White paint
- Sponge brush or paint brush
- Hot glue gun
- Metal rings
- Drill (optional)
- Cricut or other cutting machine
- Blue or Green grip mat
- Weeding tool
- 110 pound cardstock (preferably white)
- Printer and ink
- Access to Design Program for cutter (like Design Space)

How To Make A Christmas DIY Flip Countdown
My Cricut machine helped me put together this countdown sign and I can’t wait to show you how to do it. Check out my simple instructions below:
Begin by cutting the wood and dowel rod. The base and face should both be 12 inches. The dowel rod should be 12 inches as well.
Next, paint each piece of wood. You may also use stain if you prefer. Always be sure to paint/stain along the grain of wood.
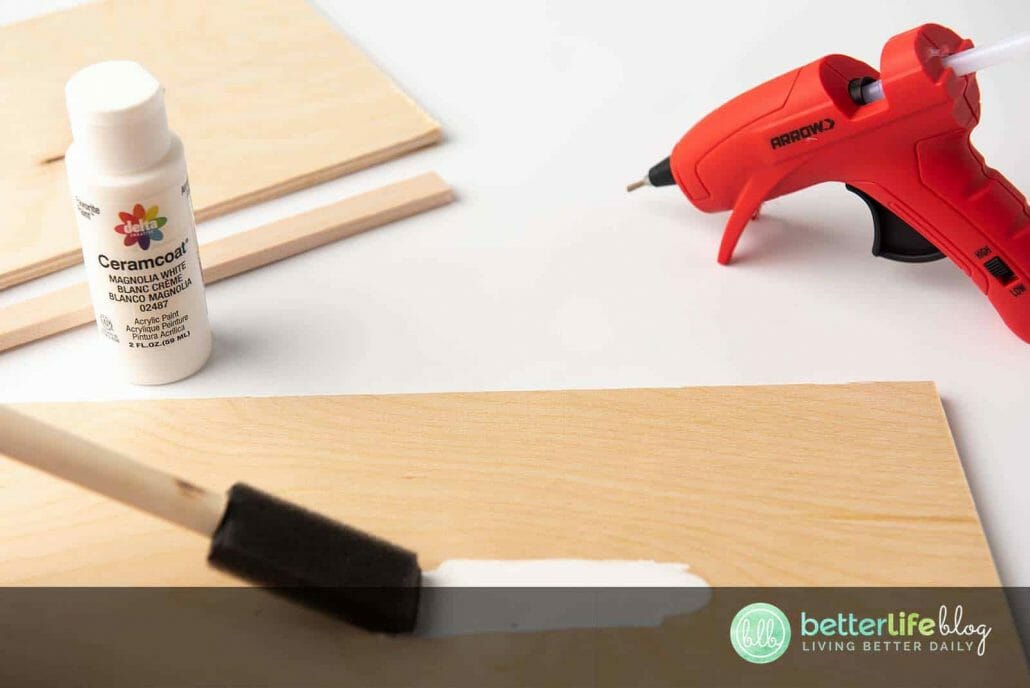
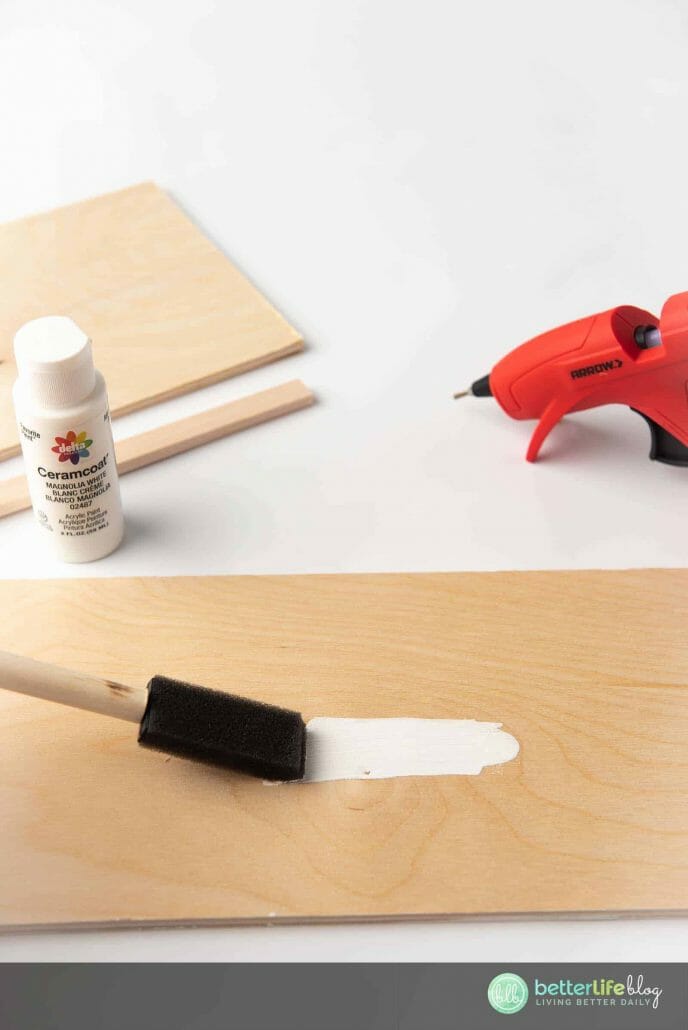
Allow the paint/stain to dry completely.
Load the SVG file in Design Space – this design in particular has multiple files. Be sure to repeat the steps for all SVG files.
In the “Layers” panel, use the Eyeball icon to turn off all other files and work on each individual layer.
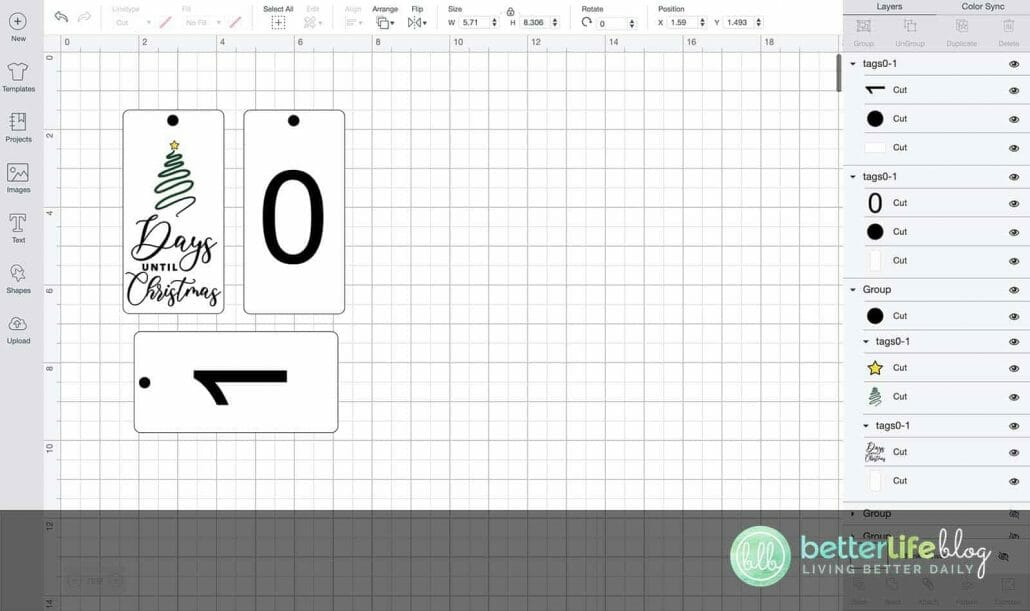
Select the entire file and in actions select: “Ungroup.”
In the Layers Panel, select “tag” (Shape) and “number.”
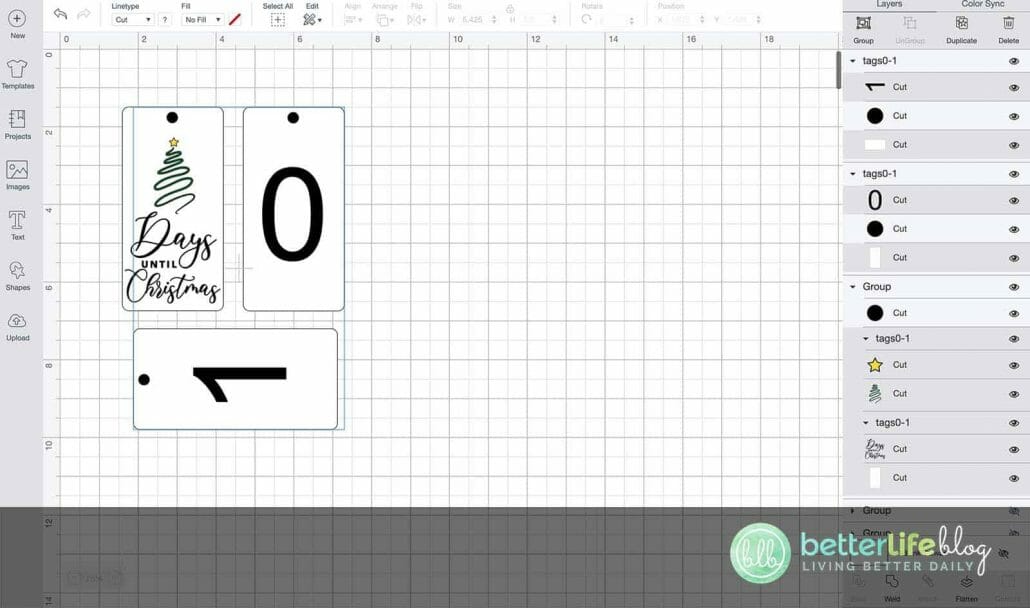
At the bottom of Layers Panel, select “Flatten.” Be sure to leave the small circle at the top of the tag shape as a cut action – this is to ensure that the circle is cut to allow a hook to pass through on the sign.
Select flattened print and cut layer and select the circle cut layer, hit attach.
Repeat for other two tags in file.
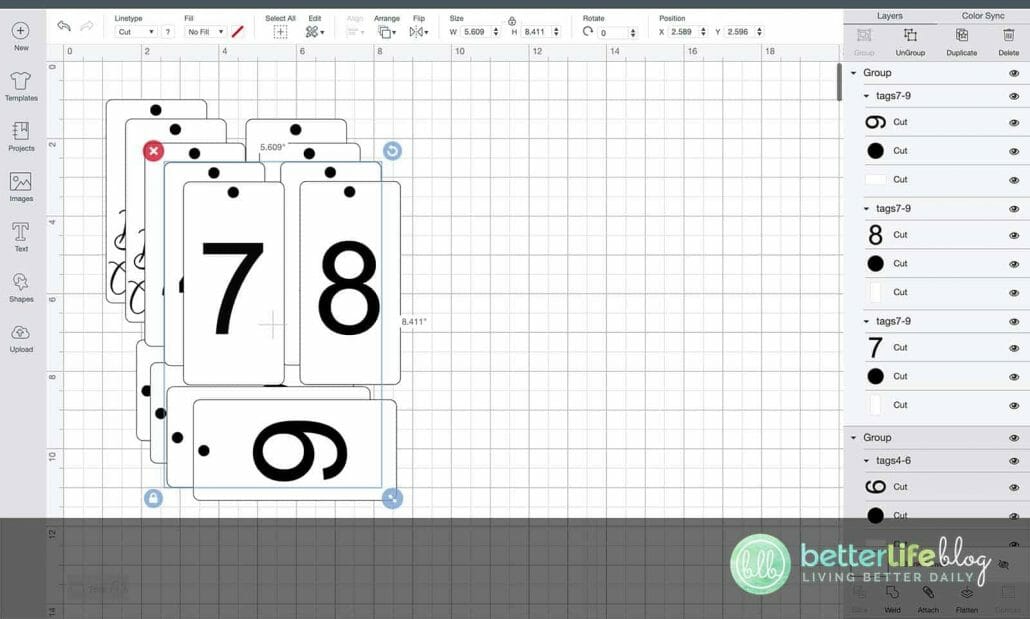
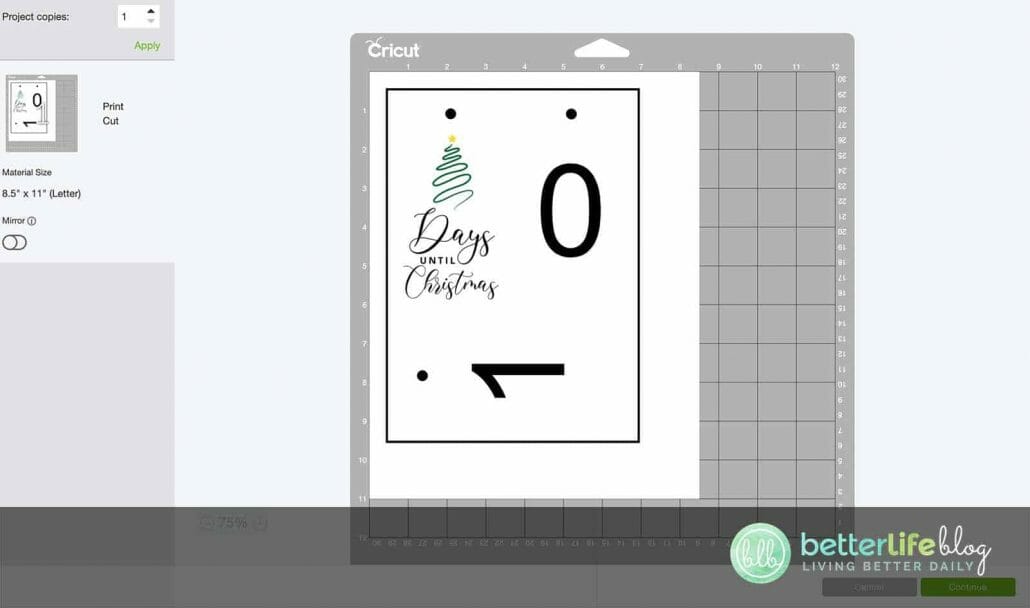
Once repeated, select all tags and hit attach. Next, hit the “Make It” button.
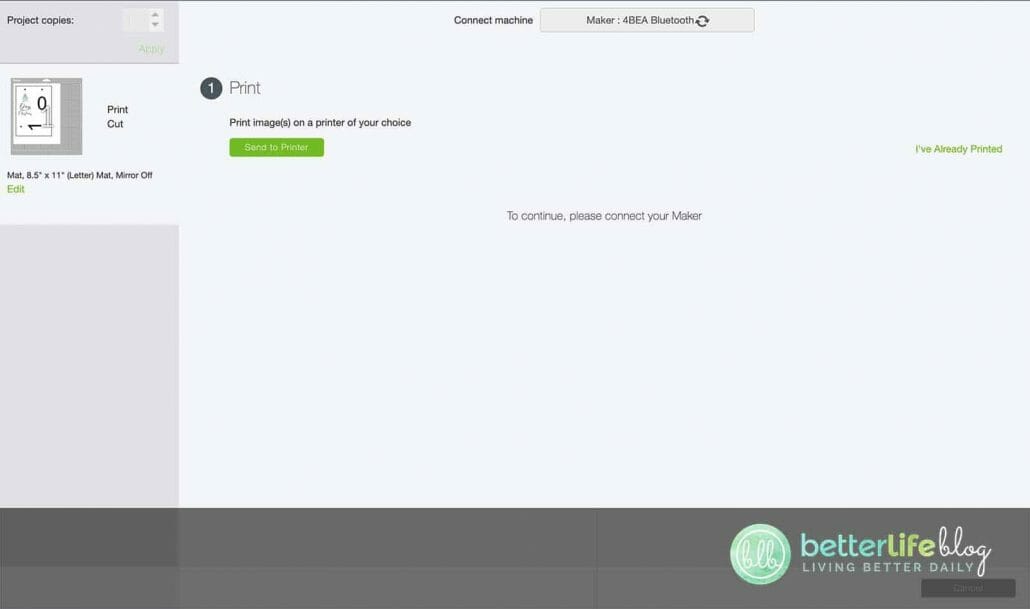
Once selected, you will be prompted to the next screen (ie.: the Preview Screen).
Displayed will be registration lines that Cricut will use to make the cut. Remember that tag shapes will not display certain lines. This is how Cricut does print and cuts – it’s expected.
Next, hit continue and then send to the printer.
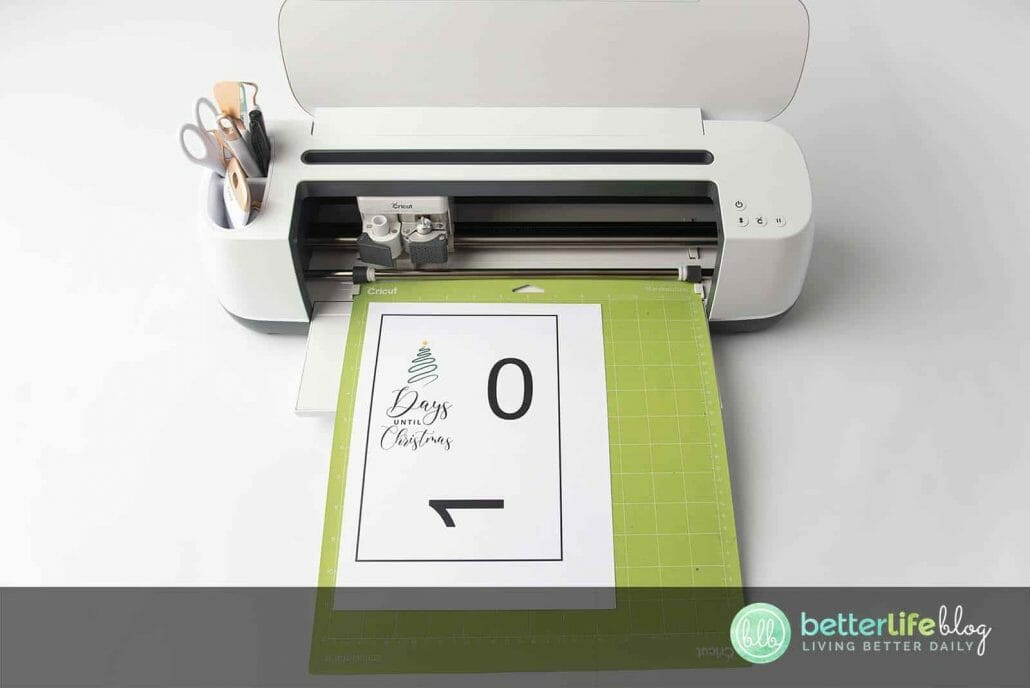
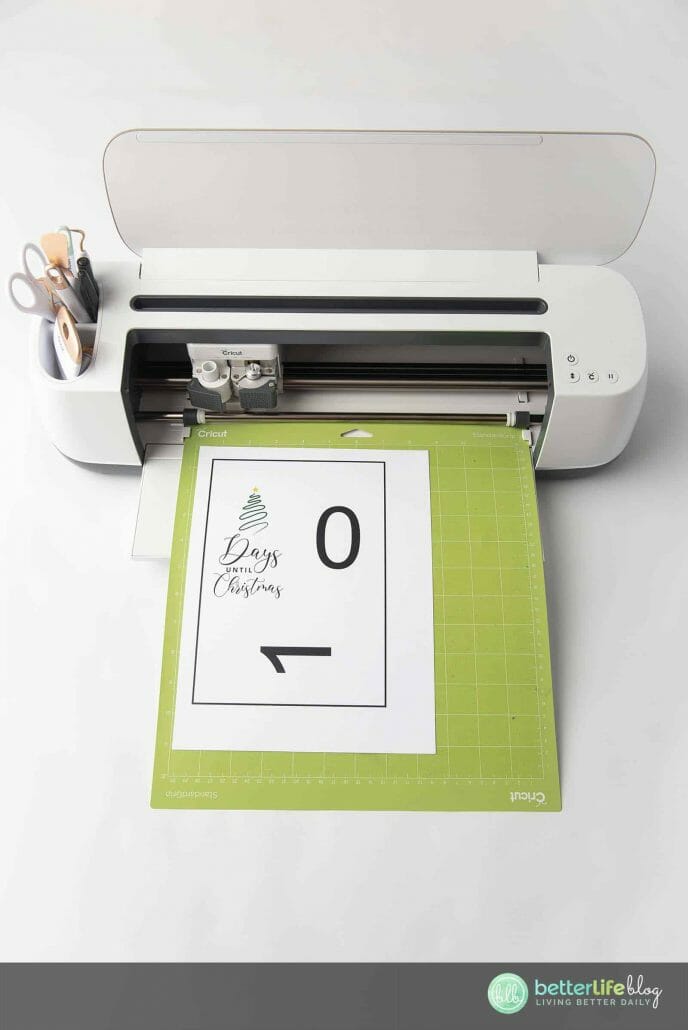
Apply the print to your cutting mat and load mat onto the cutting machine.
Adjust your machine’s setting/material dial from “Vinyl” to “Thick Cardstock” option and hit “Go” to cut. Repeat for all SVG files.


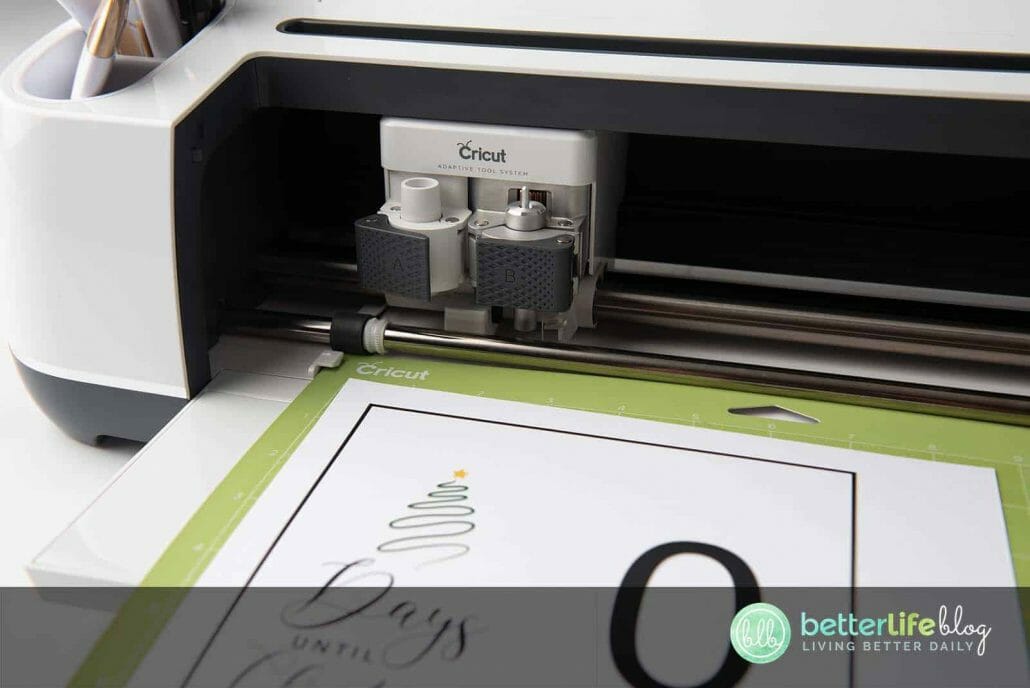
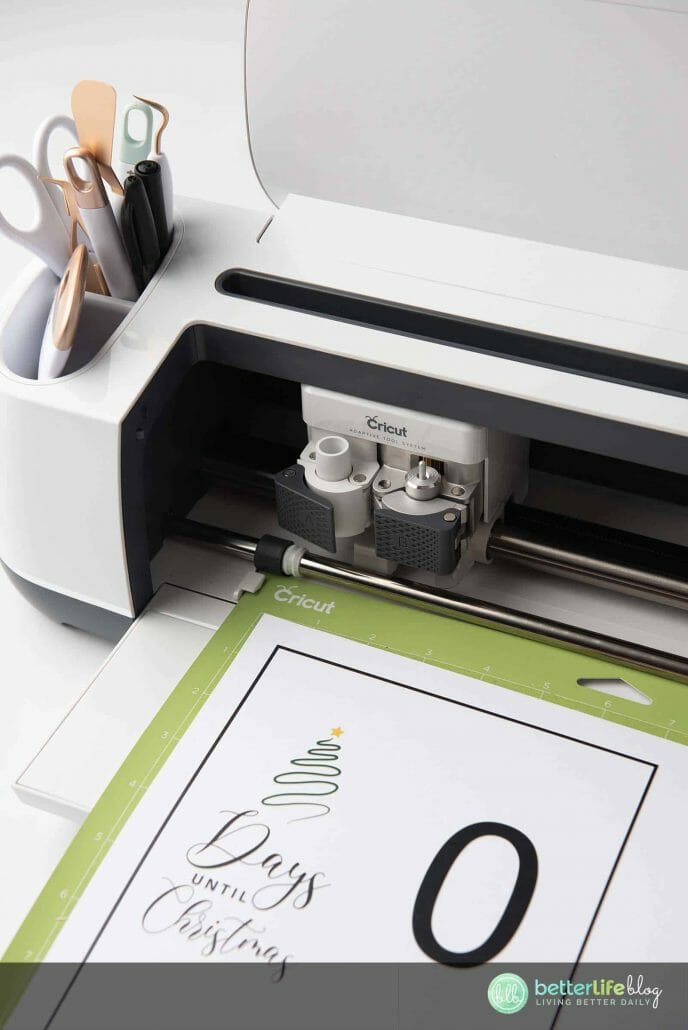
After all the cuts are complete, pull off the negative vinyl with the weeding tool.
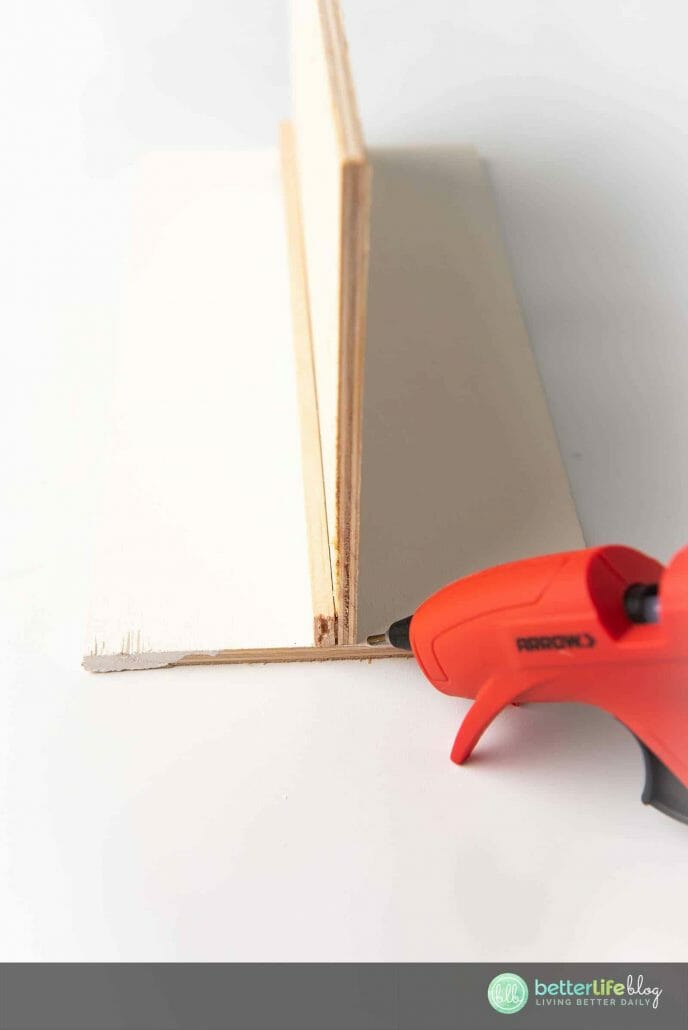
Next, assemble the wood pieces: place the base piece of wood on a flat surface.
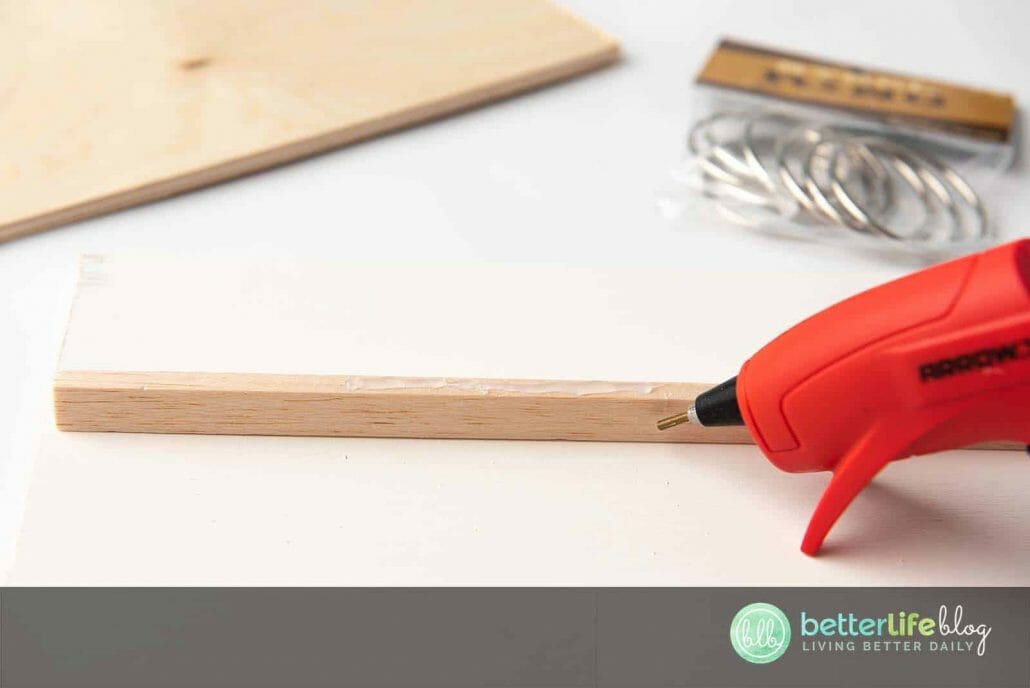
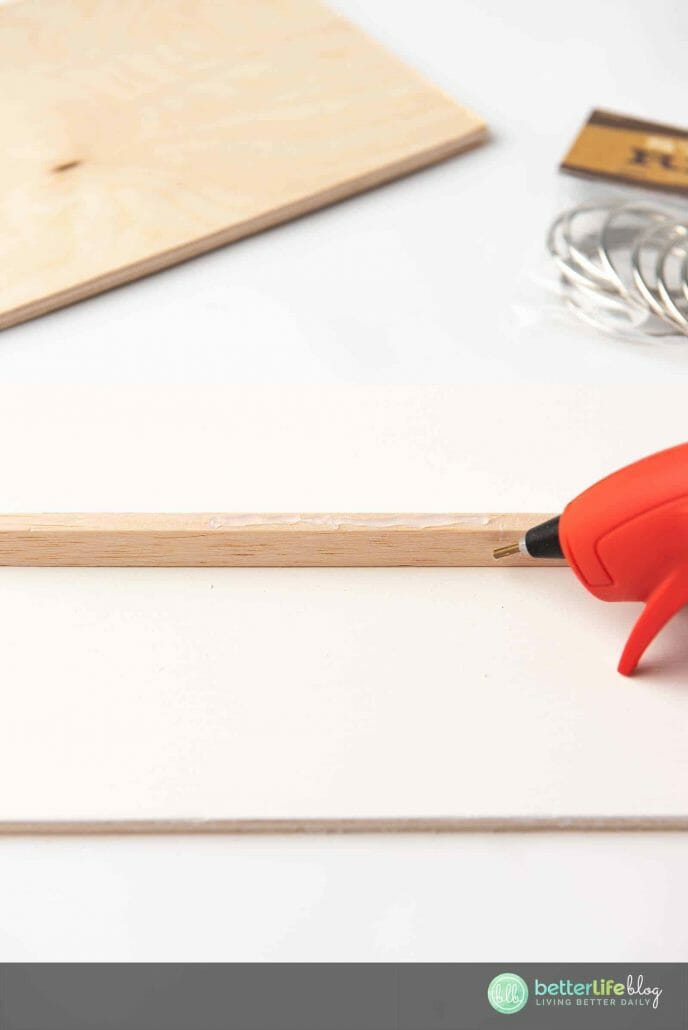
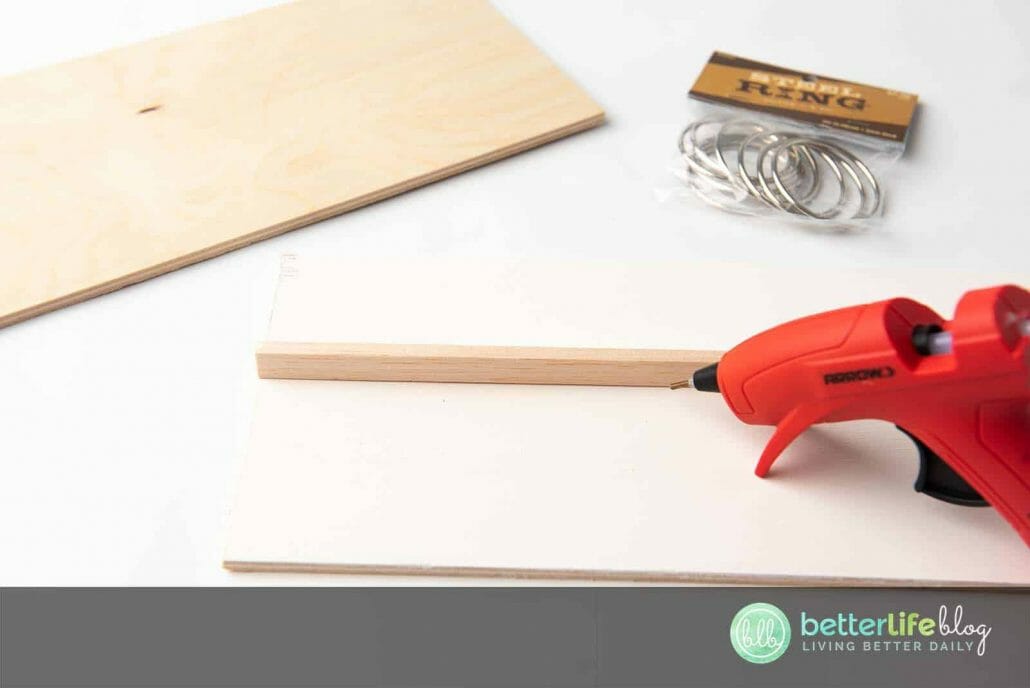

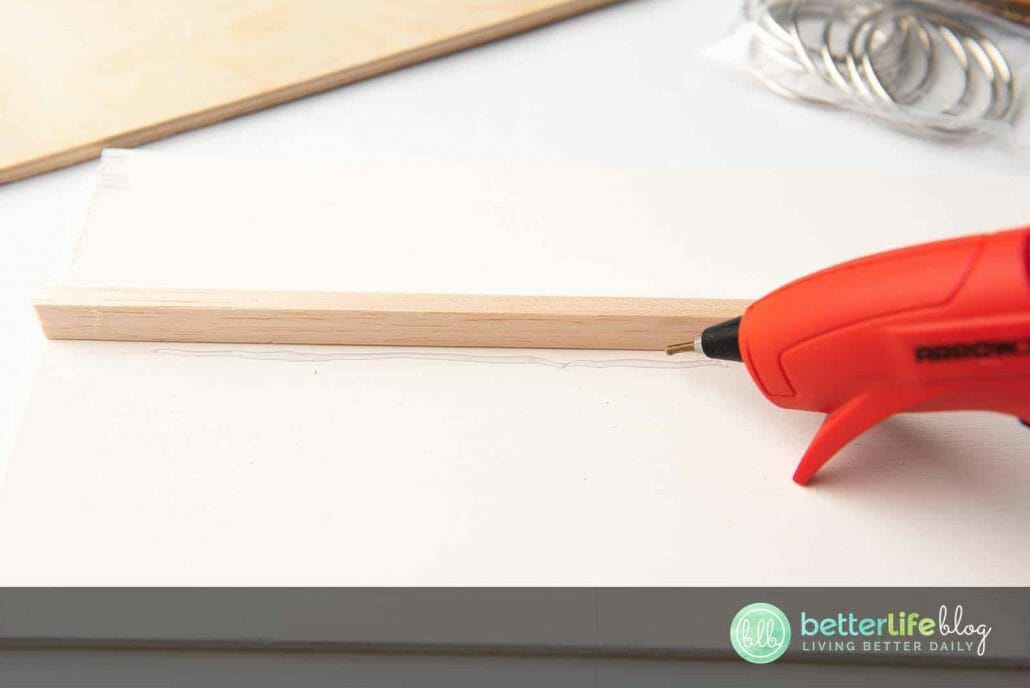
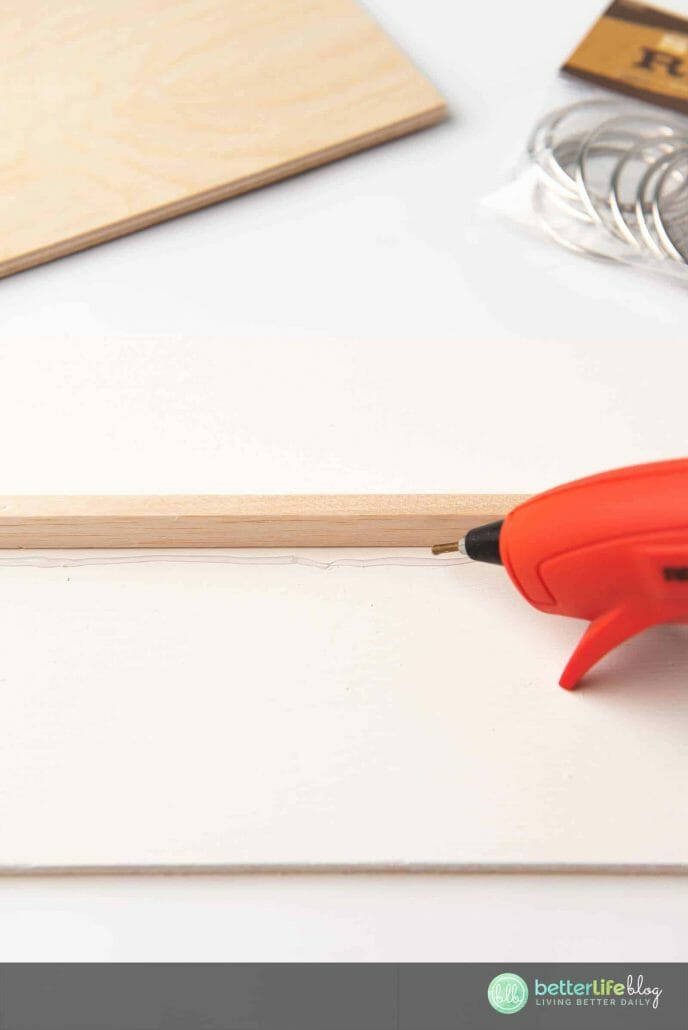
Glue the dowel rod onto the base. This will be used to support the standing wood piece (ie.: the face).
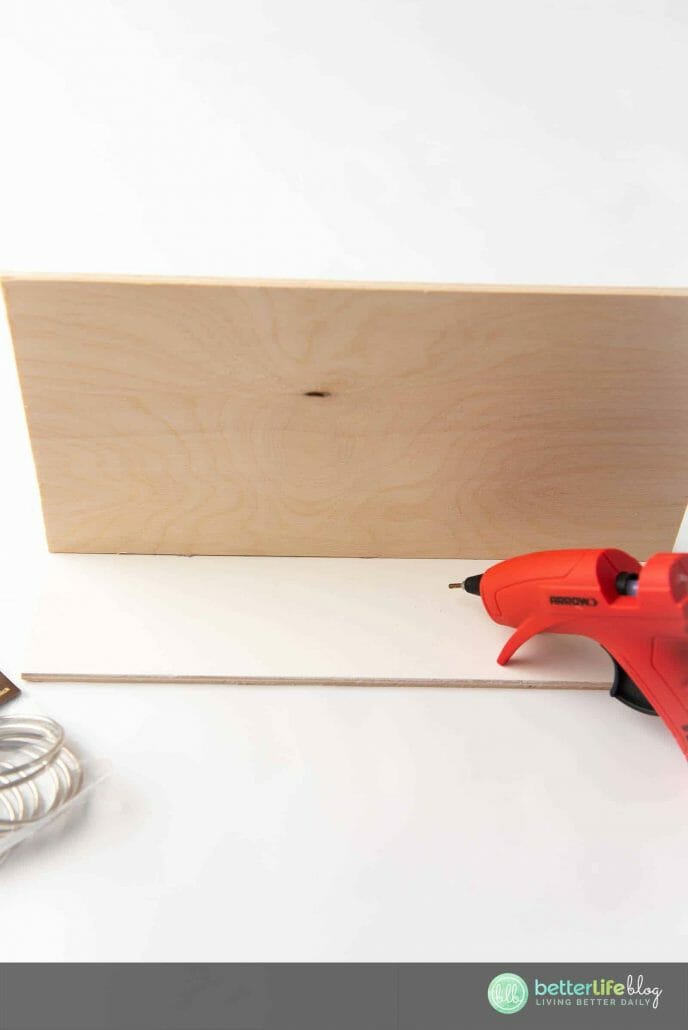
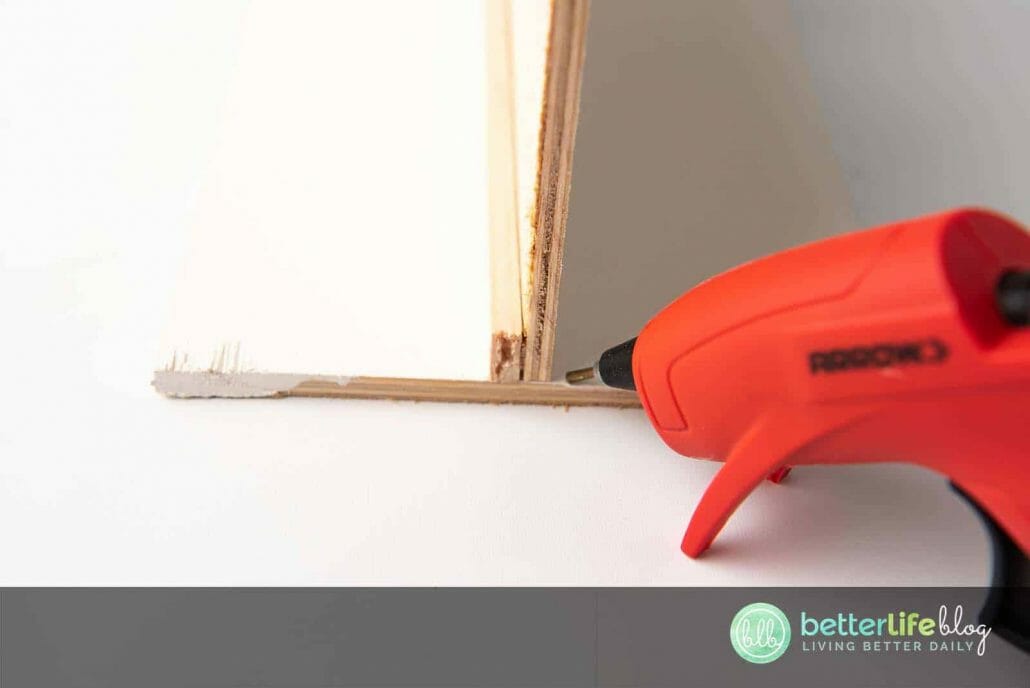
Grab the standing wood piece and glue to the dowel. Ensure you hold everything in place until the it has dried.

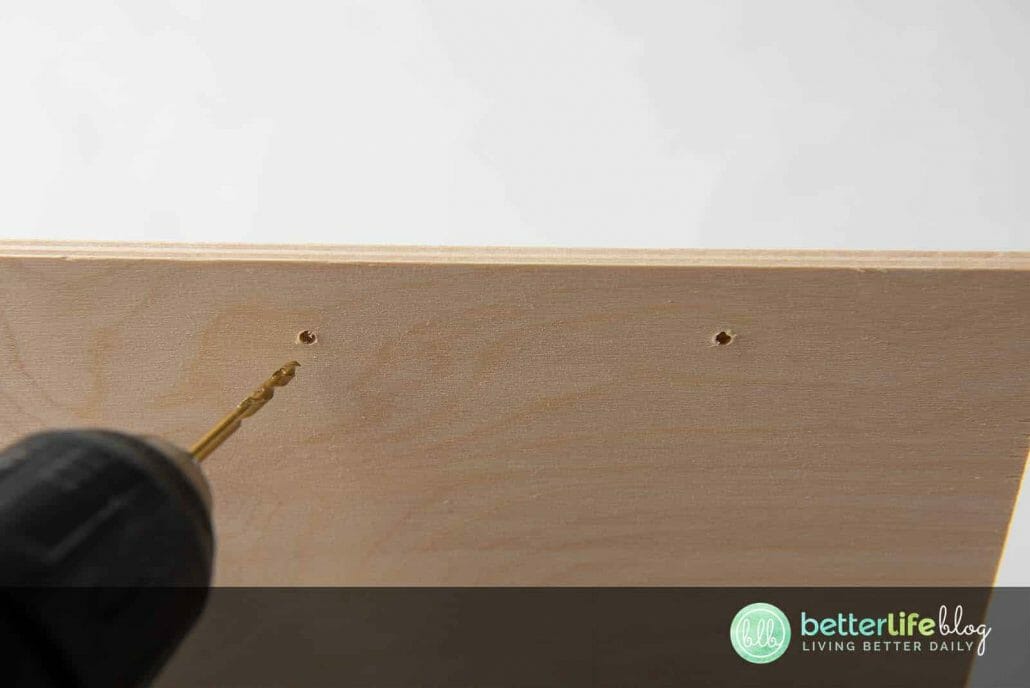
Once the sign is sturdy, use 3 cut tags to mark out where you want to place 3 holes for its metal rings.
Once marked, drill holes in the sign. The holes need to be large enough to fit the metal ring.

Once the tags are cut out, string them in order to the metal rings.
Next, attach the metal rings to the sign. Once it’s in place, pinch close the ring to ensure the tags don’t fall off.
Use hot glue to permanently attach the rings in the back of the sign.


DIY Flip Christmas Countdown
With my DIY Flip Christmas Countdown craft, you and your little ones can countdown together - and wait for the 25th with much anticipation and tons of excitement!
Materials
- Piece of wood (¼” x 6” x 36” in size)
- Dowel rod support (3/32” x 3/8” x 36” in size)
- White paint
- Sponge brush or paint brush
- Hot glue gun
- Metal rings
- Drill (optional)
- Cricut or other cutting machine
- Blue or Green grip mat
- Weeding tool
- 110 pound cardstock (preferably white)
- Printer and ink
- Access to Design Program for cutter (like Design Space)
Instructions
- Cut the wood and dowel rod. The base and face should both be 12 inches. The dowel rod should be 12 inches as well.
- Next, paint each piece of wood. You may also use stain if you prefer. Always be sure to paint/stain along the grain of
wood. - Allow the paint/stain to dry completely.
- Load the SVG file in Design Space - this design in particular has multiple files. Be sure to repeat the steps for all SVG files.
- In the “Layers” panel, use the Eyeball icon to turn off all other files and work on each individual layer.
- Select the entire file and in actions select: “Ungroup.”
- In the Layers Panel, select “tag” (Shape) and “number.”
- At the bottom of Layers Panel, select “Flatten.” Be sure to leave the small circle at the top of the tag shape as a cut action - this is to ensure that the circle is cut to allow a hook to pass through on the sign.
- Select flattened print and cut layer and select the circle cut layer, hit attach.
- Repeat for other two tags in file.
- Once repeated, select all tags and hit attach. Next, hit the “Make It” button.
- Once selected, you will be prompted to the next screen (ie.: the Preview Screen).
- Displayed will be registration lines that Cricut will use to make the cut. Remember that tag shapes will not display
certain lines. This is how Cricut does print and cuts - it’s expected. - Next, hit continue and then send to the printer.
- Apply the print to your cutting mat and load mat onto the cutting machine.
- Adjust your machine’s setting/material dial from “Vinyl” to “Thick Cardstock” option and hit “Go” to cut. Repeat for all
SVG files. - After all the cuts are complete, pull off the negative vinyl with the weeding tool.
- Next, assemble the wood pieces: place the base piece of wood on a flat surface.
- Glue the dowel rod onto the base. This will be used to support the standing wood piece (ie.: the face).
- Grab the standing wood piece and glue to the dowel. Ensure you hold everything in place until the it has dried.
- Once the sign is sturdy, use 3 cut tags to mark out where you want to place 3 holes for its metal rings.
- Once marked, drill holes in the sign. The holes need to be large enough to fit the metal ring.
- Once the tags are cut out, string them in order to the metal rings.
- Next, attach the metal rings to the sign. Once it’s in place, pinch close the ring to ensure the tags don’t fall off.
- Use hot glue to permanently attach the rings in the back of the sign.