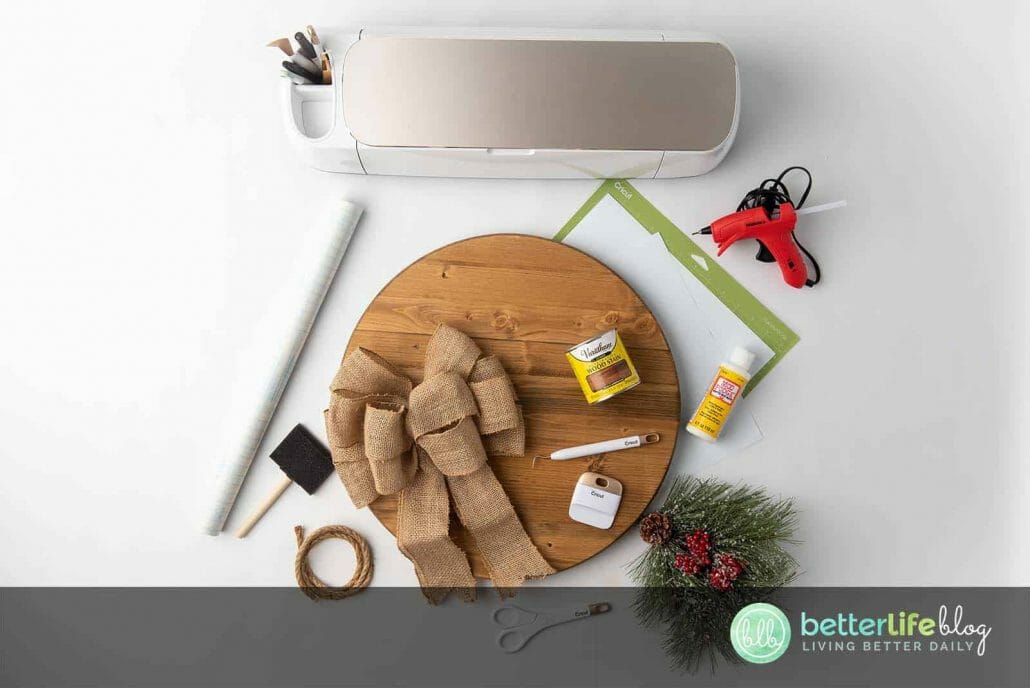
‘Tis the season to get started on our holiday decorating! It’s never too early to get into the holiday spirit. Our Farmhouse Christmas Door Sign is elegant and a offers a beautiful, rustic touch to your home.

With our Farmhouse Christmas Door Sign tutorial, you’ll learn how to properly prepare/stain wood. We’ll also teach you how to work with the Cricut machine while using a permanent vinyl application.
The possibilities are endless with the final look of this craft. Because it boasts so many beautiful details, you can choose what kind of cord, bow and floral accessories you’d like to add it. I hope you love it as much as I do!
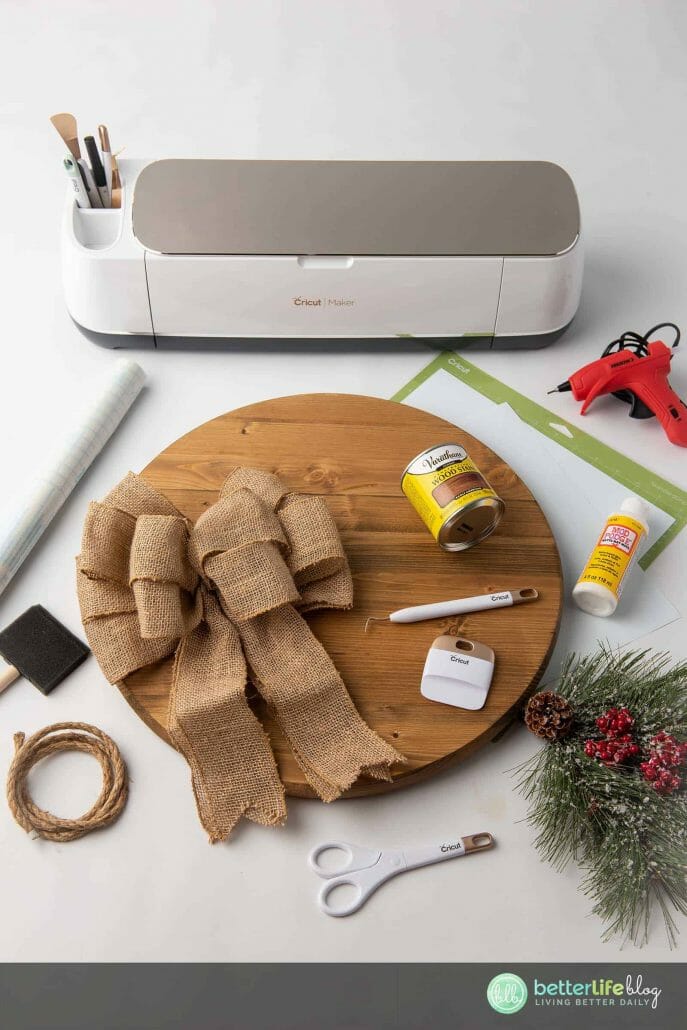
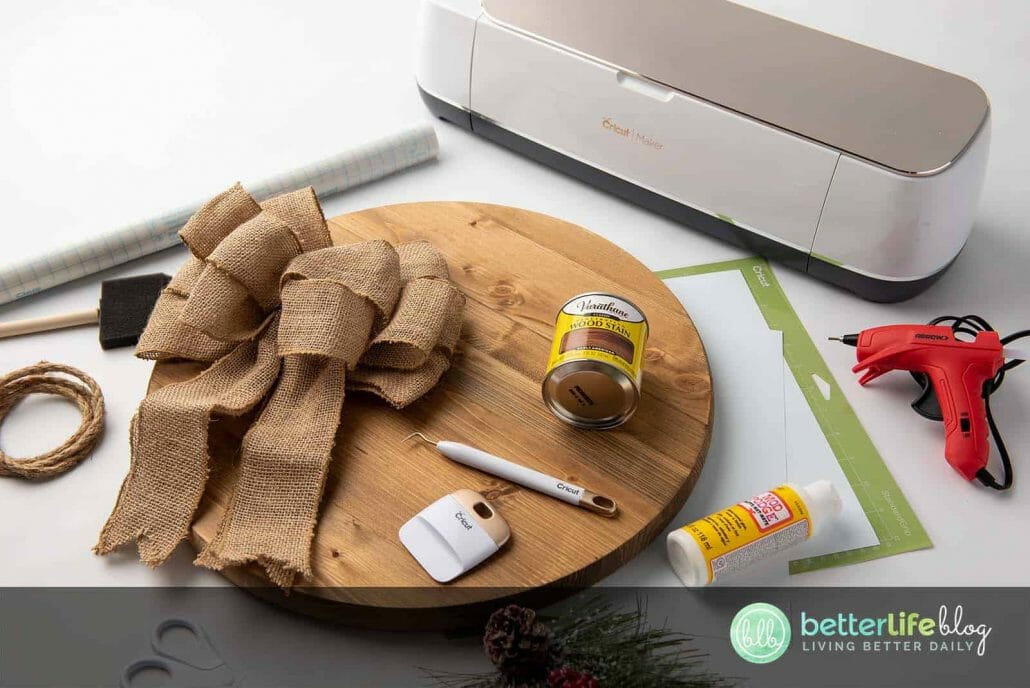
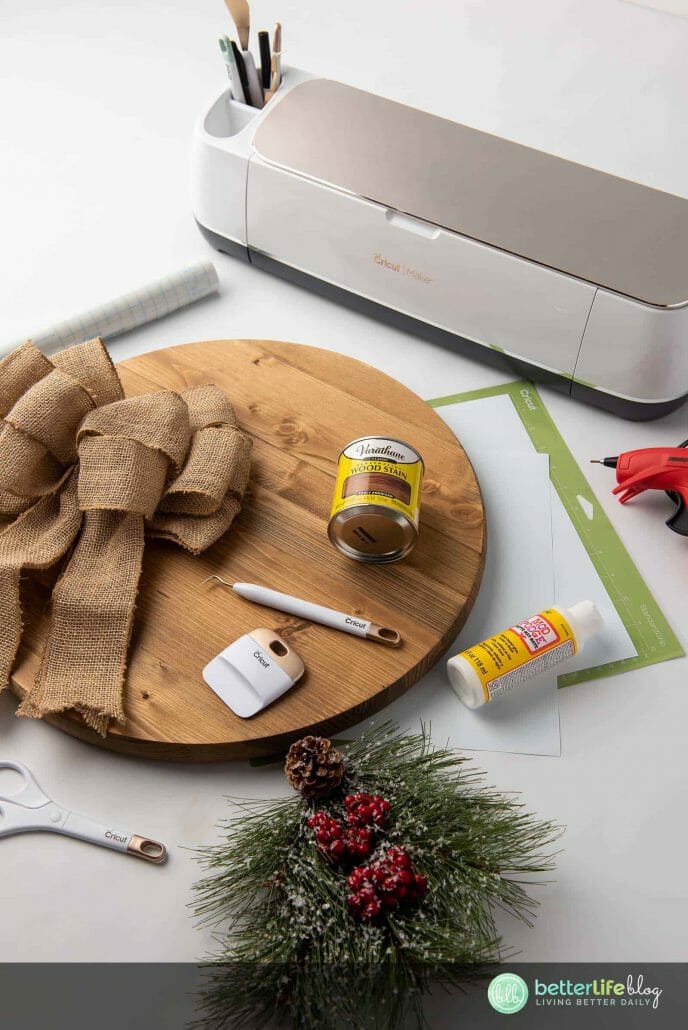
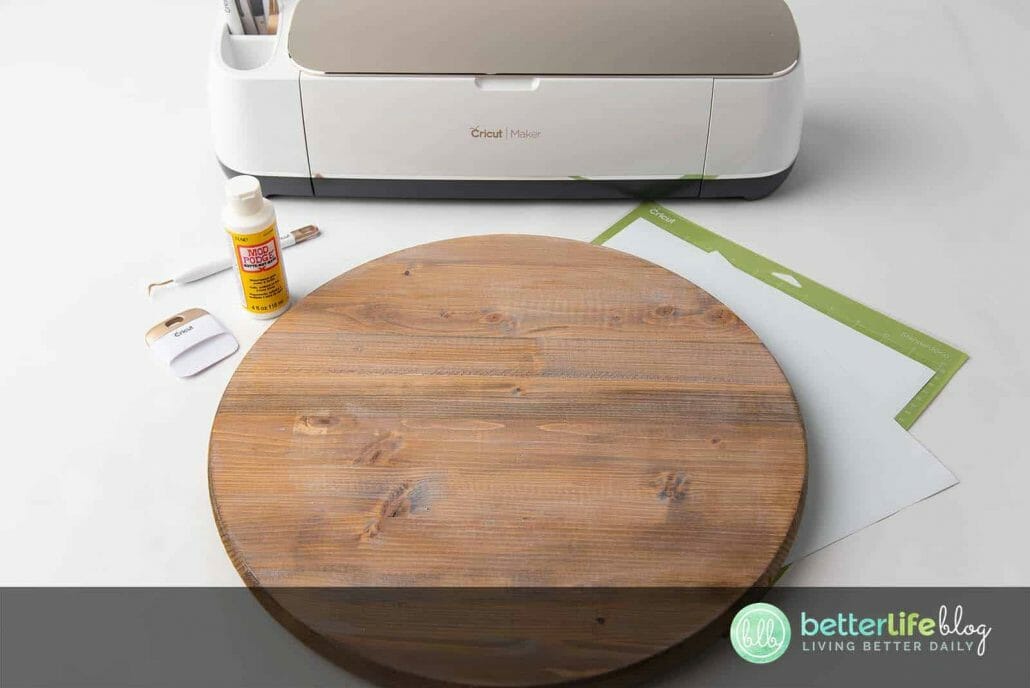
Materials Needed:
- Wood round (we used an 18” wood round)
- Wood Stain (you may also use paint or any color stain)
- Mod Podge (you may also use polyurethane – the Mod Podge is used as a top coat to allow the vinyl to grab the stained wood)
- Staining sponge brush
- Hot Glue Gun
- Staple Gun
- Jute Cord (thick)
- Decorative bow
- Floral details + floral picks
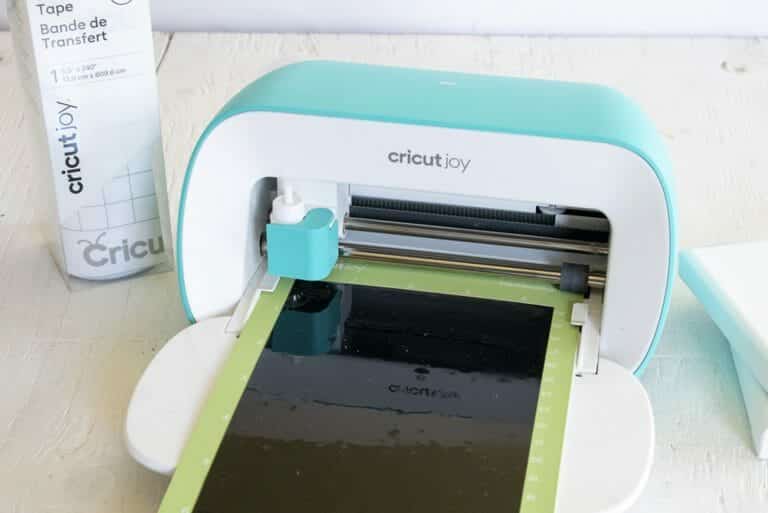
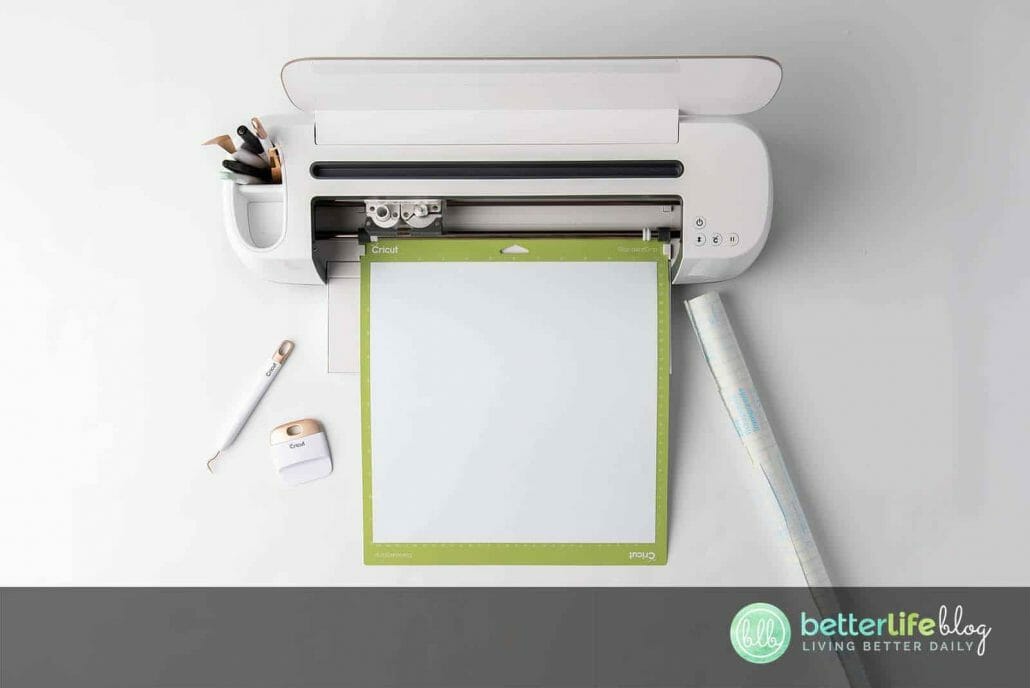
- Cricut or other cutting machine
- Blue or Green Grip Mat
- Contact/transfer paper
- Weeding tool
- Scraper tool/old gift card
- Oracle 651 permanent vinyl (white, but you may use any color you wish)
- Access to design program (ie.: Design Space)


Instructions:
Begin by staining the wood round with a brush in a well-ventilated area. Be sure to stain along the grain of the wood.
Use an old cloth or paper towel to apply pressure and wipe 90% of the stain away. Be sure to work quickly so the wood doesn’t soak too much stain.

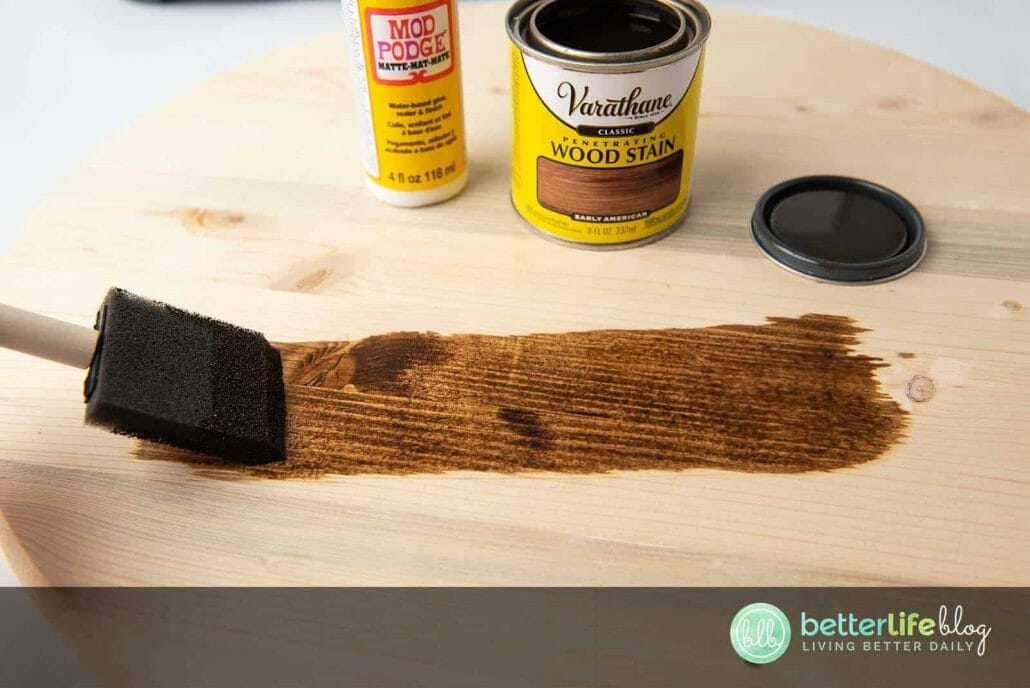


Allow 12 – 24 hours for the stain to set and dry.
Once the stain is dried, use a sealant to seal the wood before applying vinyl. We decided to use Mod Podge. To do so, apply a very thin layer with a sponge brush, constantly going in the same direction. Be sure to not make the layer too thick and allow for the Mod Podge coating to dry completely.

If you decide to paint the wood instead, follow the same steps above except, paint as normal. You do not have to wipe any paint off (note: chalk paint holds vinyl best).

Once the wood is completely dry, you may begin working on the actual vinyl. Import and upload the SVG file to the machine design program (ie.: Design Space).
Adjust the SVG size based on your wood round size, leaving enough space for decorative finishes at the top of the wood round.
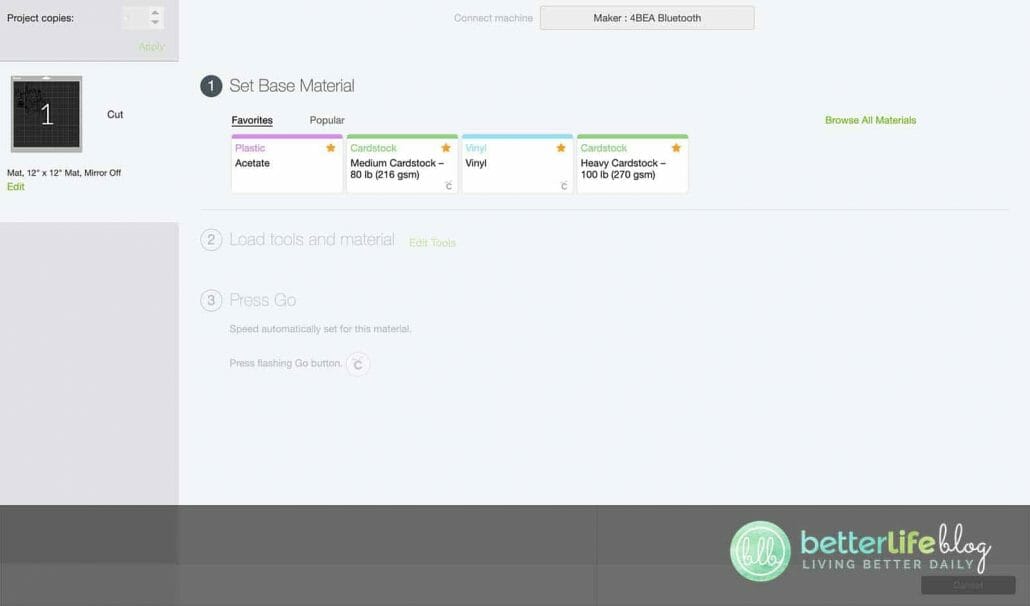


Hit “Make It” button.
Adjust the machine’s setting/material dial to “Vinyl.”
Load the Oracle 651 vinyl to the machine on the cutting grip and hit “Go.”


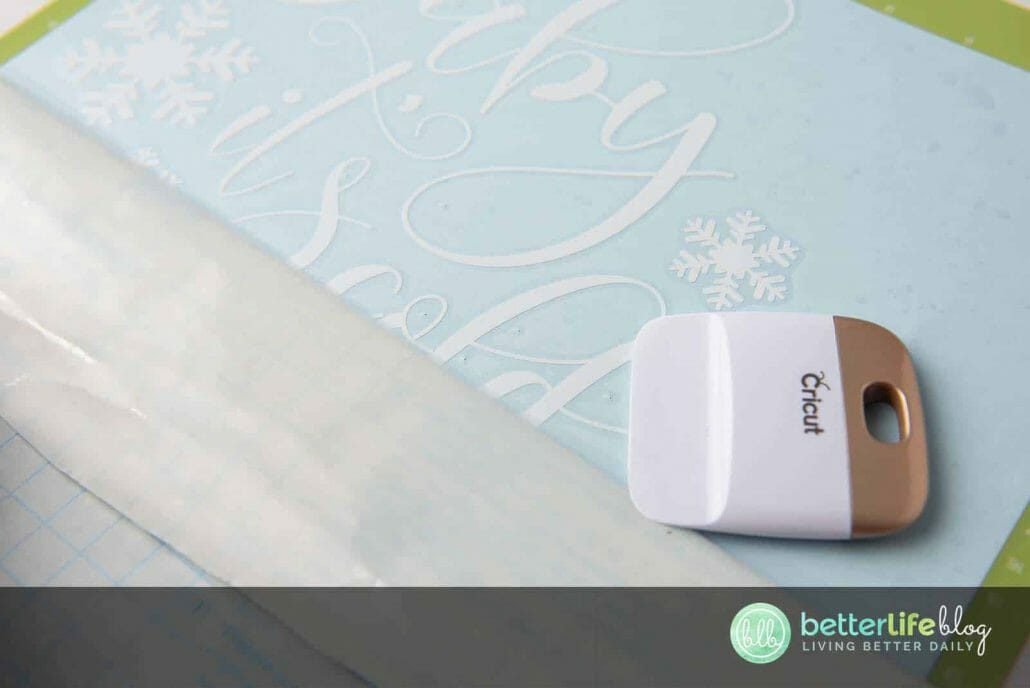
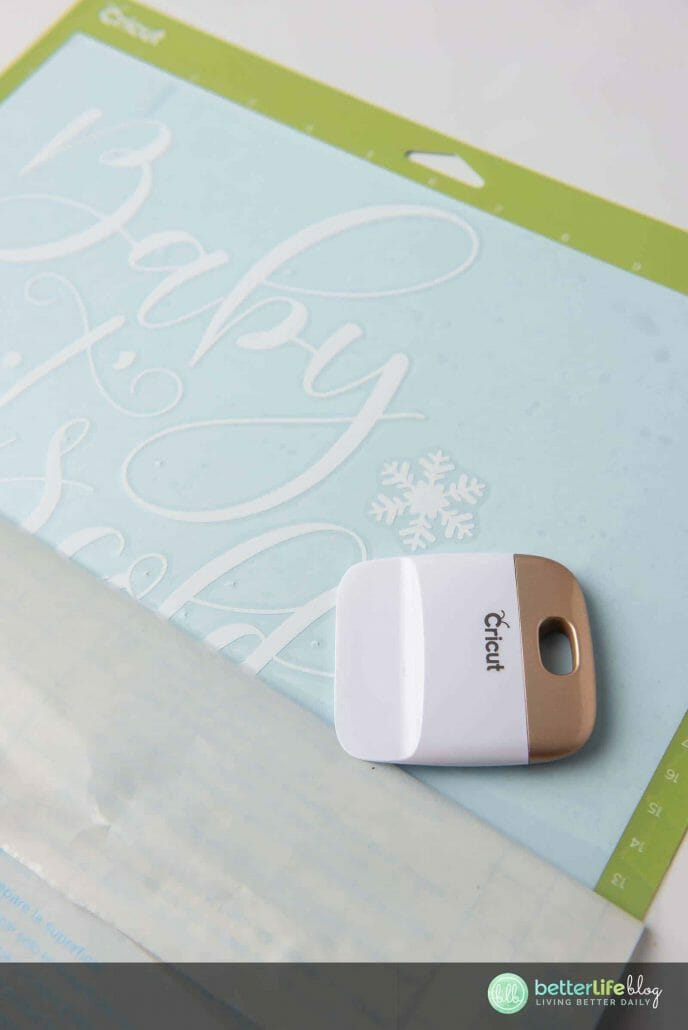
Once the cut is complete, begin to pull the negative vinyl off using the weeding tool.
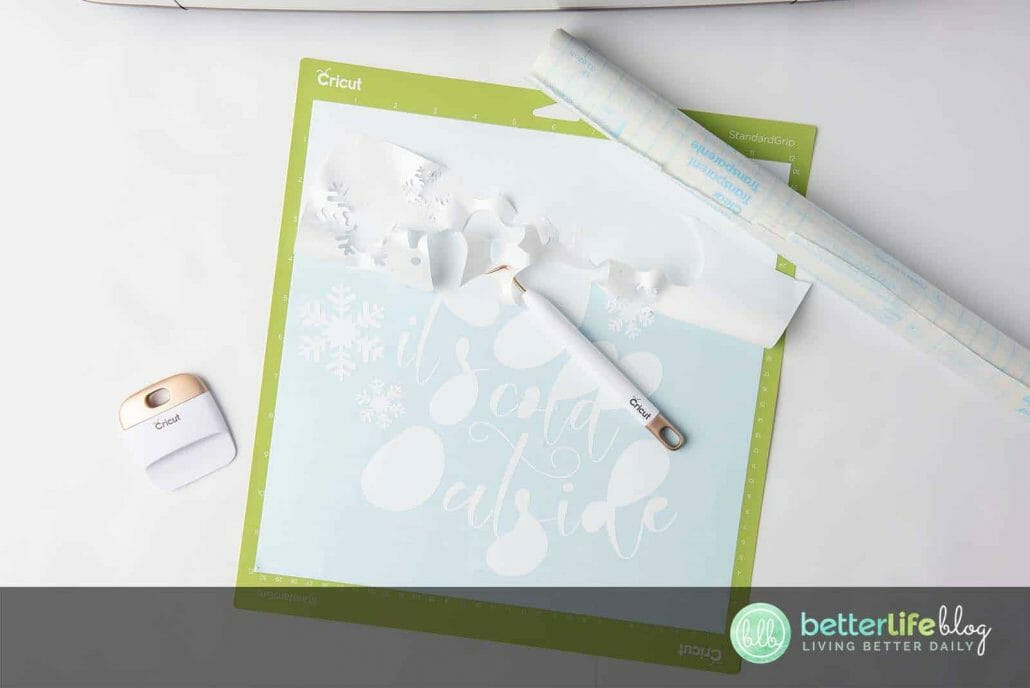
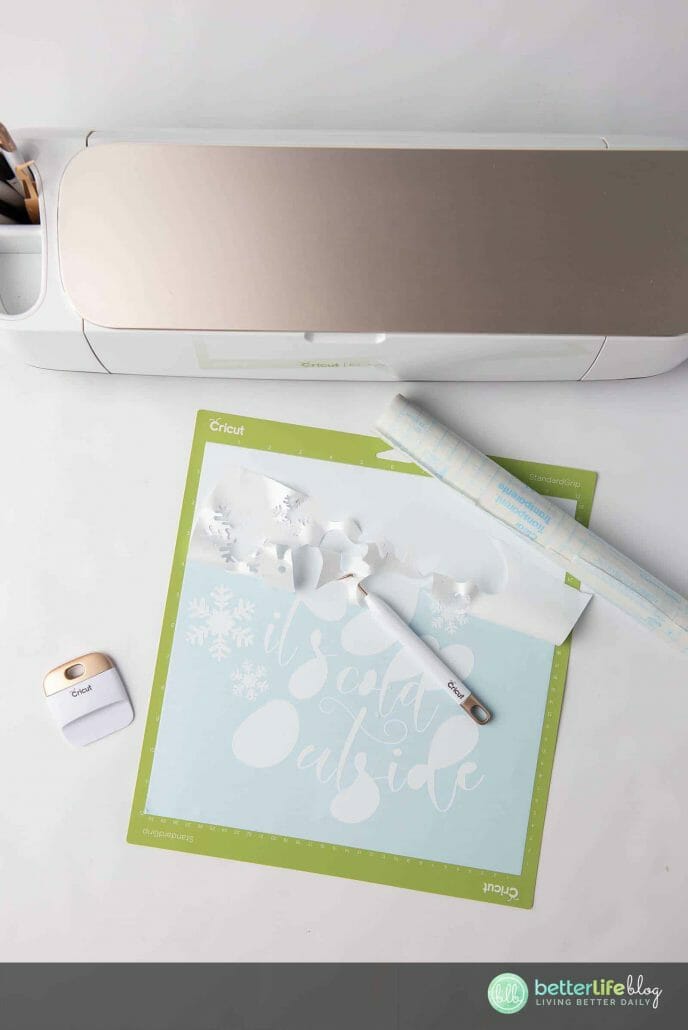
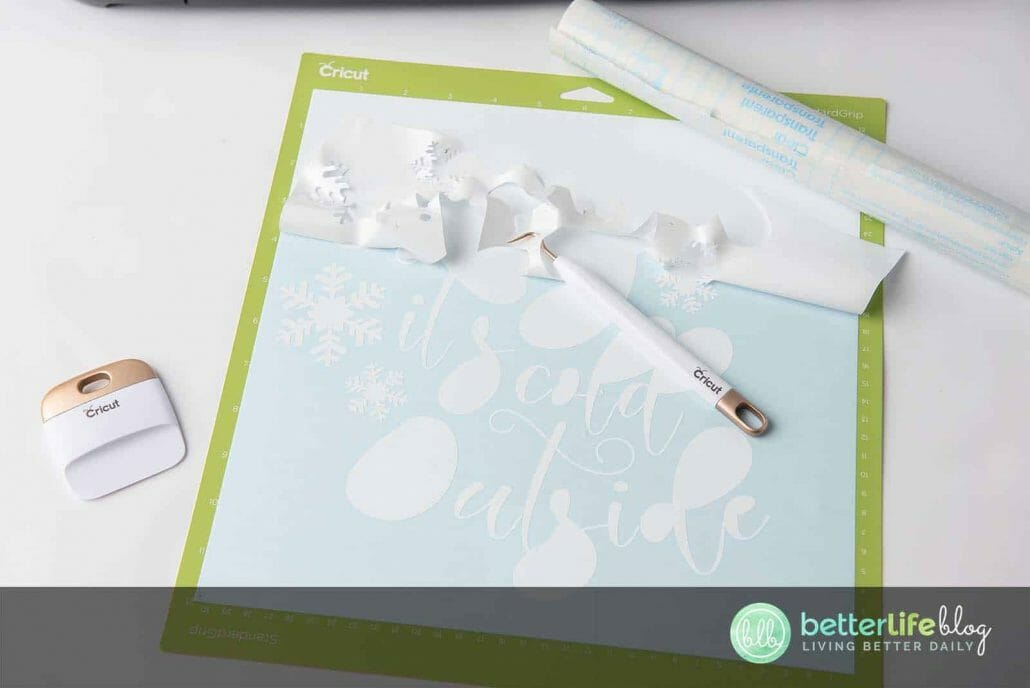
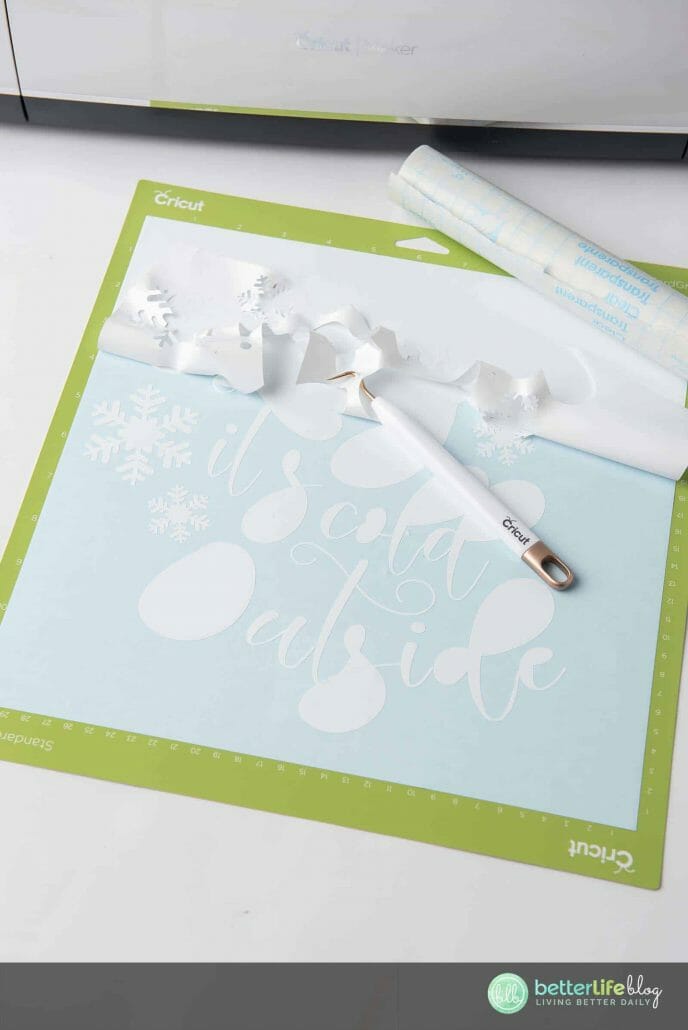

Once the weeding is complete, cut off a piece of transfer paper the size of the cut vinyl. Apply onto the vinyl. This will be done to help get your vinyl off its plastic backing and onto the wood round surface.
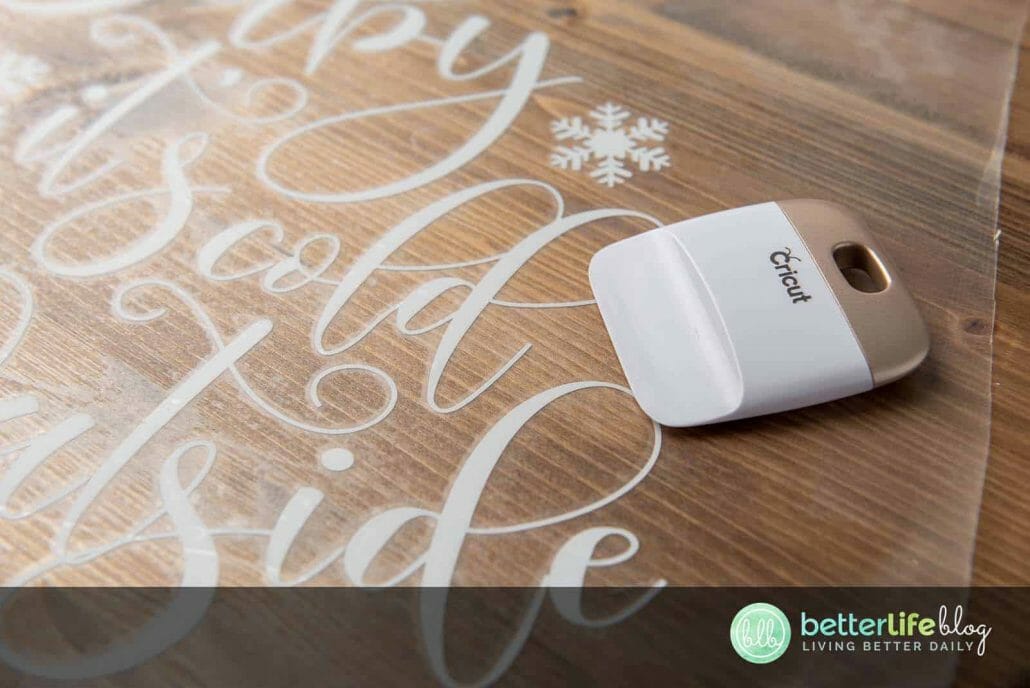
Since this project is a rather large design, to get transfer paper to lay smooth, begin by pulling the plastic backing off a little at a time. Then, use the scraper tool (or an old gift/credit card) down the vinyl.
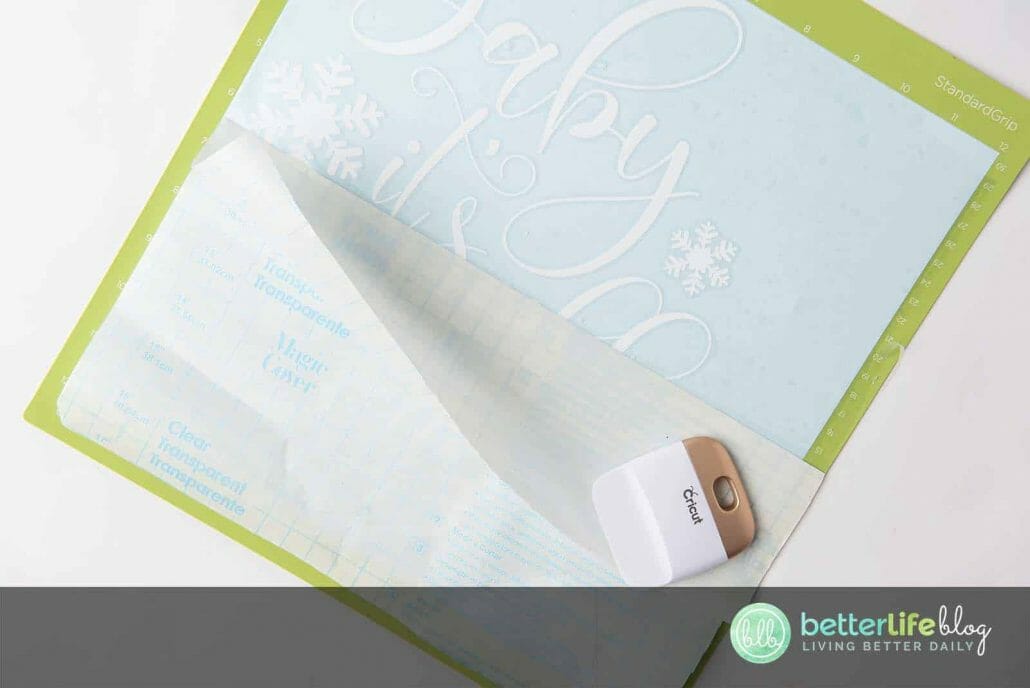

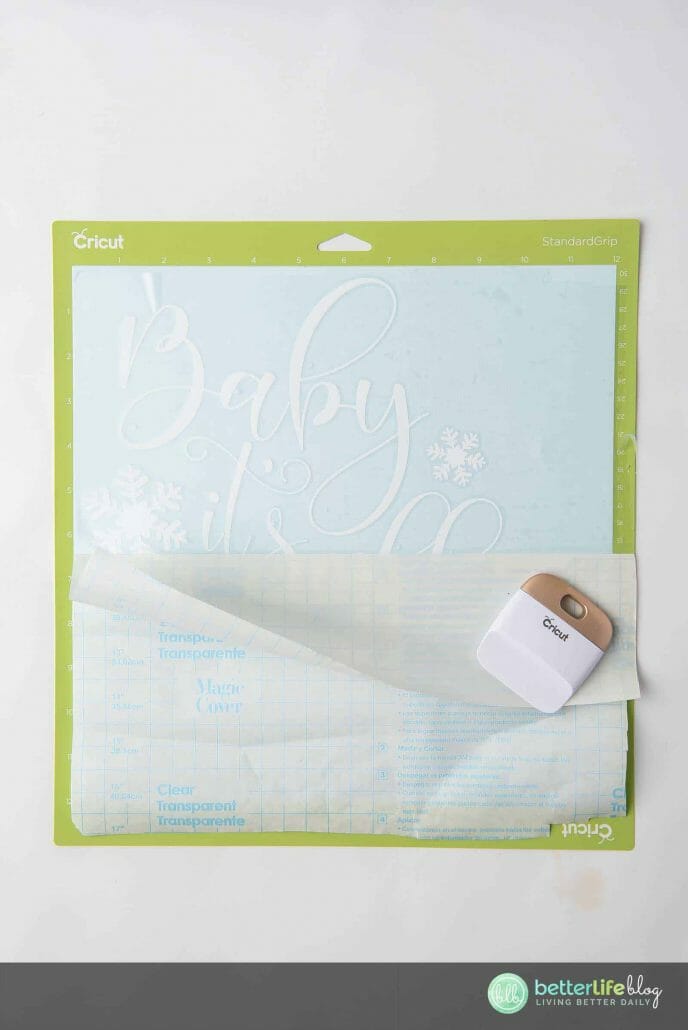
Next, turn the entire design facing downwards and begin gentle pulling the vinyl’s plastic backing off and away from the transfer paper. Starting at a corner and rolling it away slowly while applying pressure is best.
Once it’s successfully transferred, you’ll be able to see the vinyl design through the transfer paper.
Measure out the middle of the wood round, making sure to leave enough room at the top for your bow.
Lay the transfer with vinyl lightly on top of the wood round. Do not pull too tight when laying it down. This can distort the vinyl and leave you with air bubbles later on.
Once you are happy with the placement, use a scraper tool or gift card to apply pressure and smooth over the design.
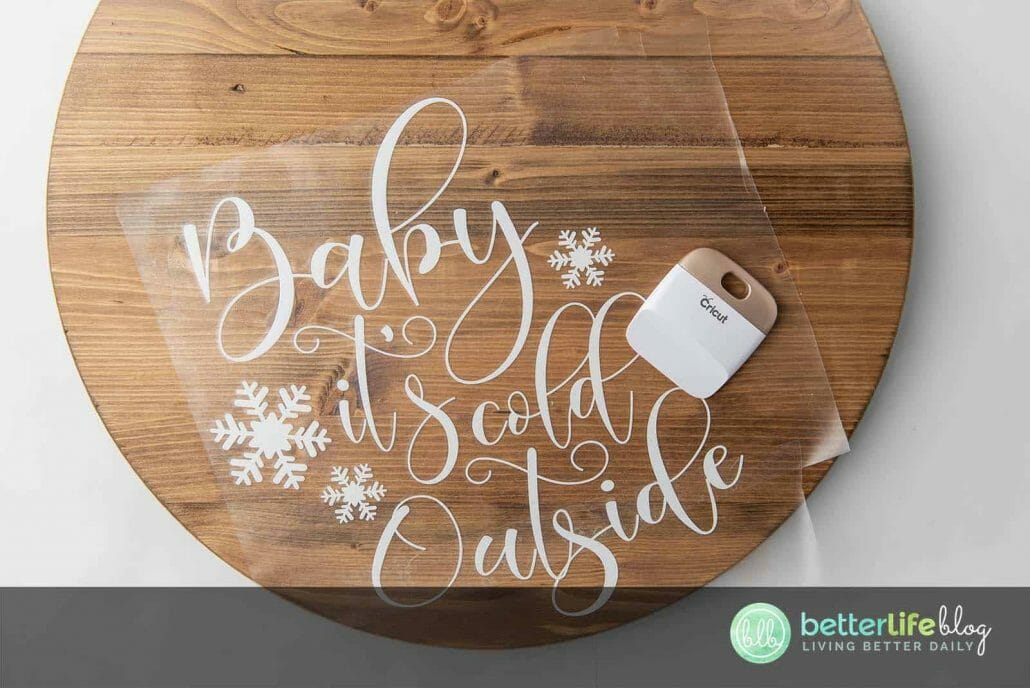

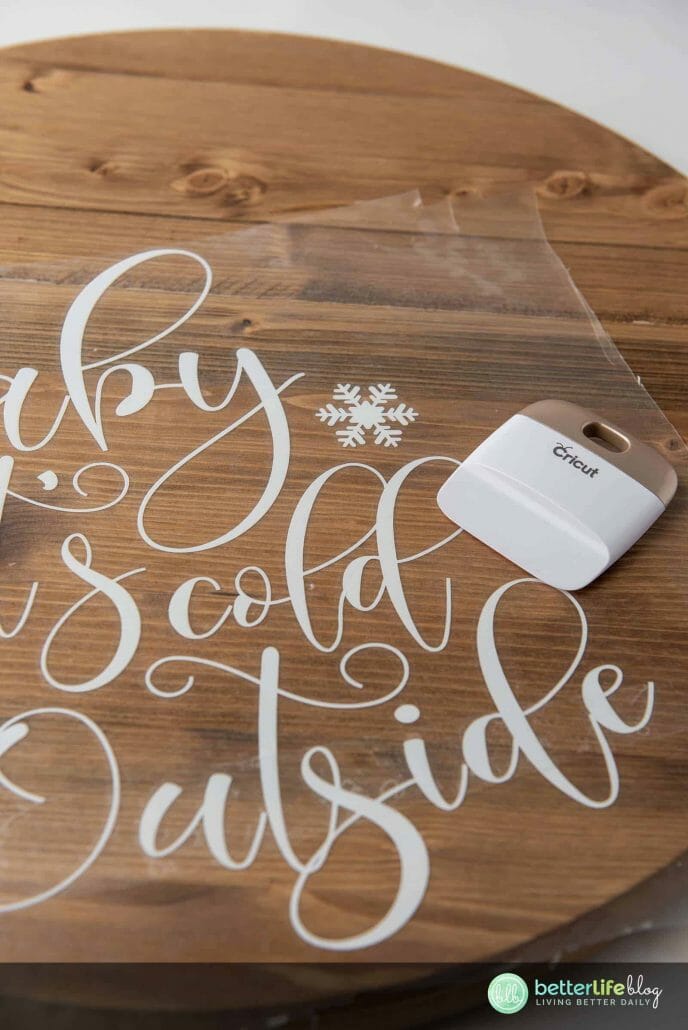
Once enough pressure had been applied slowly remove the transfer paper by starting at a corner and very carefully and slowly rolling it away and off the wood. The vinyl will remain on your project.
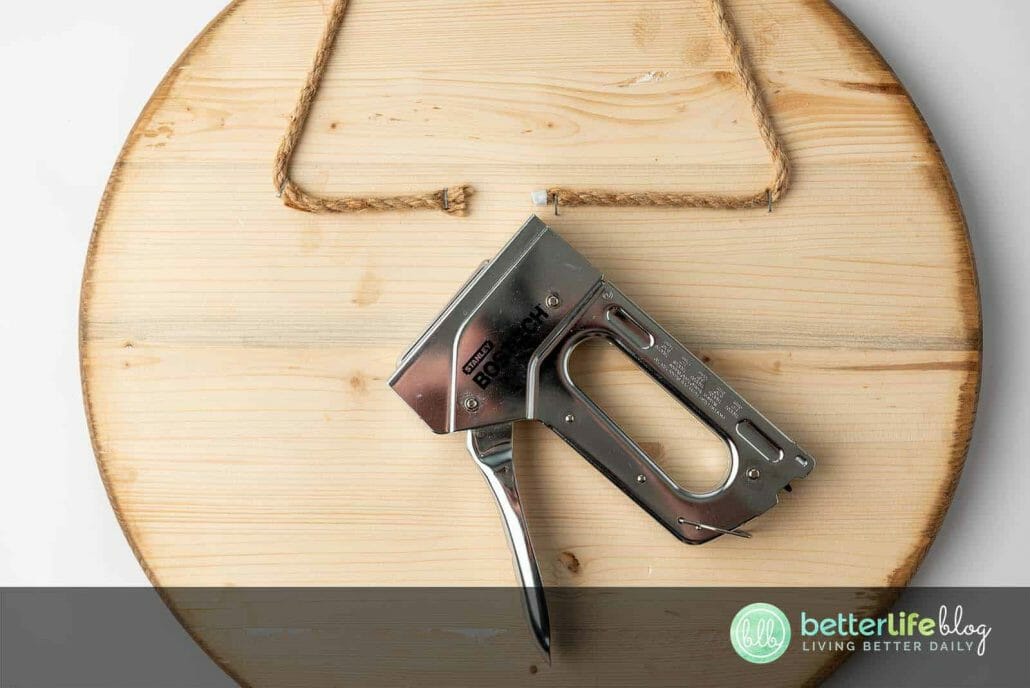
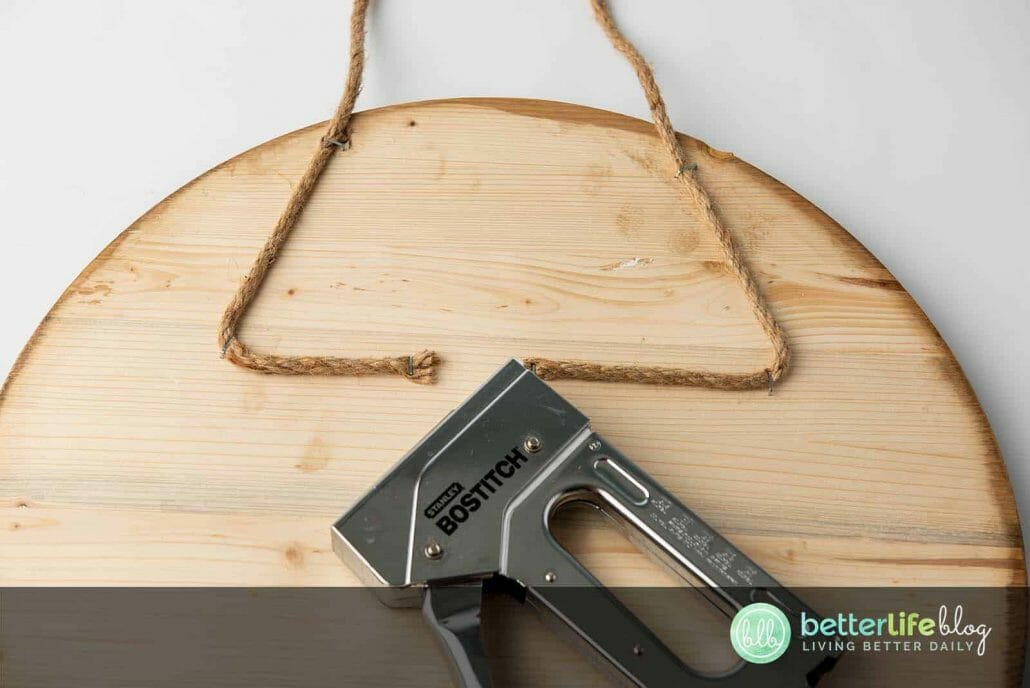
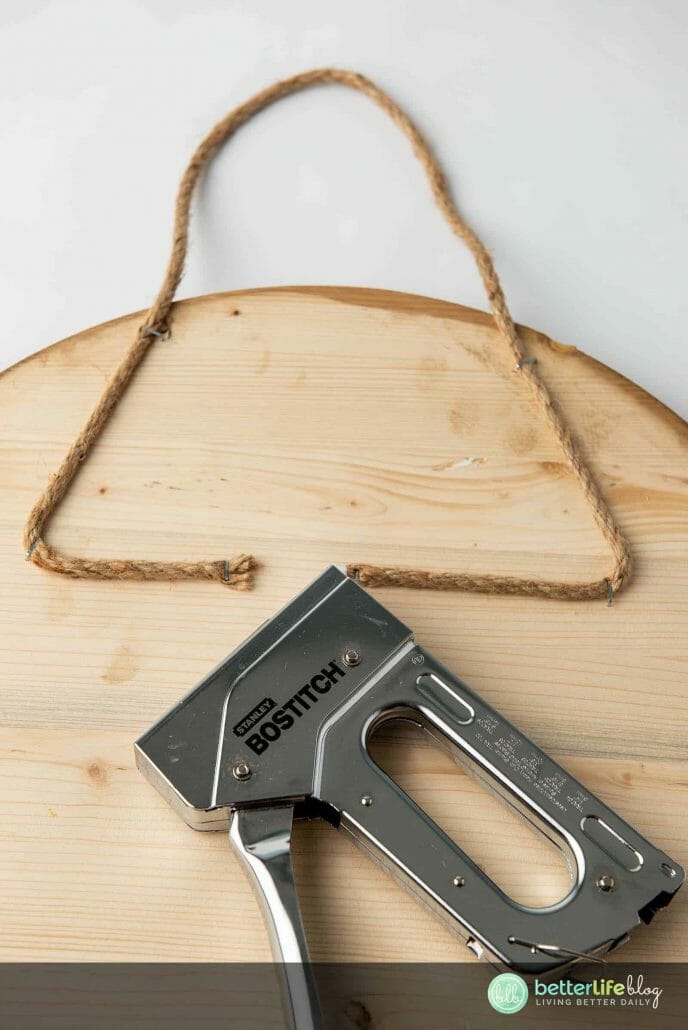
Measure out the length needed for the jute cord to allow the sign to hang off the door.
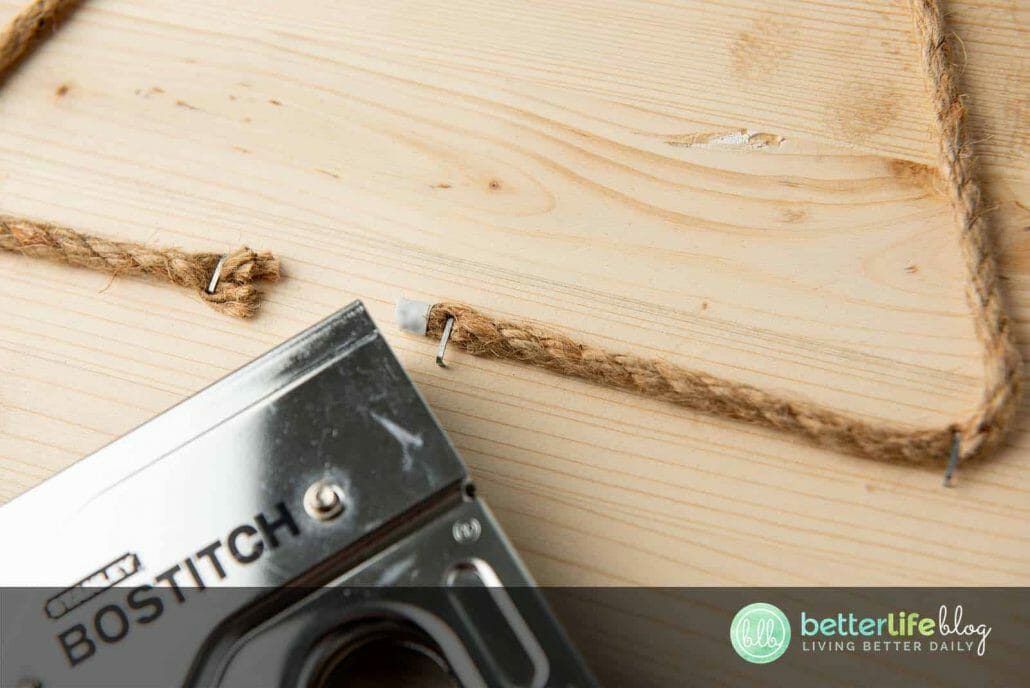
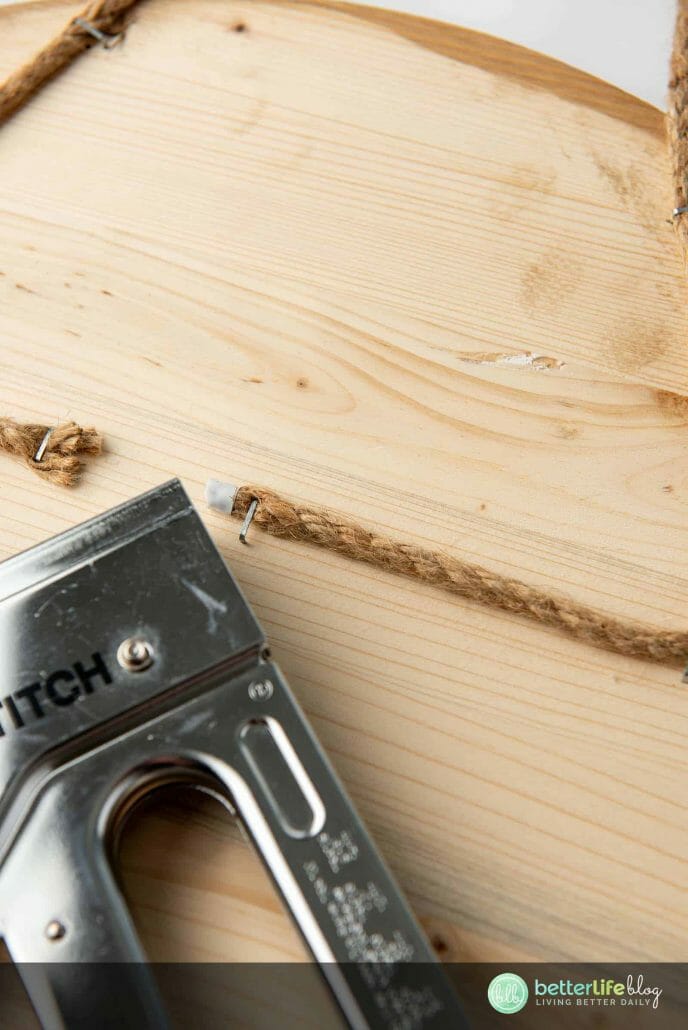
We made tension points so cord would not be able to easily slip through staples. To do so, make a triangle-like shape. Apply staples liberally.


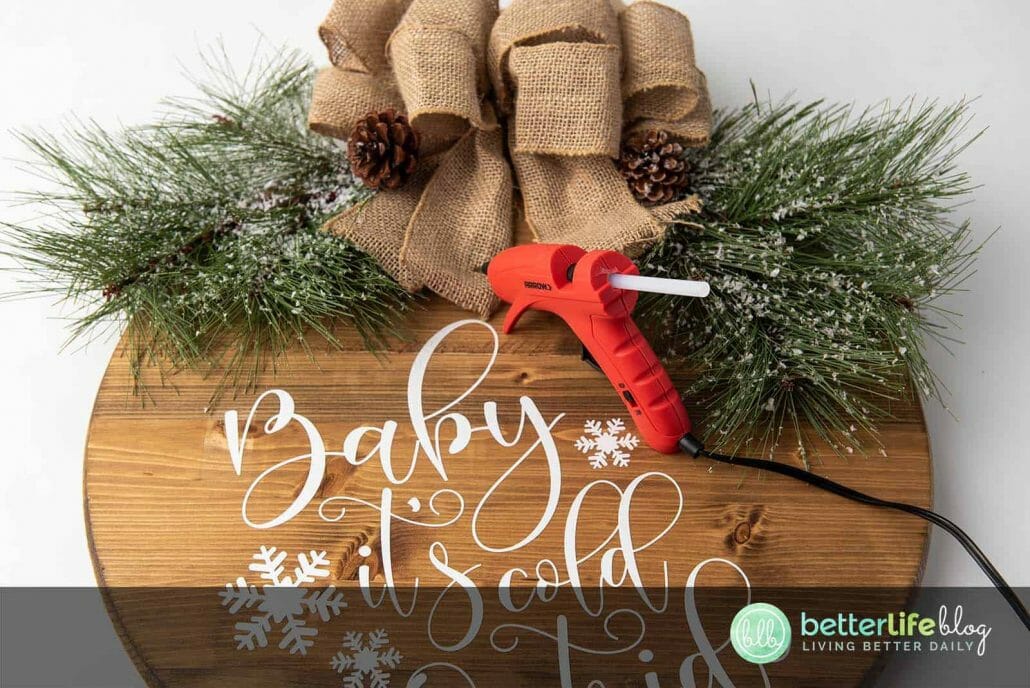
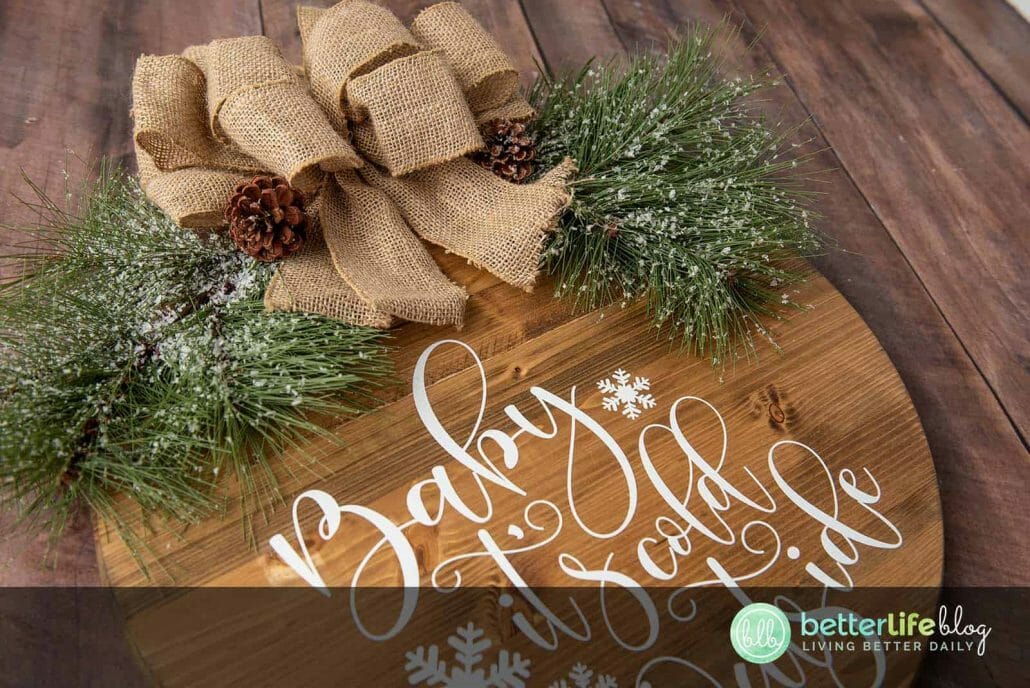
Flip sign back over to apply floral picks to top of finished sign. Next, attach floral details and secure with glue gun.
Finally, apply bow at the top center, securing with a glue gun.


Notes:
Some letters on this design are small so be careful when removing the transfer paper once applying on the wood round. If you are having trouble, try applying heat to it (ie.: with a blow dryer) while removing.
You may add a sealant/Mod Podge on top of the vinyl.


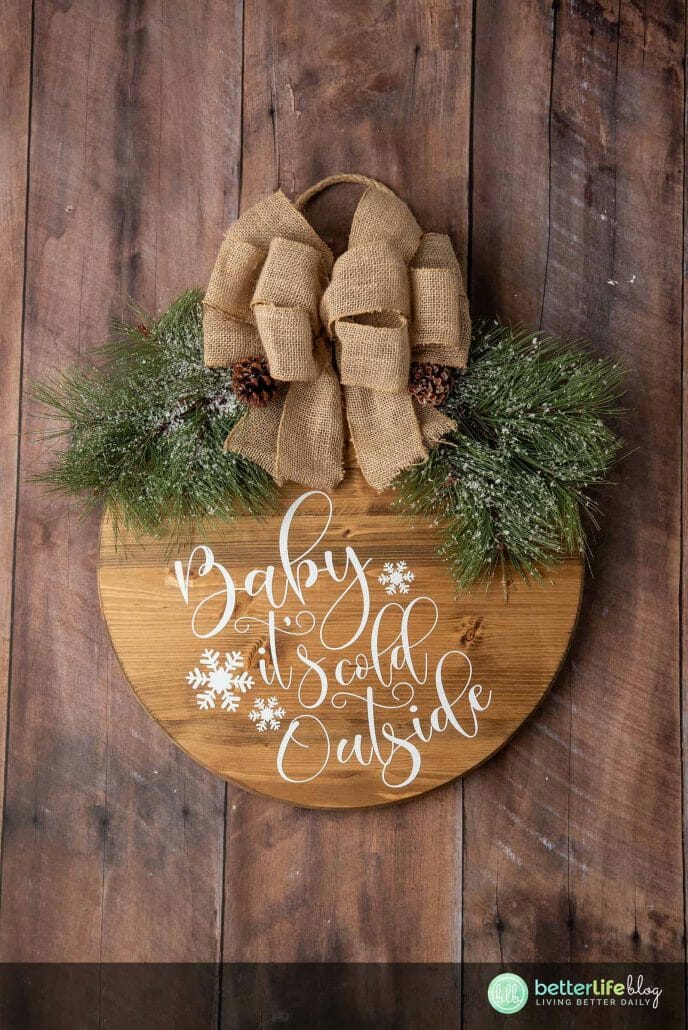
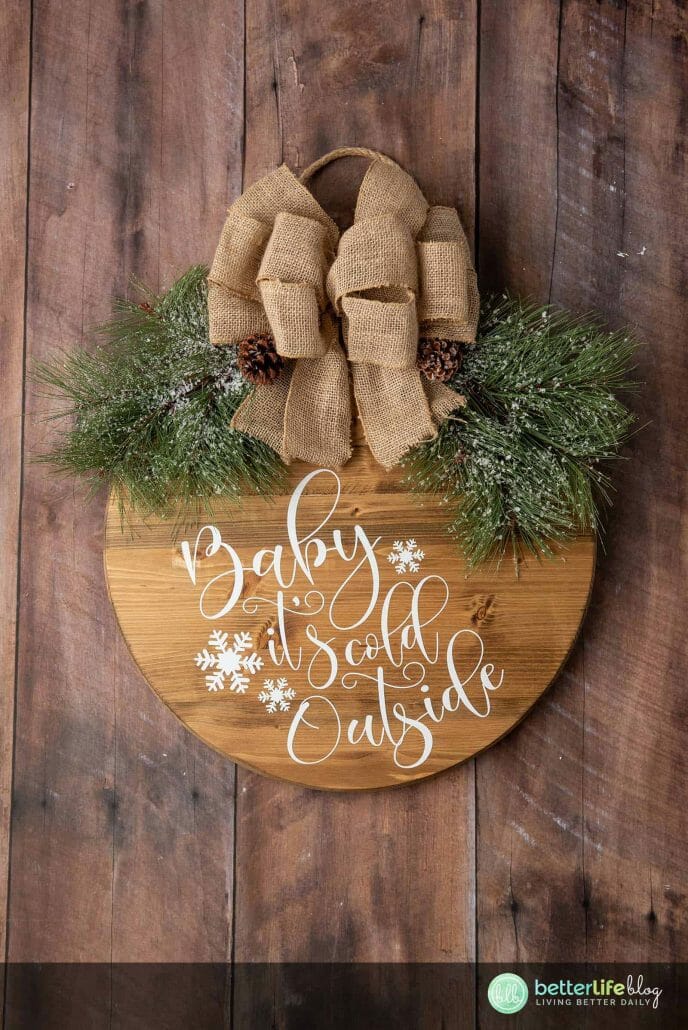


Farmhouse Christmas Door Sign
Our Farmhouse Christmas Door Sign is elegant and a offers a beautiful, rustic touch to your home. Made using a Cricut Machine, this door sign is absolutely perfect for the holiday season.
Materials
- Wood round (we used an 18” wood round)
- Wood Stain (you may also use paint or any color stain)
- Mod Podge (you may also use polyurethane - the Mod Podge is used as a top coat to allow the vinyl to grab the stained wood)
- Staining sponge brush
- Hot Glue Gun
- Staple Gun
- Jute Cord (thick)
- Decorative bow
- Floral details + floral picks
- Cricut or other cutting machine
- Blue or Green Grip Mat
- Contact/transfer paper
- Weeding tool
- Scraper tool/old gift card
- Oracle 651 permanent vinyl (white, but you may use any color you wish)
- Access to design program (ie.: Design Space)
Instructions
- Begin by staining the wood round with a brush in a well-ventilated area. Be sure to stain along the grain of the wood.
- Use an old cloth or paper towel to apply pressure and wipe 90% of the stain away. Be sure to work quickly so the wood
doesn’t soak too much stain. - Allow 12 - 24 hours for the stain to set and dry.
- Once the stain is dried, use a sealant to seal the wood before applying vinyl. We decided to use Mod Podge. To do so, apply a very thin layer with a sponge brush, constantly going in the same direction. Be sure to not make the layer too thick and allow for the Mod Podge coating to dry completely.
- If you decide to paint the wood instead, follow the same steps above except, paint as normal. You do not have to wipe any paint off (note: chalk paint holds vinyl best).
- Once the wood is completely dry, you may begin working on the actual vinyl. Import and upload the SVG file to the machine design program (ie.: Design Space).
- Adjust the SVG size based on your wood round size, leaving enough space for decorative finishes at the top of the wood
round. - Hit “Make It” button.
- Adjust the machine’s setting/material dial to “Vinyl.”
- Load the Oracle 651 vinyl to the machine on the cutting grip and hit “Go.”
- Once the cut is complete, begin to pull the negative vinyl off using the weeding tool.
- Once the weeding is complete, cut off a piece of transfer paper the size of the cut vinyl. Apply onto the vinyl. This
will be done to help get your vinyl off its plastic backing and onto the wood round surface. - Since this project is a rather large design, to get transfer paper to lay smooth, begin by pulling the plastic backing off a little at a time. Then, use the scraper tool (or an old gift/credit card) down the vinyl.
- Next, turn the entire design facing downwards and begin gentle pulling the vinyl’s plastic backing off and away from the transfer paper. Starting at a corner and rolling it away slowly while applying pressure is best.
- Once it’s successfully transferred, you’ll be able to see the vinyl design through the transfer paper.
- Measure out the middle of the wood round, making sure to leave enough room at the top for your bow.
- Lay the transfer with vinyl lightly on top of the wood round. Do not pull too tight when laying it down. This can distort
the vinyl and leave you with air bubbles later on. - Once you are happy with the placement, use a scraper tool or gift card to apply pressure and smooth over the design.
- Once enough pressure had been applied slowly remove the transfer paper by starting at a corner and very carefully and slowly rolling it away and off the wood. The vinyl will remain on your project.
- Measure out the length needed for the jute cord to allow the sign to hang off the door.
- We made tension points so cord would not be able to easily slip through staples. To do so, make a triangle-like shape.
Apply staples liberally. - Flip sign back over to apply floral picks to top of finished sign. Next, attach floral details and secure with glue gun.
- Finally, apply bow at the top center, securing with a glue gun.
Notes
Some letters on this design are small so be careful when removing the transfer paper once applying on the wood round. If
you are having trouble, try applying heat to it (ie.: with a blow dryer) while removing.
You may add a sealant/Mod Podge on top of the vinyl.