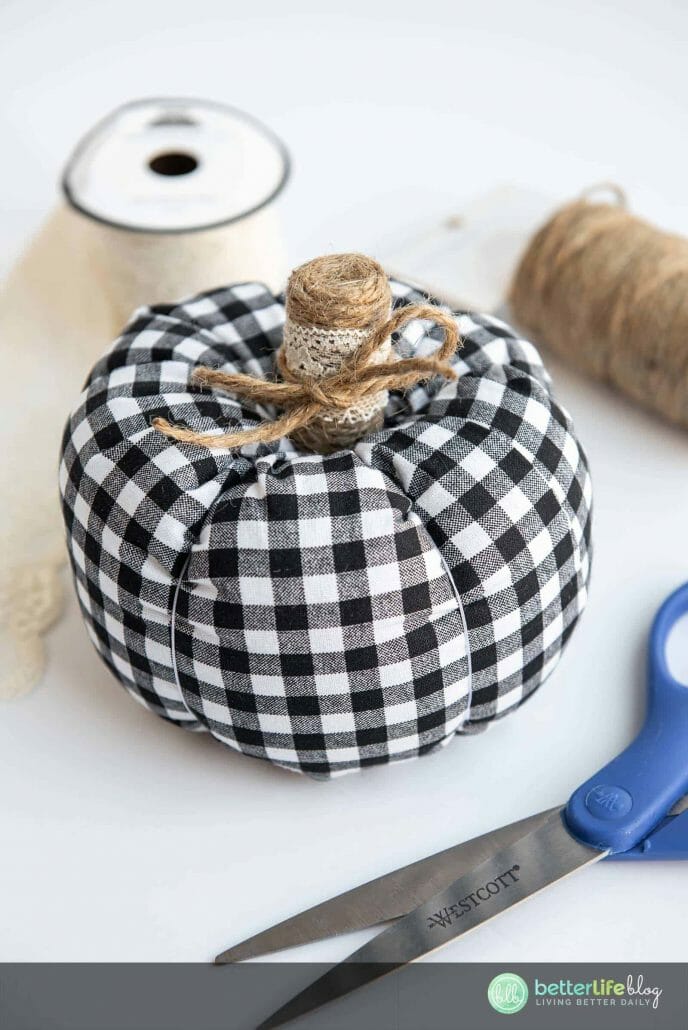
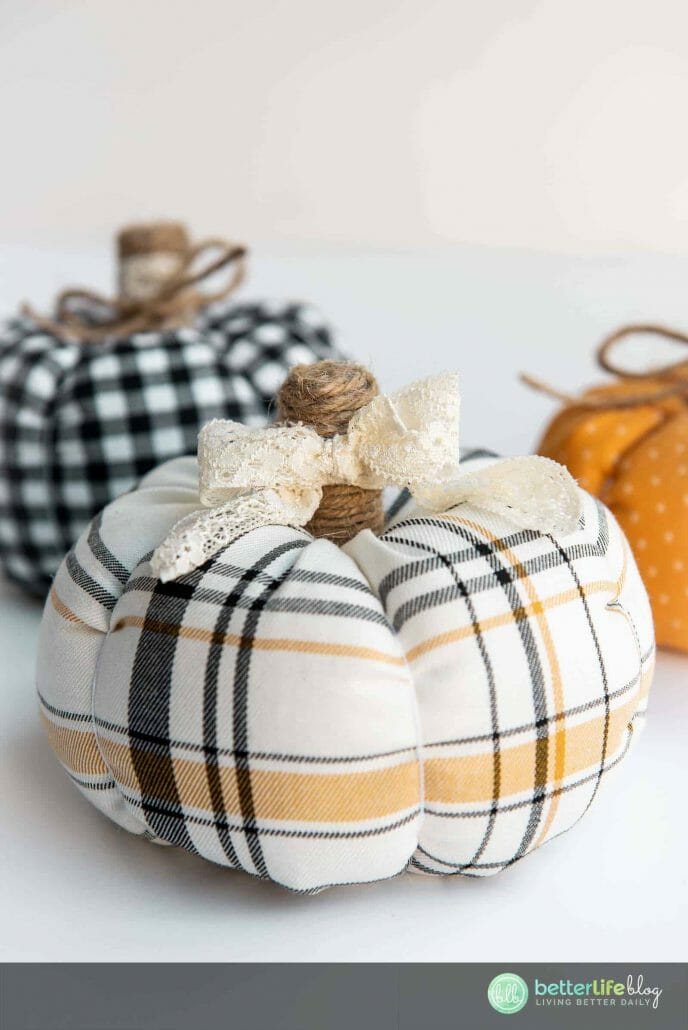
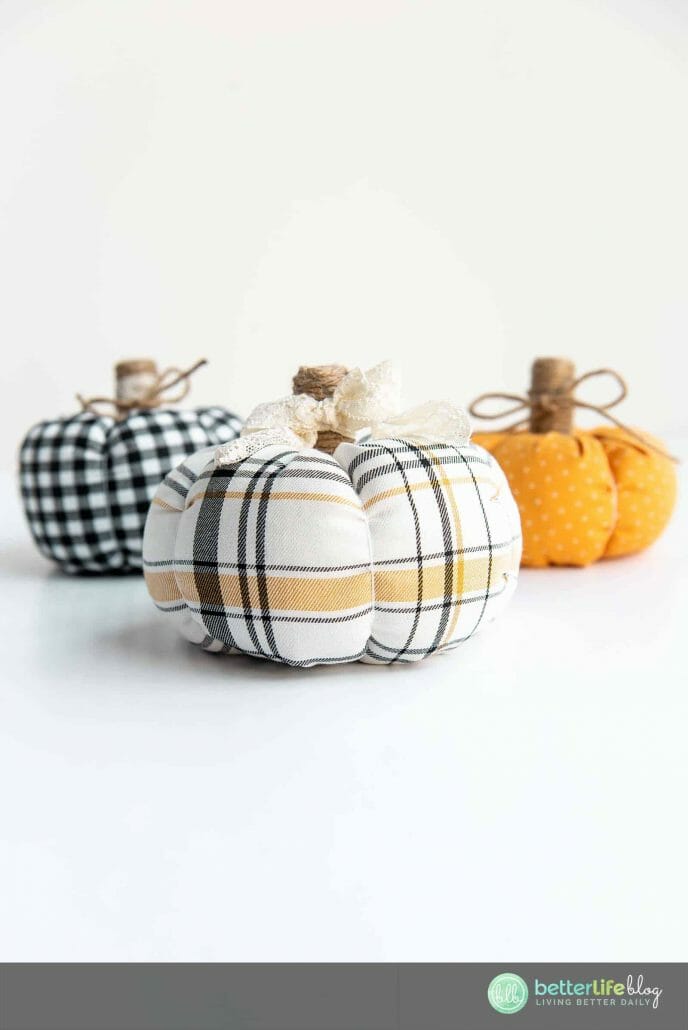
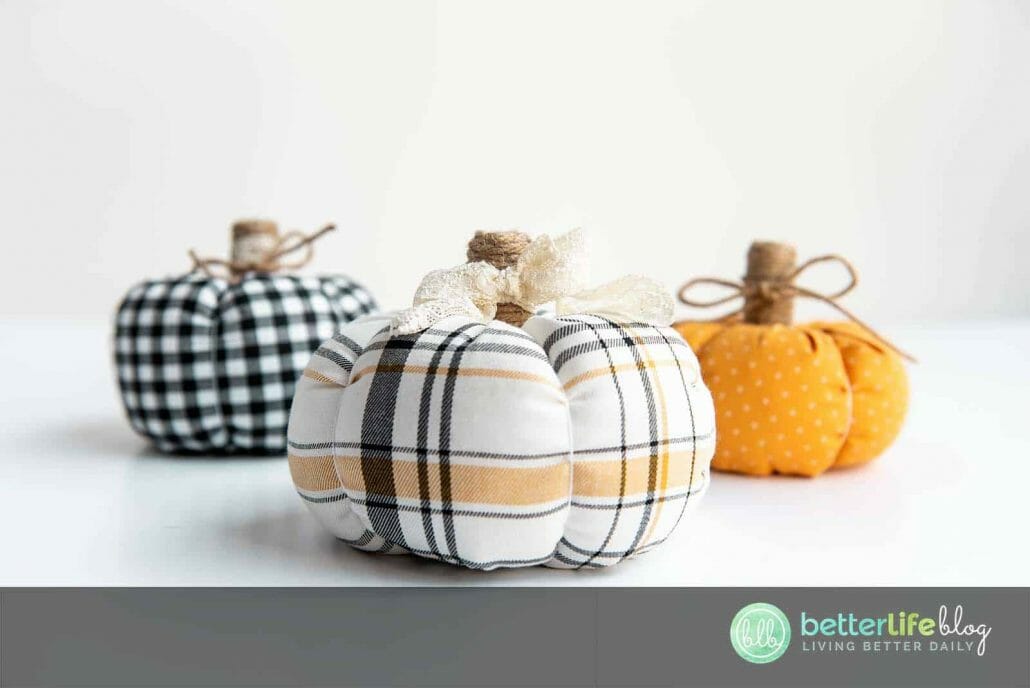
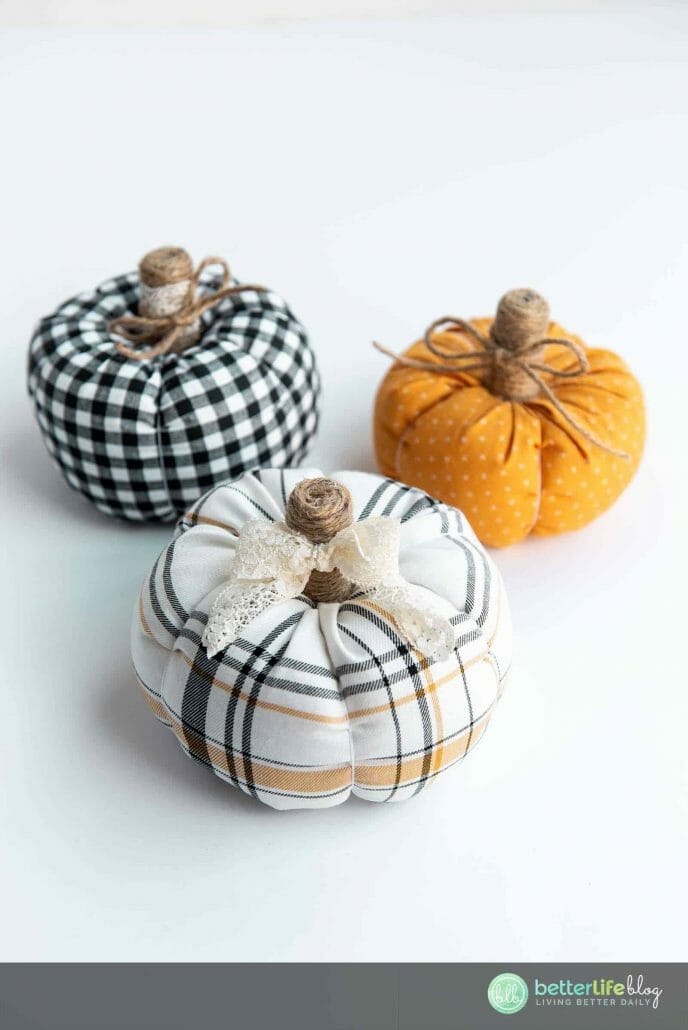
Pumpkins are my favorite embellishments when it comes to autumn décor. Today, I am showing you how to make beautiful DIY Fabric Pumpkins – and they’re extremely easy to put together!
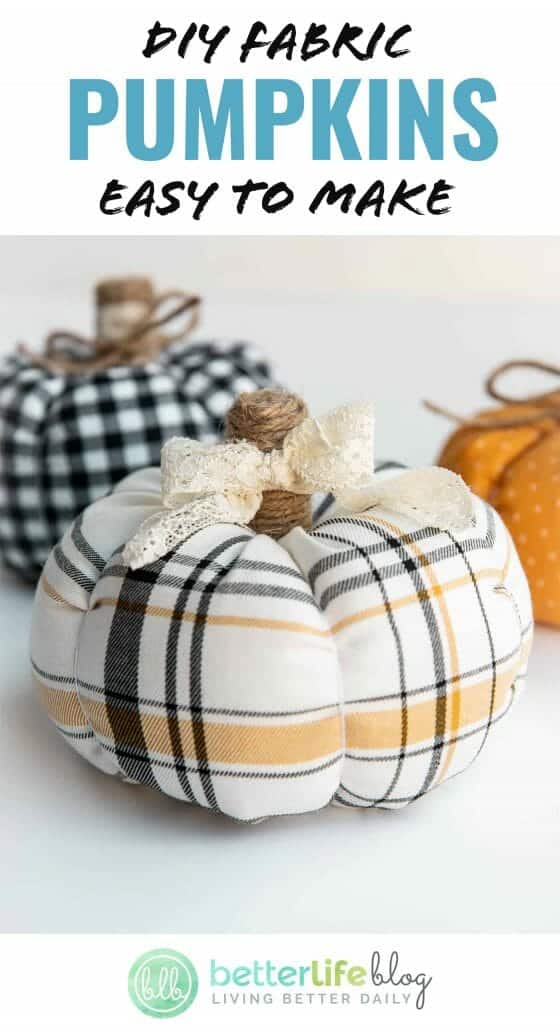
What’s great about these easy-to-make DIY Fabric Pumpkins is that you can choose whatever fabric you like. You can have fun with the colors and patterns and create a look of your very own.
I love how plump these fabric pumpkins are. Be sure to fill yours with lots of poly filling to give it a “full look.” Remember, the fuller they look, the better they will stand on your display.
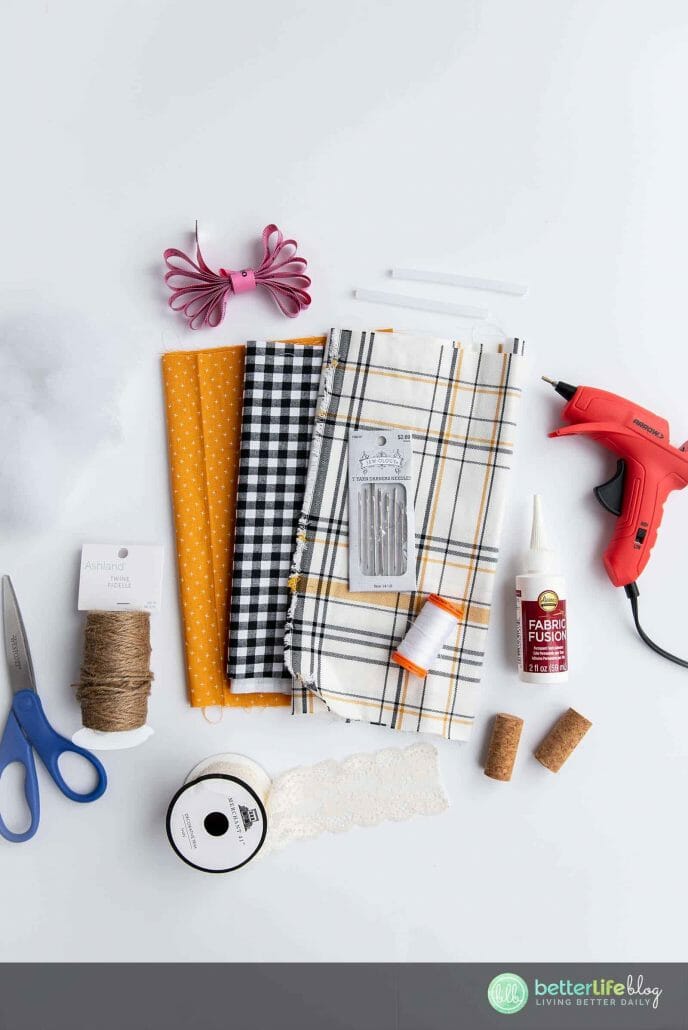
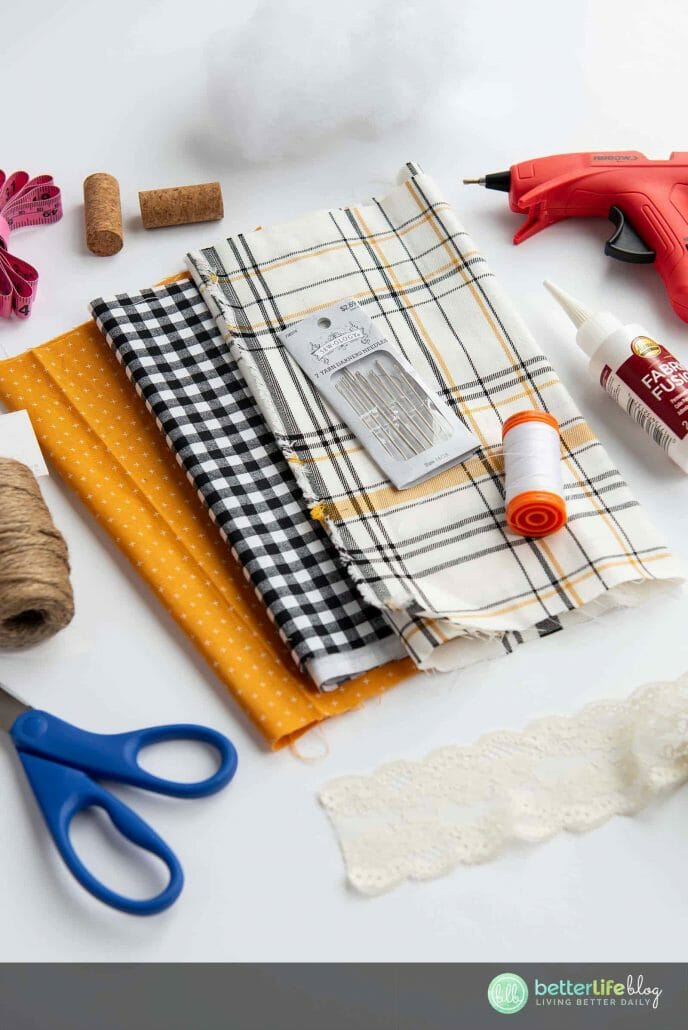
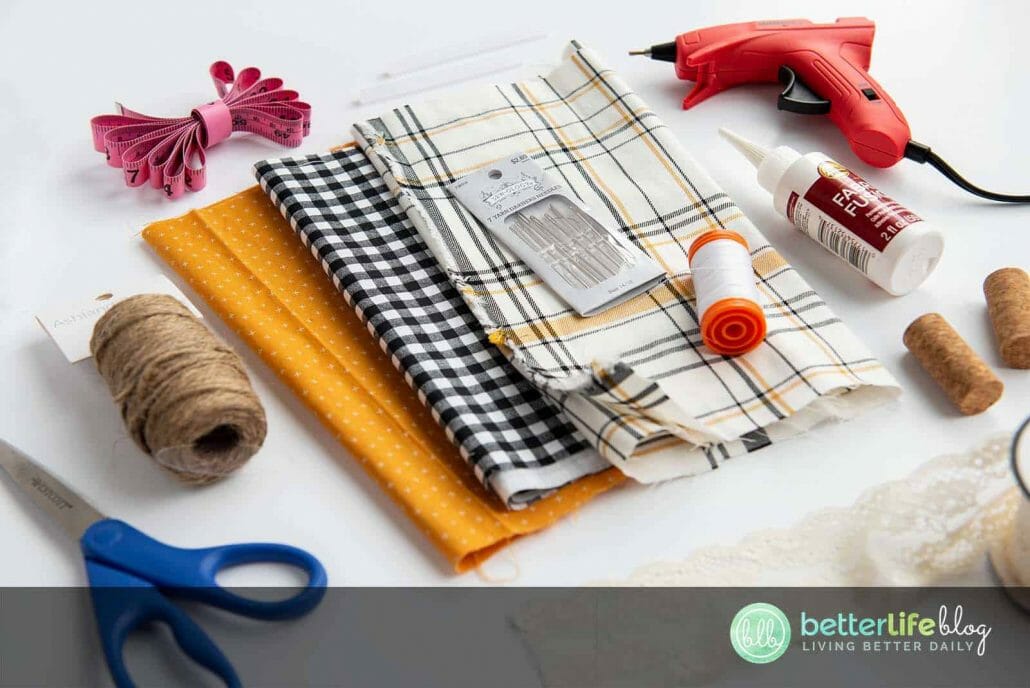
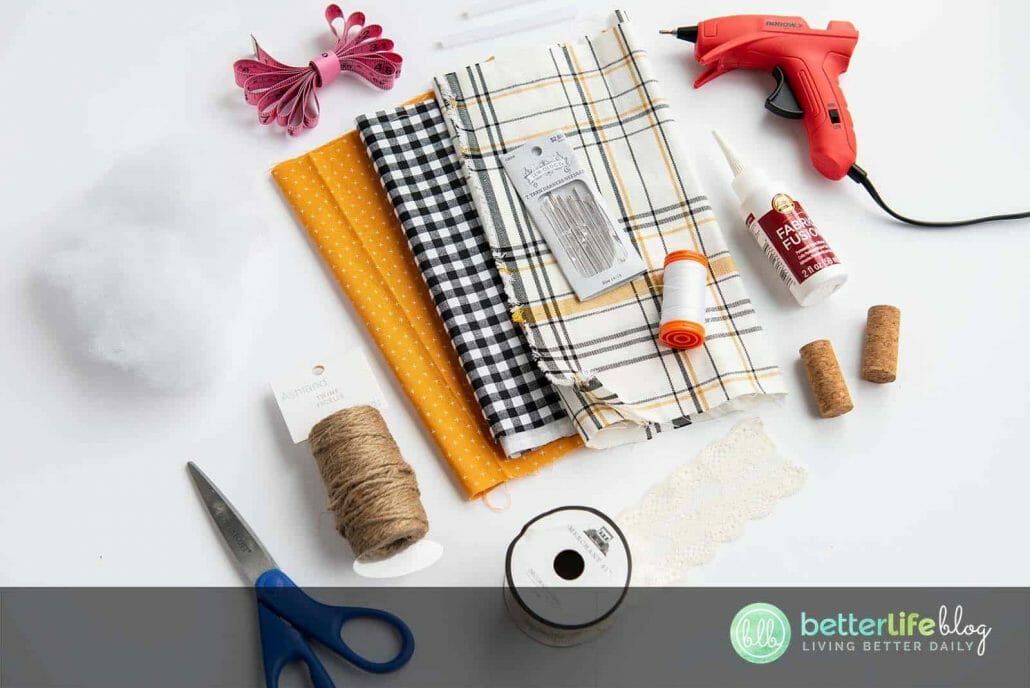
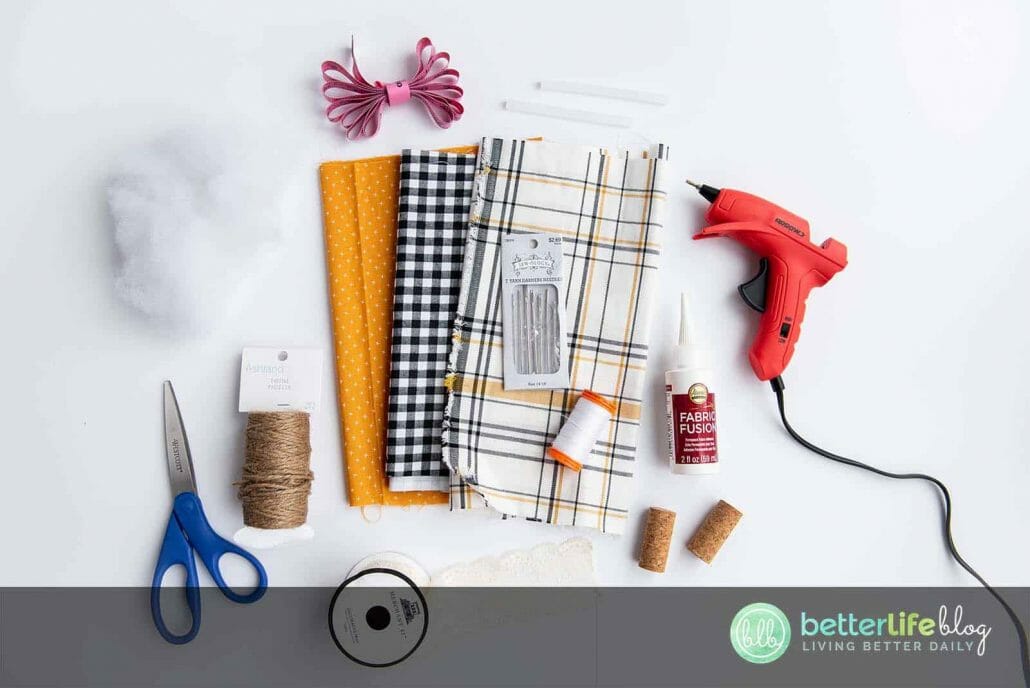
Tools and Materials:
- 1/4 yard fabric (color of pattern of choice)
- Embroidery thread
- Hand sewing needles
- Fabric fusion
- Corks
- Hot glue gun and glue sticks
- Scissors
- Bag of poly fill
- Twine
- Ribbon or lace
- Seamstress measuring tape

Directions:
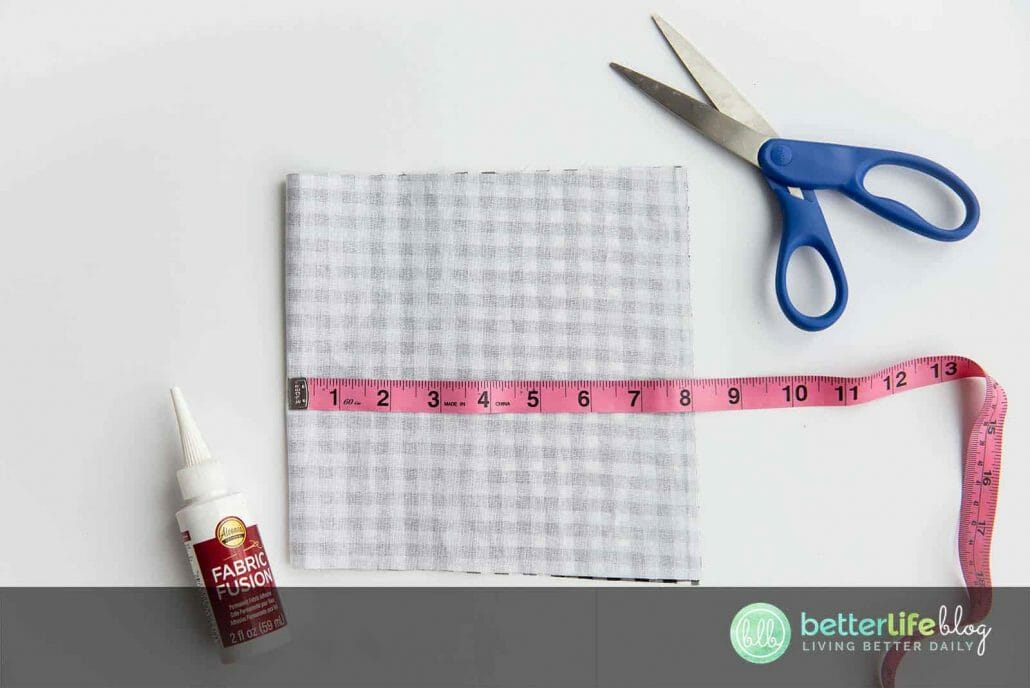
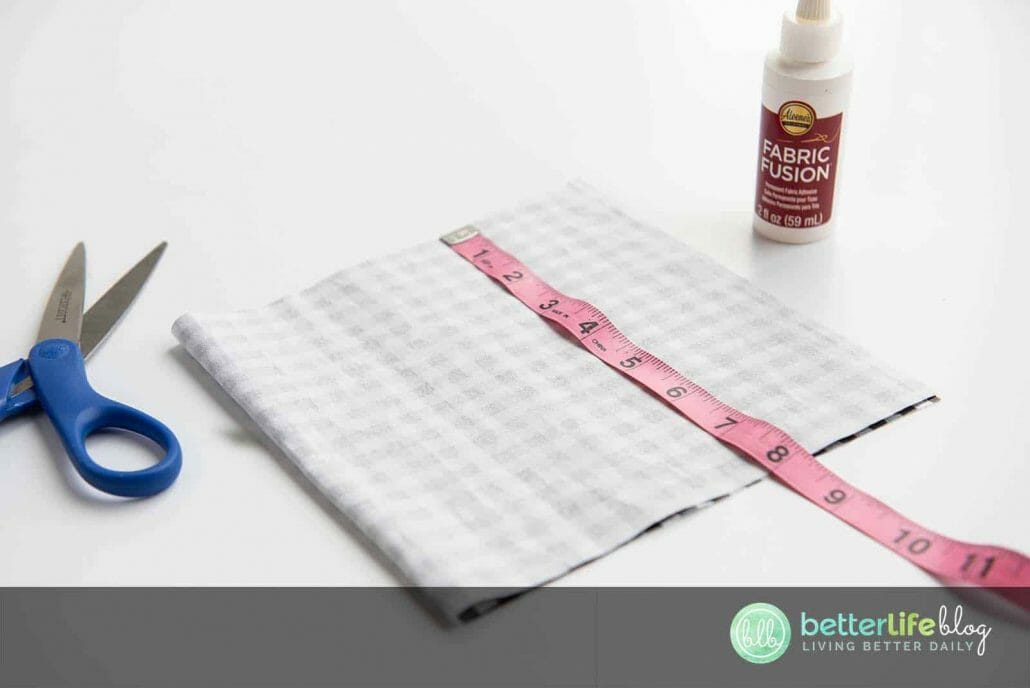
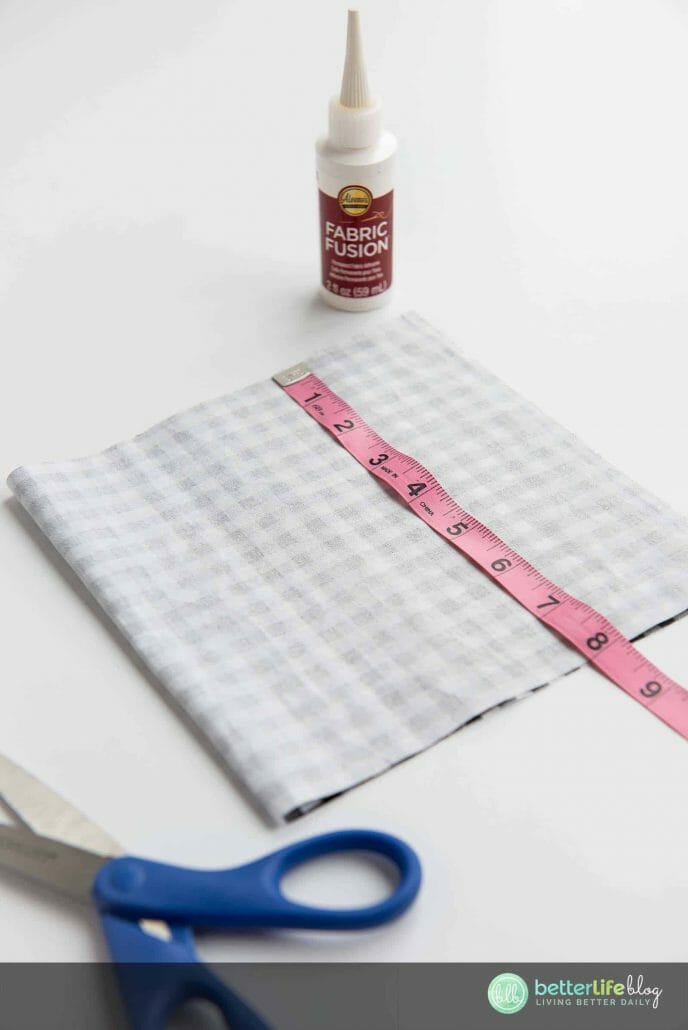
The first step is to take the fabric and turn it inside out. Cut it to your desired size. For a medium-sized pumpkin, 7.5” x 8” is ideal – but you may use any size you’d like. (Note: For your own sizing, the length unfolded should be about double the height (ex. 8” unfolded is 16” by 7.5”).

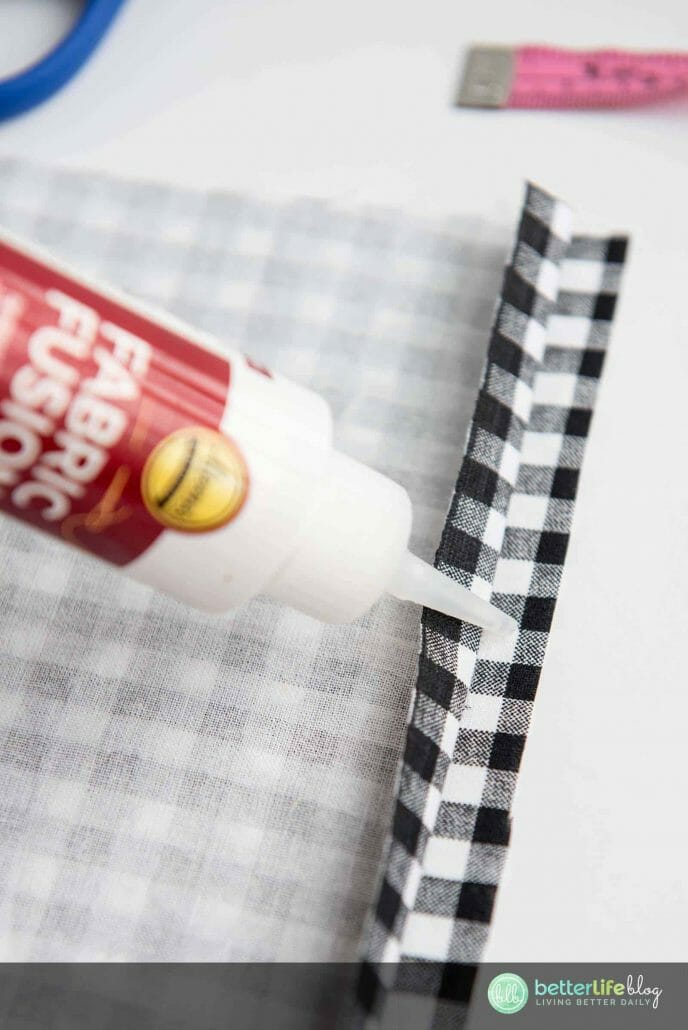
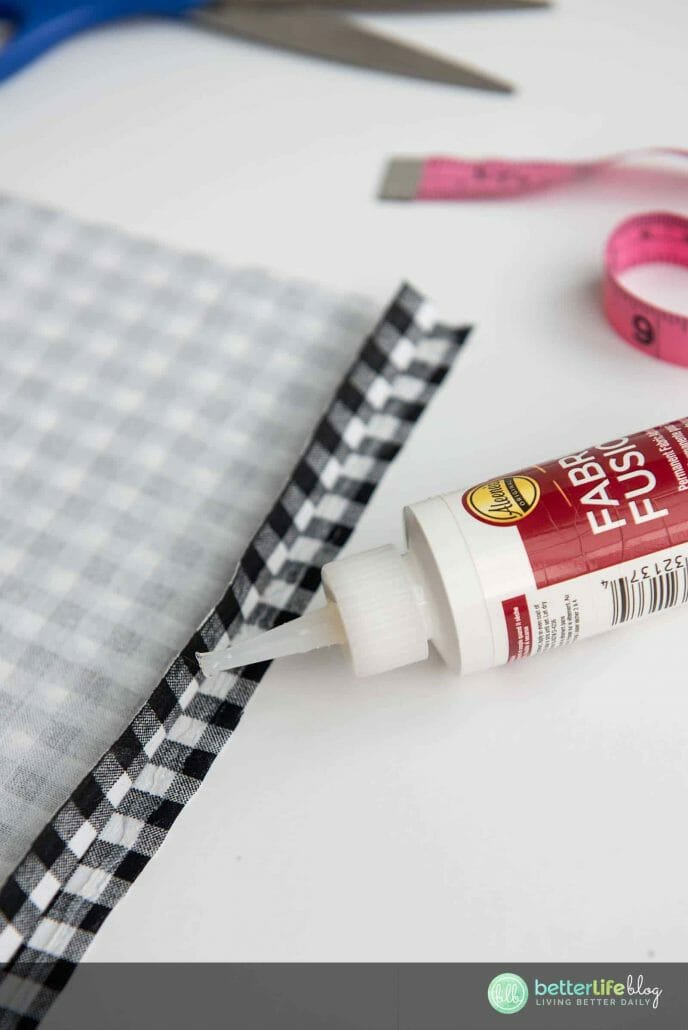
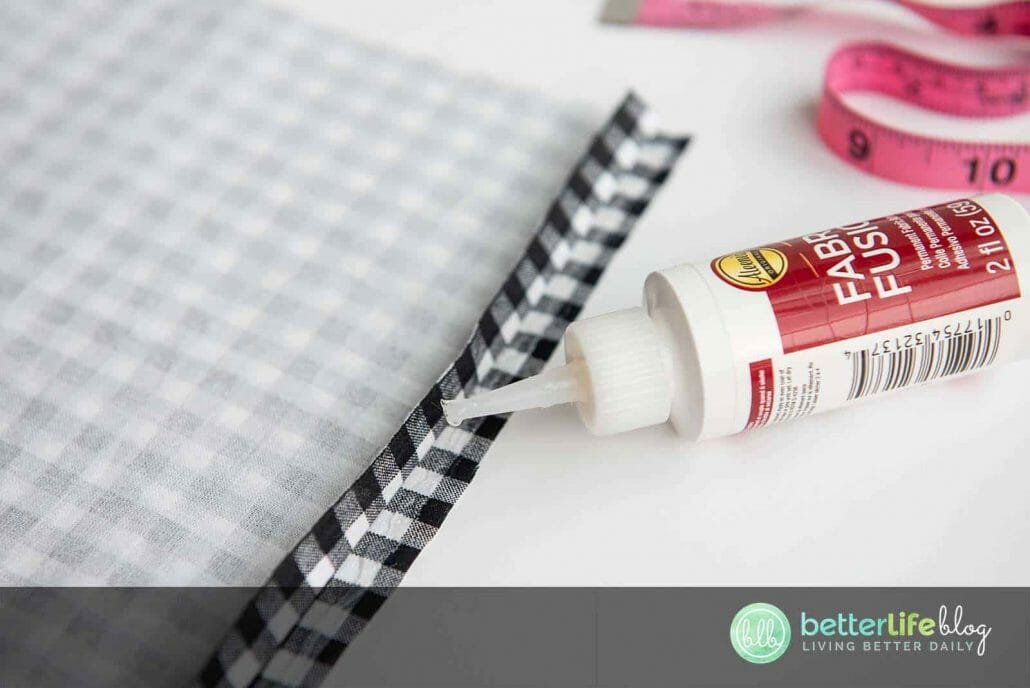
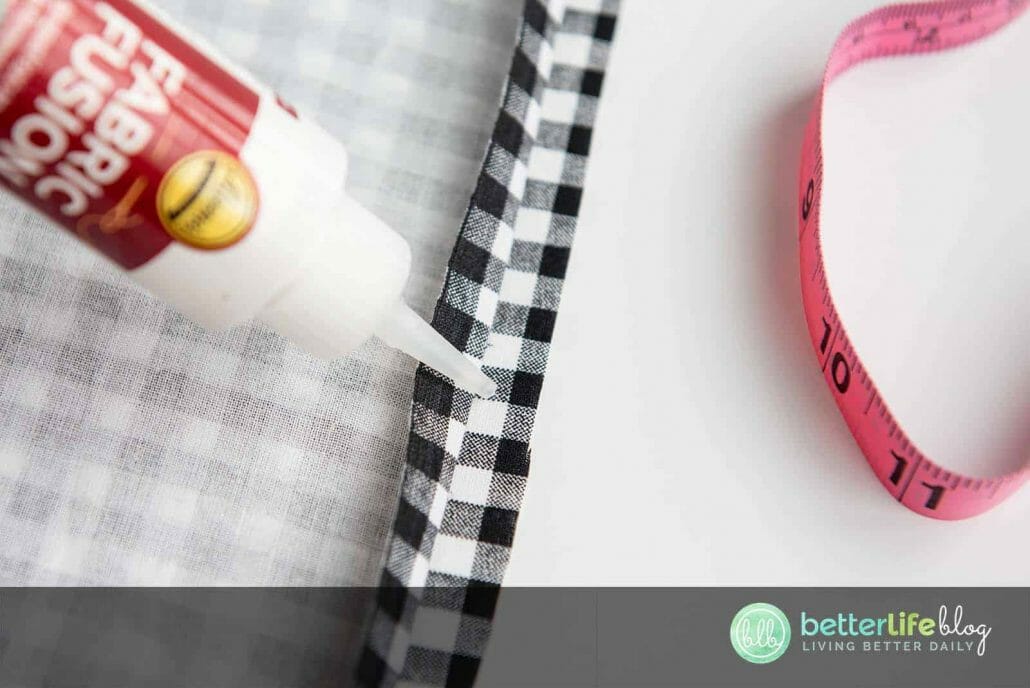
As the fabric is inside out, use fabric fusion (alternatively, you may use a hot glue gun) to fold over and glue about ¼ inch of the raw edge to create a faux hem. Set aside and allow to dry. This will create a small sleeve of fabric leaving the raw edge inside.
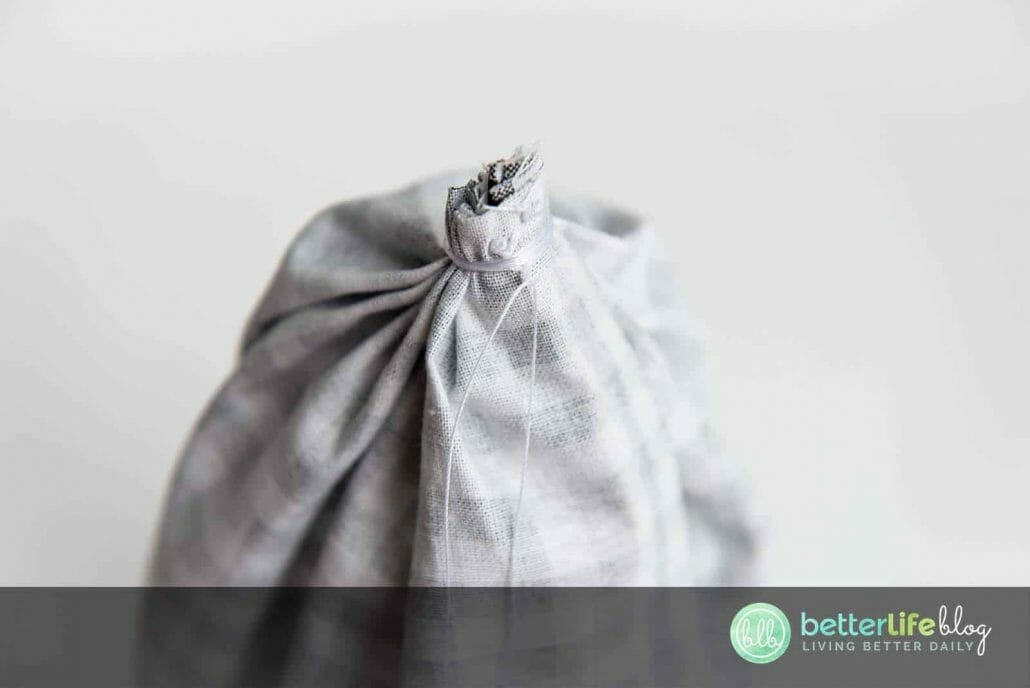
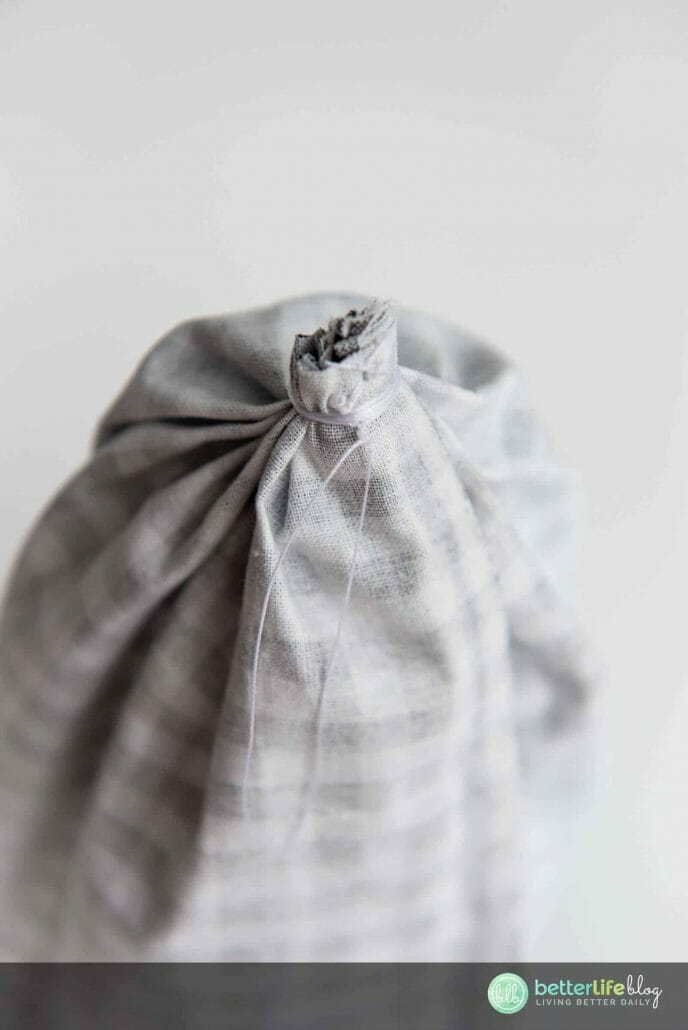
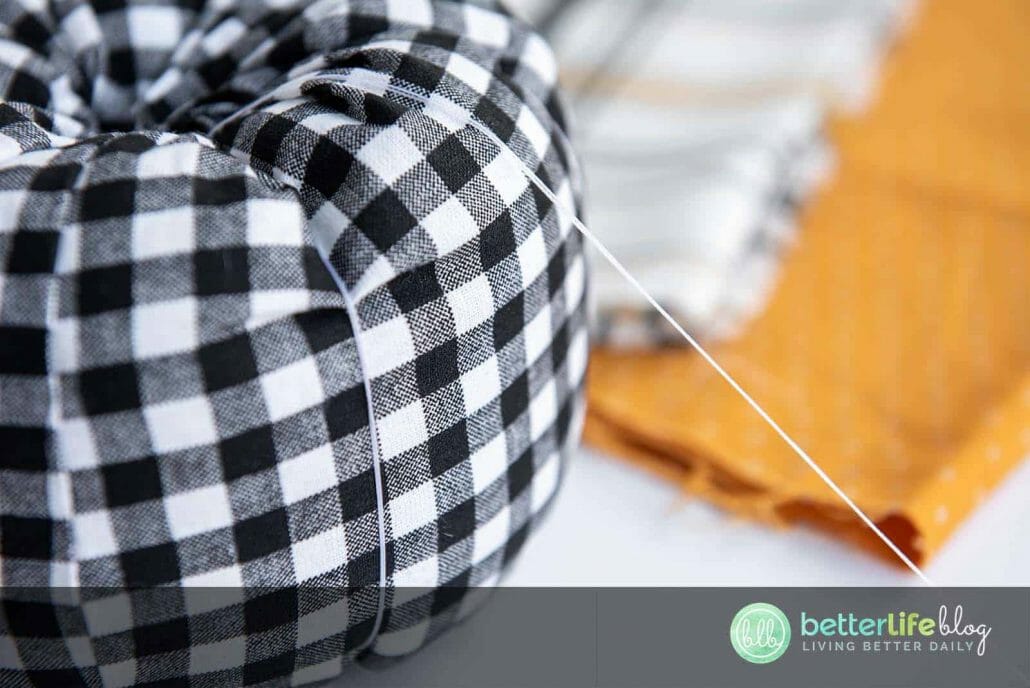
Next, double thread a hand sewing needle about an arm’s length of thread. Tie a knot at the ends of the thread to avoid any seems from popping later on.
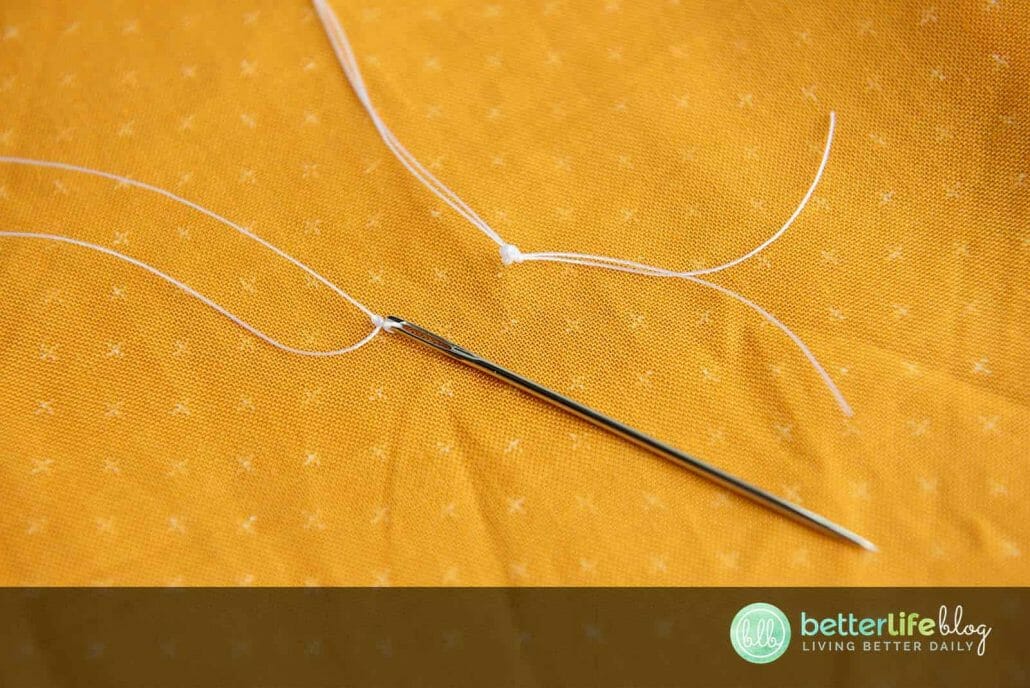
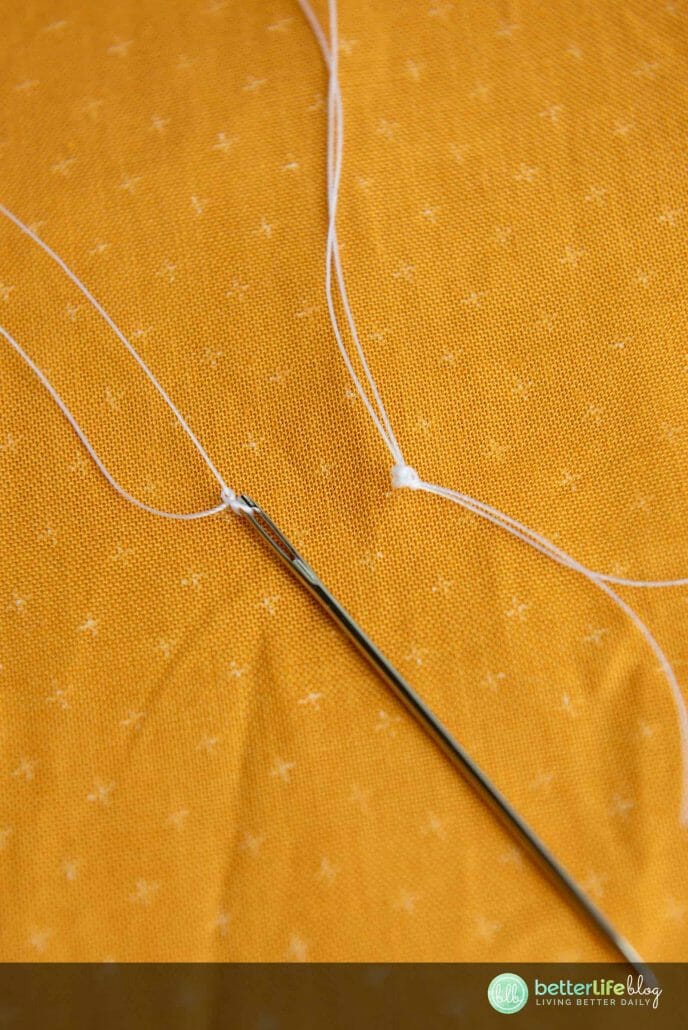
Starting at the left side of the faux hem, begin to weave the needle and thread around the diameter of the fabric (approximately ¼ of an inch from the raw edge). Once at the other side, pull the thread tightly and tie to secure.
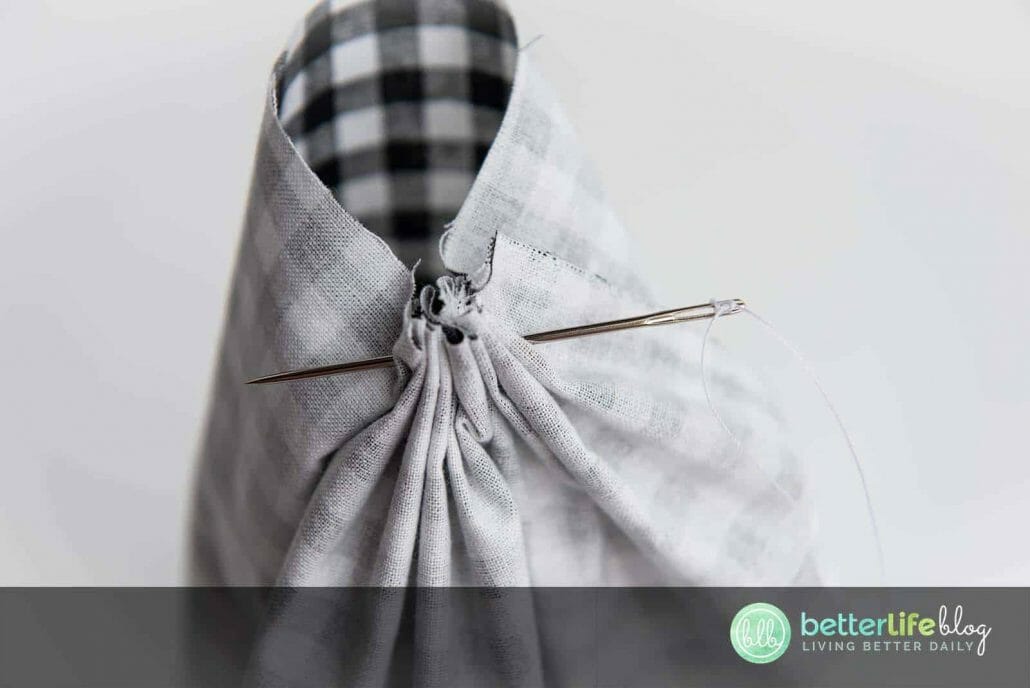
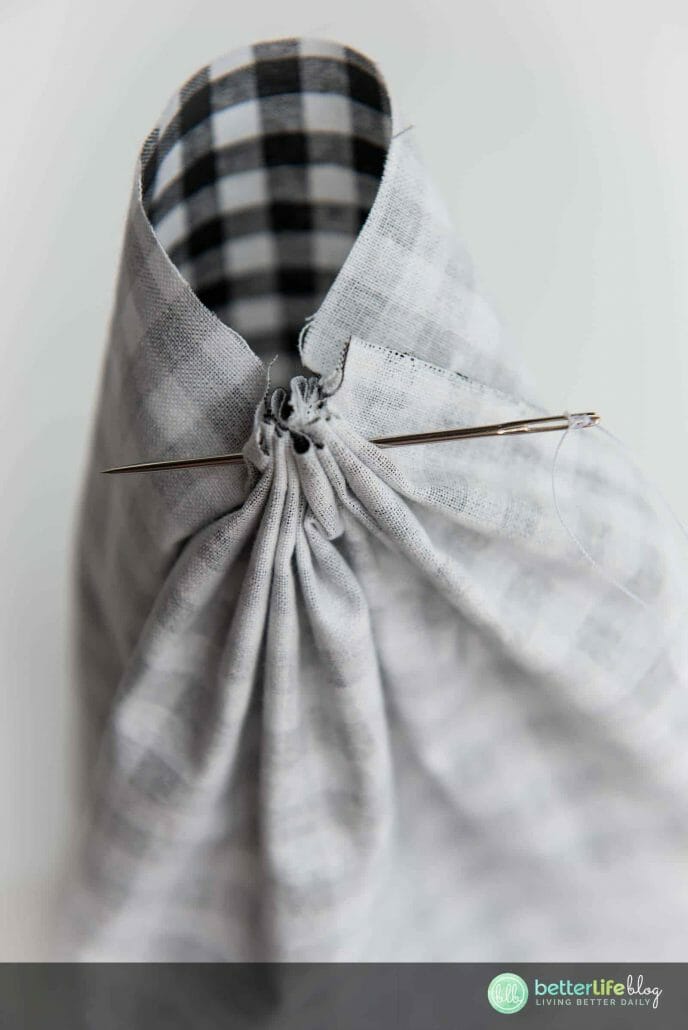


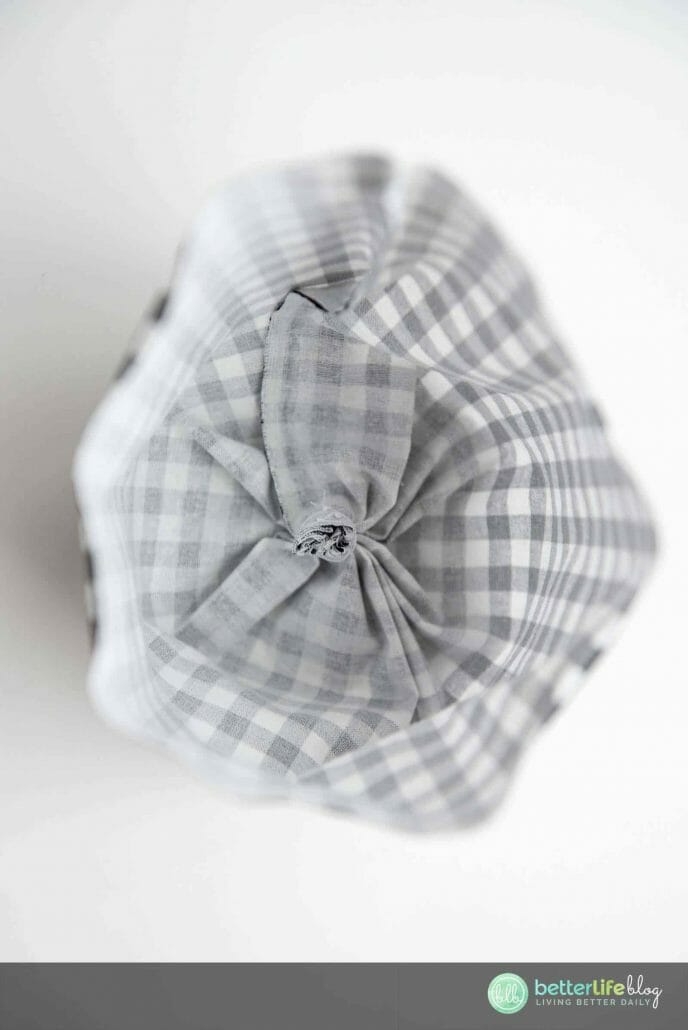
Next, take the thread leaving a small tail and gather the ruched fabric. Tightly wrap the thread around the fabric to create a small stem. Tie off the excess thread.
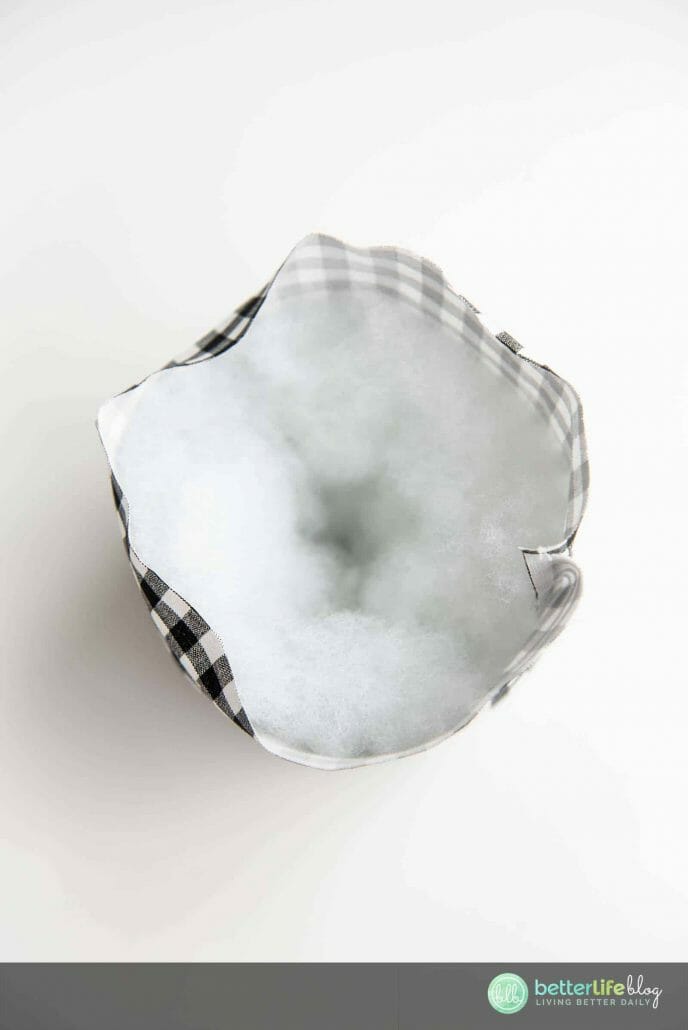
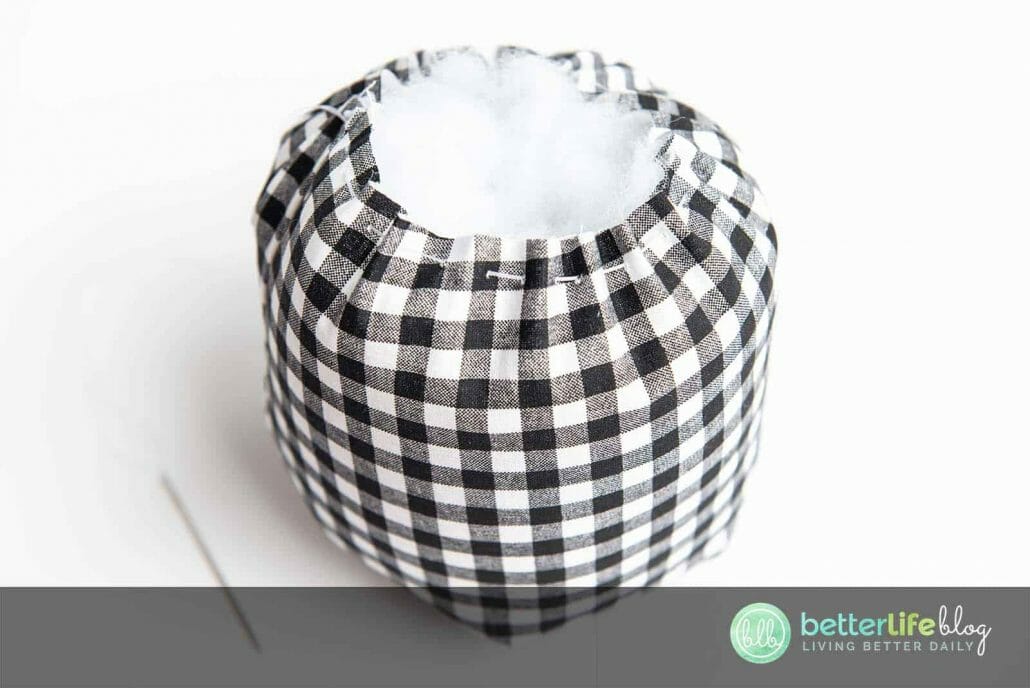
Grab the poly filling and stuff the pumpkin, ensuring to pack the sides. Leave the middle as open as possible, as this will help with the pleats later on.


Repeat the forth step to ruche and enclose the top of the pumpkin. Tie off once you add more poly fill and the pumpkin feels plump and full. To tie off, pull on the thread tightly, knot and trim any threads.


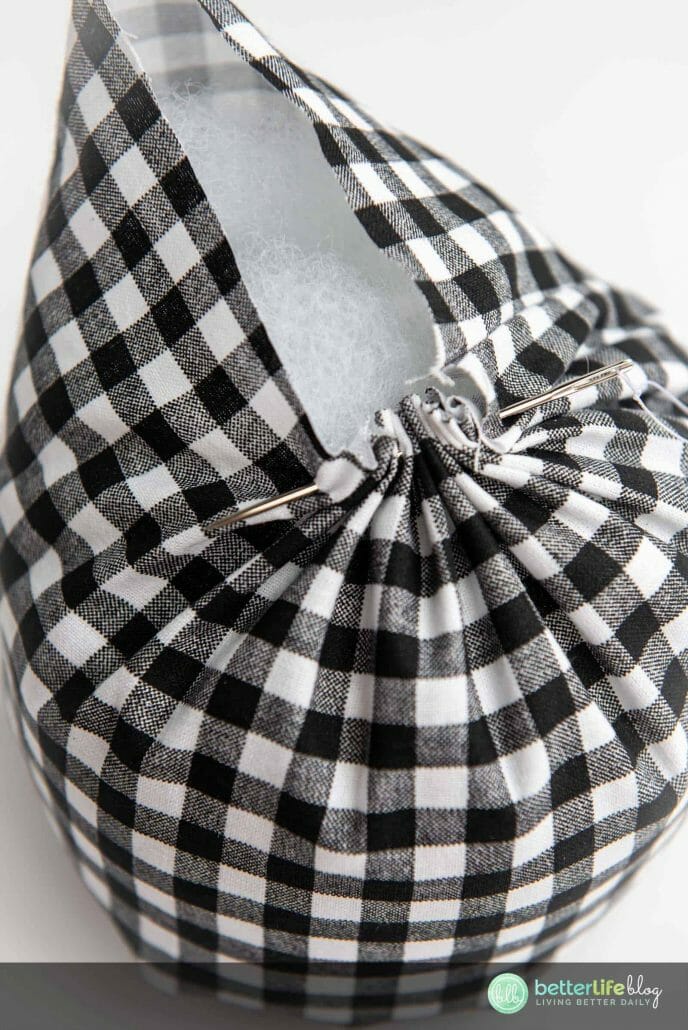
Be sure to double thread the needle one more time. You may create the pleats by threading the needle through the bottom of the pumpkin and up through the top. Pull the thread over the side of the pumpkin, pulling it tight and down to the bottom to repeat for another 4 pleats. Alternate the sides of each pleat. (Note: Ensure that you are keeping the thread tightly pulled while continuing to thread from the bottom to top. If you do not pull tightly enough, it will result in a loose thread, without a pleating effect.)


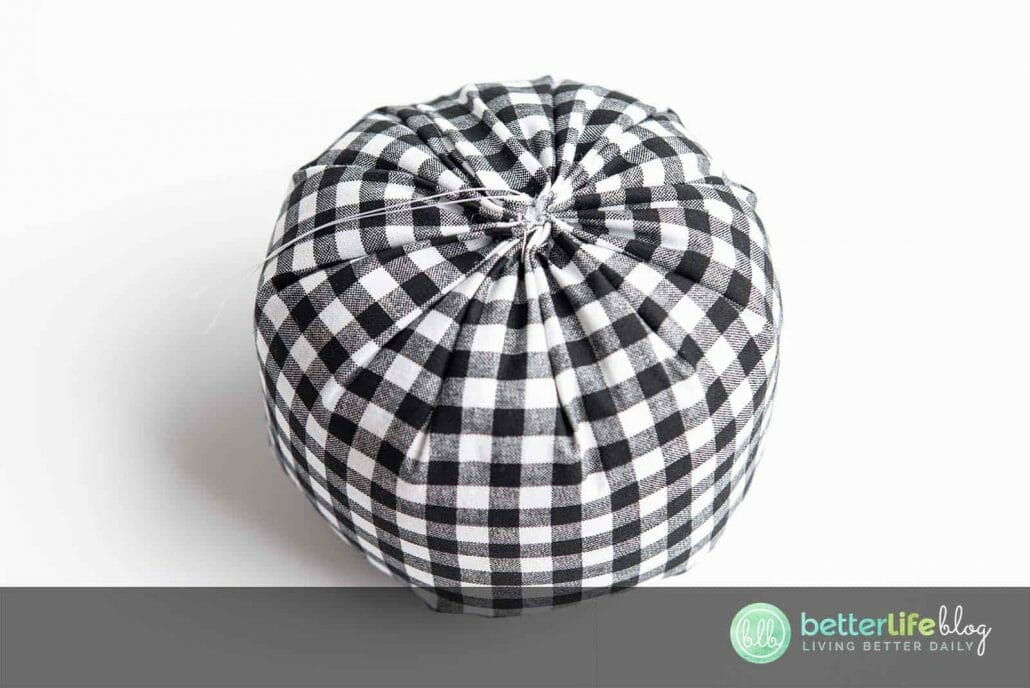
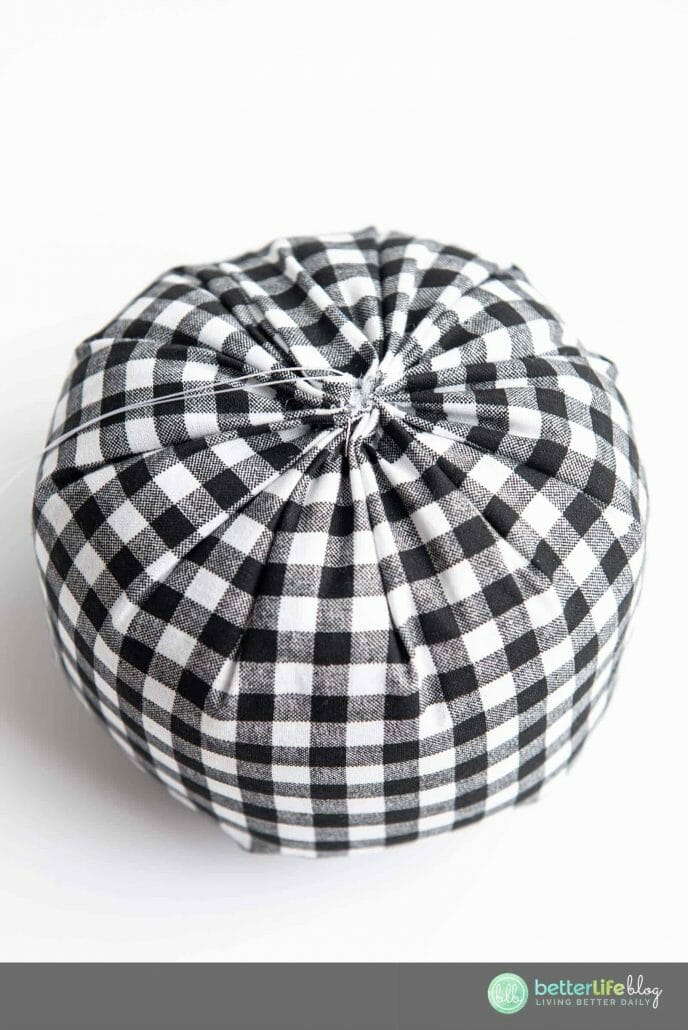
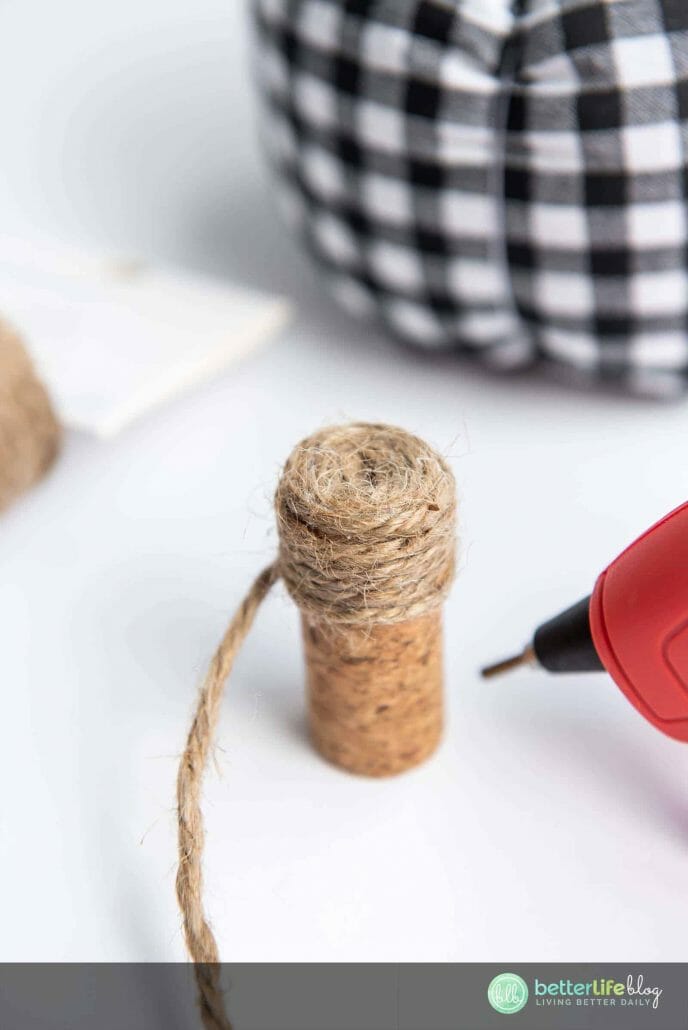
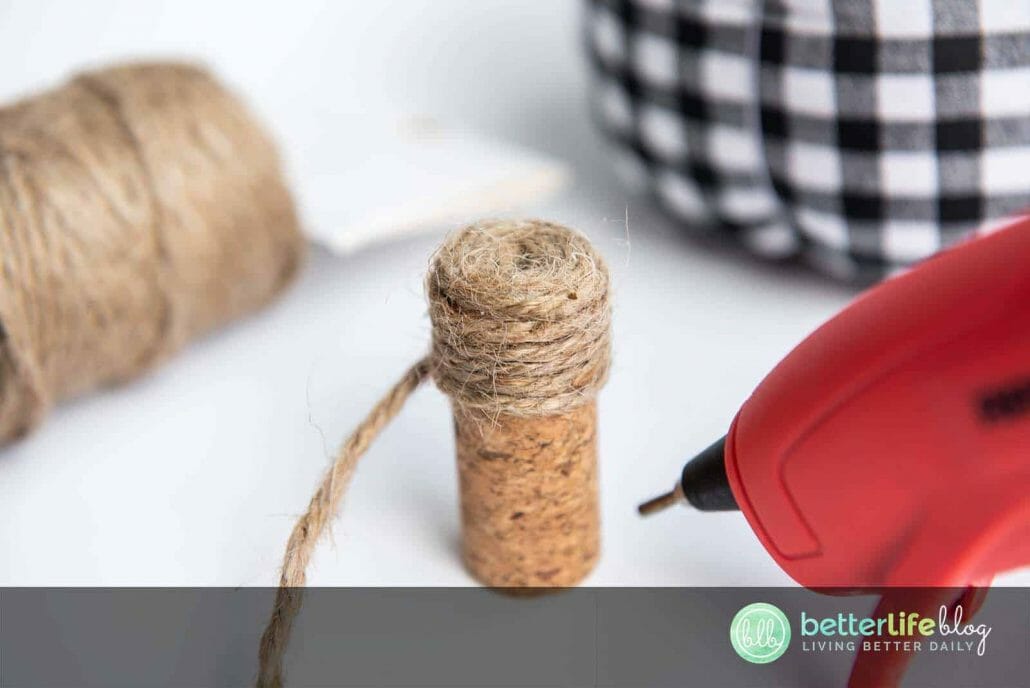
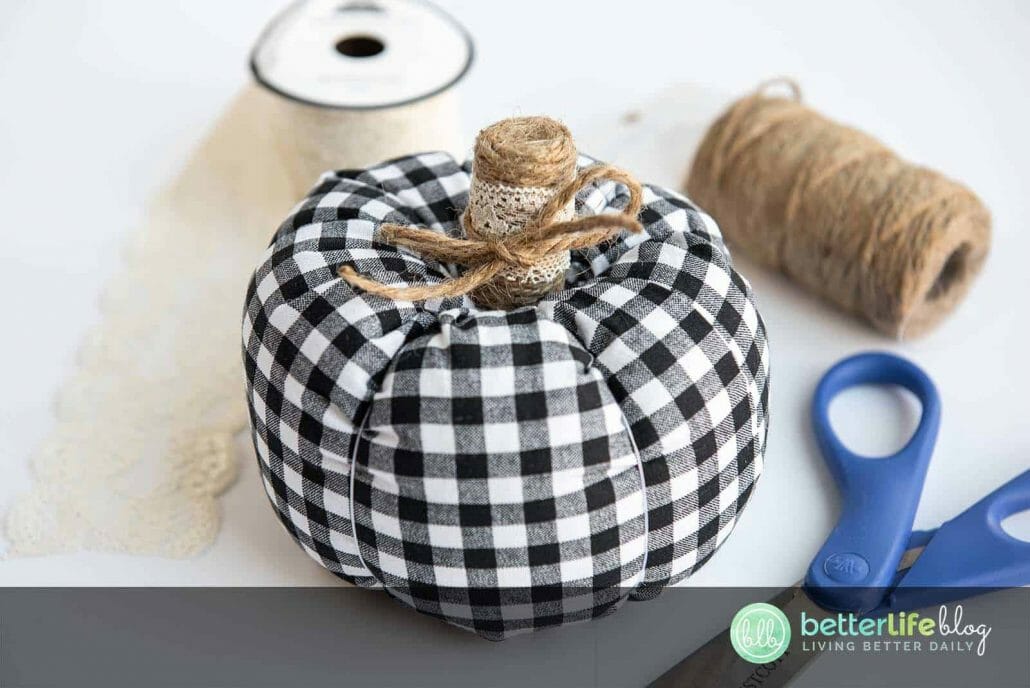
Next, wrap twine around the cork stem – hot glue until completely covered. Add a large amount of glue to the bottom of the cork and press it on the top of the pumpkin.


Tie some twine ribbon or fabric ribbon to give the pumpkin a decorative touch!


DIY Fabric Pumpkins - Easy to Make
Pumpkins are my favorite embellishments when it comes to autumn décor. Today, I am showing you how to make beautiful DIY Fabric Pumpkins - and they’re extremely easy to put together!
Materials
- 1/4 yard fabric (color of pattern of choice)
- Embroidery thread
- Hand sewing needles
- Fabric fusion
- Corks
- Hot glue gun and glue sticks
- Scissors
- Bag of poly fill
- Twine
- Ribbon or lace
- Seamstress measuring tape
Instructions
- The first step is to take the fabric and turn it inside out. Cut it to your desired size. For a medium-sized pumpkin,
7.5” x 8” is ideal - but you may use any size you’d like. (Note: For your own sizing, the length unfolded should be about double the height (ex. 8” unfolded is 16” by 7.5”). - As the fabric is inside out, use fabric fusion (alternatively, you may use a hot glue gun) to fold over and glue about ¼
inch of the raw edge to create a faux hem. Set aside and allow to dry. This will create a small sleeve of fabric leaving the raw edge inside. - Next, double thread a hand sewing needle about an arm’s length of thread. Tie a knot at the ends of the thread to avoid any seems from popping later on.
- Starting at the left side of the faux hem, begin to weave the needle and thread around the diameter of the fabric
(approximately ¼ of an inch from the raw edge). Once at the other side, pull the thread tightly and tie to secure. - Next, take the thread leaving a small tail and gather the ruched fabric. Tightly wrap the thread around the fabric to
create a small stem. Tie off the excess thread. - Grab the poly filling and stuff the pumpkin, ensuring to pack the sides. Leave the middle as open as possible, as this will help with the pleats later on.
- Repeat the forth step to ruche and enclose the top of the pumpkin. Tie off once you add more poly fill and the pumpkin feels plump and full. To tie off, pull on the thread tightly, knot and trim any threads.
- Be sure to double thread the needle one more time. You may create the pleats by threading the needle through the bottom of the pumpkin and up through the top. Pull the thread over the side of the pumpkin, pulling it tight and down to the bottom to repeat for another 4 pleats. Alternate the sides of each pleat. (Note: Ensure that you are keeping
the thread tightly pulled while continuing to thread from the bottom to top. If you do not pull tightly enough, it will result in a loose thread, without a pleating effect.) - Next, wrap twine around the cork stem - hot glue until completely covered. Add a large amount of glue to the bottom of the cork and press it on the top of the pumpkin.
- Tie some twine ribbon or fabric ribbon to give the pumpkin a decorative touch!