
Craft Tools
How to Remove HTV with a Clothing Iron and Tweezers
Mistakes happen – and more often than not, they can be fixed! Learn how to remove HTV with basic household supplies (including a clothing iron


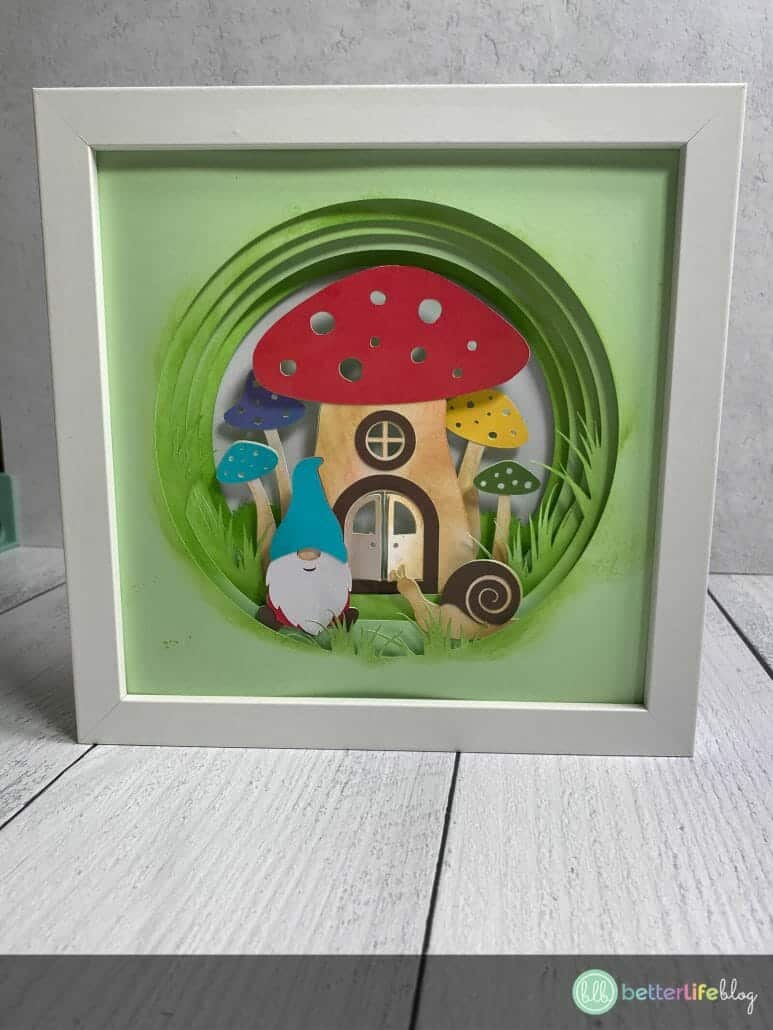
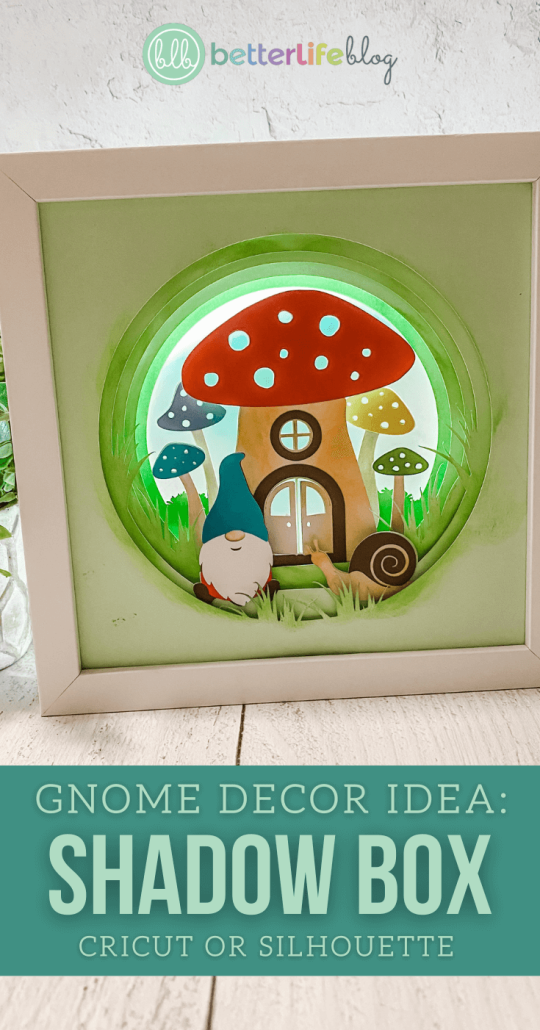
If you’re looking for some new Cricut shadow box ideas, look no further! Our DIY Gnome Shadow Box is absolutely adorable. It’s a great piece for the holiday season, but is equally as beautiful to display in your home year-round.
Hello, crafty friends! Welcome back to Better Life Blog, a blog dedicated to crafty tutorials using your cutting machine (like your Cricut or Silhouette). I’m so glad to have you here today!

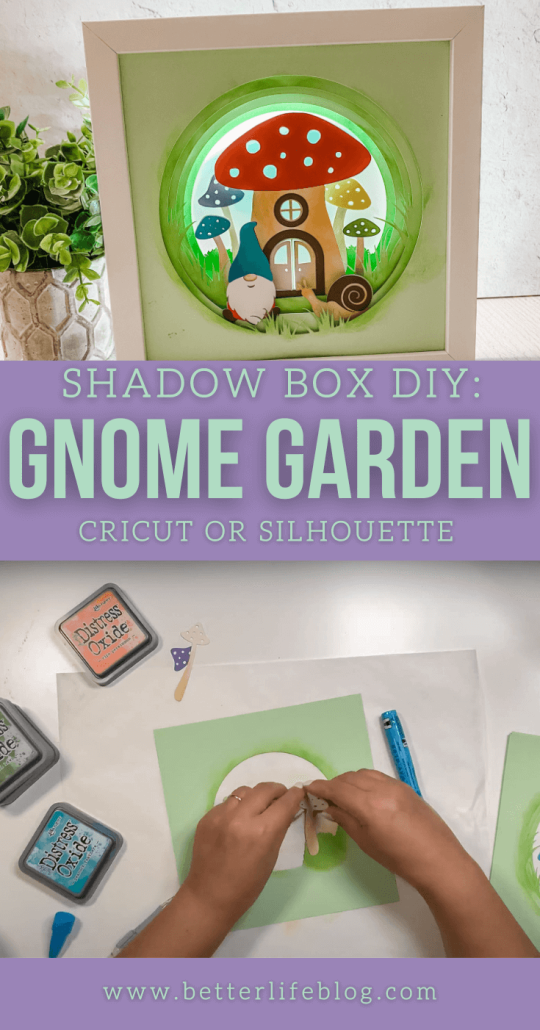
I’m very proud to present my latest creation: a DIY Gnome Shadow Box. Making shadow boxes with your Cricut or Silhouette is easier than you think! Don’t be intimidated! They may look complicated and intricate, but putting one together is rather quick… and they always make for the cutest gifts!
Do you love shadow boxes? I don’t blame you! Shadow boxes are one of my all-time favorite Cricut/Silhouette projects. Here are more of my shadow box crafts that I recently put together:
I’m so glad you asked! Grabbing this file is very simple: all you have to do is log onto your VIP Crafters Club dashboard and download the October 2021 files. You will find the Gnome Shadow Box SVG file in there.

If you’re not yet a member of our VIP Crafters Club, all you have to do is click here to join! Becoming a member unlocks hundreds of cut files for you and gives you access to our online community, where we make crafts together every month!
Otherwise, you can download the Gnome Shadow Box cut file here.
Absolutely not – especially with my original cut files! I design them so that they’re very easy to assemble! For most of my shadow boxes, all you have to do is layer each piece one by one. As you layer each of the cardstock pieces, you will start to see the design slowly take shape. It’s always amazing to see the final product once you place your last layer on the top!
I most certainly do! Be sure to check out these shadow box SVG files that I created:
3-D Layered Winter Scene Shadow Box
Tree With Birds Scene 3-D Layered Shadow Box
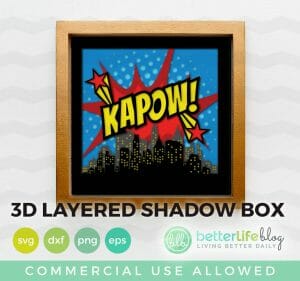
Comic Shadow Box BOOM SVG Cut File
To put together your Gnome Shadow Box, you will need the following tools and supplies:
Cricut or Silhouette machine
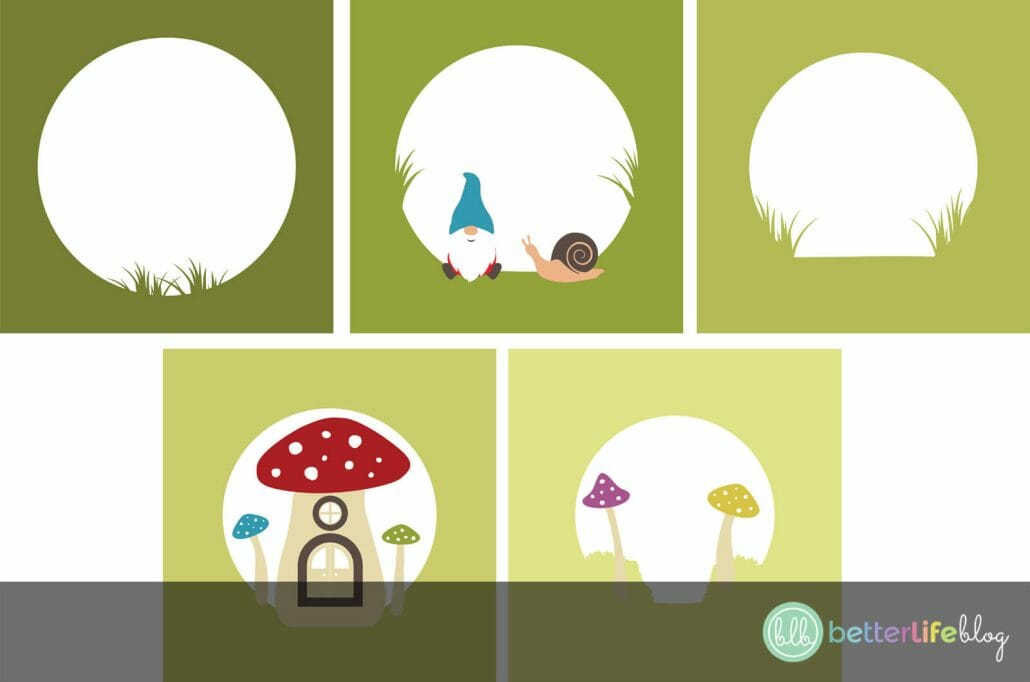
Colored cardstock (we used different shades of green as the main base for each layer, and various colors for the layers’ pieces – please refer to the screenshot of the SVG below, as you can use it as your guide)
Begin by downloading my Gnome Shadow Box SVG cut file. Then upload it to your program of choice (ie.: the program that corresponds with your cutting machine).
Adjust the layers so that they’re the same size as the interior of your shadow box. In my case, I adjusted mine to be 8×8 so that it could fit into my 9×9 shadow box frame.
Follow the steps on your design program to cut each of the layers and their corresponding pieces. Weed out any necessary pieces from each cardstock layer.
Be sure to keep your cut-out layers in order! Please refer to the screenshot below: working from left to right, the top layer is the design that’s on the top row to the very left. The most bottom layer is the design that’s on the bottom row, to the right.
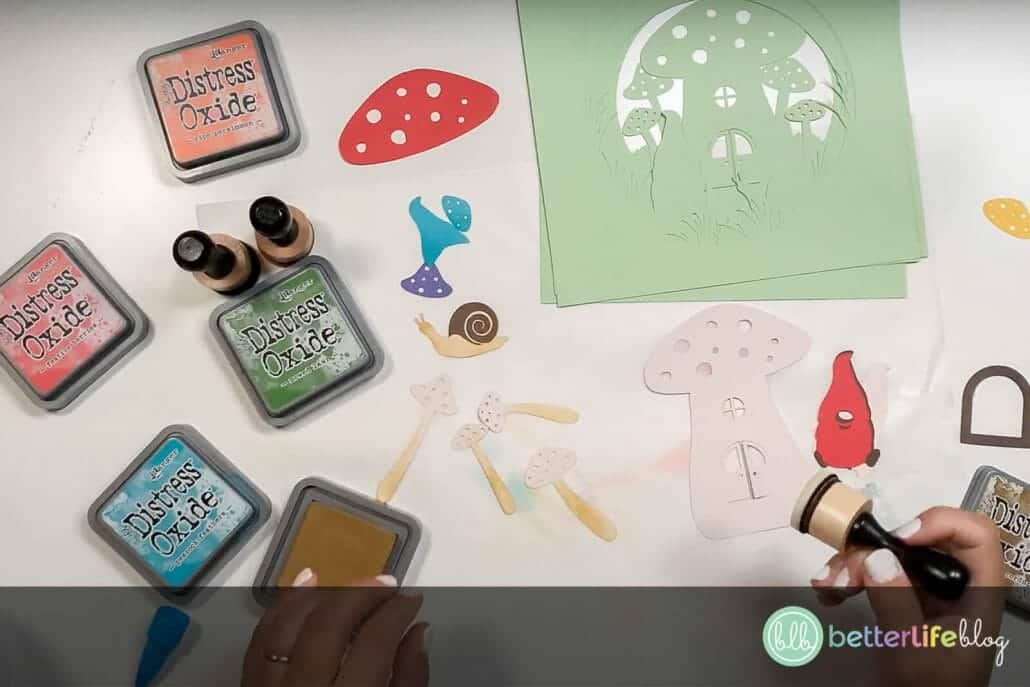
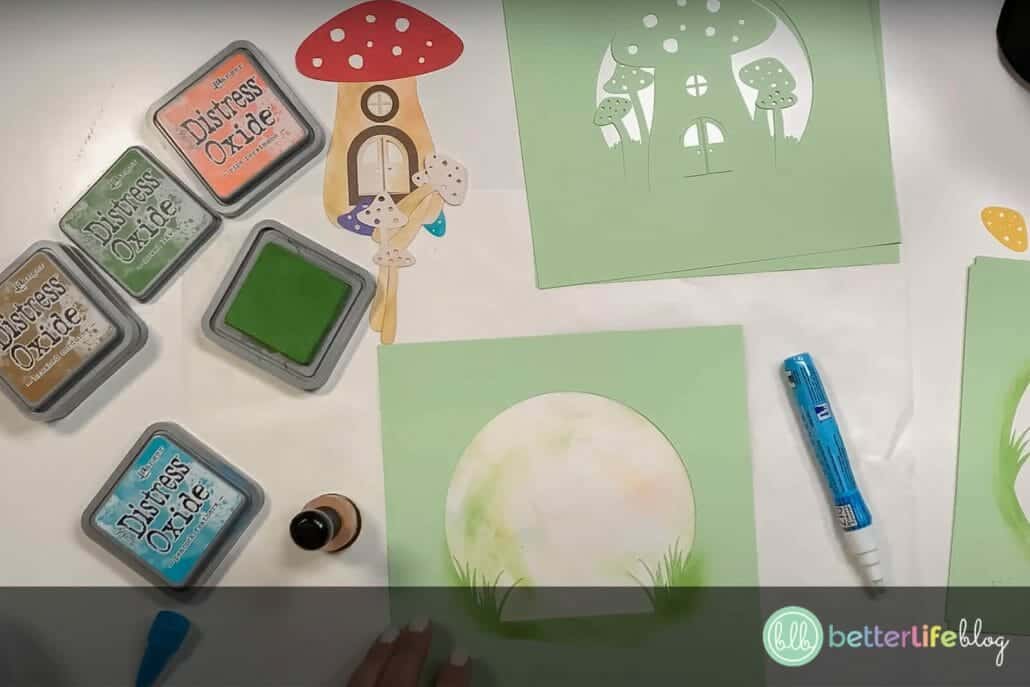
For each layer, glue its corresponding pieces (mushrooms, gnome details, etc.)
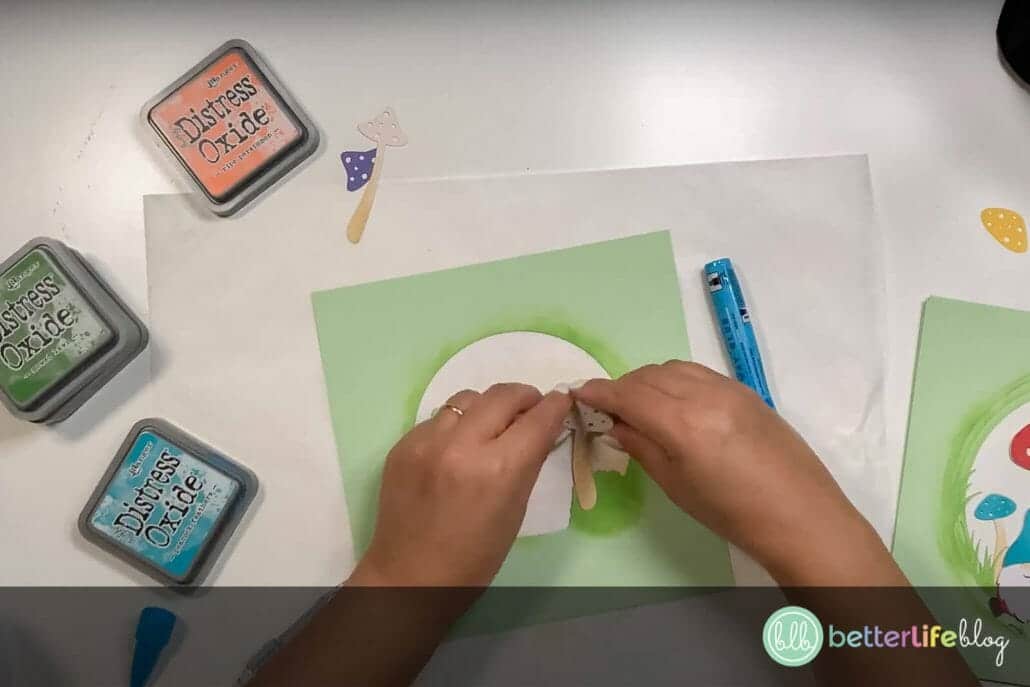
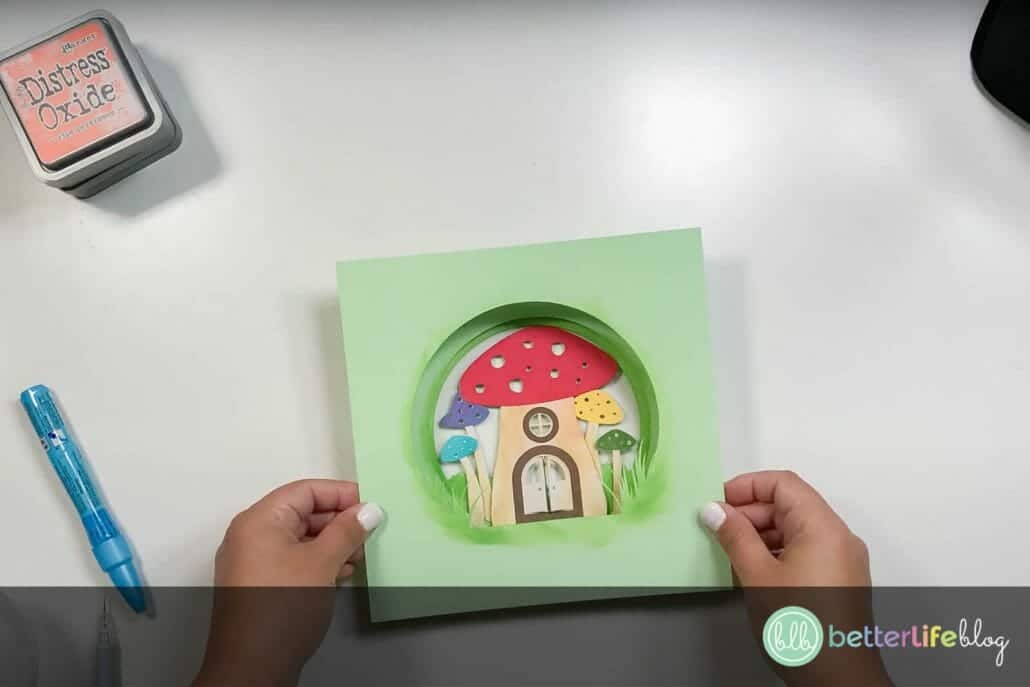
Use your Distress Oxide Ink to add distress details to elements of your layers, like mushroom stems, around the borders in the center of your layers, etc.
Next, turn over your shadow box (glass facing down), and open its backing. Using your scraper, remove the canvas covered pad that is attached to the backing material.
Now, it’s time to layer! Add double-sided foam tape along the edges of the front of your last layer (so the design that was on the bottom row, to the very right).
Remove the backing of the foam tape, revealing the sticky part, and add the next layer on top. Continue doing this until you reach the last layer (ie.: the design that was on the top row to the very left). Set aside.
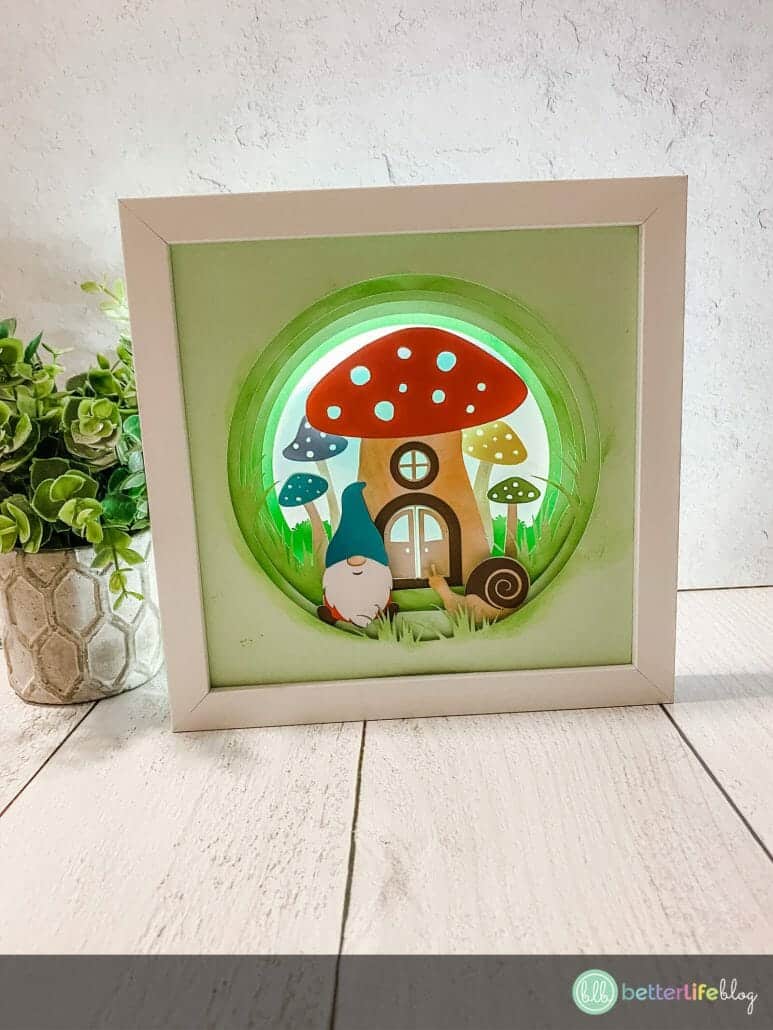
Add a light strip to your shadow box frame by removing the backing to your LED light strip. Attach to the inner edges of your frame, trimming where necessary.
Add your attached layers into the frame. Place back the frame’s backing and press the tabs down to hold your project in place. You may either present the shadow box with the lights on or off – either way, the design will look amazing!


Mistakes happen – and more often than not, they can be fixed! Learn how to remove HTV with basic household supplies (including a clothing iron

I hope you’re ready to add a touch of elegance and shimmer to your crafting projects because today’s tutorial is all about the mesmerizing art

I love making three-dimensional projects using my Cricut and Silhouette machines! Whether it’s a favor box, pop up card or 3-D Paper sculpture, any folded

This easy-to-make piano pop-up card is perfect for the music connoisseur in your life. Make it with the help of your trusty Cricut or Silhouette.

If you’ve been with me for a minute, then you already know how much I love making shadow box designs! It’s one of my absolute

Ironing heat transfer vinyl onto wood is a great way to add a personal touch to your home decor or create unique gifts for your


This course is for beginners who want to learn to use their cutting machines! There are two course options: Cricut Cutting Basics or Silhouette Cutting Basics! Click the button below to enroll for free
