I love it when kid-friendly activities have an educational twist to them. It’s always tons of fun to play “mad scientist” with my kiddos – especially on a rainy afternoon.
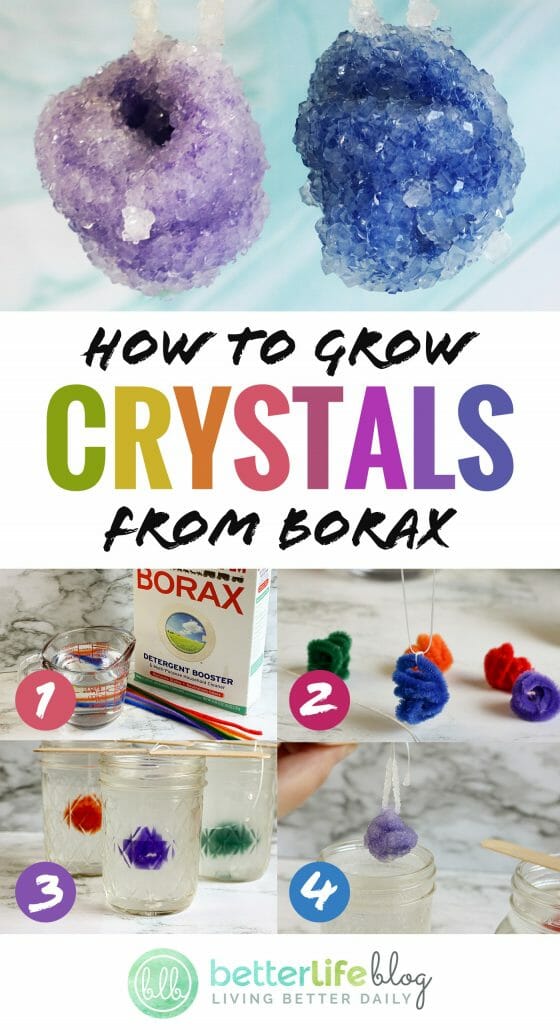
Today, I’m going to show you how to grow crystals. With a few simple materials (and some very easy steps!), you’ll see crystals form before your very own eyes. Your kids will be absolutely amazed with the process!
Growing crystals is not hard at all – and it’s a great learning experience for your little ones. Like I said, I’m all about a good educational DIY. Remember my color-changing slime experiment and how I made my own rock candy? Well, if you liked those, then you’ll certainly enjoy this “how-to” on growing crystals. Have fun!
Materials and Tools Needed:
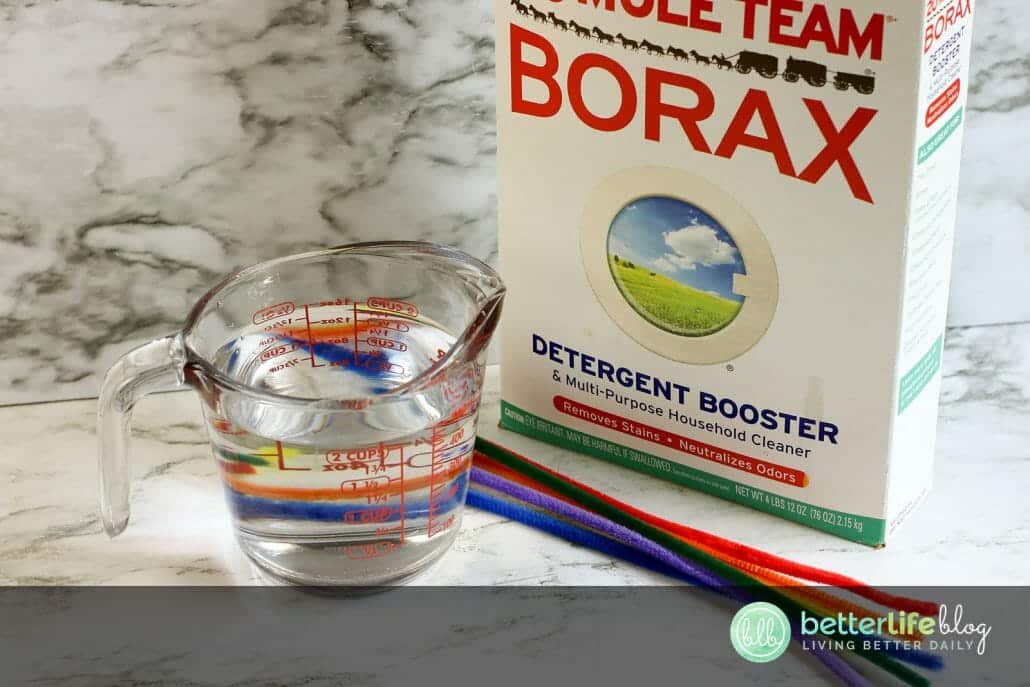
- 2 cups water
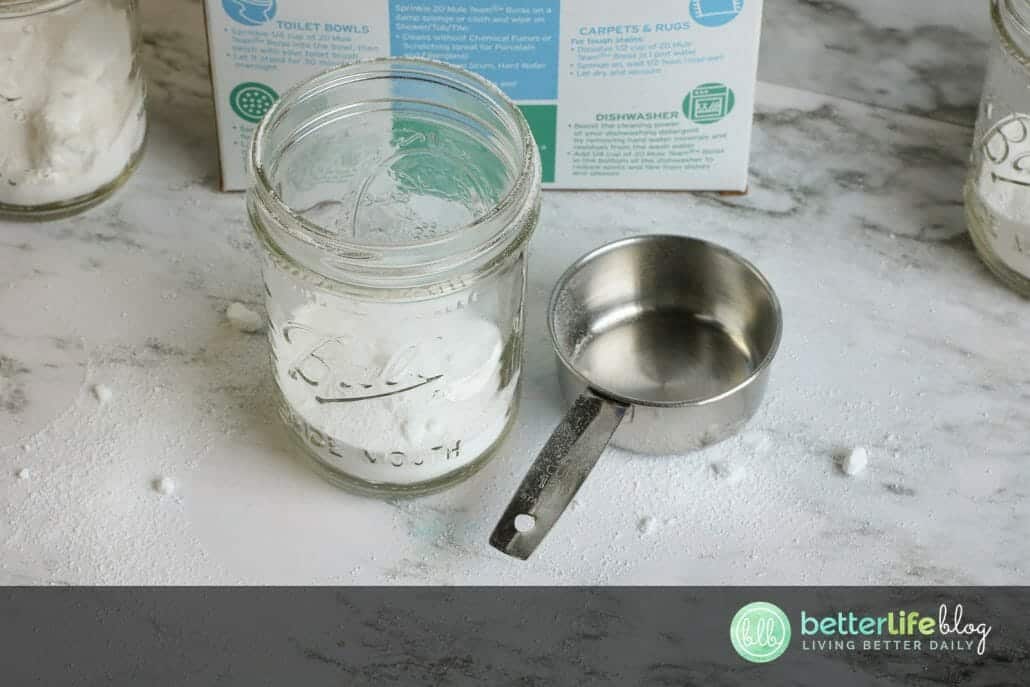
- ¼ cup Borax detergent booster (for each jar)
- Chenille stems, 1 for each crystal
- Scissors
- Wide-mouth jars or glasses, 1 for each crystal
- Thread or thin string
- Popsicle sticks
Directions:
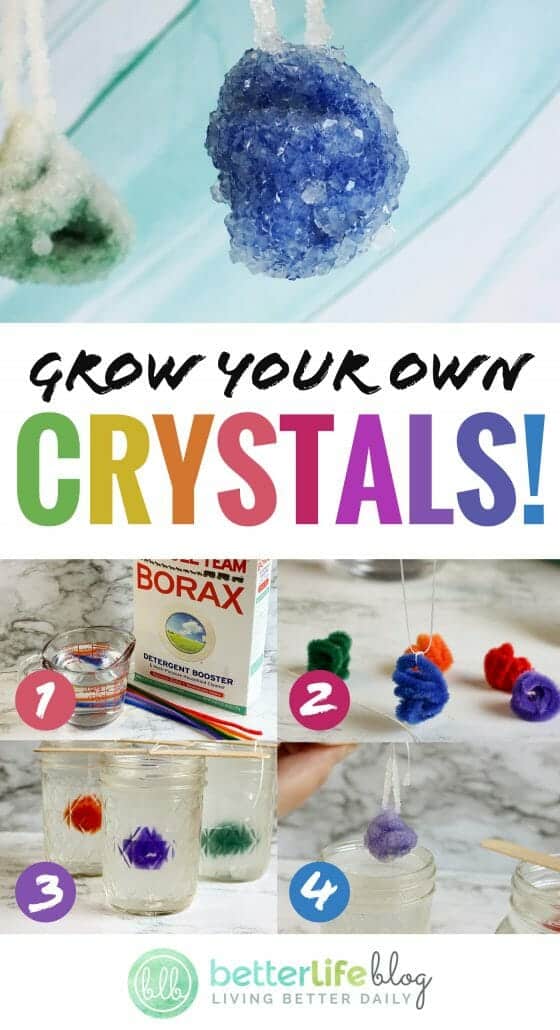
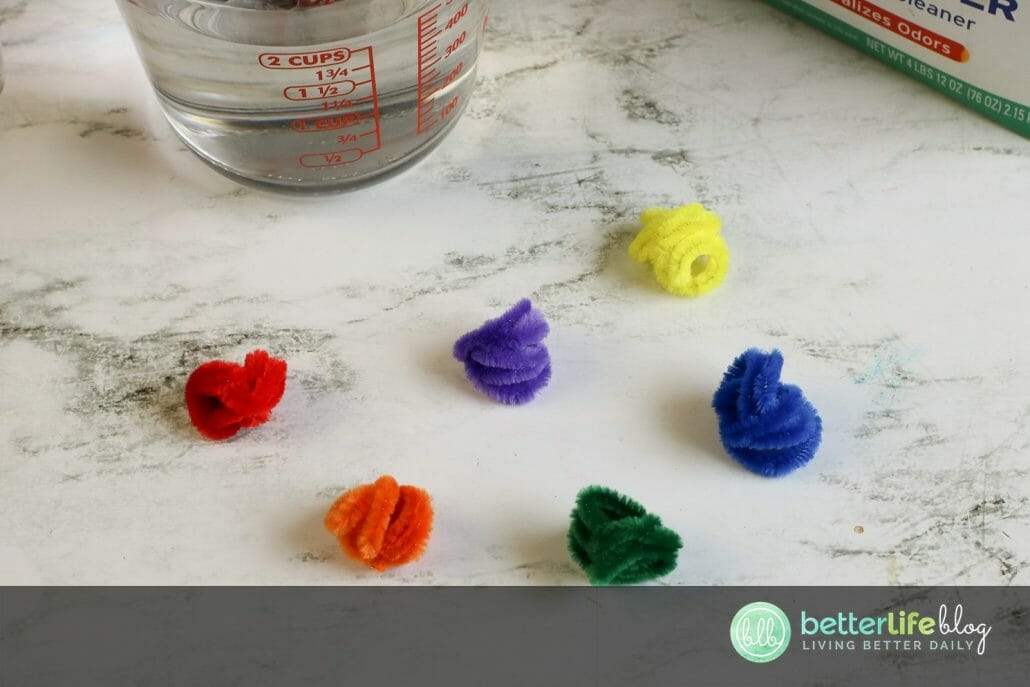
Begin by twisting your chenille stems into stone-like shapes. Remember, it takes one chenille stem for each crystal.
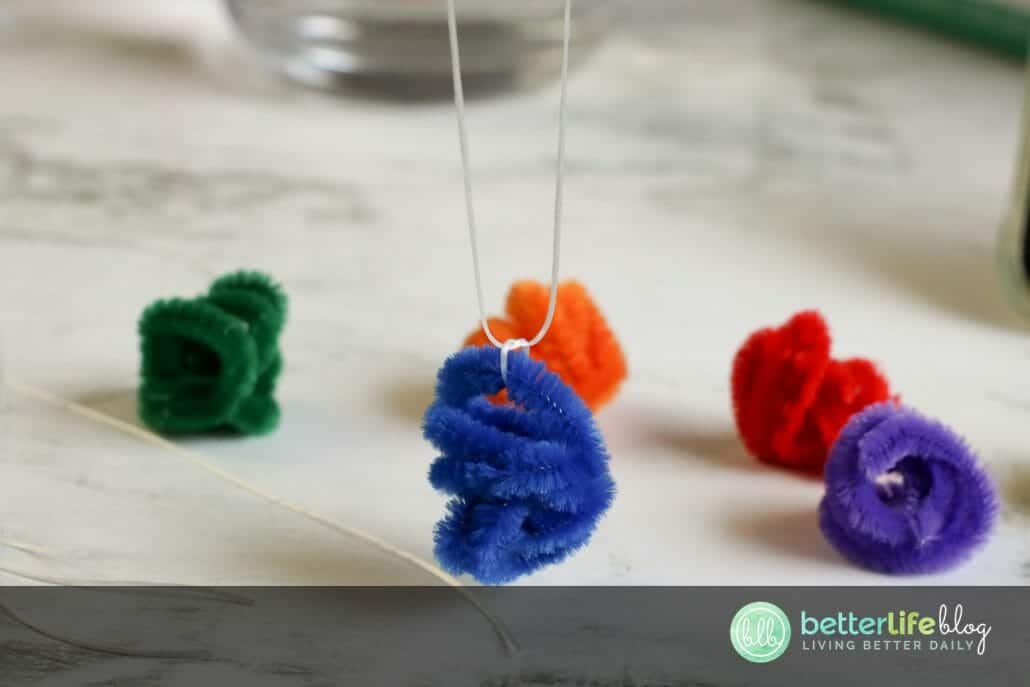
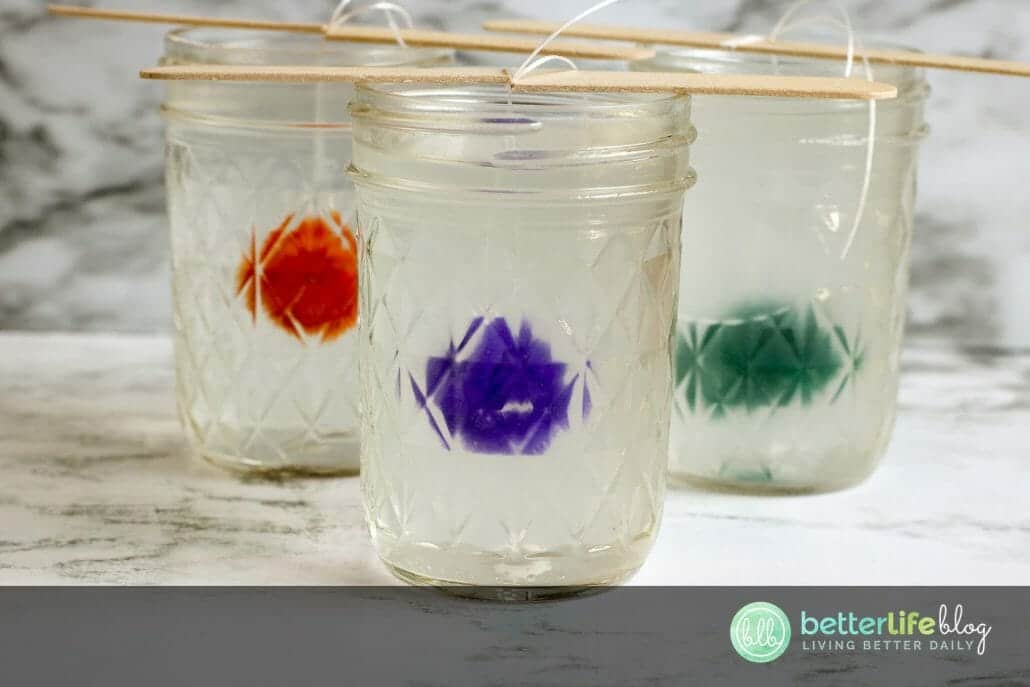
Attach a string on each chenille stem – this will allow them to each hang in their own jar.
Place borax powder in each wide-mouth jar.
In a medium stock pot, bring the water to a boil. Slowly pour the water into each jar. Be sure to pour slowly – this will allow the jar temperature to adjust so it does not crack. Stir the mixture until all of the borax powder is dissolved.
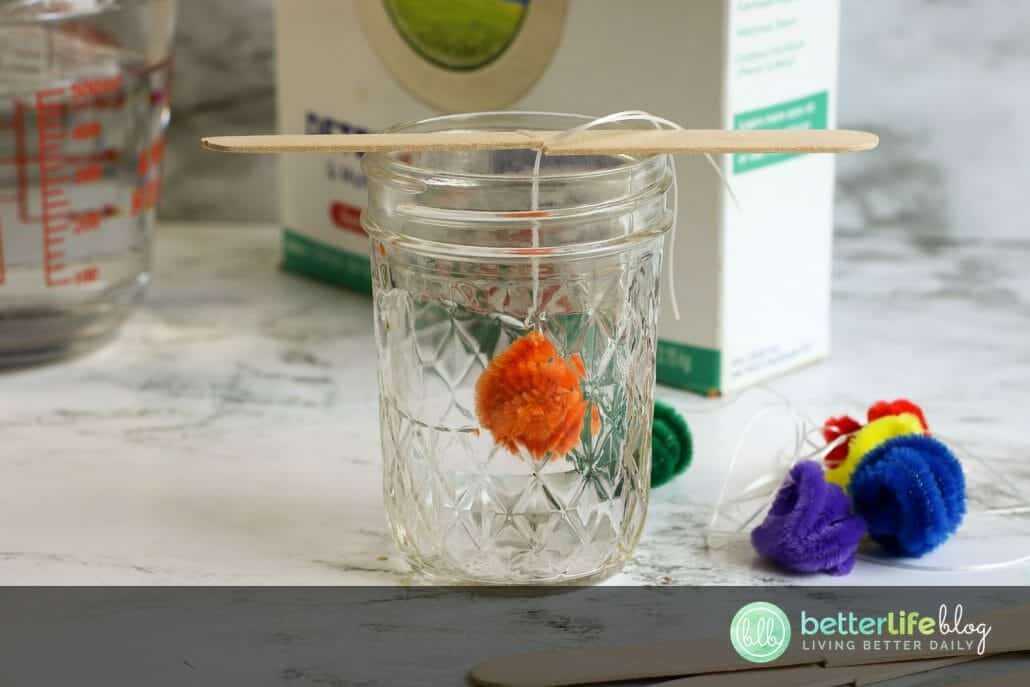
Attach the stringed chenille stem “stone” onto a popsicle stick and drop into the borax solution. This will ensure that the chenille stem hangs in the middle of the jar without touching the edges or the bottom.
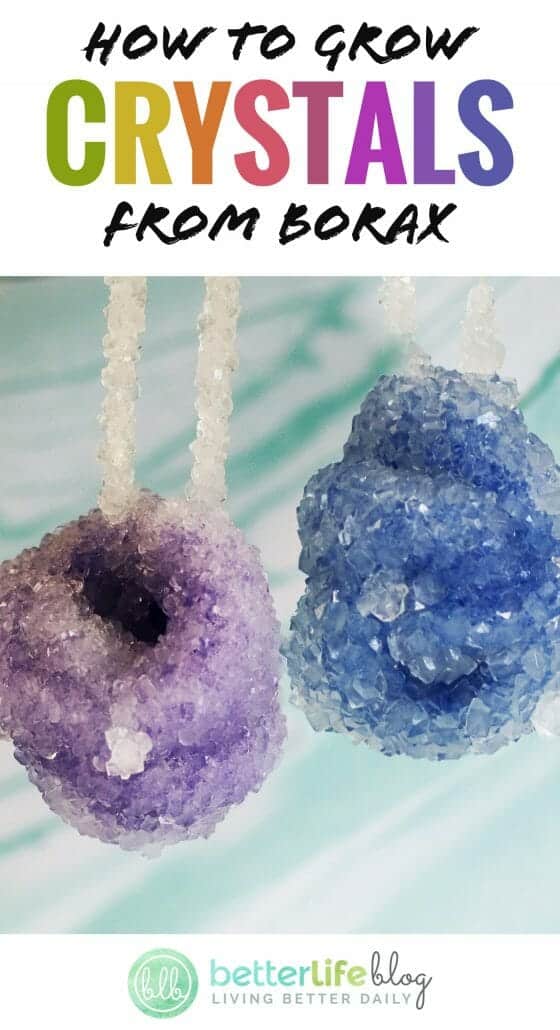
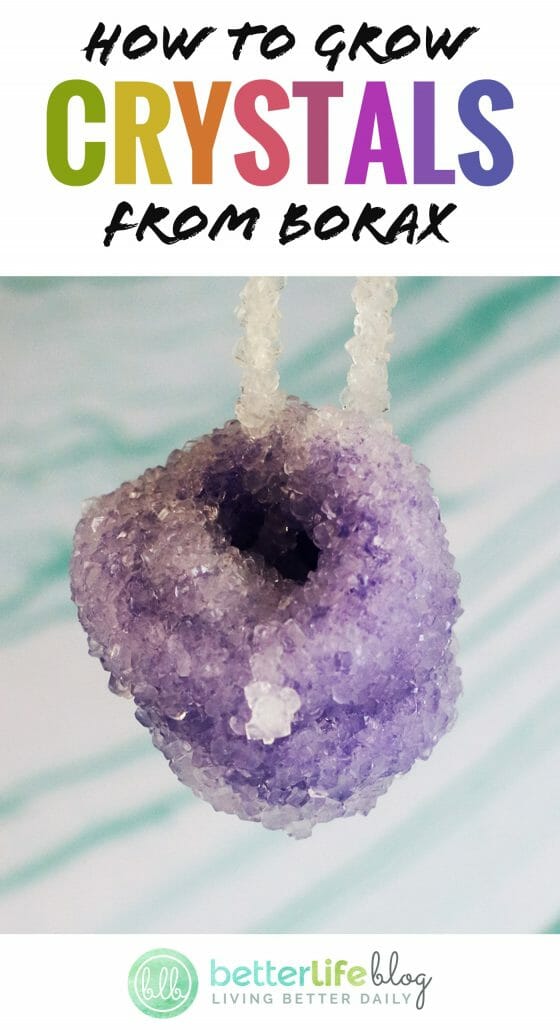
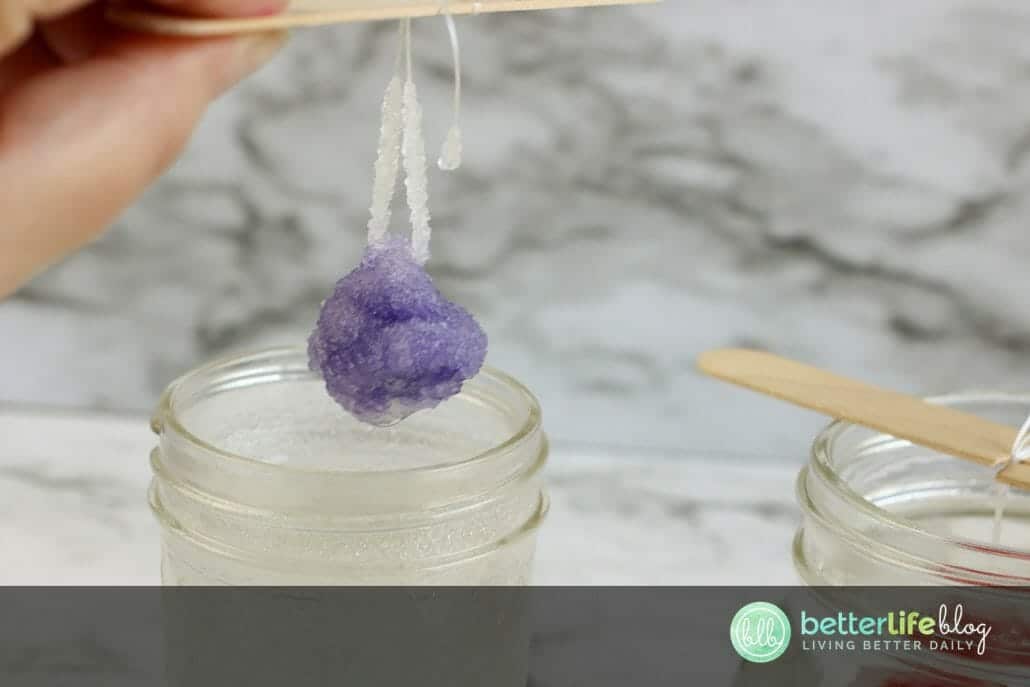
As soon as the mixture starts to cool, crystals will begin forming. This can begin in as little as two hours! For the best results, avoid disturbing the chenille stems for 24 hours.

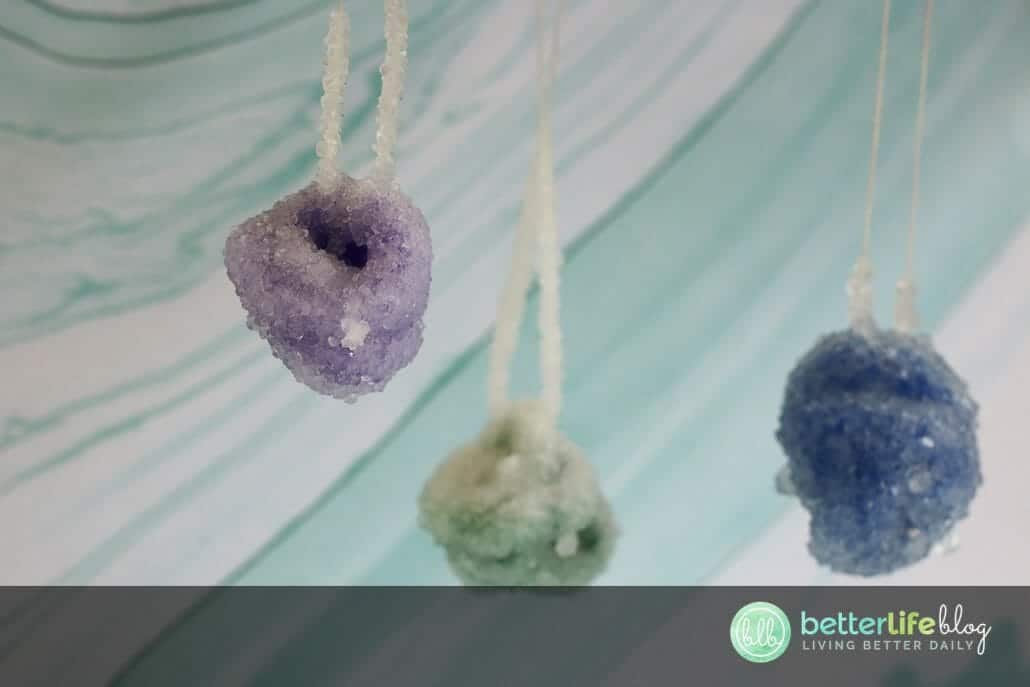
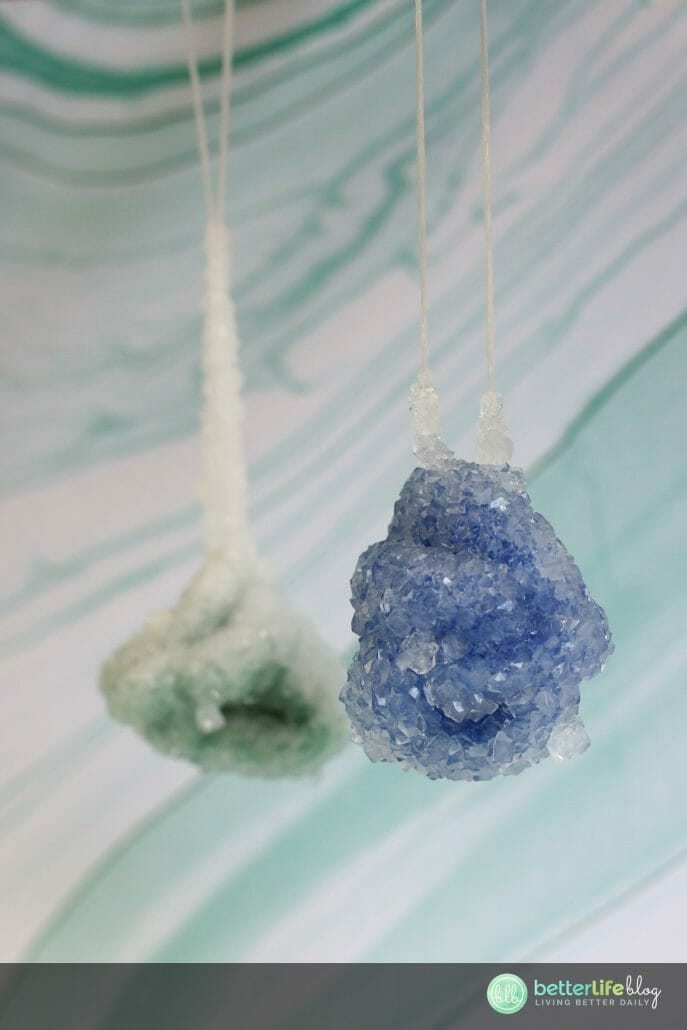
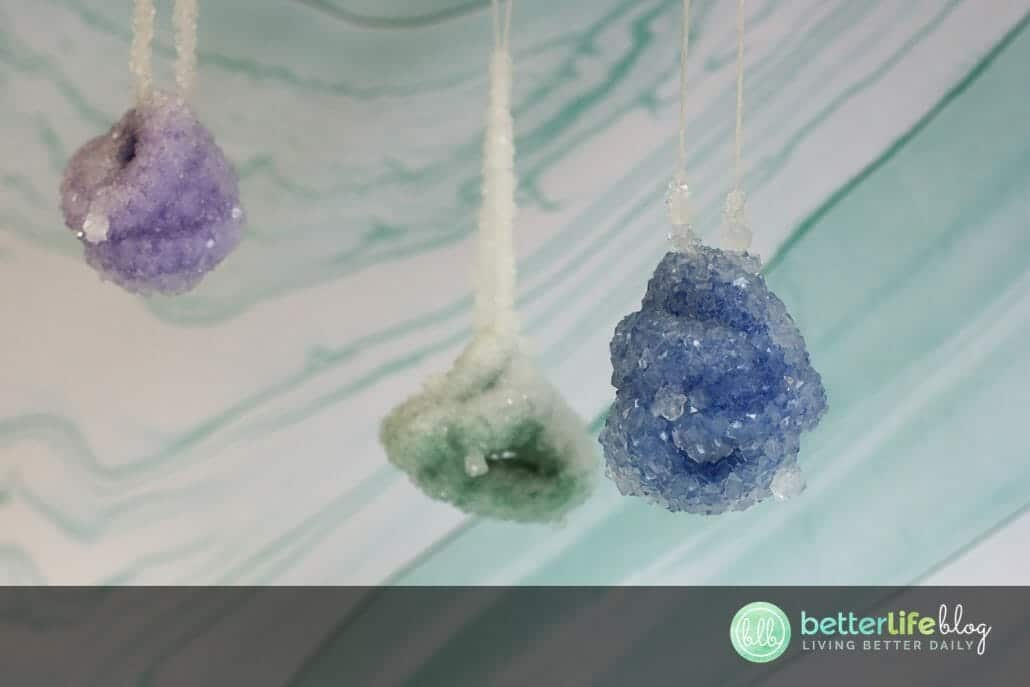
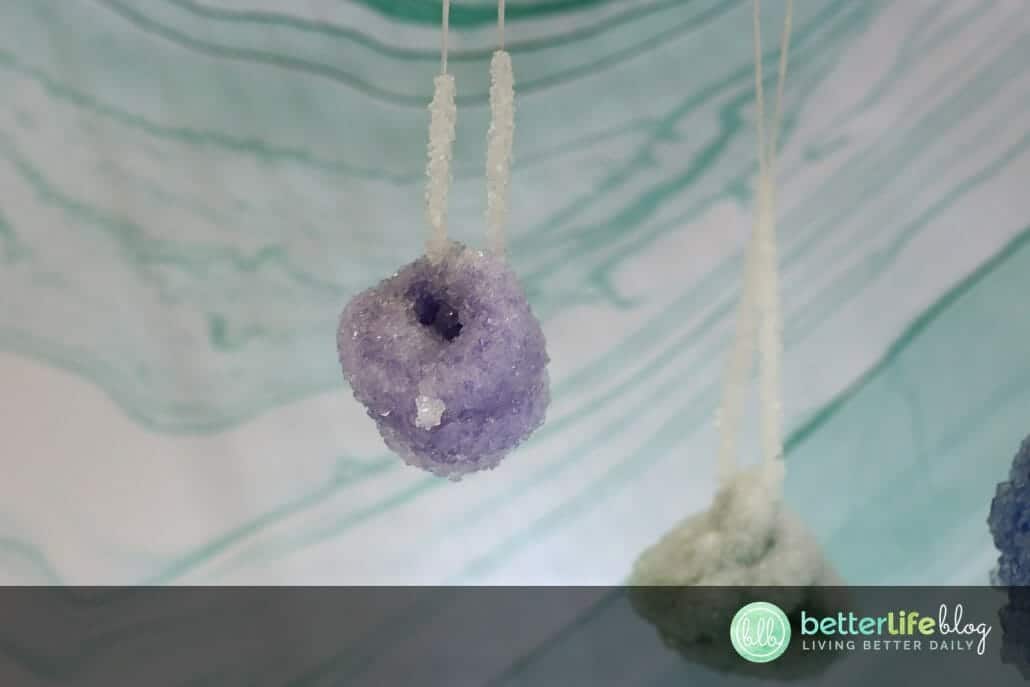
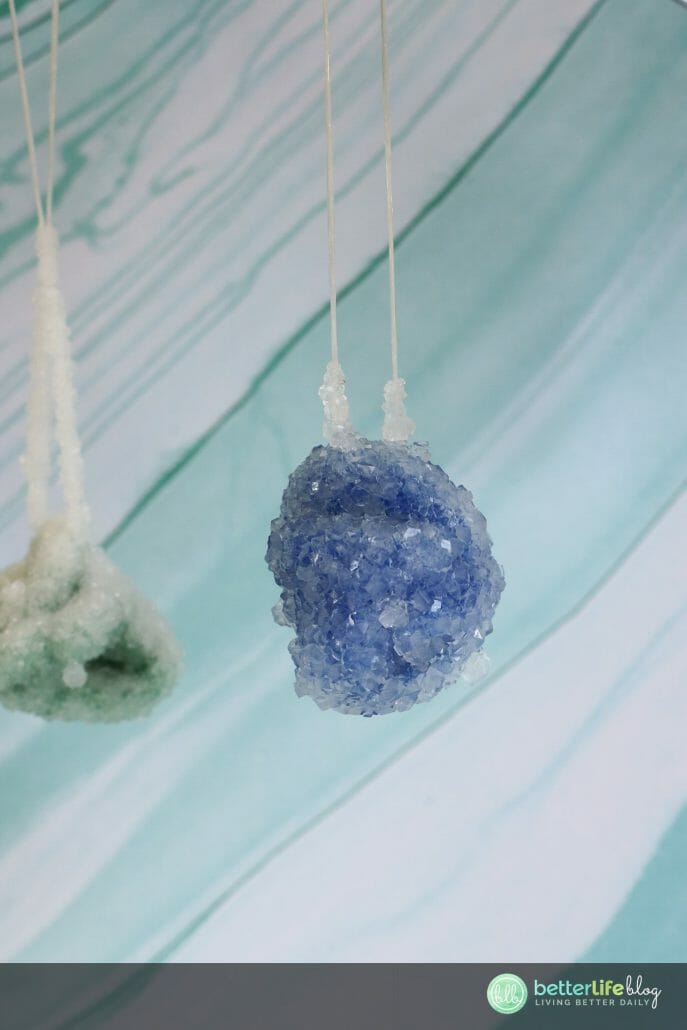
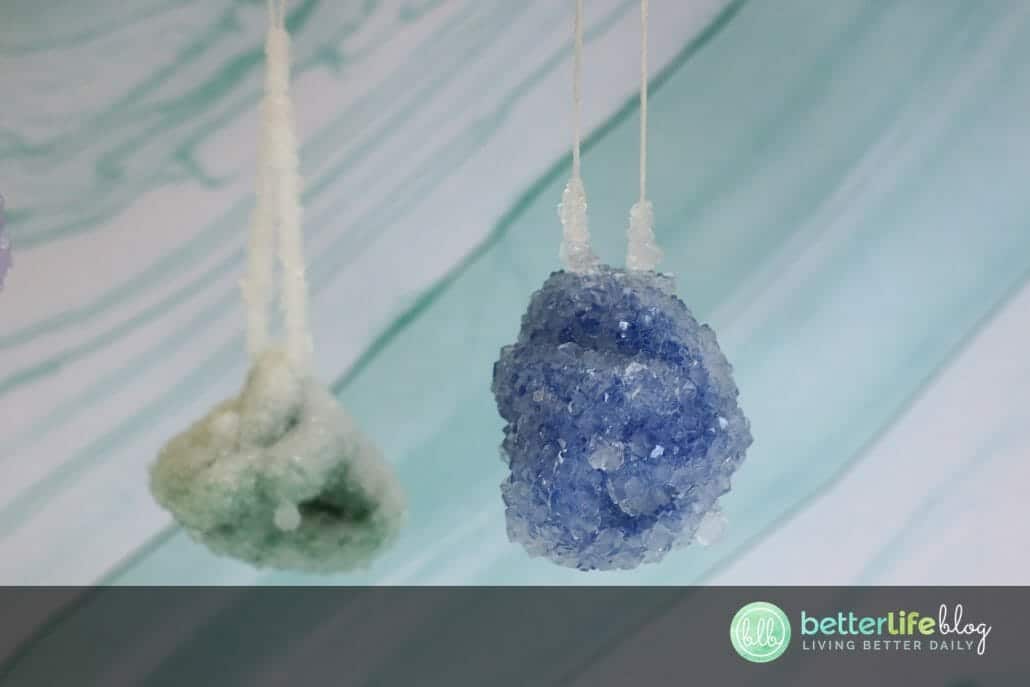
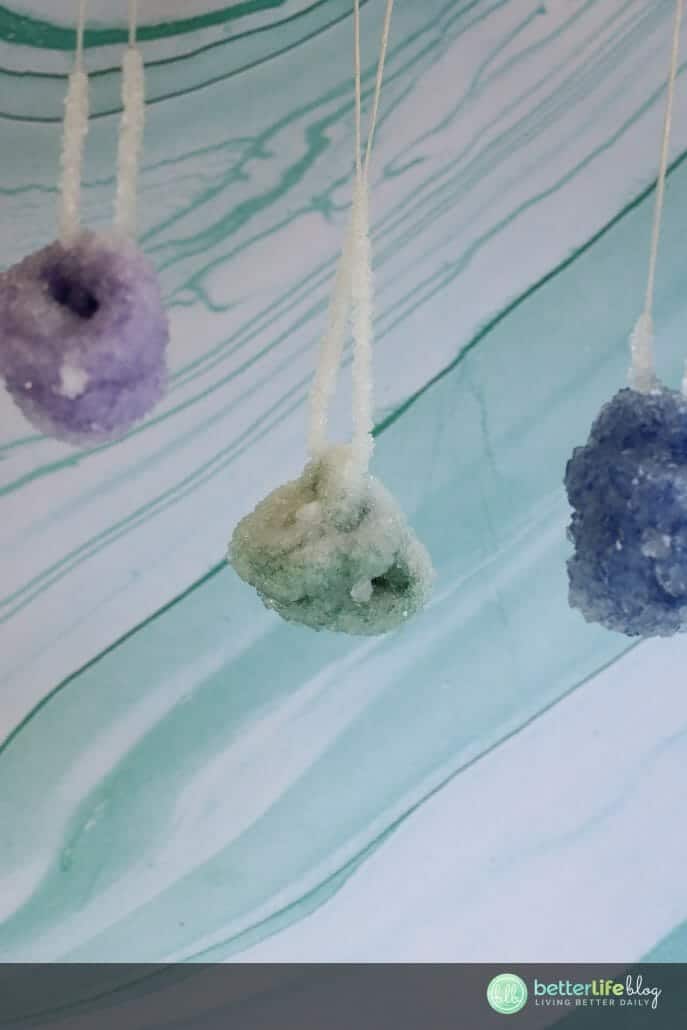
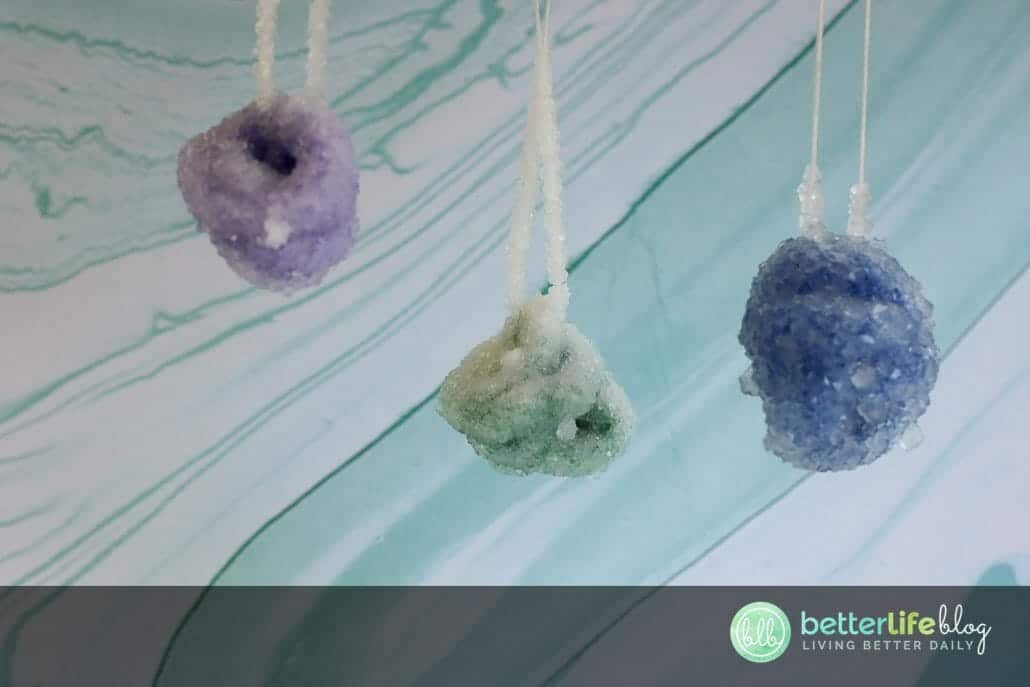
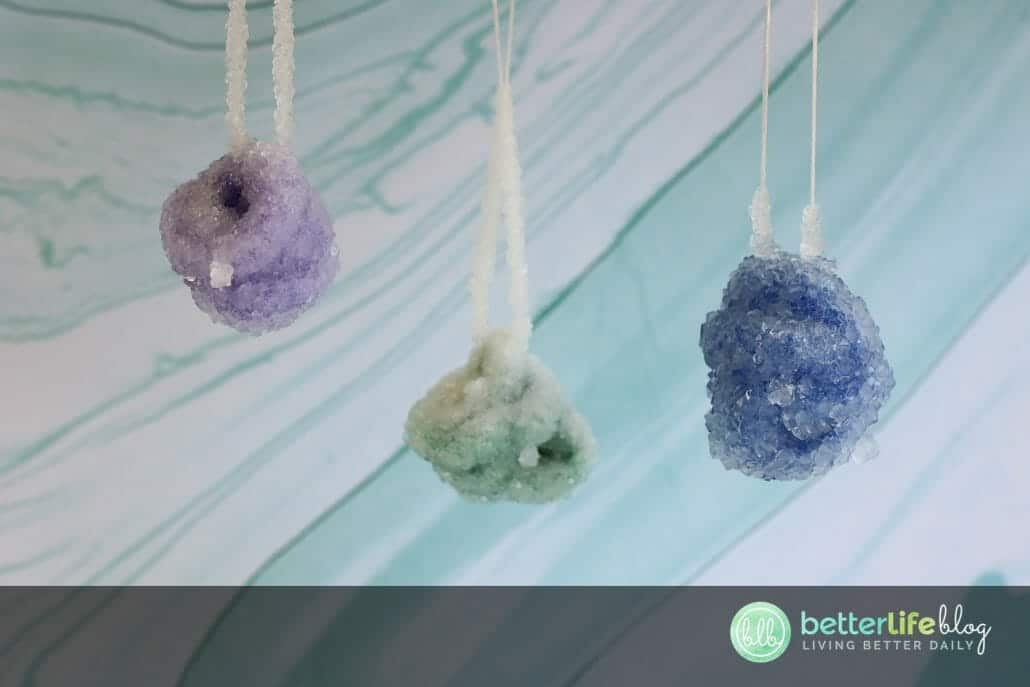
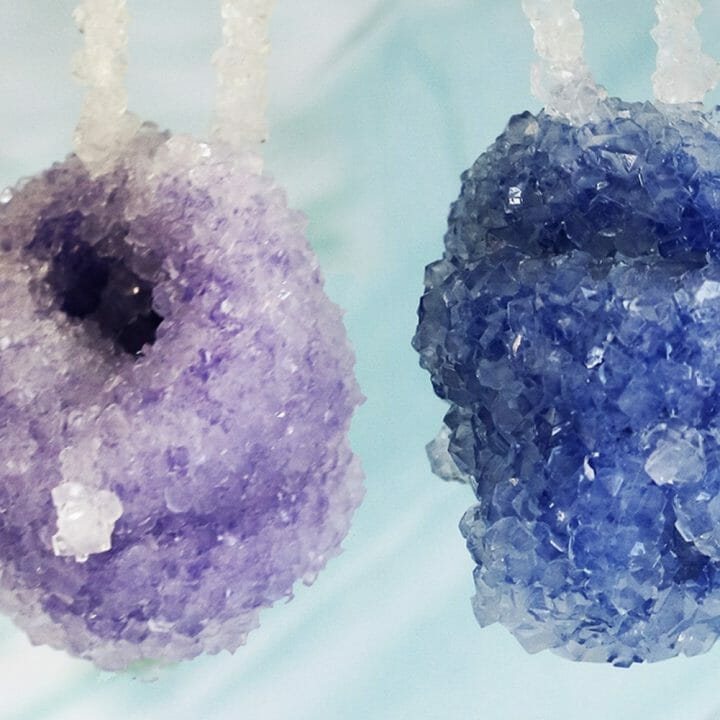
Remove the chenille stems from the jar and allow to dry completely.
You may use the thread to hang the chenille stems for display. You may also cut the string if desired.

How to Grow Crystals
Showing you how to grow crystals: it’s a fun, educational DIY that your kiddos will absolutely adore! Follow my easy steps to grow your own homemade crystals. Awesome!
Materials
- 2 cups water
- ¼ cup Borax detergent booster (for each jar)
- Chenille stems, 1 for each crystal
- Scissors
- Wide-mouth jars or glasses, 1 for each crystal
- Thread or thin string
- Popsicle sticks
Tools
Instructions
- Begin by twisting your chenille stems into stone-like shapes. Remember, it takes one chenille stem for each crystal.
- Attach a string on each chenille stem - this will allow them to each hang in their own jar.
- Place borax powder in each wide-mouth jar.
- In a medium stock pot, bring the water to a boil. Slowly pour the water into each jar. Be sure to pour slowly - this will allow the jar temperature to adjust so it does not crack. Stir the mixture until all of the borax powder is dissolved.
- Attach the stringed chenille stem “stone” onto a popsicle stick and drop into the borax solution. This will ensure that
the chenille stem hangs in the middle of the jar without touching the edges or the bottom. - As soon as the mixture starts to cool, crystals will begin forming. This can begin in as little as two hours! For the
best results, avoid disturbing the chenille stems for 24 hours. - Remove the chenille stems from the jar and allow to dry completely.
- You may use the thread to hang the chenille stems for display. You may also cut the string if desired.