Illuminate your Easter celebrations with these charming DIY Easter animal lanterns! Using your Cricut machine, cardstock, and vellum paper, you can create an adorable bunny, chick, and sheep lantern that’ll add a festive Easter glow to any space!

Welcome back, crafty friends! I’m Nancy, the creative mind behind Better Life Blog. I’m thrilled to share my newest craft with you today, which is centered around Easter and my famous cardstock lanterns. This time, we’ll be making lanterns in Easter animal form! Not only are they adorable, but they’re simple to make – and I’ll show you how in a few easy steps!
What Are Cricut Easter Animal Lanterns?
Cricut Easter animal lanterns are 3D paper crafts designed using layered cardstock and vellum paper. Each lantern features intricate cutouts that allow a soft light to shine through, creating a warm and whimsical ambiance. In this tutorial, we’ll focus on three designs: a bunny, a chick, and a sheep.
How to Use Cricut Cardstock Lanterns
I absolutely adore making cardstock lanterns with my Cricut. They’re so versatile and festive. These particular Easter animal ones can be used for:
- Easter Home Décor: Brighten up your space with these festive lanterns.
- Children’s Room Nightlights: Add a soft, comforting glow to your child’s room.
- Party Decorations: Ideal for Easter gatherings or spring-themed parties.
- Gifts: A handmade touch that friends and family will cherish.
If you like this lantern, you’ll also want to check out:
DIY Heart Lantern: Another lantern I recently put together, which is great to use during Valentine season!
Paris Shadow Box: I’m also best known for my shadow boxes, which emit a soft light behind layers of intricately cut cardstock to form a 3D-like design!

What Materials Do I Need to Make Easter Animal Lanterns?
- Cricut Machine (Maker or Explore) or Silhoutte
- Animal Lantern SVG Files: [Download them here or access it in our VIP Crafters Club]
- Cardstock: 65 lb or higher for durability.
- Vellum Paper: For the lantern windows.
- Standard Cutting Mat: To hold your materials in place.
- Adhesive: Precision glue like Bearly Art Glue or a quality glue stick.
- LED Tea Lights or Fairy Lights: To illuminate the lanterns safely.
Video Tutorial
For a step-by-step visual guide, watch our comprehensive video tutorial below:
How to Make DIY Bunny, Chick, and Sheep Easter Animal Lanterns
Gather all the supplies listed above.
Download and Upload SVG Files – Obtain the animal lantern SVG files and upload them to Cricut Design Space. (Be sure you grab each of the files here: bunny, chick, and sheep
Place your cardstock on the cutting mat and follow the prompts in Design Space to cut the lantern components.
Repeat the process with vellum paper for the lantern windows.
Once everything is cut, you’re ready to Assemble the Lanterns: begin by gluing the vellum pieces to the corresponding cardstock cutouts (they’re the petal pieces that are the same size as your vellum pieces). Precision glue works best for this step. Once all glued, set aside.

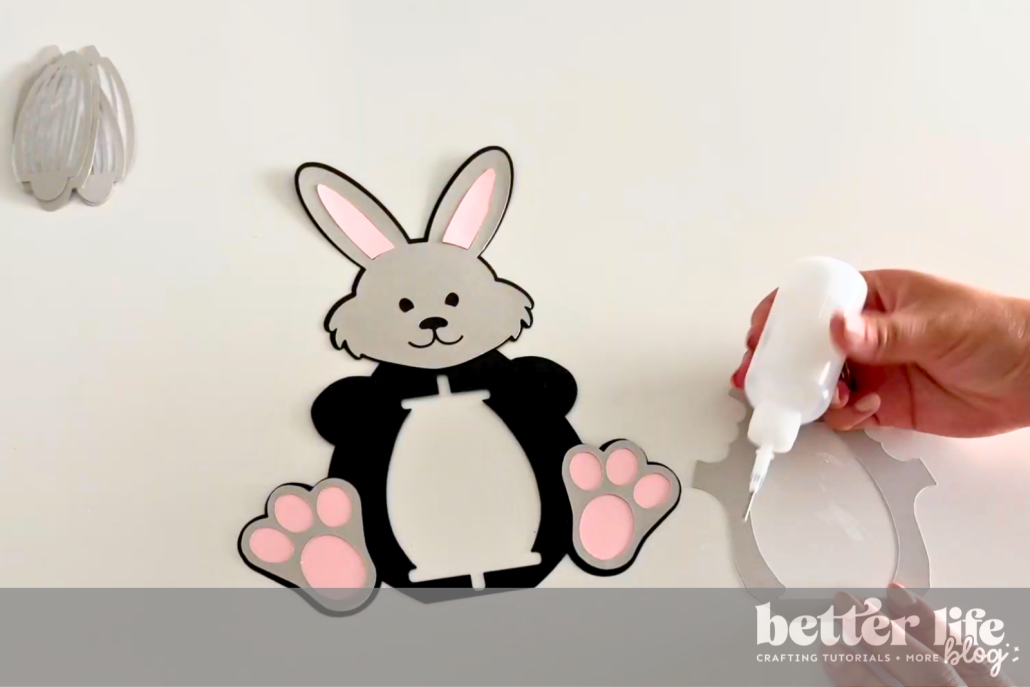
For each of the lanterns, your “base” is the large black piece. It serves as the silhouette / “outline” of each animal.
Each animal will have its own unique cutouts (face, feet, ears, wings, arms, feet, etc.). Glue each of those pieces onto the large black base.
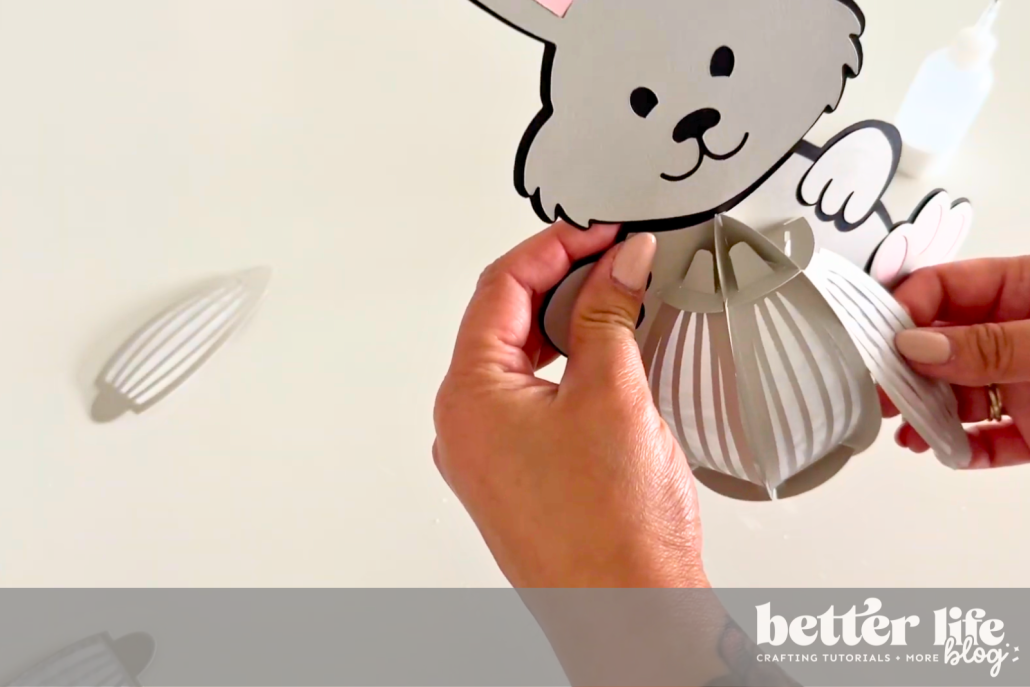
Once you’ve glued all the pieces onto the base of your lantern, grab the two cut-outs that are shaped like eggs. You’ll notice that they each have slits at the bottom and top, and you’ll want to insert those slits with one another so that they can form a stand.
Now, insert the stand into the slits of the animal base. Now your animal lantern can stand on its own.
Grab the two circular pieces – one will be larger than the other. The smaller one goes on top, and the larger one goes on the bottom of the lantern.
Each circle has a corresponding slit to the slits of the lantern base. These circles will make your lantern more sturdy and will hold your vellum petal pieces around the actual lantern. Insert each circle to the corresponding slits of your base (it would be best to refer to the video tutorial so that you can see exactly how we do this part).

Next, take the vellum petal pieces and insert in the long slits that go along the circle pieces (top and bottom). Before placing the last petal piece, insert your LED light to give your lantern a glow, then attach the final petal piece.
Creating these DIY animal lanterns is a delightful way to celebrate the Easter season. They bring a handmade charm to your home and are sure to impress guests and loved ones. Happy crafting!
If you enjoyed this tutorial, be sure to follow us on Instagram for more craft inspiration, and come join our VIP Crafters Club so that you get access to hundreds of our original SVG files!