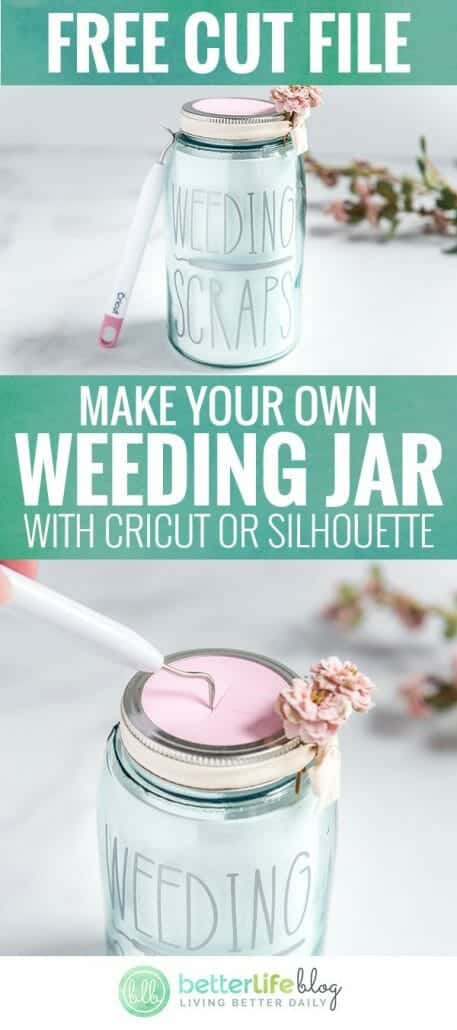
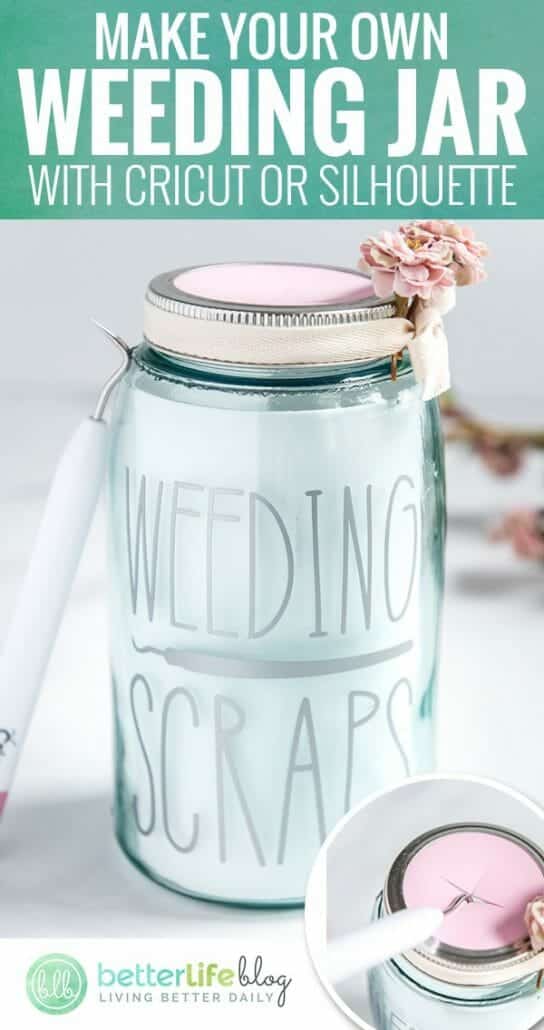
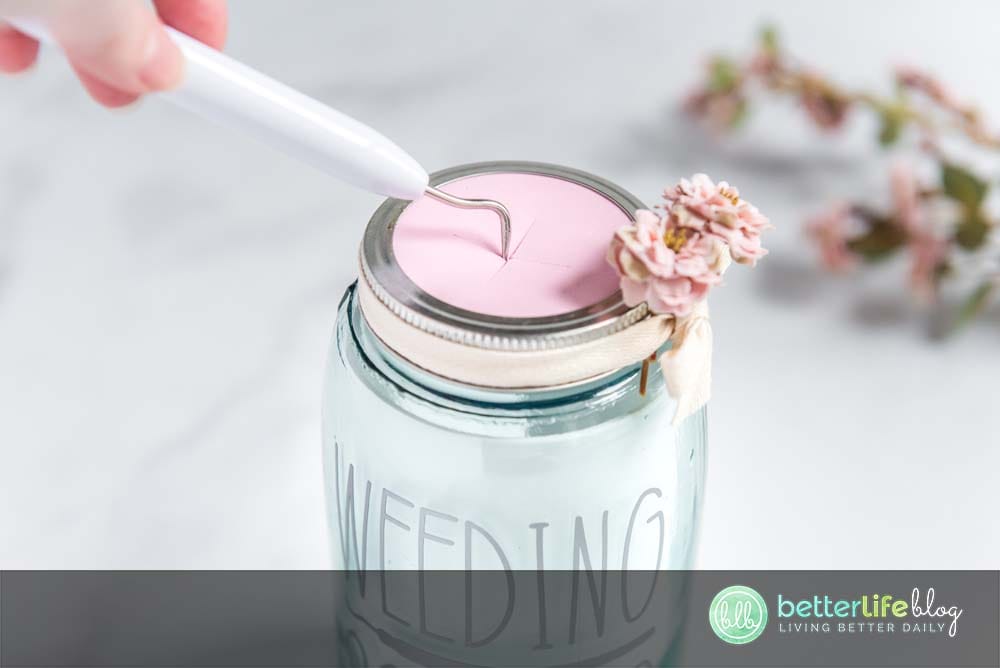
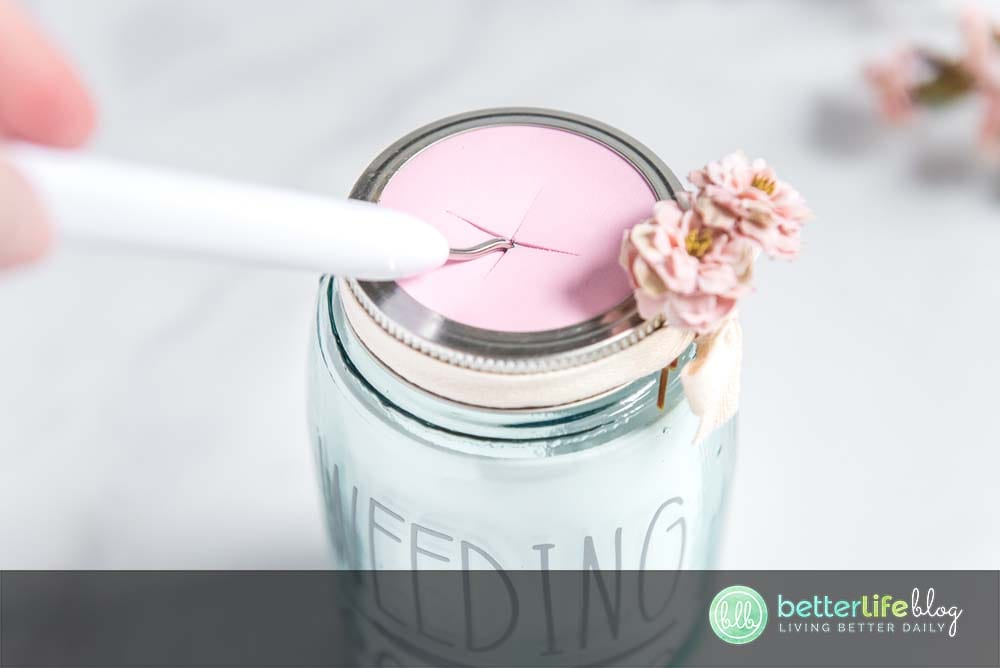
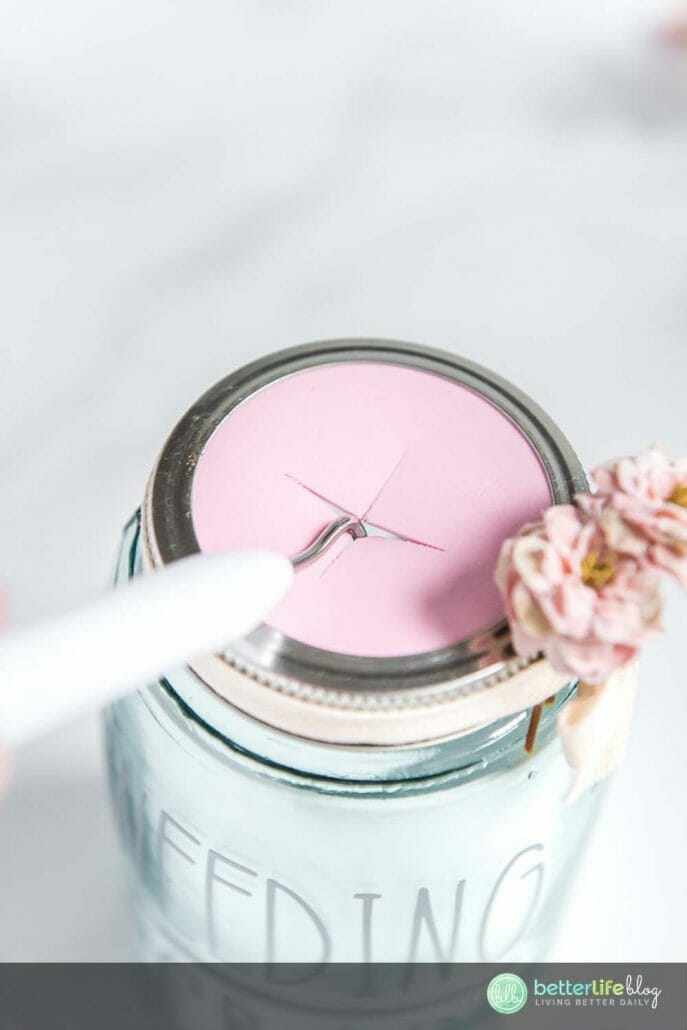
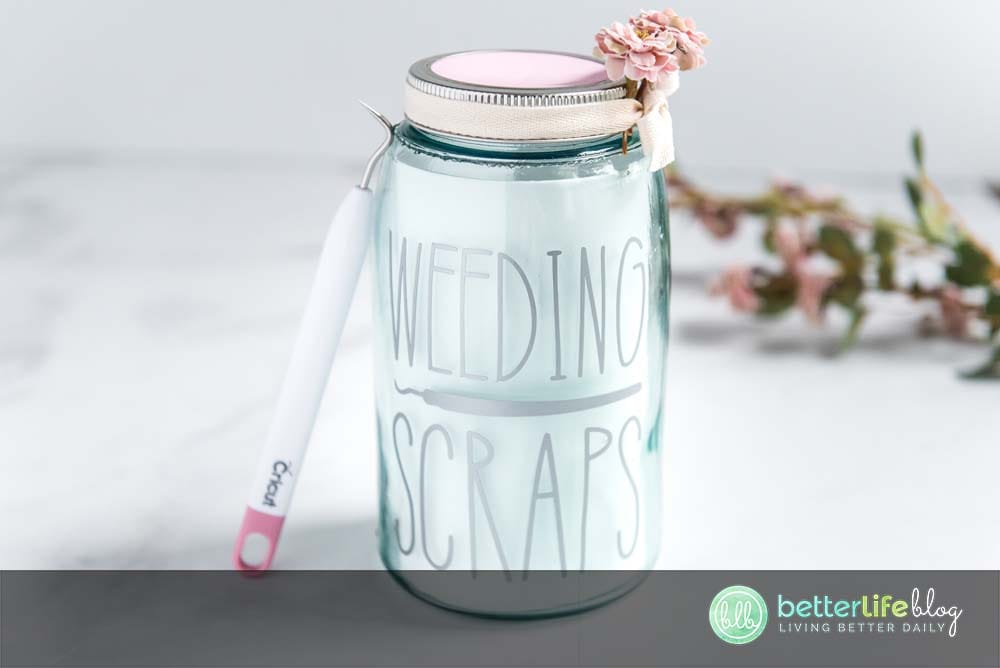
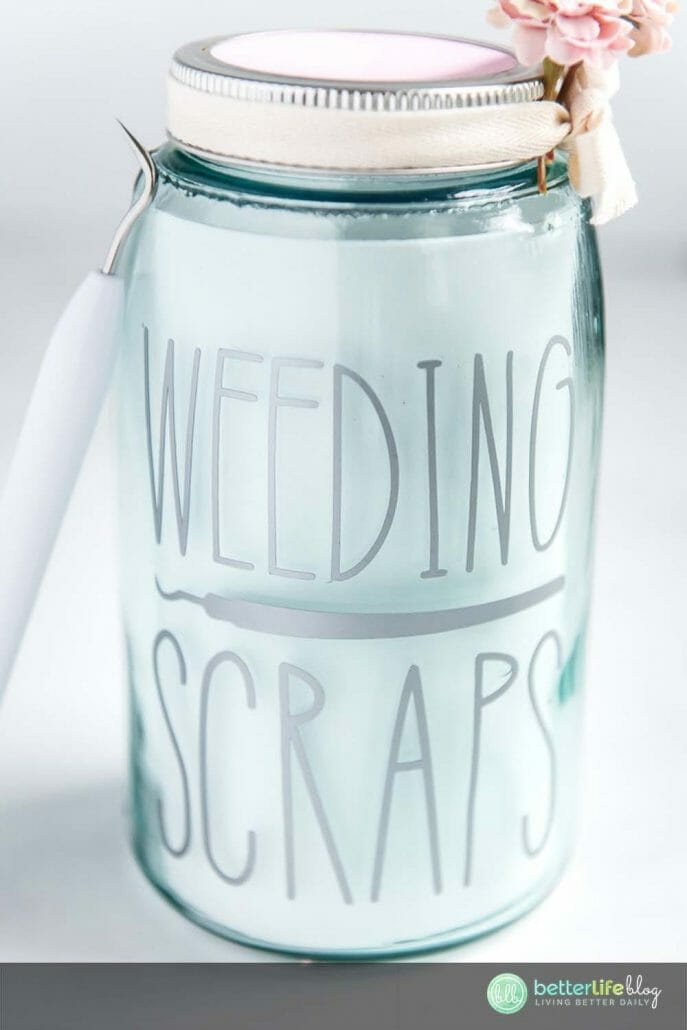
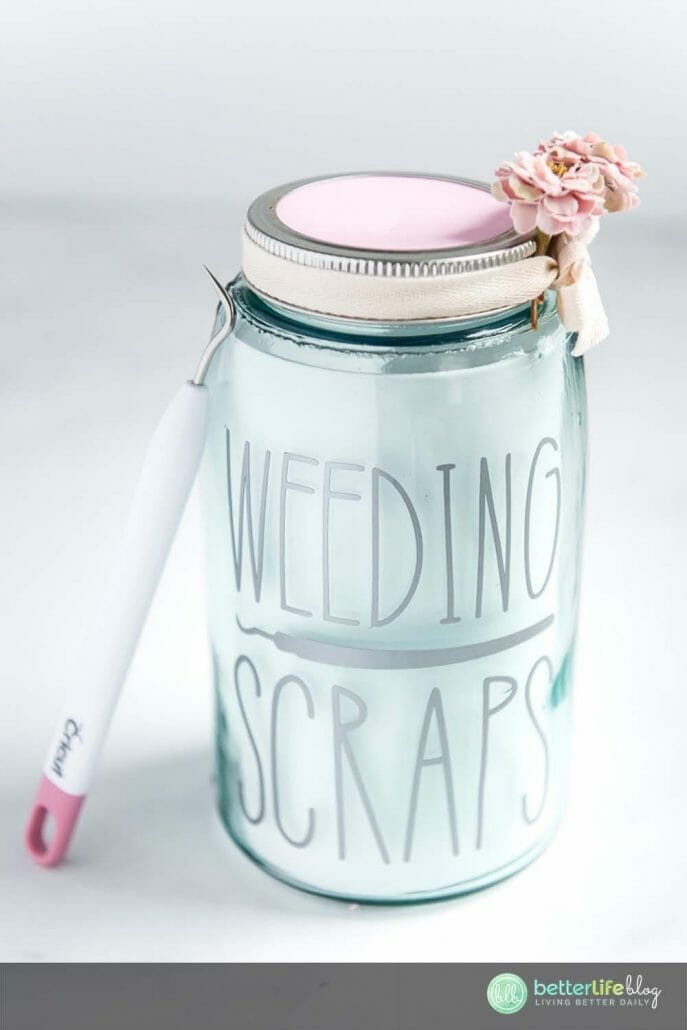
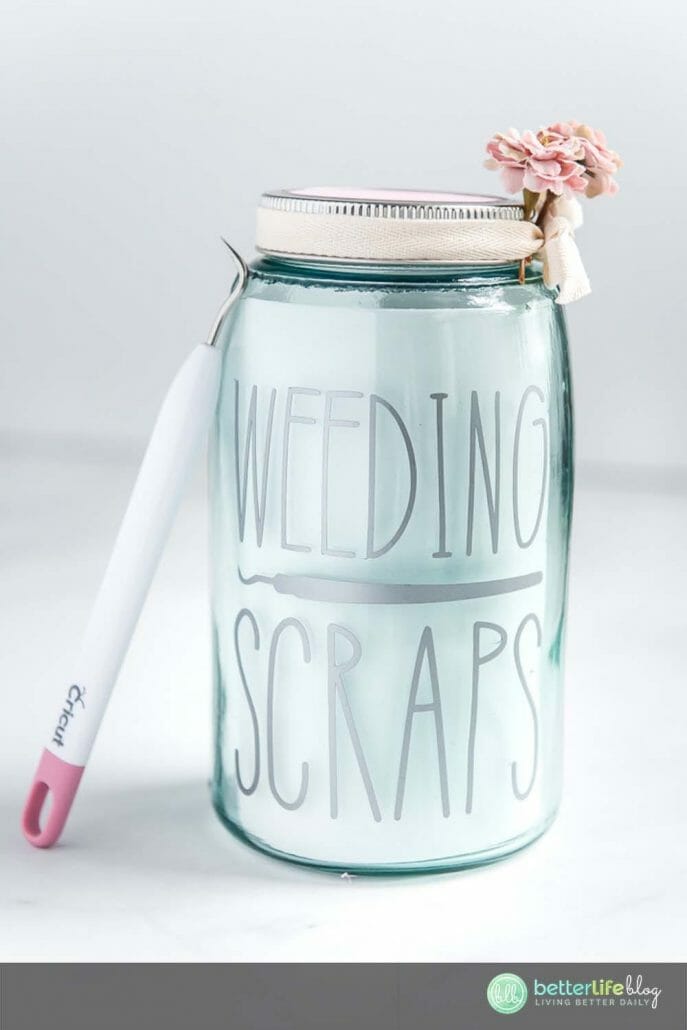
Hi friends! I’ve got a great Cricut hack for you today! This is a super cute and convenient way to dispose of your unwanted weeding scraps. Not only is this weeding jar an adorable way to hide your messy scrap pieces, but it’s also great because you can insert your weeding tool into the top of the jar, and the craft foam will “catch” the vinyl so that you can work quickly to weed your design.

If you’ve ever watched my videos, you know I love my Tweexy, but it is rather small and sometimes it doesn’t quite fit the weeding scraps that I am working with. This is a great way to solve that problem.
And the best part is, I’m giving you the cut file for free! And you probably already have the materials needed right in your craft room!

How to Make a Craft Foam Weeding Scrap Jar
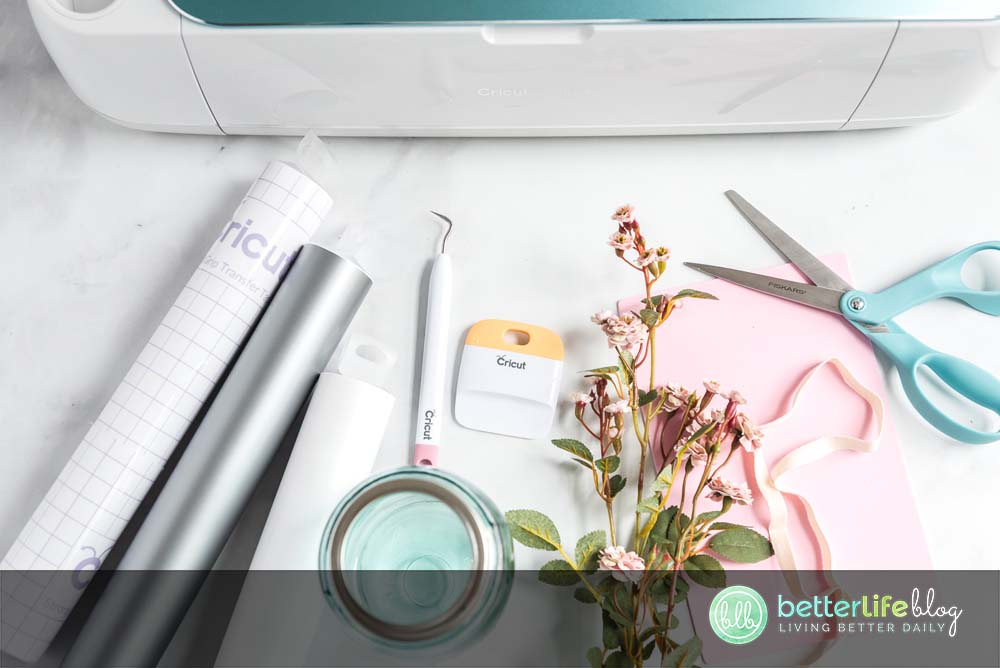
Materials List:
- Cricut Machine
- Weeding Tools
- Oracal 651 Vinyl (Silver used for this project)
- Cutting Mat
- Cricut Scraper
- Transfer Tape
- Mason jar with lid (be sure to use a jar that has a smooth area on one side)
- Ruler
- Ribbon
- Thin Craft Foam (not the adhesive kind)
- Small Artificial Flowers
- Painters tape/masking tape
- Scissors
- Weeding Scraps SVG Cut file (Get it for FREE here)
Instructions:
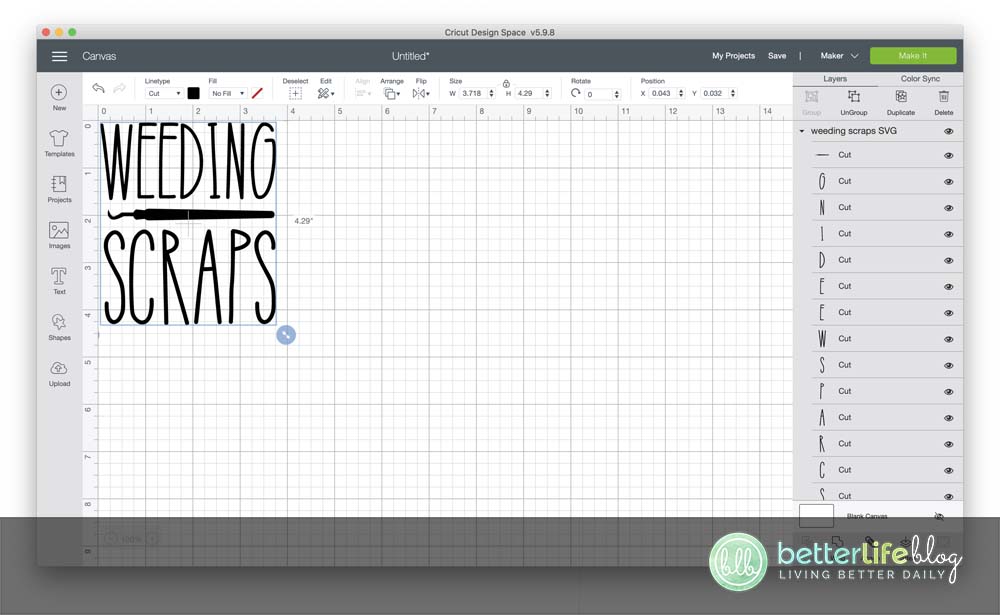
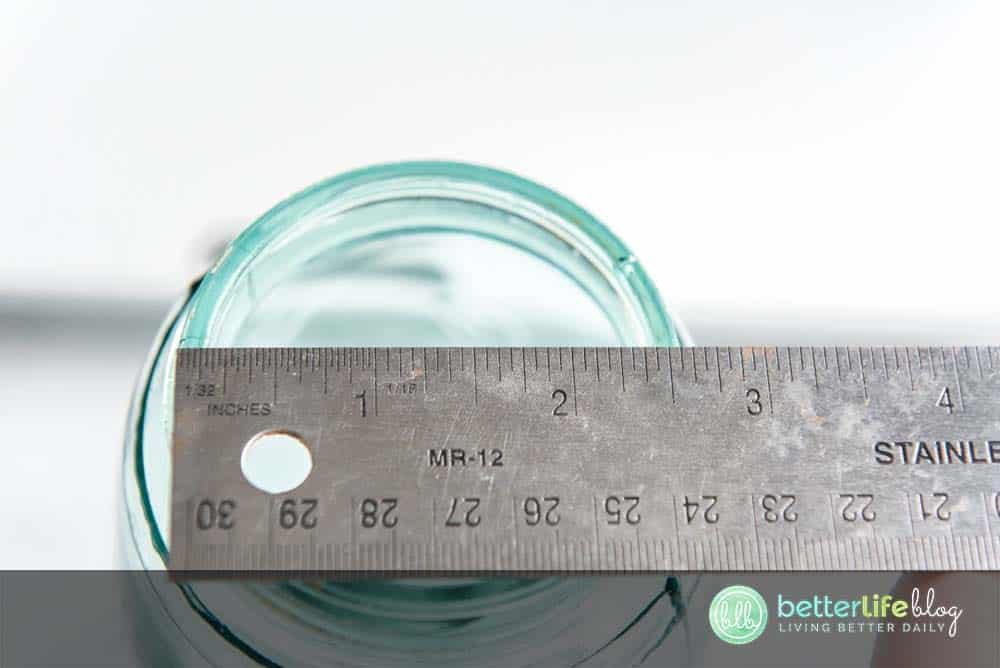
Load the “Weeding Scraps” cutting file into Cricut Design Space. Since there are many different sizes of mason jars, you will need to measure the side of your jar where you will be placing the vinyl, as well as the top of your jar with the lid off. Once you have your measurements, come back to design space, select your image and ungroup. Then, select the circle, and hide the image by selecting the little eye icon in the layers panel.
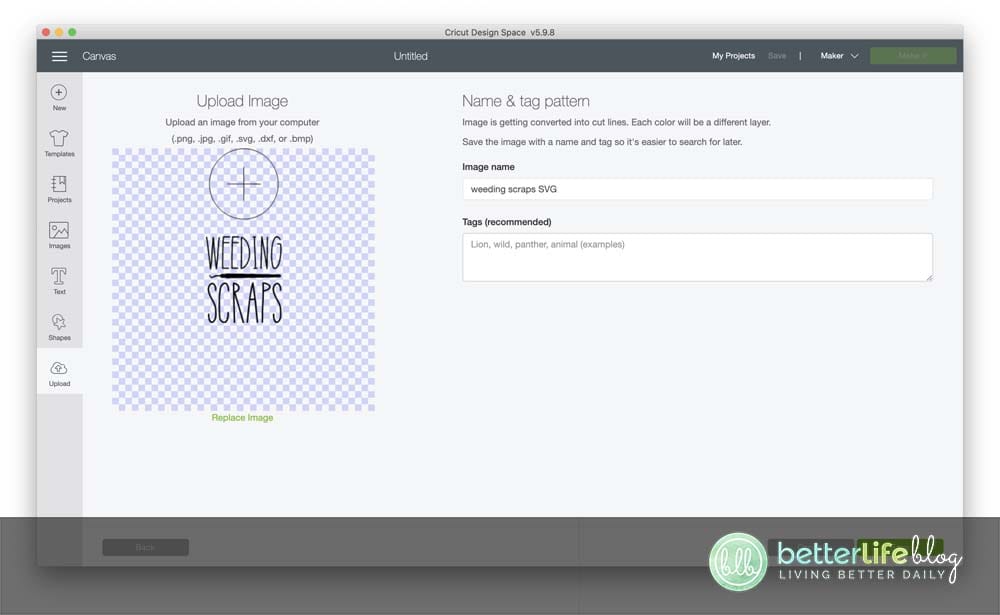
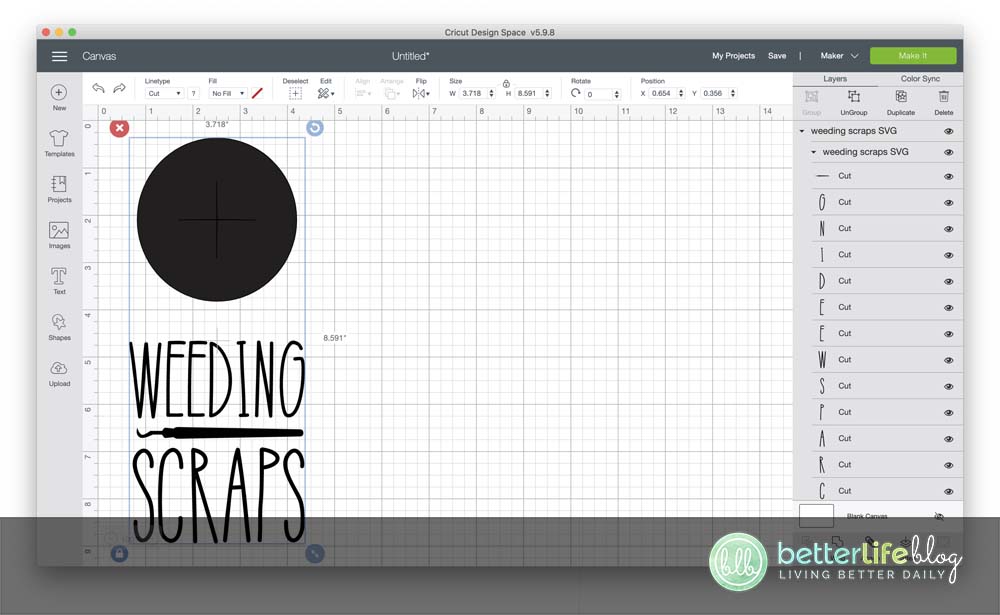
Then select the image that says “weeding scraps”, and change the measurements to fit your jar. (We are using a large, antique mason jar here, so we set the measurements to a height of 4.29”) Press the make it button and proceed to cut out your vinyl. Weed your vinyl.

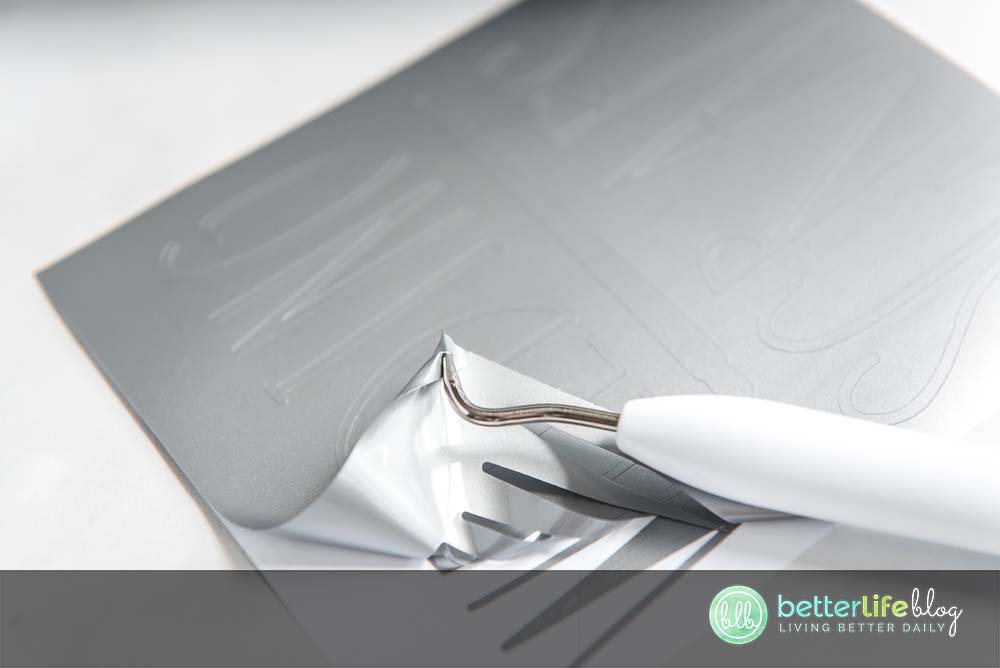
Cut a piece of transfer tape and place it over the vinyl. Remove the white backing. Adhere the vinyl to the flat, smooth side of your mason jar. Use a cricut scraper in the center of the vinyl and press outwards to the edge to adhere to the glass.


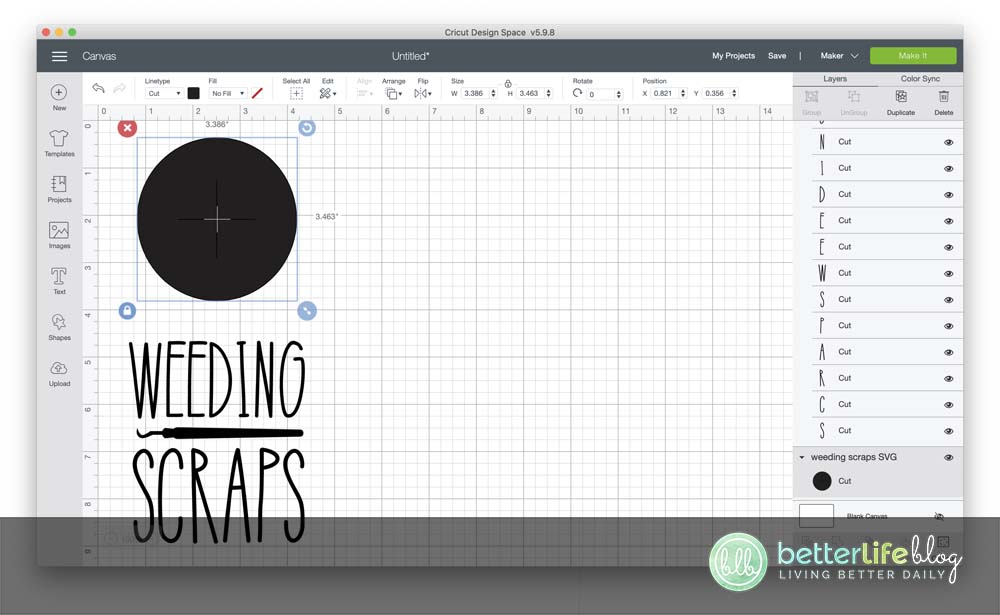
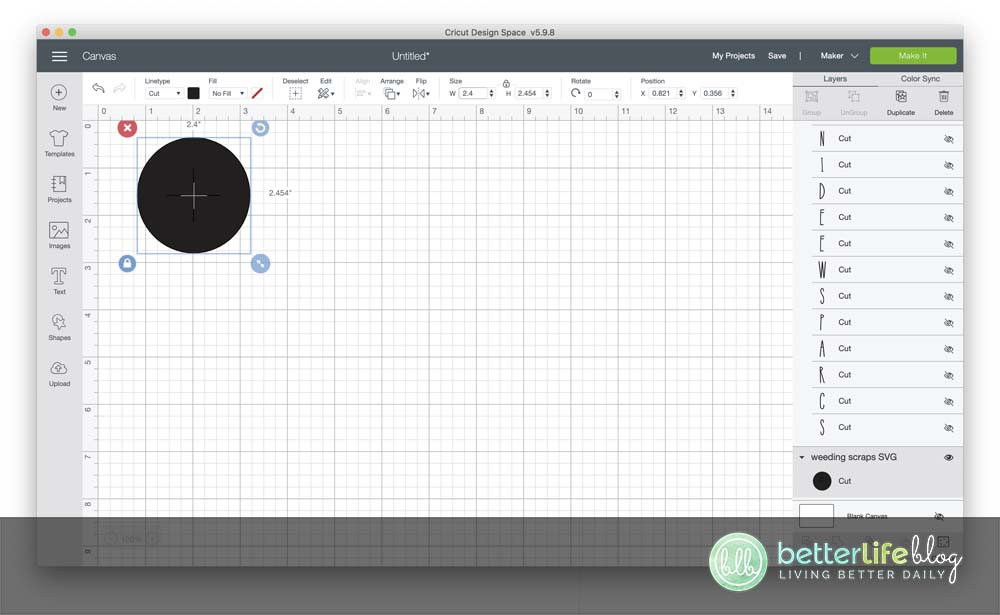
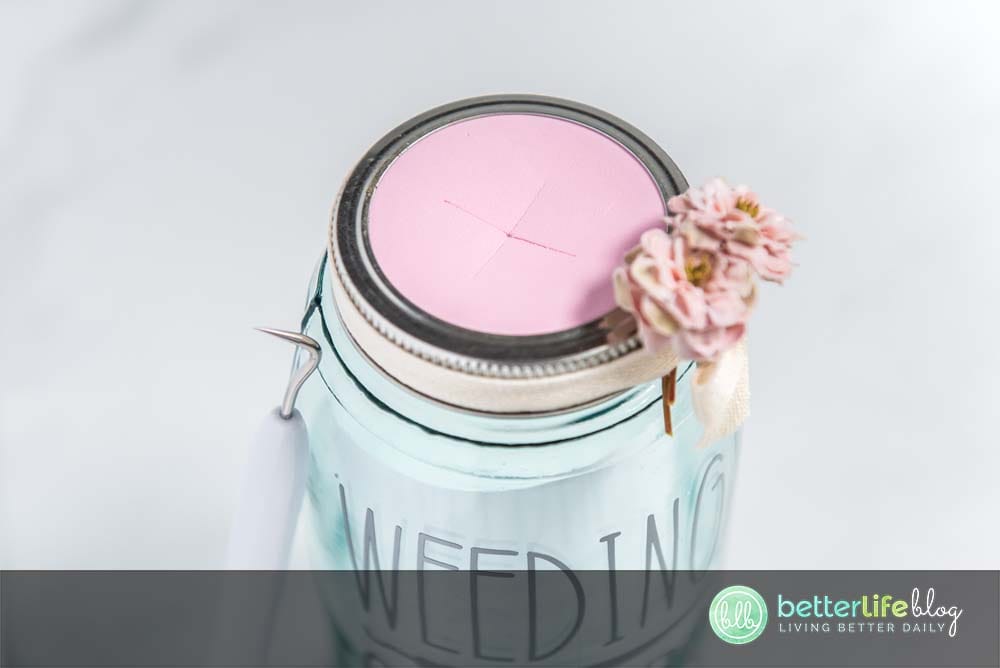
Next, go back to Design Space, hide the image you just cut, and unhide the circle. Change the dimensions of the circle to fit the top of your mason jar. (I set the width to 2.4 inches). Press the Make It button and proceed to the next screen.


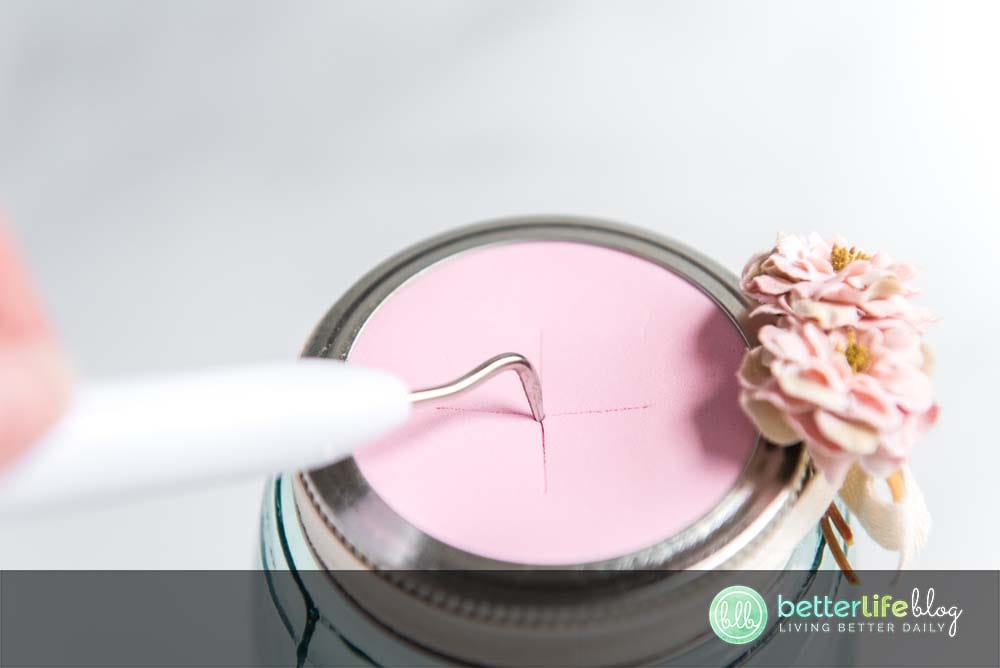
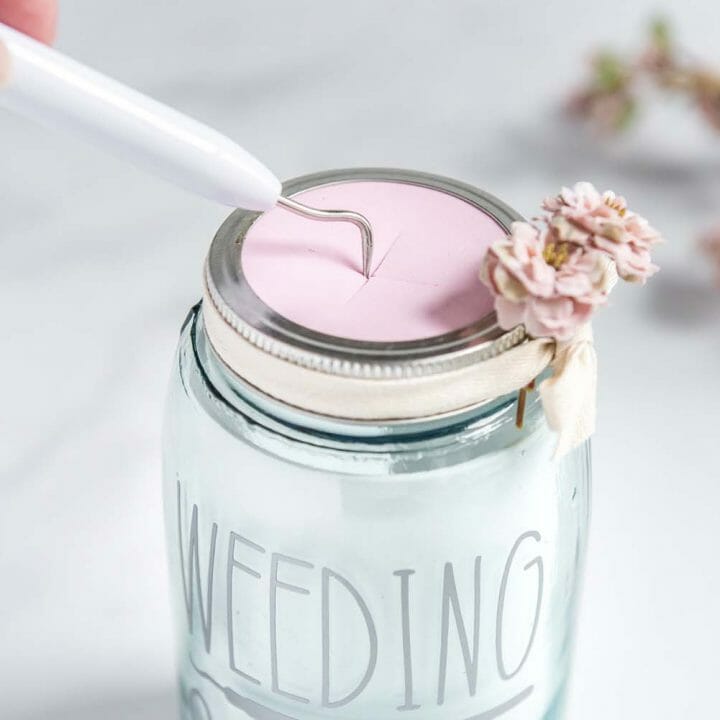
Select “Craft Foam” from the drop down menu. You will need a deep blade for this to cut the whole way through. Load your mat with the craft foam. Attach the craft foam to your cutting mat with painters or masking tape.
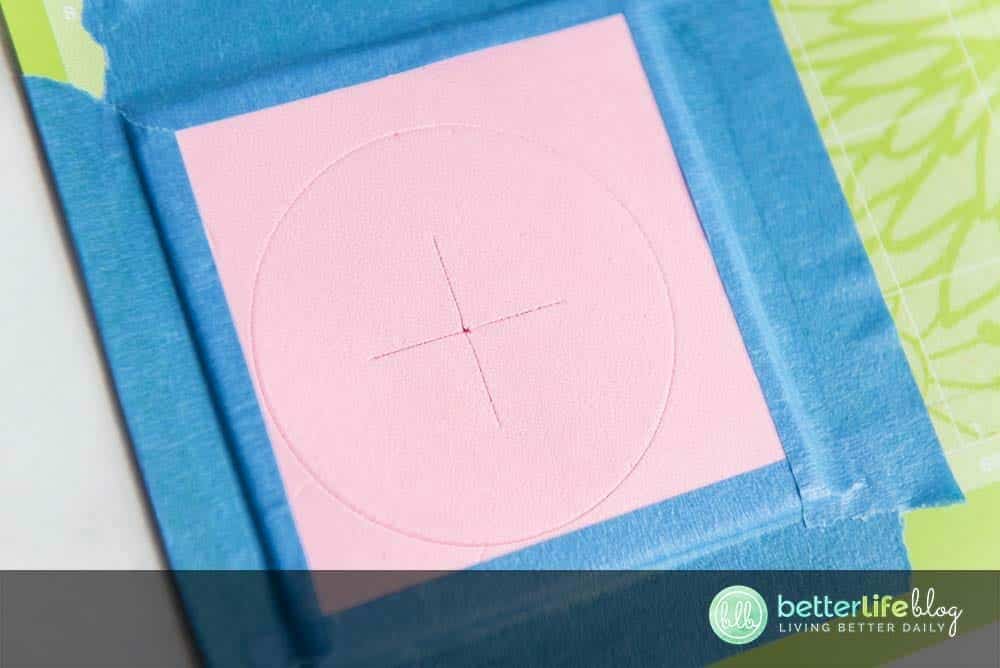
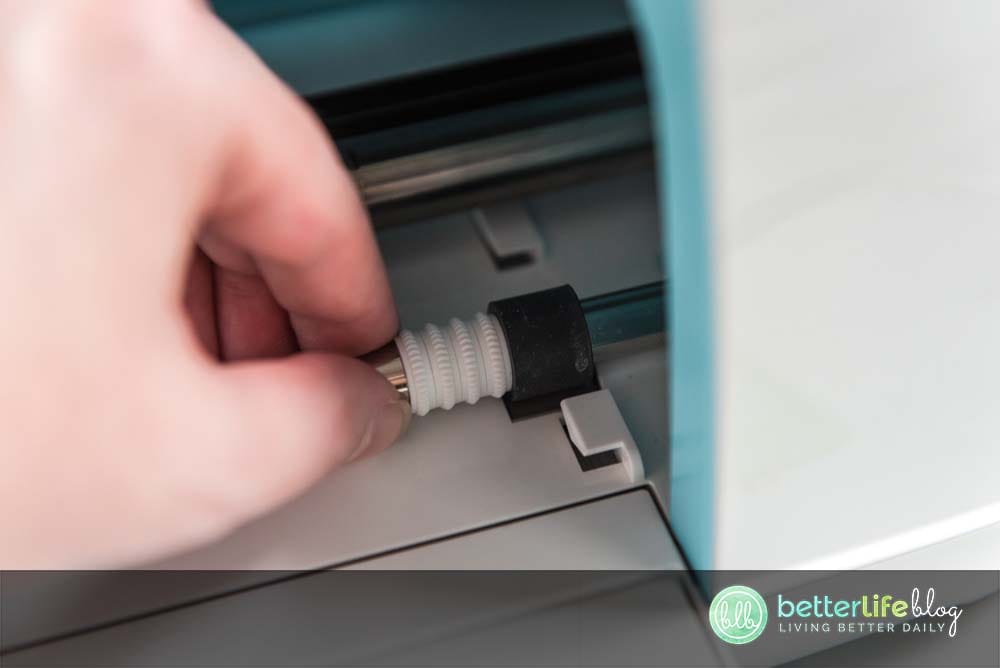
Move your star wheels all the way to the right before loading your mat into the machine. Proceed to cut out your craft foam.
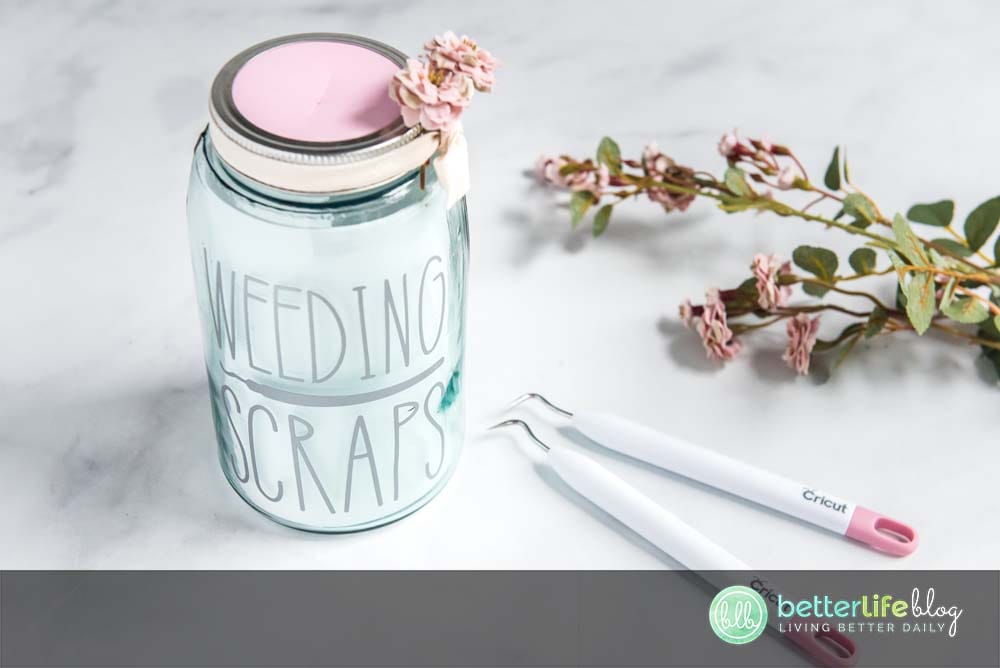
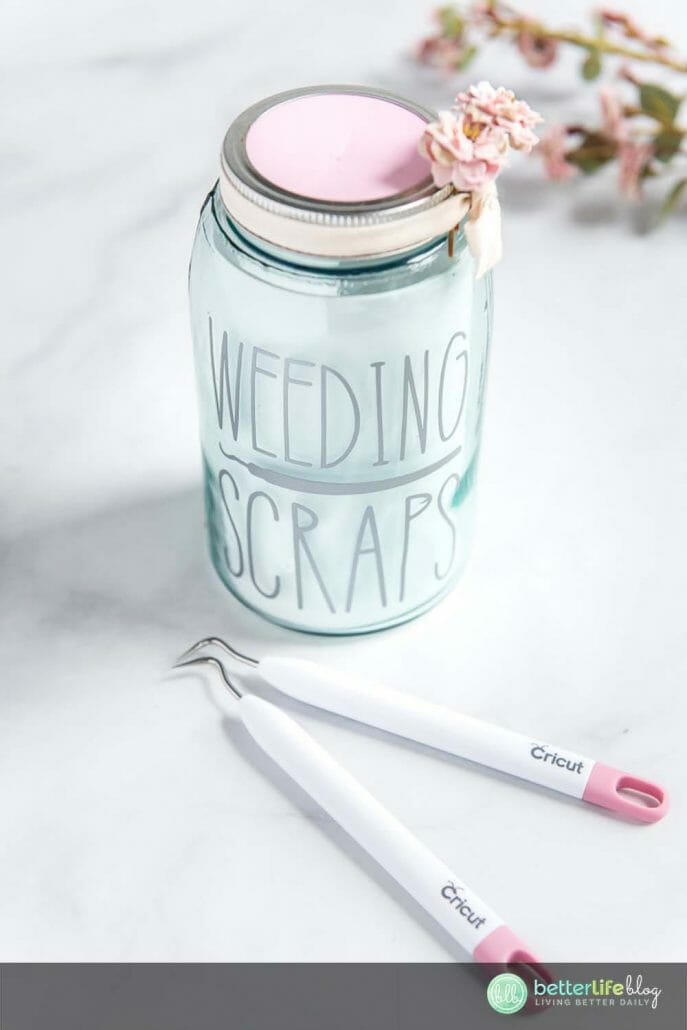
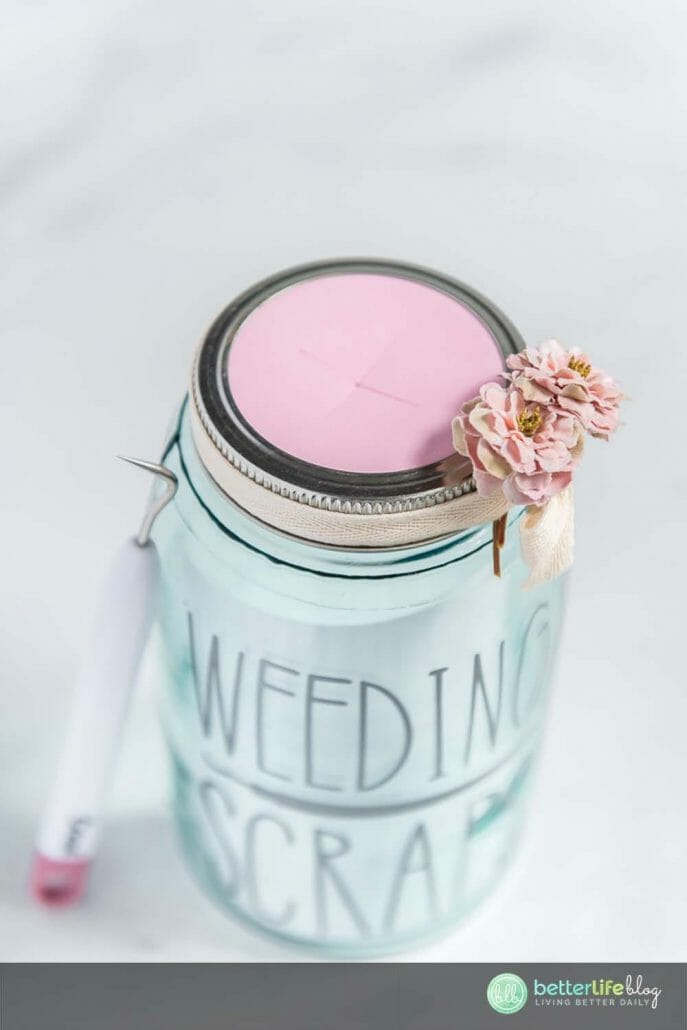
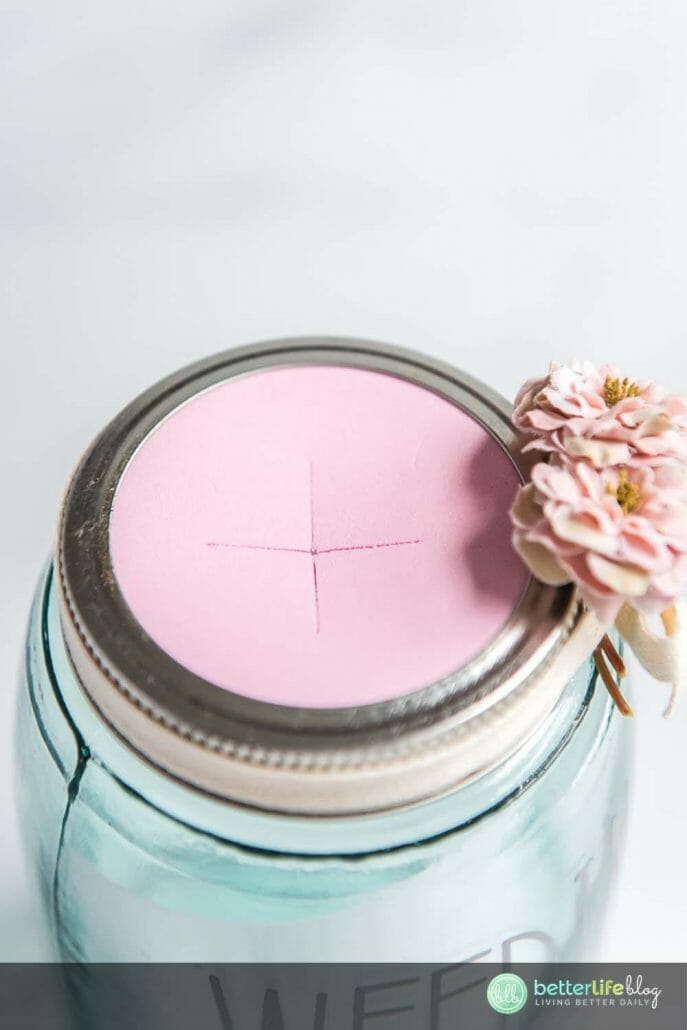
Attach your foam circle to the underside lid of your mason jar using hot glue or a strong tape. Place the lid on the jar and tie a ribbon around.

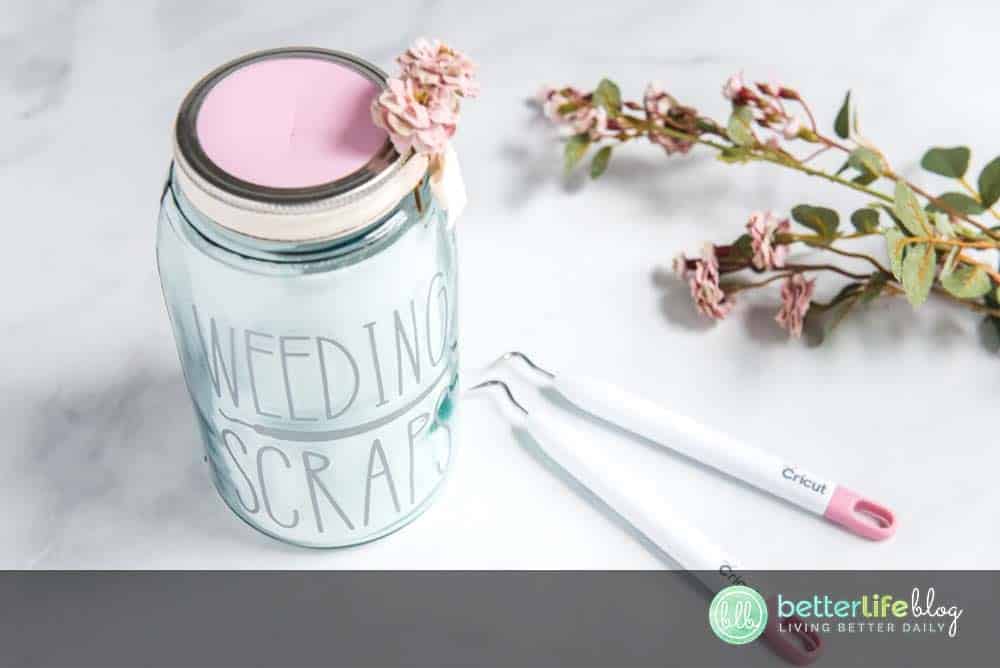
Cut a few artificial flowers and tuck behind the bow. Enjoy your new weeding scrap jar!
Notes:
- If you don’t have a Cricut Scraper, you could use a credit card or popsicle stick to adhere the vinyl.
- Mason jars come in lots of different sizes and shapes. Some of the new ones have raised letters on the side. If you can not find a jar with a smooth side on it, you could make a tag for the jar and place your vinyl on the tag and attach with the ribbon. Any size mason jar will work for this.
- Some of the old mason jars do not have lids with the removable center. You could use a new lid with an old jar (That’s what I did for this tutorial)
LINKS
- Cricut Maker Machine
- Cricut Cutting Mat
- Weeding Tools
- Cricut Vinyl
- Cricut Transfer Tape
- Mason Jars
- Ruler
- Craft foam
- Artificial Flowers
- Masking Tape
- Natural Ribbon

DIY Weeding Scraps Mason Jar for Cricut
Make this adorable and functional Weeding trash jar to dispose of your weeded vinyl scraps. The top is made of craft foam and you can also download the FREE SVG cut file!
Materials
- Premium Vinyl (Silver used for this project)
- Mason jar with lid (be sure to use a jar that has a smooth area on one side)
- Ribbon
- Thin Craft Foam (not the adhesive kind)
- Small Artificial Flowers
- Weeding Scraps FREE SVG cut file
Tools
- Weeding Tools
- Cutting Mat
- Cricut Scraper
- Transfer Tape
- Ruler
- Painters tape/masking tape
- Scissors
Instructions
- Load the “Weeding Scraps” cutting file into Cricut Design Space. Since there are many different sizes of mason jars, you will need to measure the side of your jar where you will be placing the vinyl, as well as the top of your jar with the lid off. Once you have your measurements, come back to design space, select your image and ungroup. Then, select the circle, and hide the image by selecting the little eye icon in the layers panel.
- Then select the image that says “weeding scraps”, and change the measurements to fit your jar. (We are using a large, antique mason jar here, so we set the measurements to a height of 4.29”) Press the make it button and proceed to cut out your vinyl. Weed your vinyl.
- Cut a piece of transfer tape and place it over the vinyl. Remove the white backing. Adhere the vinyl to the flat, smooth side of your mason jar. Use a cricut scraper in the center of the vinyl and press outwards to the edge to adhere to the glass.
- Next, go back to Design Space, hide the image you just cut, and unhide the circle. Change the dimensions of the circle to fit the top of your mason jar. (We set the width to 2.4 inches). Press the Make It button and proceed to the next screen.
- Select “Craft Foam” from the drop down menu. You will need a deep blade for this to cut the whole way through. Load your mat with the craft foam. Attach the craft foam to your cutting mat with painters or masking tape. Move your star wheels all the way to the right before loading your mat into the machine. Proceed to cut out your craft foam.
- Attach your foam circle to the underside lid of your mason jar. Place the lid on the jar and tie a ribbon around.
- Cut a few artificial flowers and tuck behind the bow. Enjoy your new weeding scrap jar!
Notes
- If you don’t have a Cricut Scraper, you could use a credit card or popsicle stick to adhere the vinyl.
- Mason jars come in lots of different sizes and shapes. Some of the new ones have raised letters on the side. If you can not find a jar with a smooth side on it, you could make a tag for the jar and place your vinyl on the tag and attach with the ribbon. Any size mason jar will work for this.
- Some of the old mason jars do not have lids with the removable center. You could use a new lid with an old jar (That’s what I did for this tutorial)