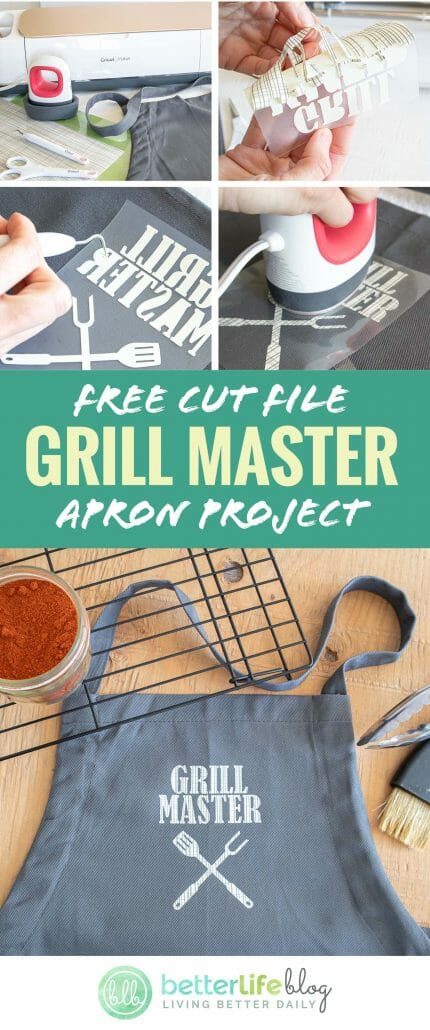
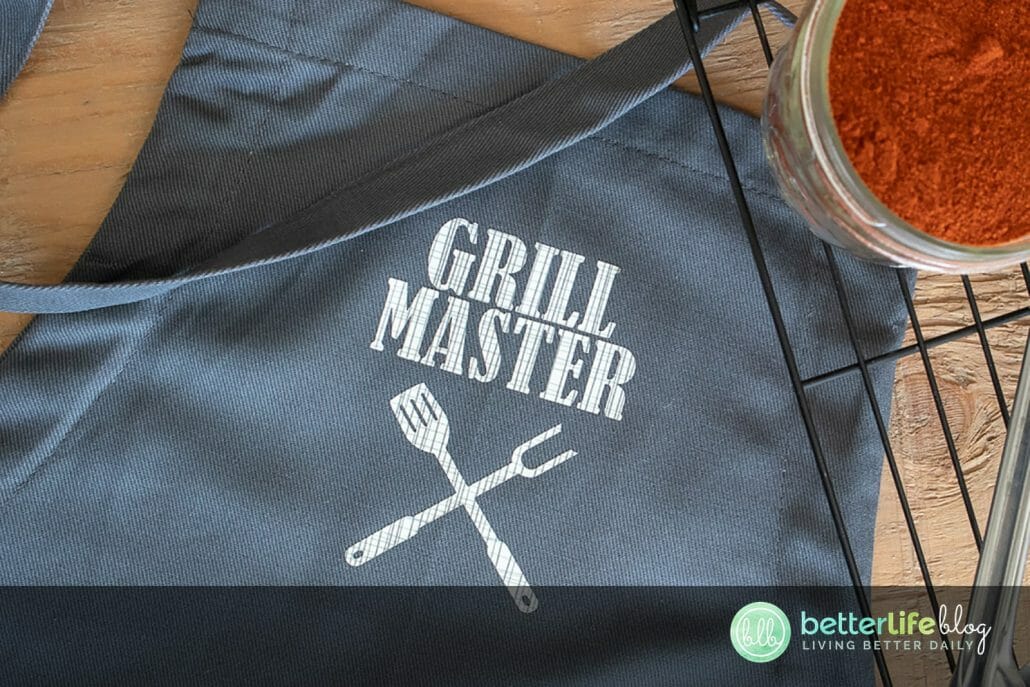
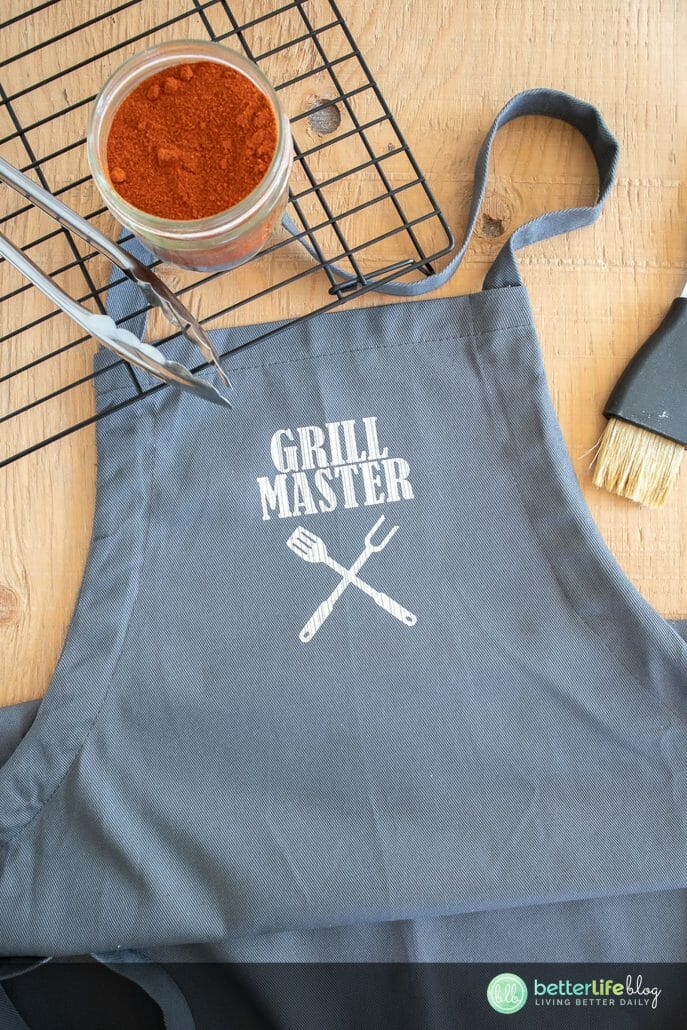
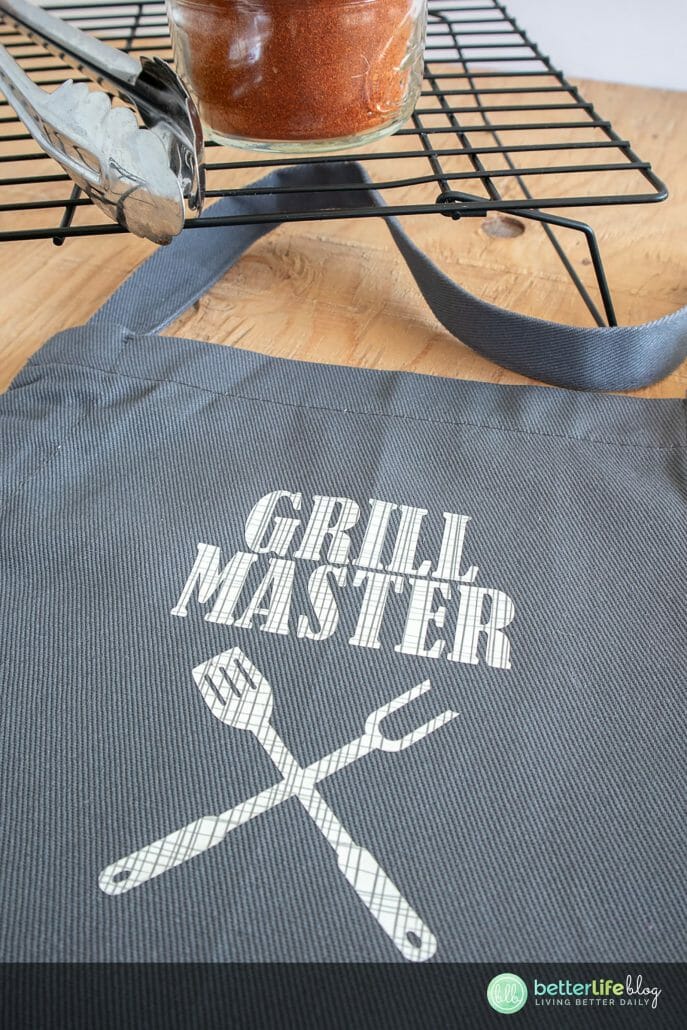
The Cricut EasyPress Mini is a nifty little gadget. Today, I’m showing you how you can use it to make this incredibly adorable Mini Press Cricut Apron.
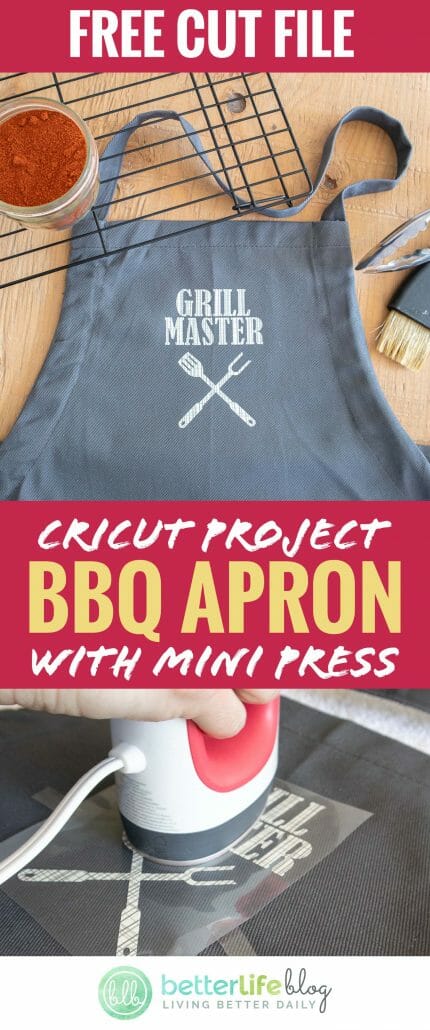
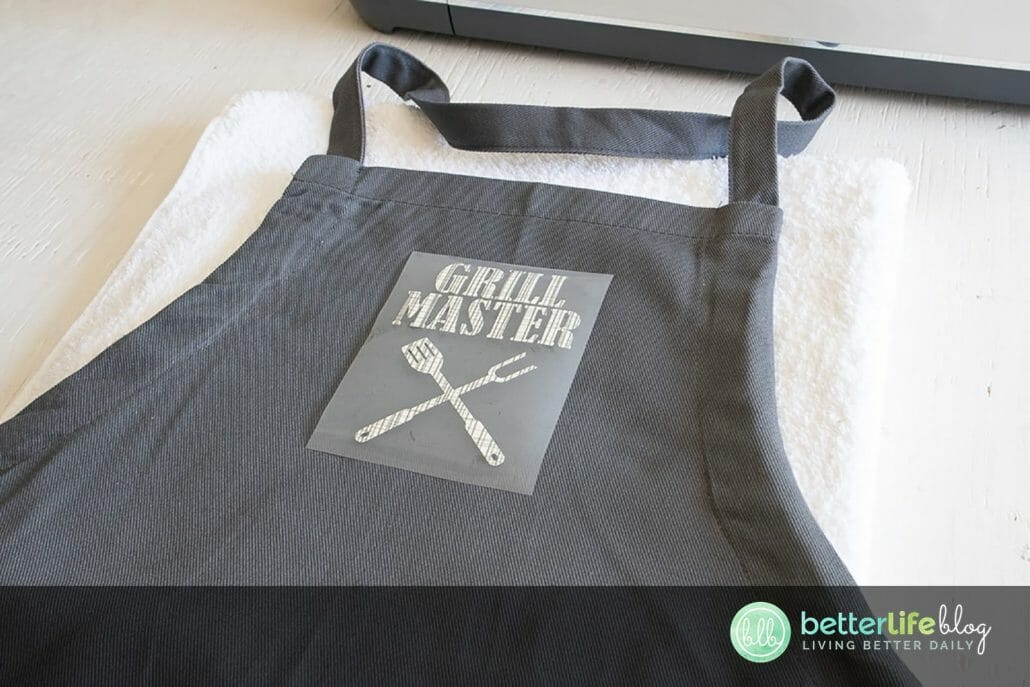
Personalized aprons make for the most unique gifts. This Mini Press Cricut Apron boasts a “Grill Master” image, making it the ideal gift for the foodie in your life!
In my tutorial, you’ll find easy-to-follow directions and a free “Grill Master” SVG file so that you can make this apron yourself. Once you’ve completed this DIY, you’ll want to make TONS of projects with your EasyPress Mini.
Materials and Tools Needed:
- Grill Master SVG Cut File (get it FREE here)
- Apron
- Cricut Machine with Fine Point Blade
- Patterned Iron On Vinyl, I used the Cricut Rustic Lodge Lumberjack Sampler
- Cricut Standard Grip Mat
- Weeding Tool of your choice
- EasyPress Mini
- EasyPress Mat or Towel

Instructions:
Pre-Work
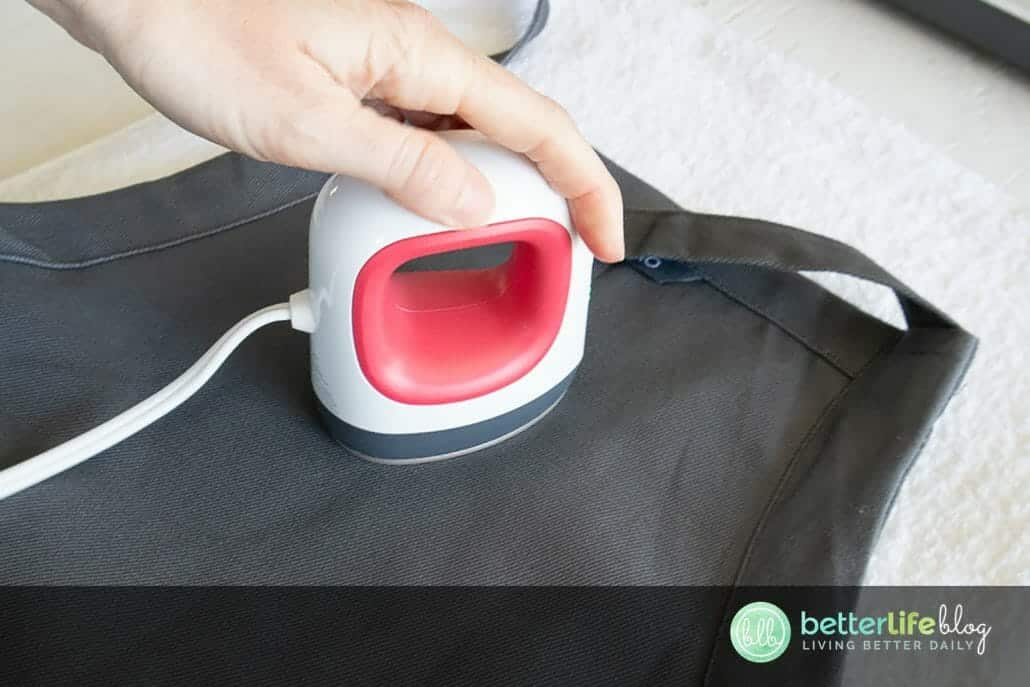
- To start, it’s important to pre-wash and dry your apron. Once washed and dried, iron out all wrinkles and creases.
Preparing the Image
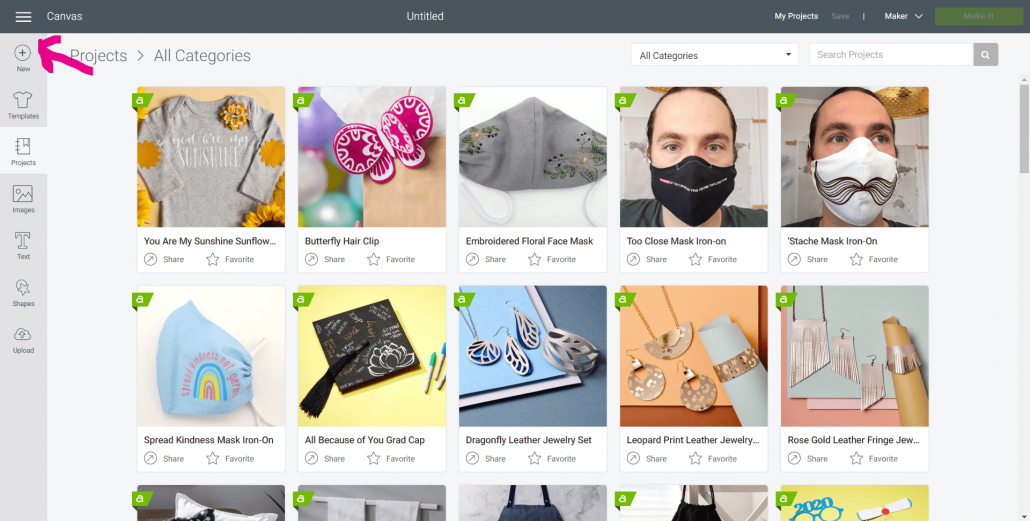
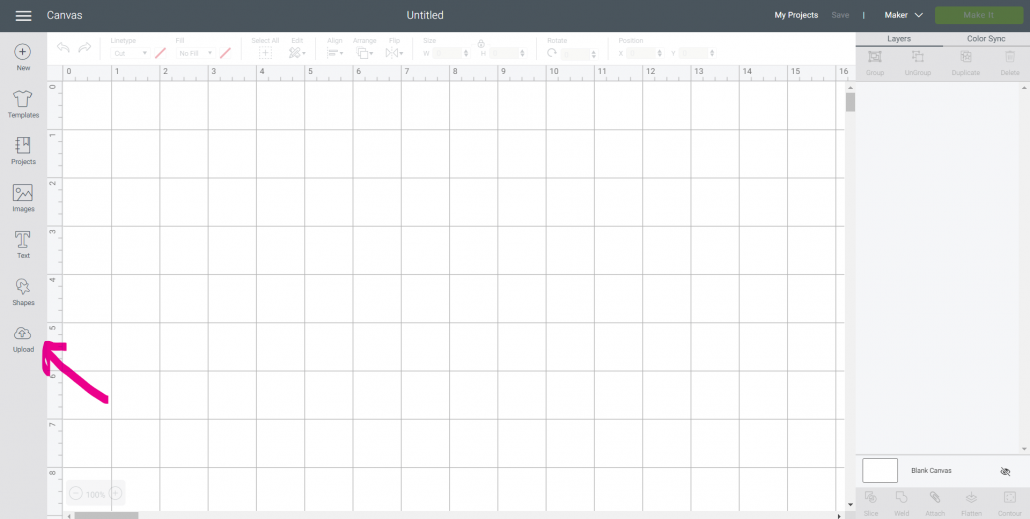
- Begin by opening Cricut’s Design Space. Click on the “+” sign to start a new project – this will open up a blank canvas.
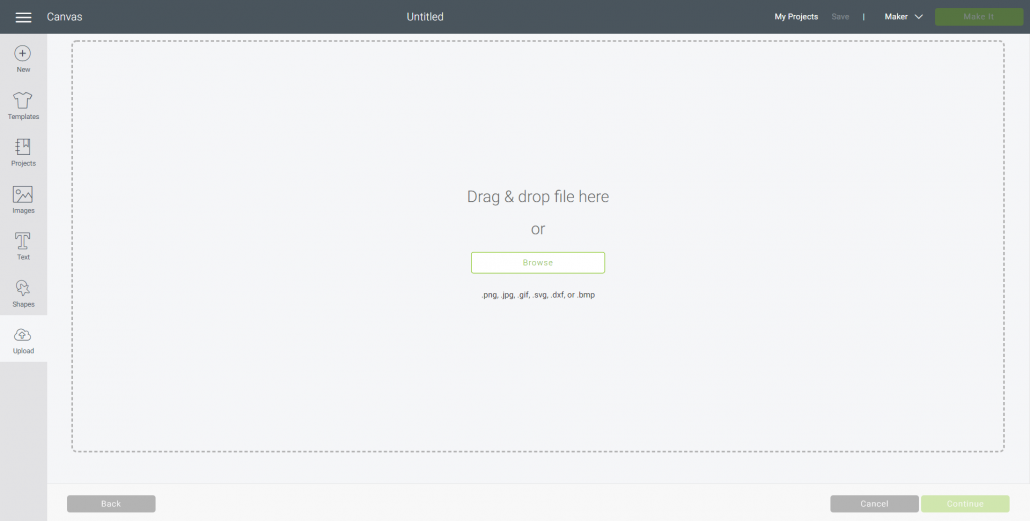
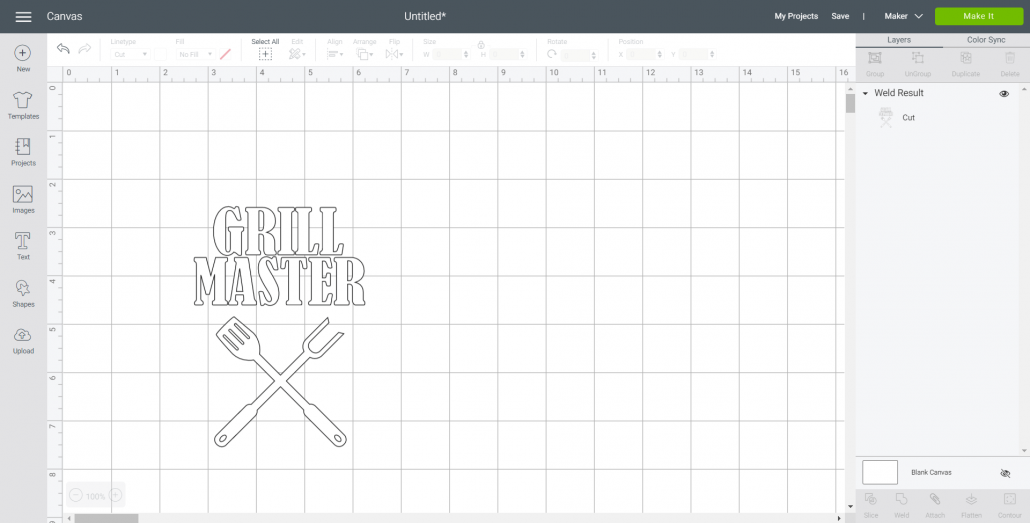
- On the toolbar, click on “Upload” and browse downloaded files to insert the “Grill Master” SVG file. Once uploaded, the “Grill Master” image will appear on the canvas.
- Highlight the image and click on “Weld.” This will secure all parts of the image together for cutting.
- You may maintain the image’s original size (5” high x 3.5” wide”) but if desired, you can also adjust the image to fit your apron. In order to make proper adjustments, highlight the image and click on the size box in the top toolbar. From there, change the measurement to suit your apron.


Cutting the Iron-On Vinyl
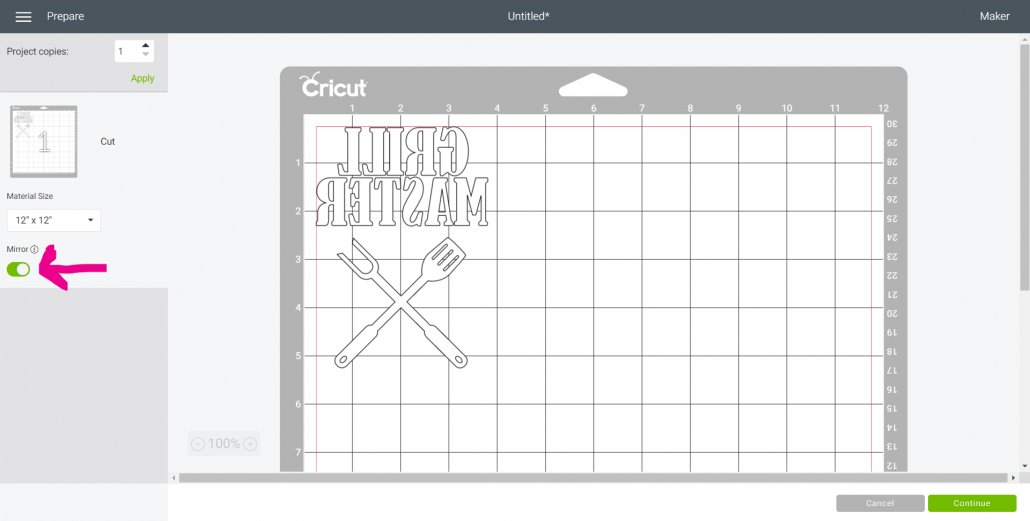
- To begin the cutting process, select “Make It” in the upper right corner.
- Click the “Mirror” toggle button in order to turn it on. This is necessary for ALL iron on vinyl cuts.
- Change the material size or maintain it as 12”x12”.
- From the list of options in the drop down menu, select “Patterned Iron-On Vinyl.”
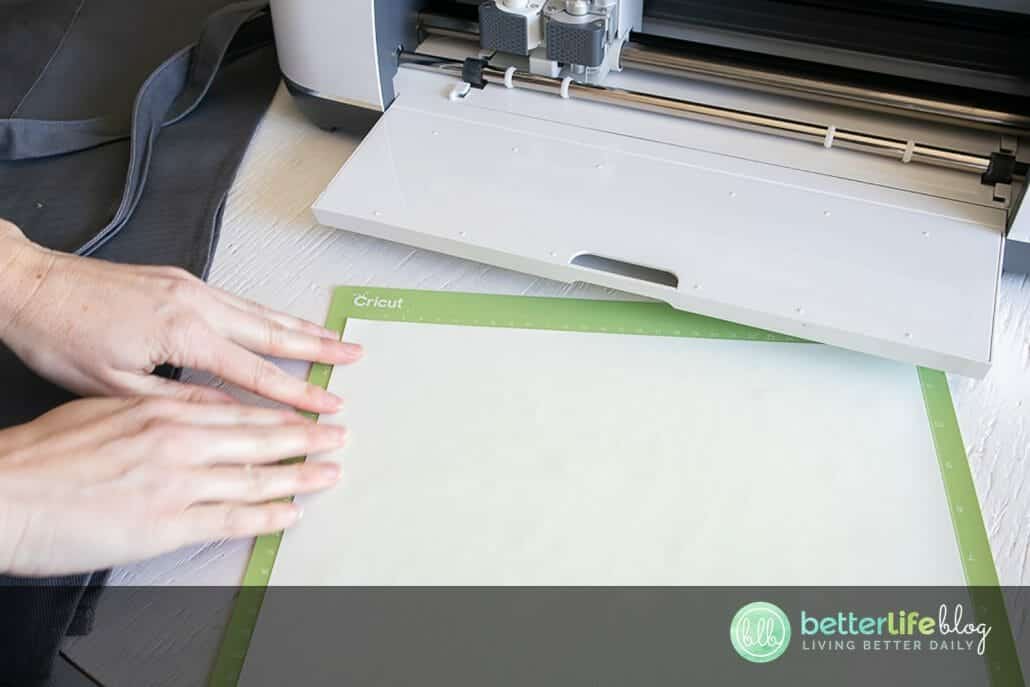
- Place the Iron-On Vinyl onto the standard grip Cricut mat. Ensure that the shiny side is down.
- Follow the instructions as prompted on the screen and cut out the vinyl.
Preparing the Cut Image
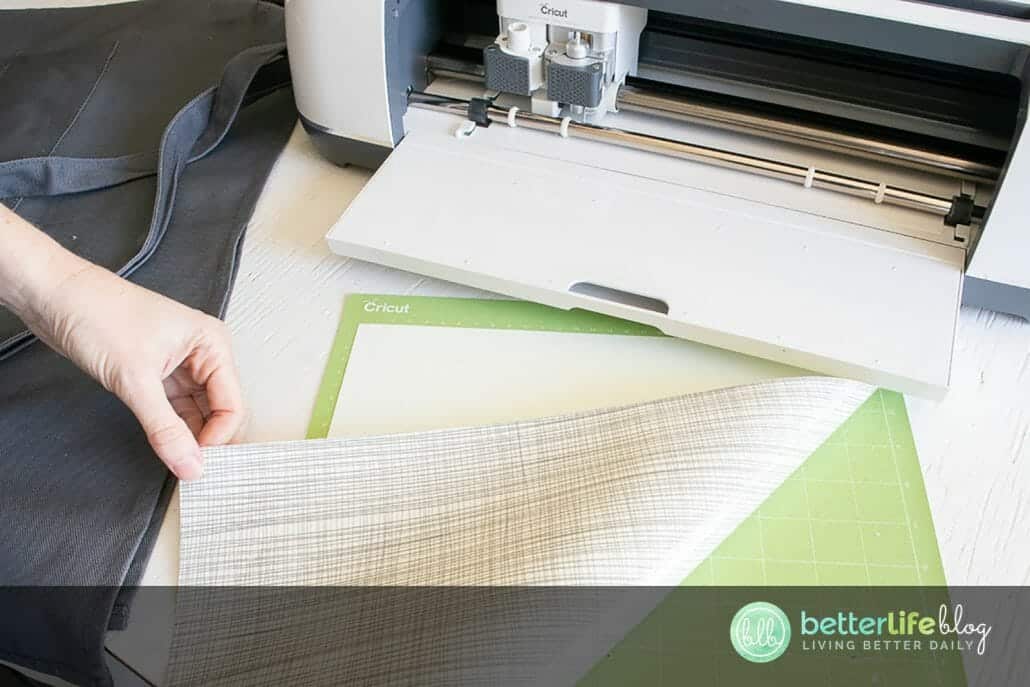
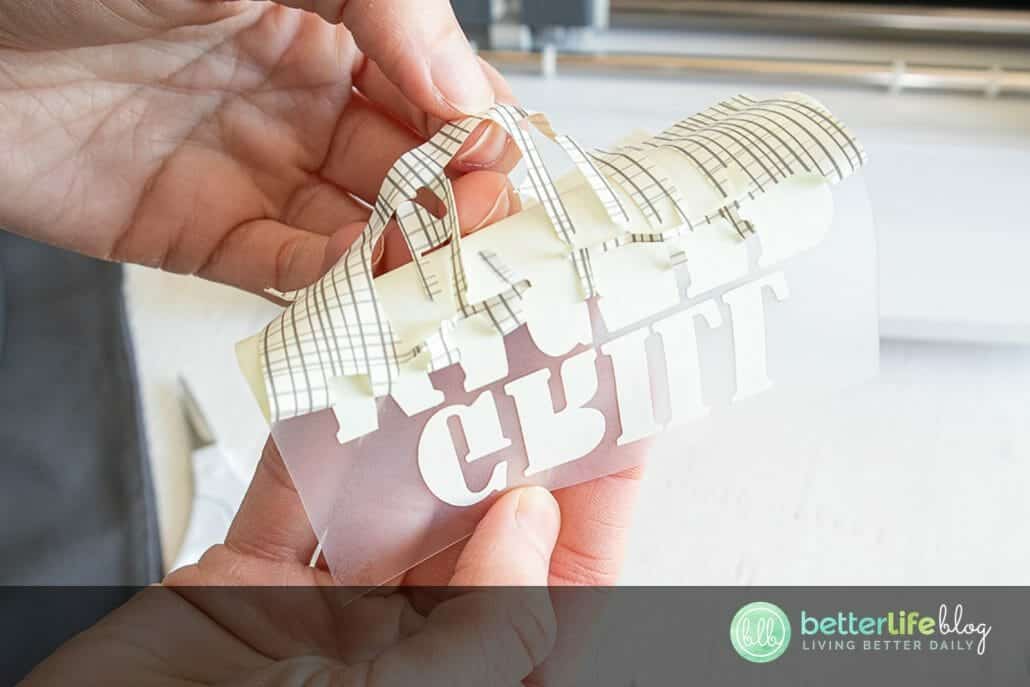
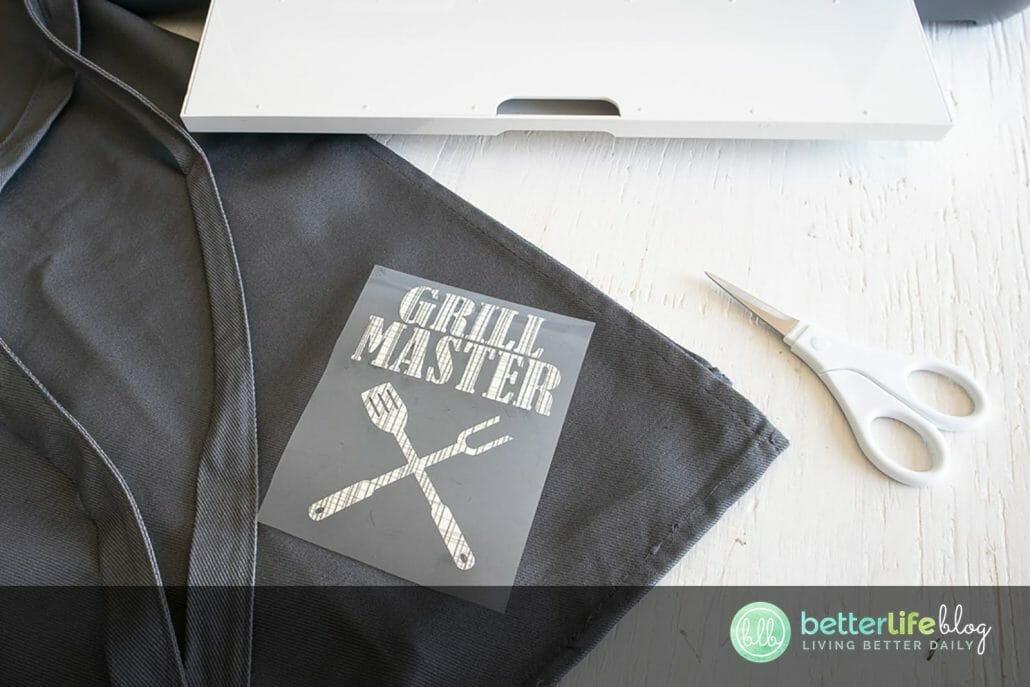
- Once the cutting process is complete, carefully remove the vinyl from the mat.
- Cut around the image. You may save the left over vinyl for a future project.
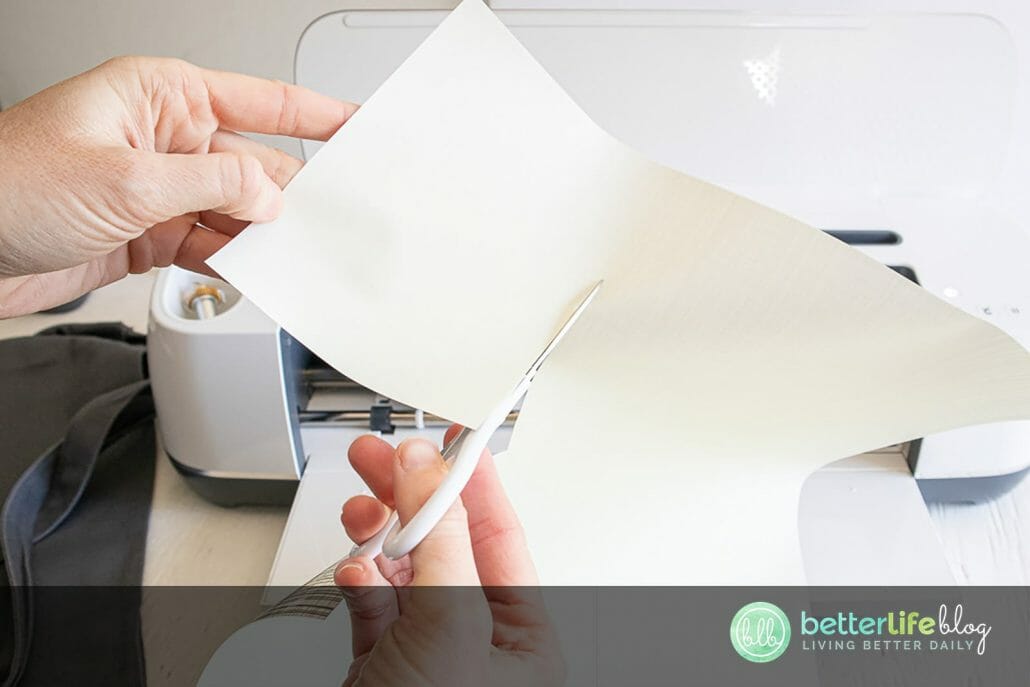
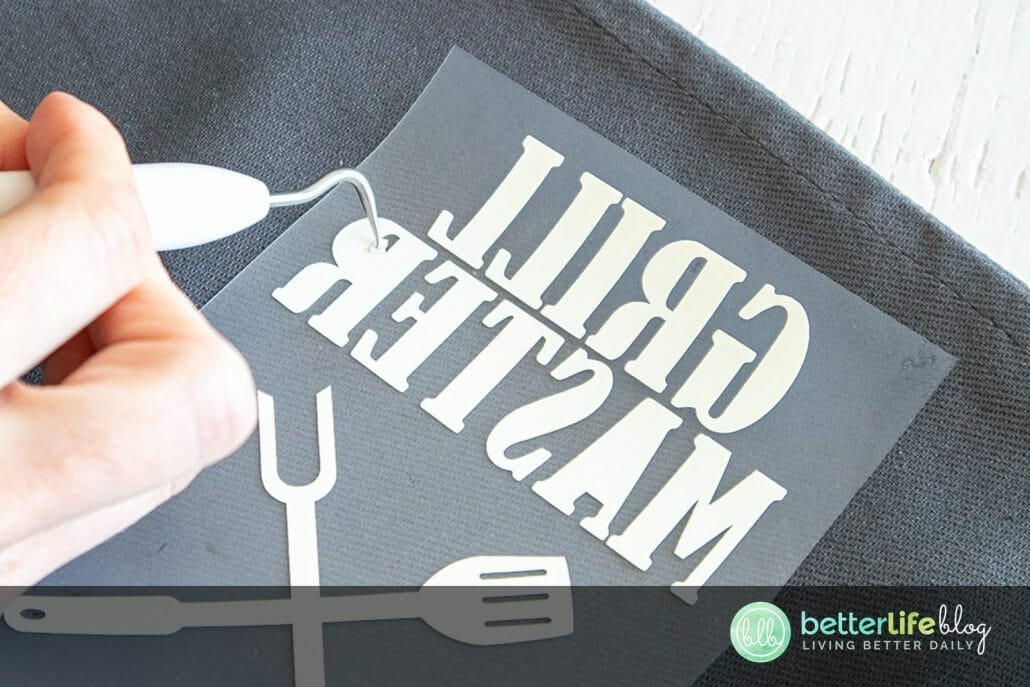
- Using a weeding tool, peel away the excess vinyl. You will only want want to be left with the “Grill Master” image.
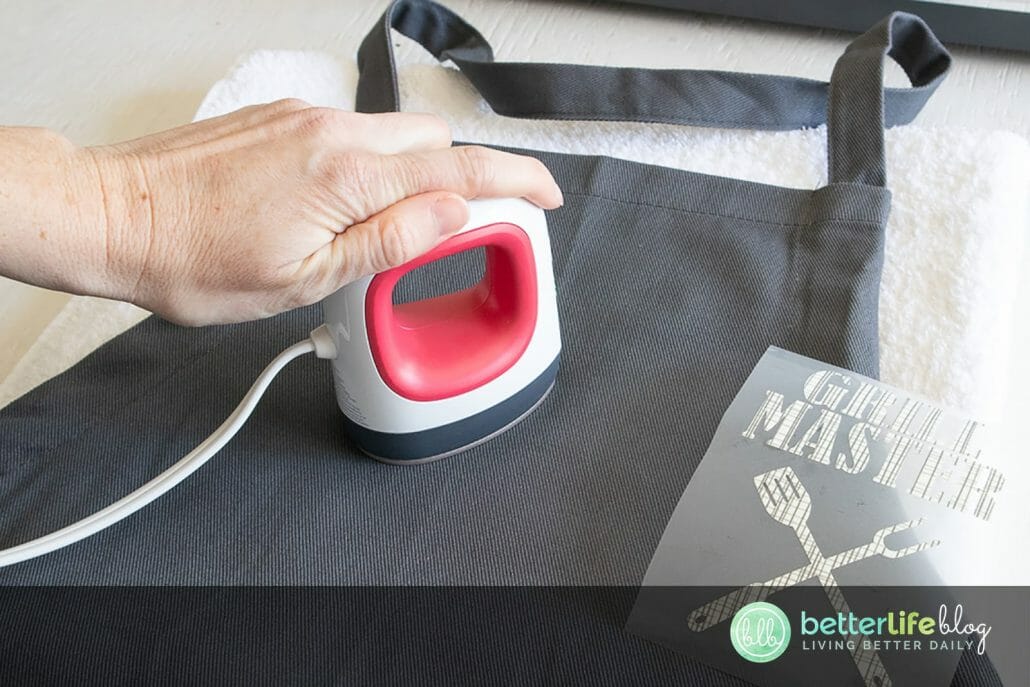
Applying the Image with the Cricut EasyPress Mini
- Position the mat or a towel on a flat surface.
- On your EasyPress, set temperature and time by following the chart for the type of vinyl and material being used. You may use this EasyPress Interactive Quick Reference Guide.
- If your apron is 100% cotton and you’re using Patterned Iron-On Vinyl, we recommend setting the EasyPress Mini to medium heat.
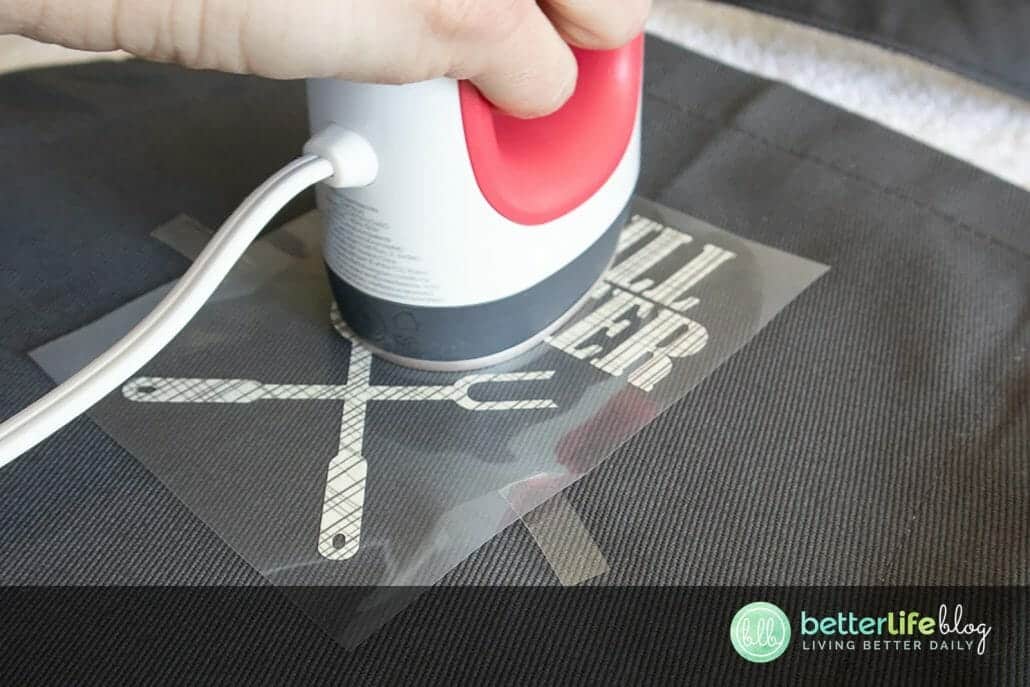
- Determine where you will be placing the image. Preheat the apron in that spot for 5 seconds. Preheating preps the fabric for the vinyl and also helps remove any excess moisture before application. Moreover, the preheating process further removes any creases and wrinkles from the fabric.
- Place the cut image on to the apron with the shiny side up.
- Temporarily hold the cut image in place with heat transfer tape.
- While constantly moving the EasyPress Mini as your press, press the image on the apron for 25 seconds.
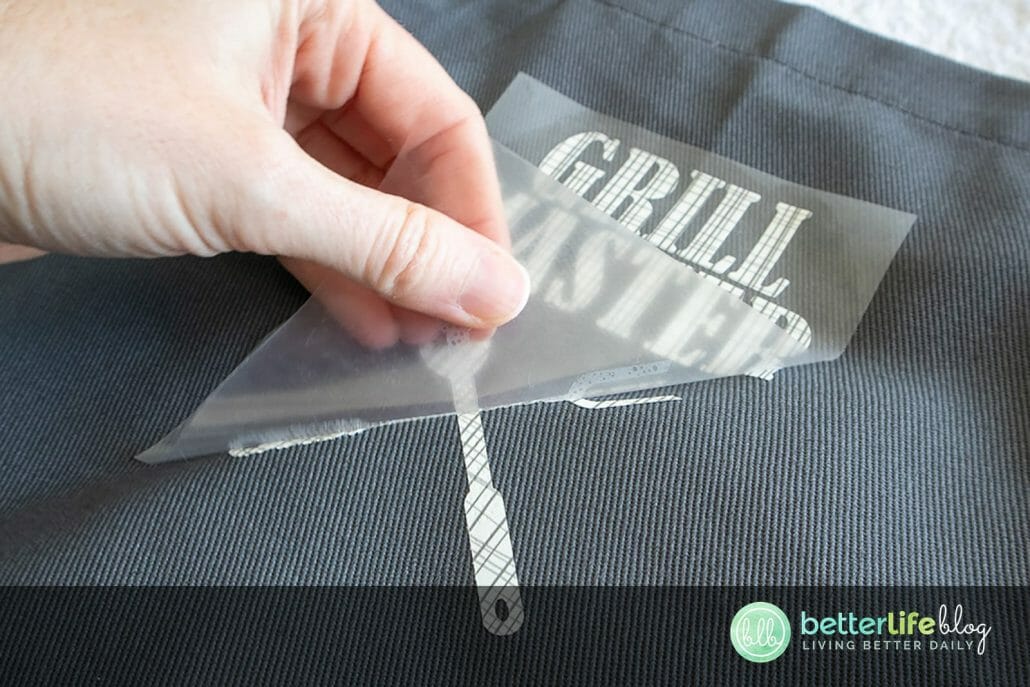
- Turn the apron upside down and apply heat for an additional 15 seconds. Allow the vinyl to cool.
- Once the vinyl cools, carefully peel off the plastic part of the vinyl and discard.
- Take note to never place an iron or the EasyPress Mini directly over the vinyl without a protective plastic cover.
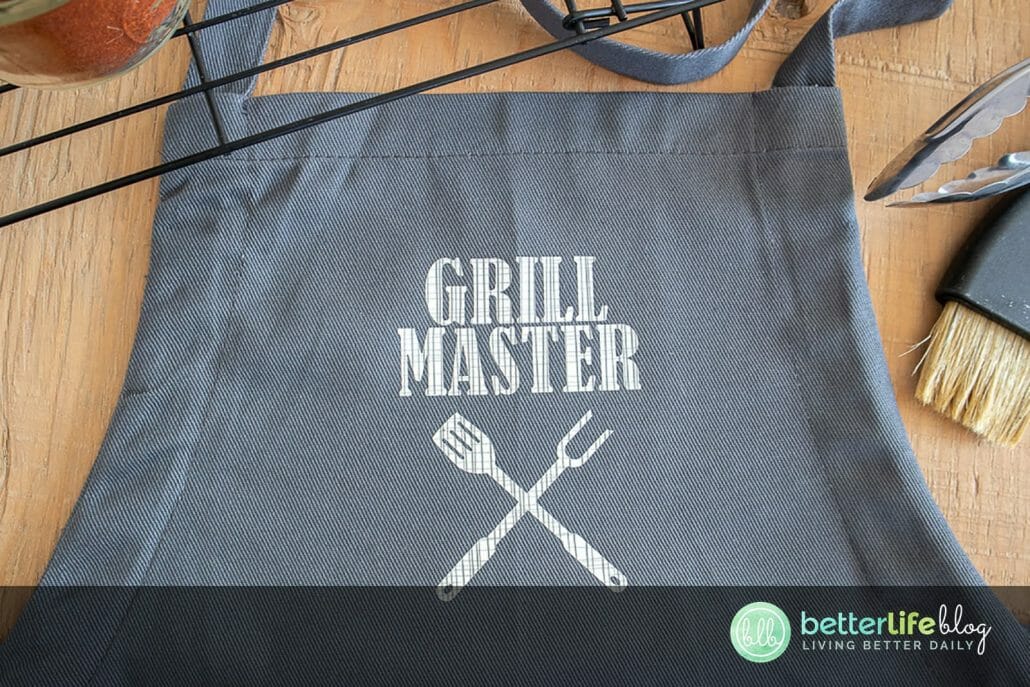

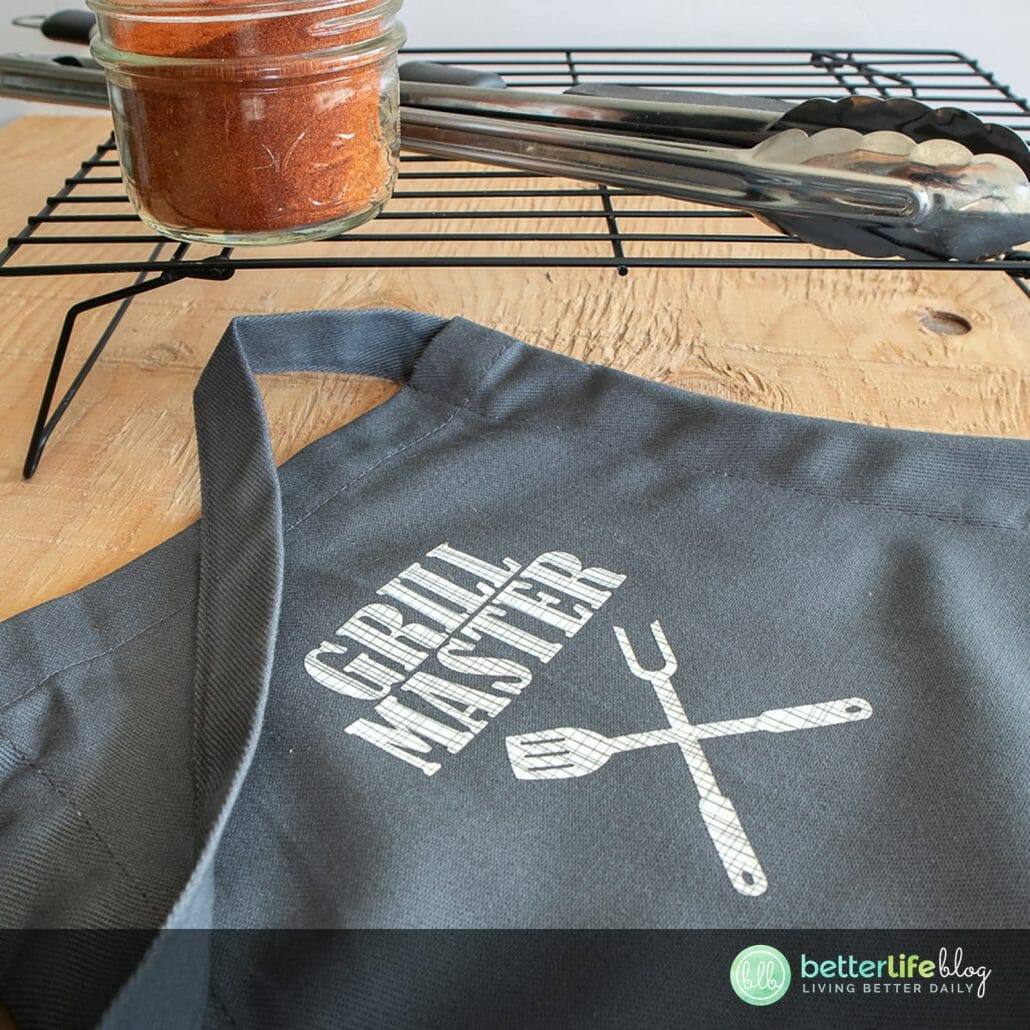
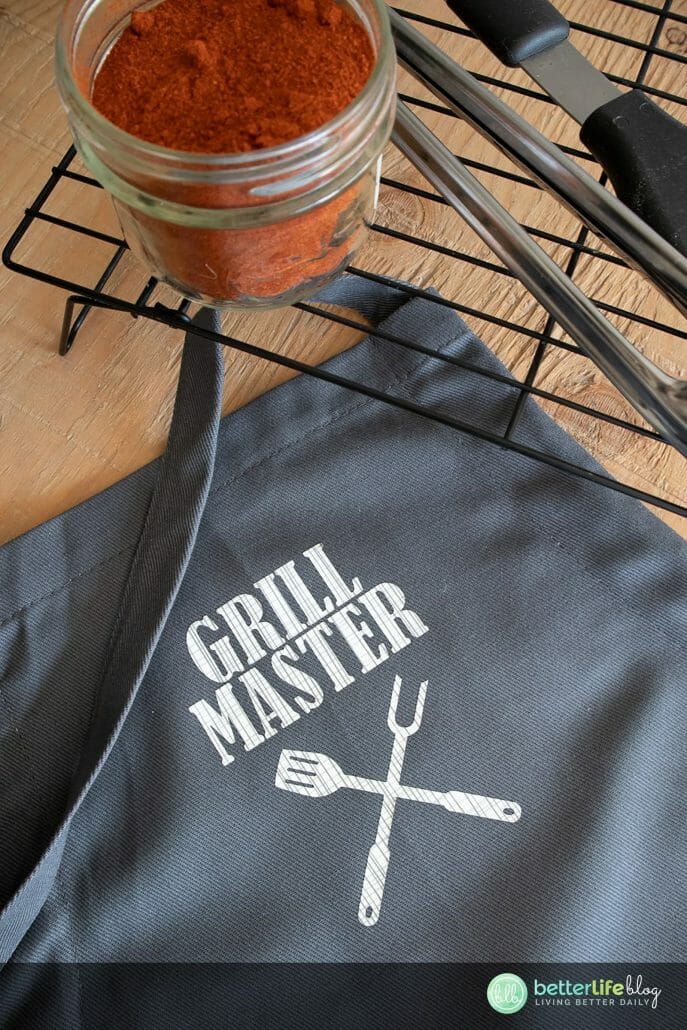
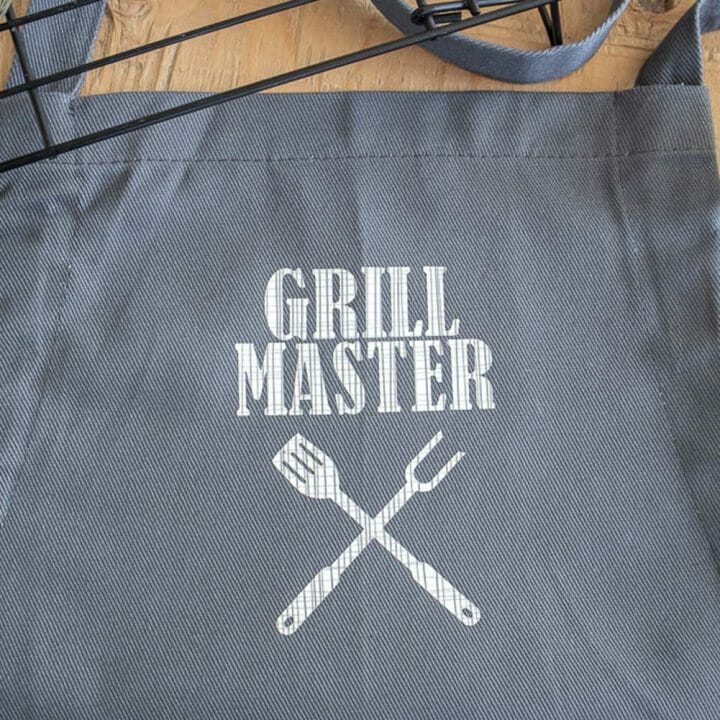
Mini Press Cricut Apron
This Mini Press Cricut Apron makes for the perfect gift for the foodie in your life! You’ll see how easy it is to personalize anything with the nifty Cricut EasyPress Mini.
Materials
- Grill Master SVG file
- Apron
- Cricut Maker with Fine Point Blade
- Patterned Iron On Vinyl, Rustic Lodge Lumberjack Sampler
- Cricut Standard Grip Mat
- Weeding Tool
- EasyPress Mini
- EasyPress Mat or Towel
Instructions
Pre-Work
- To start, it’s important to pre-wash and dry your apron. Once washed and dried, iron out all wrinkles and creases.
Preparing the Image
- Begin by opening Cricut’s Design Space. Click on the “+” sign to start a new project - this will open up a blank canvas.
- On the toolbar, click on “Upload” and browse downloaded files to insert the “Grill Master” SVG file. Once uploaded, the “Grill Master” image will appear on the canvas.
- Highlight the image and click on “Weld.” This will secure all parts of the image together for cutting.
- You may maintain the image’s original size (5” high x 3.5” wide”) but if desired, you can also adjust the image to fit
your apron. In order to make proper adjustments, highlight the image and click on the size box in the top toolbar. From there, change the measurement to suit your apron.
Cutting the Iron-On Vinyl
- To begin the cutting process, select “Make It” in the upper right corner.
- Click the “Mirror” toggle button in order to turn it on. This is necessary for ALL iron on vinyl cuts.
- Change the material size or maintain it as 12”x12”.
- From the list of options in the drop down menu, select “Patterned Iron-On Vinyl.”
- Place the Iron-On Vinyl onto the standard grip Cricut mat. Ensure that the shiny side is down.
- Follow the instructions as prompted on the screen and cut out the vinyl.
Preparing the Cut Image
- Once the cutting process is complete, carefully remove the vinyl from the mat.
- Cut around the image. You may save the left over vinyl for a future project.
- Using a weeding tool, peel away the excess vinyl. You will only want want to be left with the “Grill Master” image.
Applying the Image with the Cricut
EasyPress Mini
- Position the mat or a towel on a flat surface.
- On your EasyPress, set temperature and time by following the chart for the type of vinyl and material being used. You may use this EasyPress Interactive Quick Reference Guide: https://home.cricut.com/easypress-heat-settings-guide
- If your apron is 100% cotton and you’re using Patterned Iron-On Vinyl, we recommend setting the EasyPress Mini to
medium heat. - Determine where you will be placing the image. Preheat the apron in that spot for 5 seconds. Preheating preps the
fabric for the vinyl and also helps remove any excess moisture before application. Moreover, the preheating process further removes any creases and wrinkles
from the fabric. - Place the cut image on to the apron with the shiny side up.
- Temporarily hold the cut image in place with heat transfer tape.
- While constantly moving the EasyPress Mini as your press, press the image on the apron for 25 seconds.
- Turn the apron upside down and apply heat for an additional 15 seconds. Allow the vinyl to cool.
- Once the vinyl cools, carefully peel off the plastic part of the vinyl and discard.
- Take note to never place an iron or the EasyPress Mini directly over the vinyl without a protective plastic cover.