When it comes to Halloween décor, it’s all about the ambiance you create. How do YOU play up the spook factor? Of course, I never like going TOO scary – there’s always a fine balance between Halloween creepiness and cuteness!
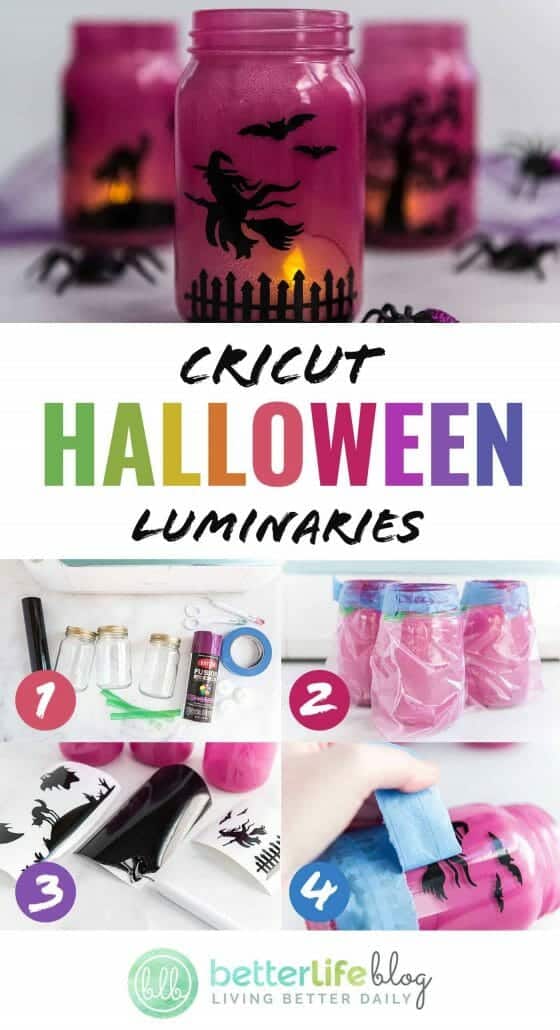
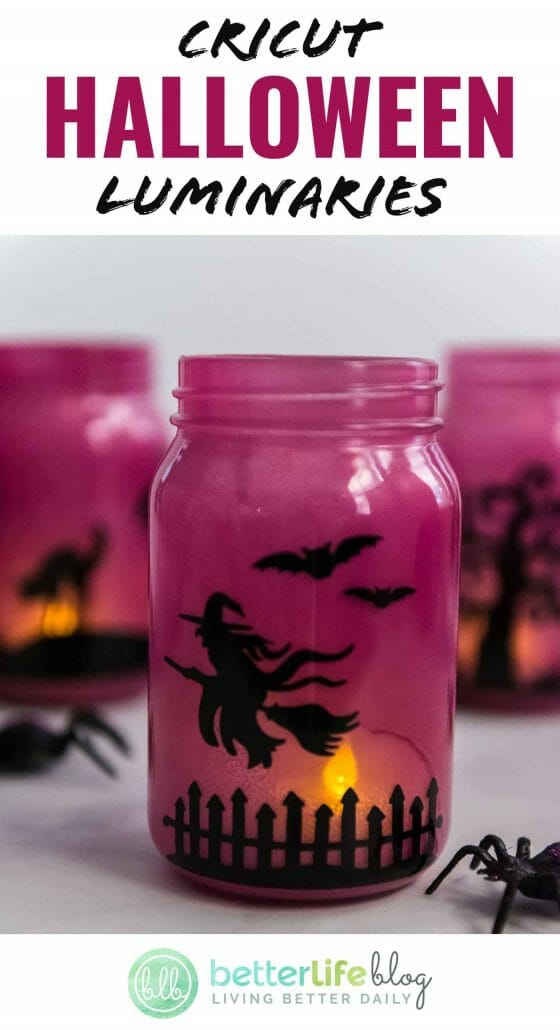
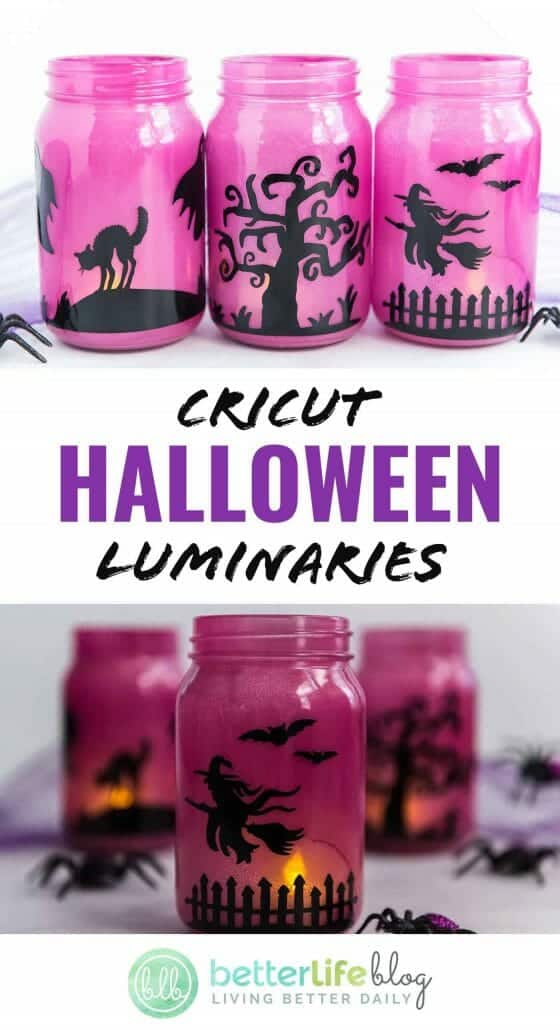
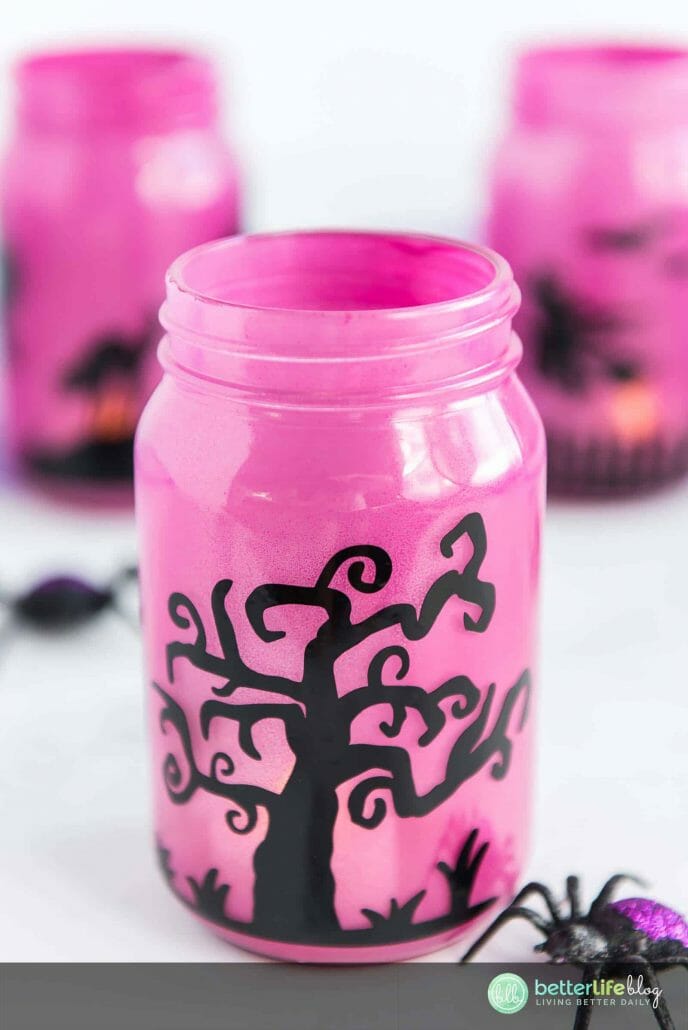
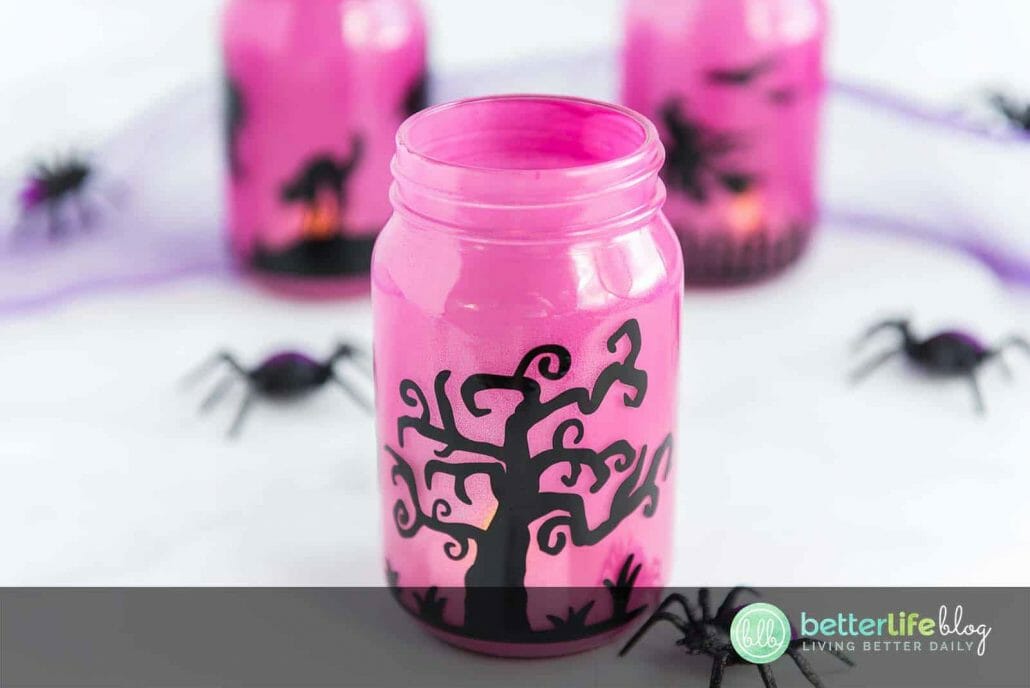
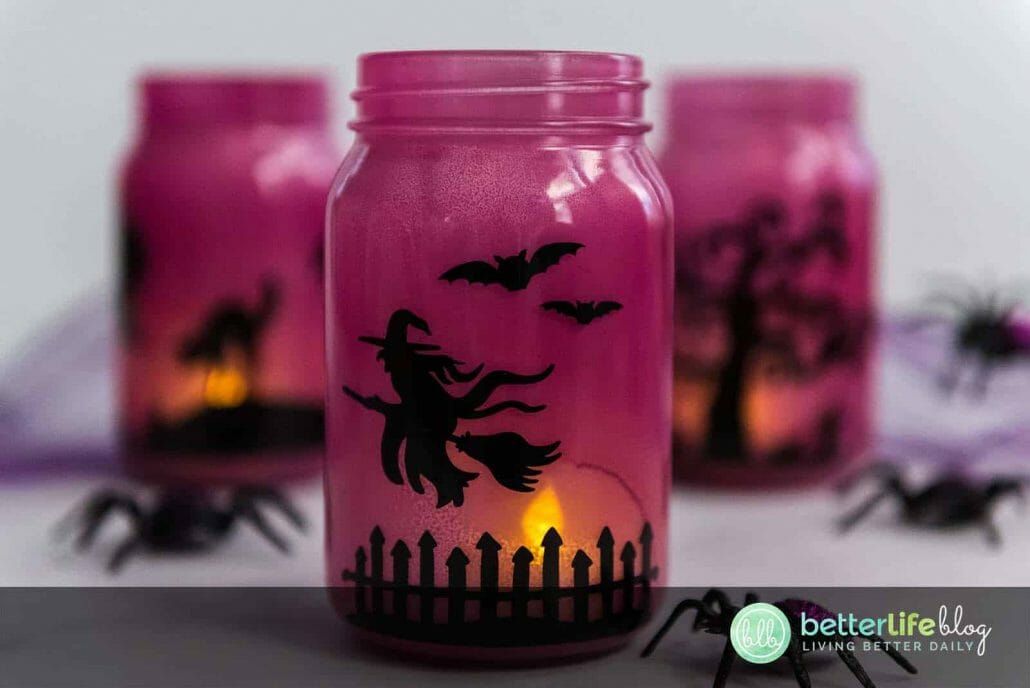
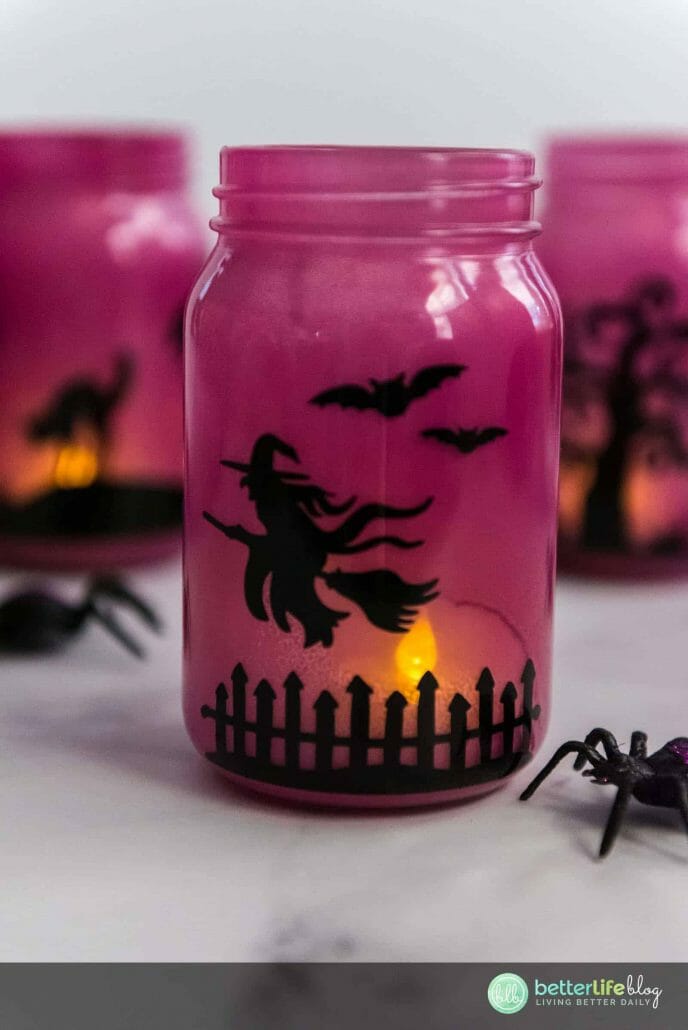
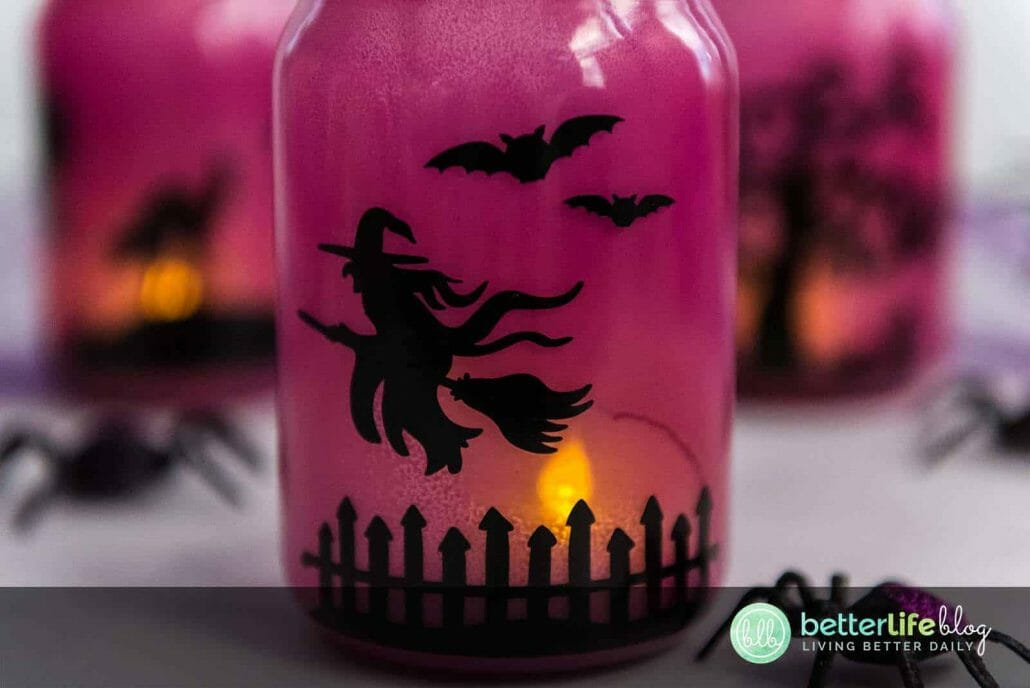
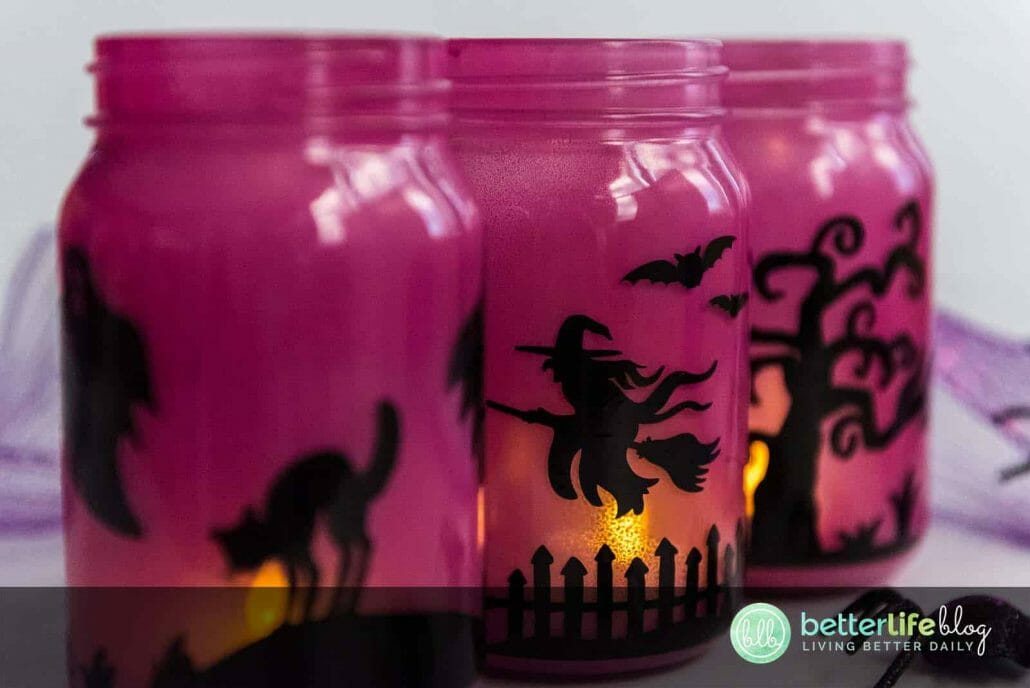
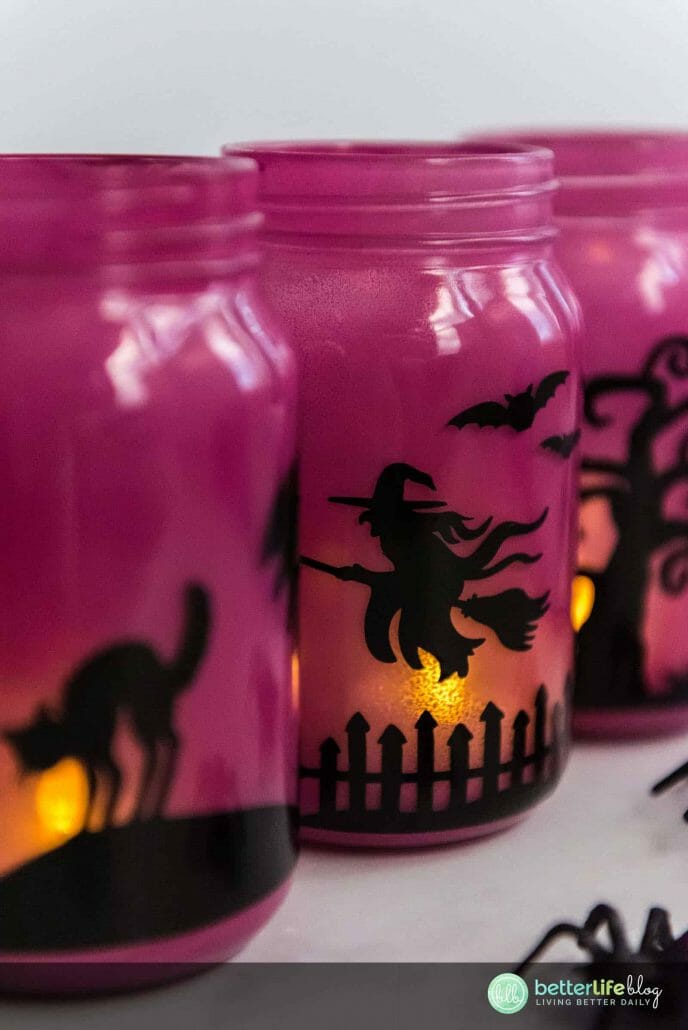
My Cricut Luminaries provide a perfect glow. Its colored glass and Cricut-made design give it the perfect feel for October 31st. It allows for light to shine through, creating exactly that spooky (yet, adorable!) ambiance I’m searching for in my annual Halloween décor setup.
Down below, you’ll find my step-by-step tutorial on how to create your very own Halloween Luminaries – all with the help of a Cricut machine! You’ll learn how to work with black permanent vinyl (which is way easier than you think!). Keep on reading to find out how!
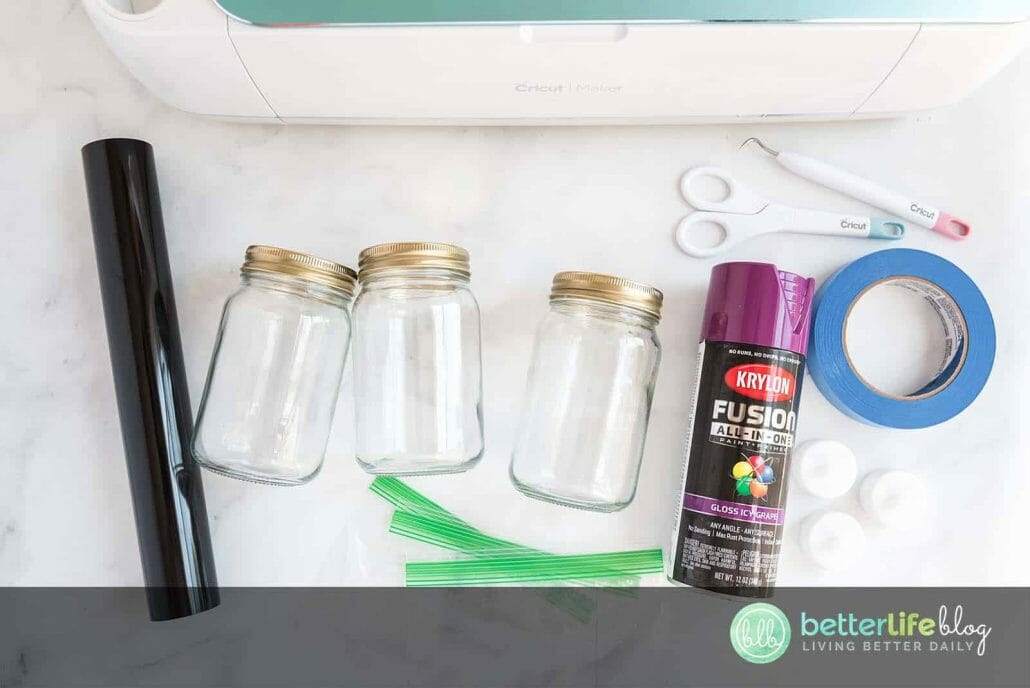
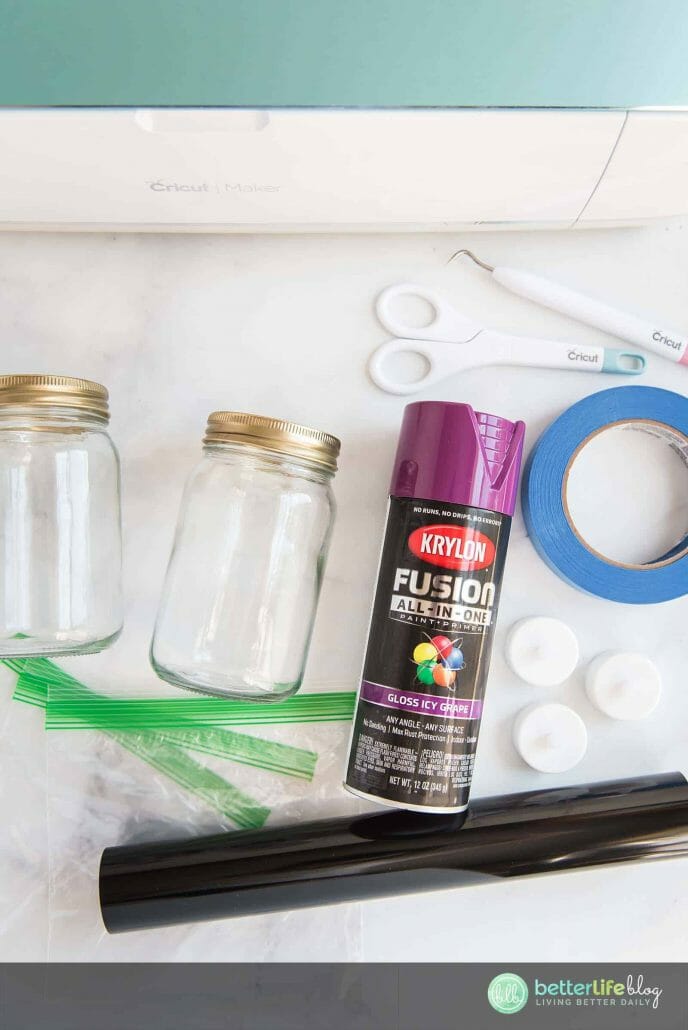
Materials List:
- Cricut machine
- Weeding and scraper tools
- Painter’s tape
- Cutting mat
- Scissors
- Plastic sandwich bags
- Black permanent vinyl
- Krylon Fusion All-in-One Spray paint in the color Gloss Icy Grape
- Battery-powered tea light candles
- 16 oz Smooth Glass Mason Jars
- Cardboard box or other surface that can be painted on
- Spooky Silhouette SVG Cut File

Instructions:
Open your plastic sandwich bags and place one mason jar inside each bag. Take your painters tape and attach the bag evenly around the top rim of the jar.

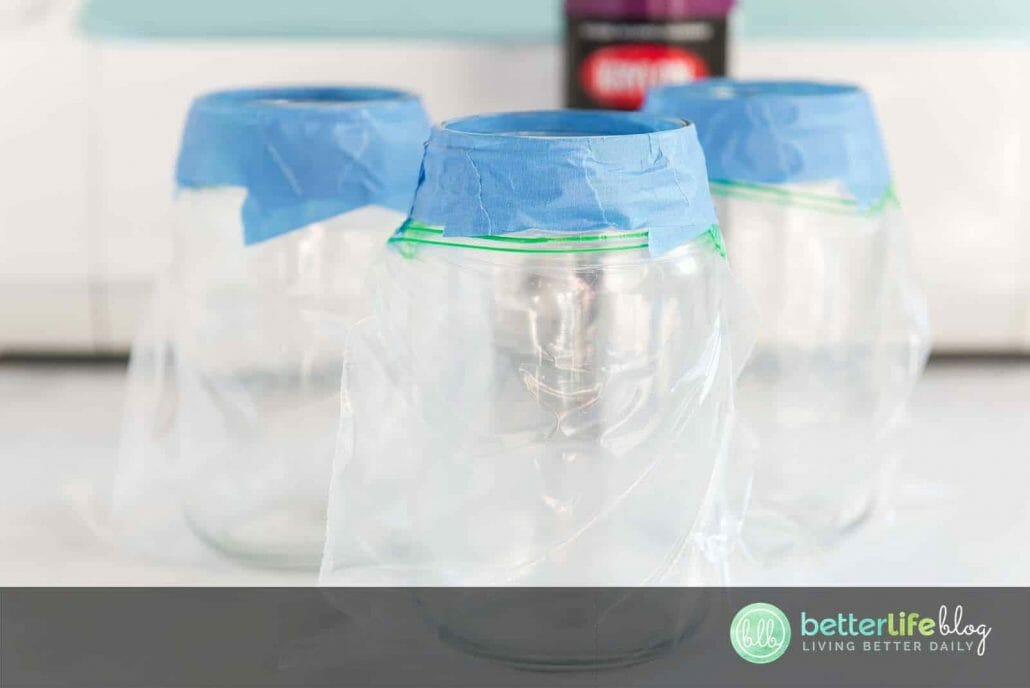
Place your taped jars inside a cardboard box or other surface that can be painted on. Take outside to paint where there is a lot of ventilation. Following the directions on the back of your spray paint, lightly spray inside each jar all the way around the inside. Allow to dry completely.

Once all of your jars are dry, remove the painters tape and plastic sandwich bags.

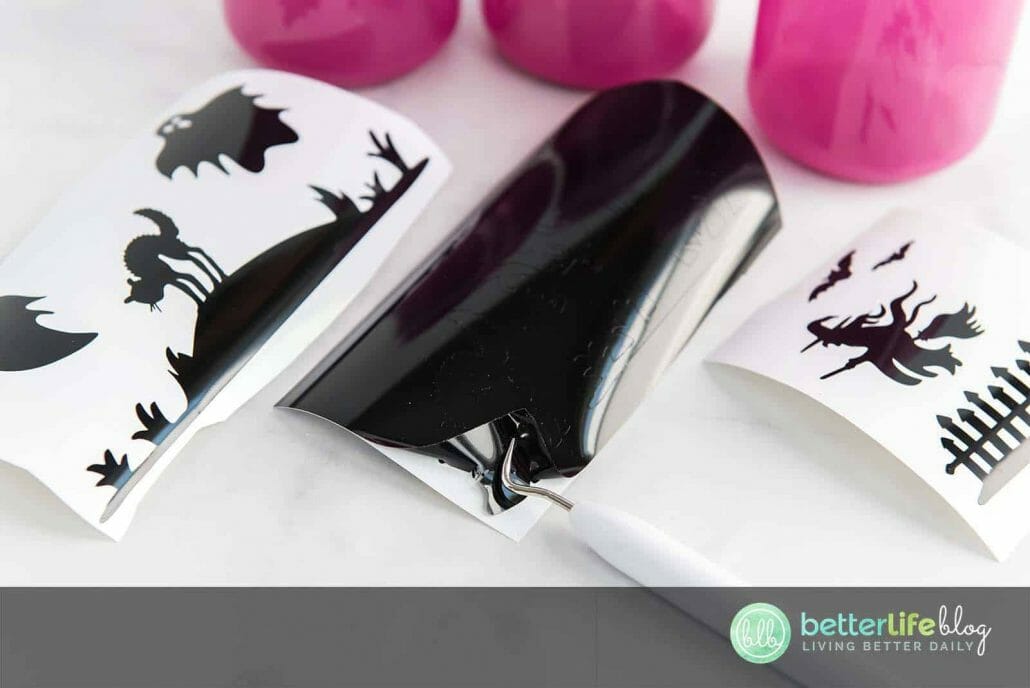
Gather your black vinyl and other supplies for your Cricut. Open Cricut Design Space and upload the “Spooky Silhouette” svg file from the October 2018 VIP Cut Files. Select all and ungroup. Remove any image groupings that you aren’t cutting. Select each image grouping and change the height to 3.5”. Next select the “Make it” button and proceed to the next screen. Select premium vinyl for your materials and proceed to cut on the next screen.
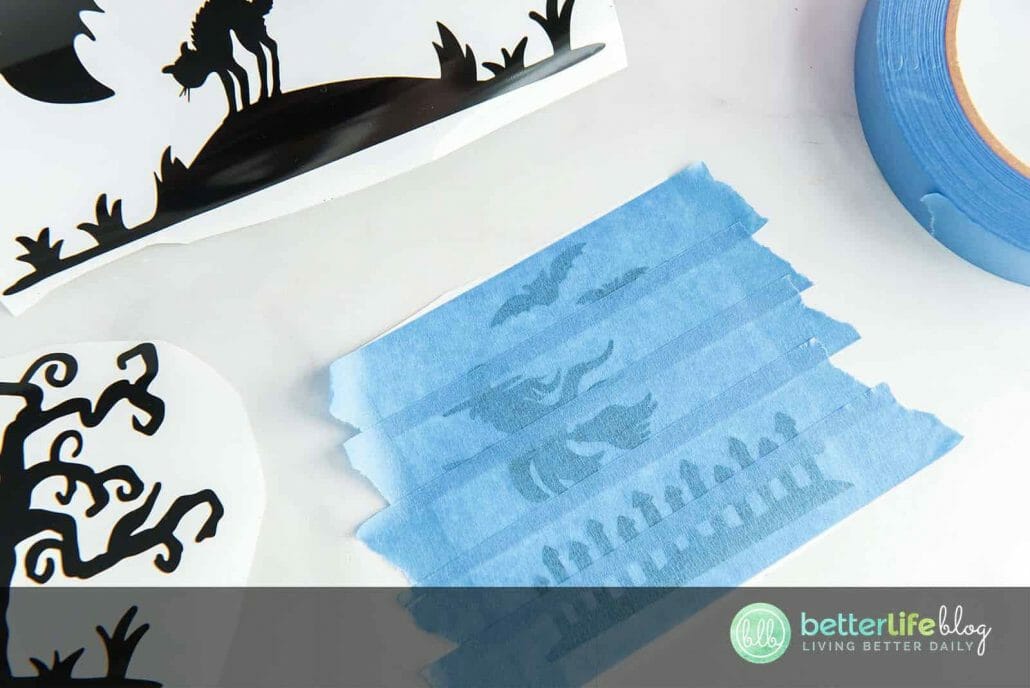
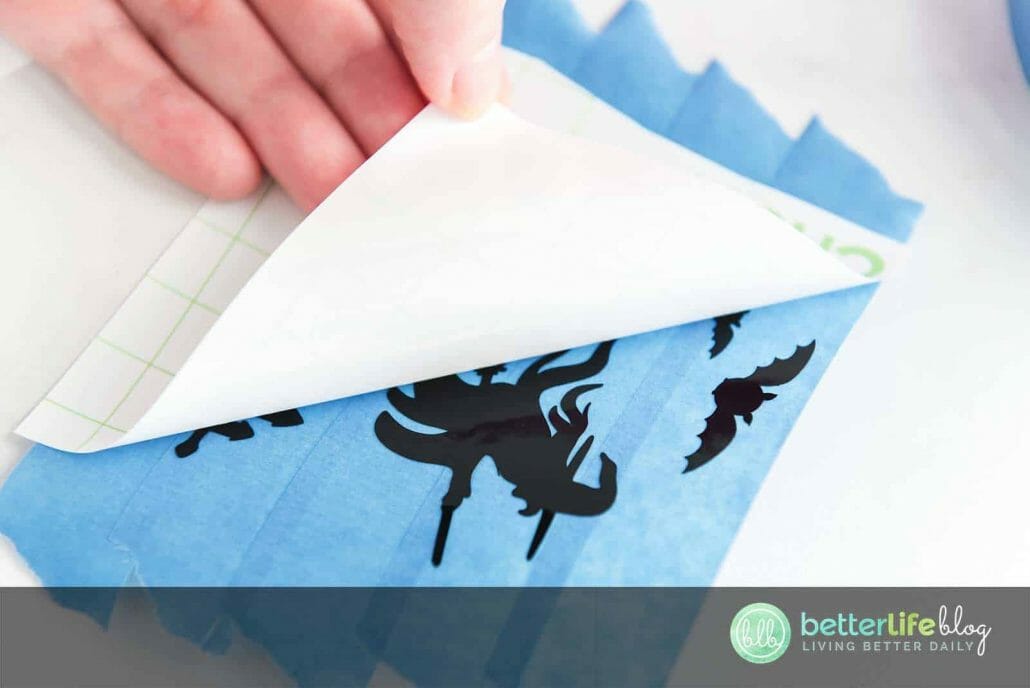
Once your material is cut, weed your vinyl on each image set. Place strips of blue painters tape over each image set until they are covered completely. Remove the backing sheet from the vinyl.
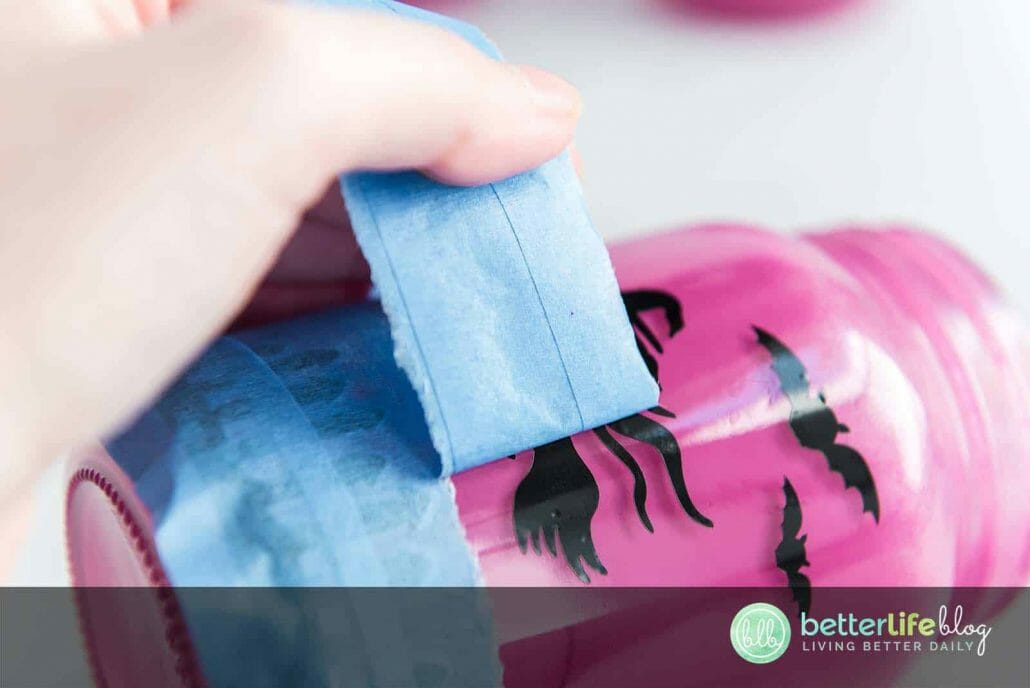
Place your vinyl onto your glass jar, starting in the middle and pressing out towards the edges. Press down over your entire image to adhere your vinyl well. Peel off your painters tape on layer at a time, starting at the top and work your way down to the bottom of the jar. Repeat this for all image sets on each jar.

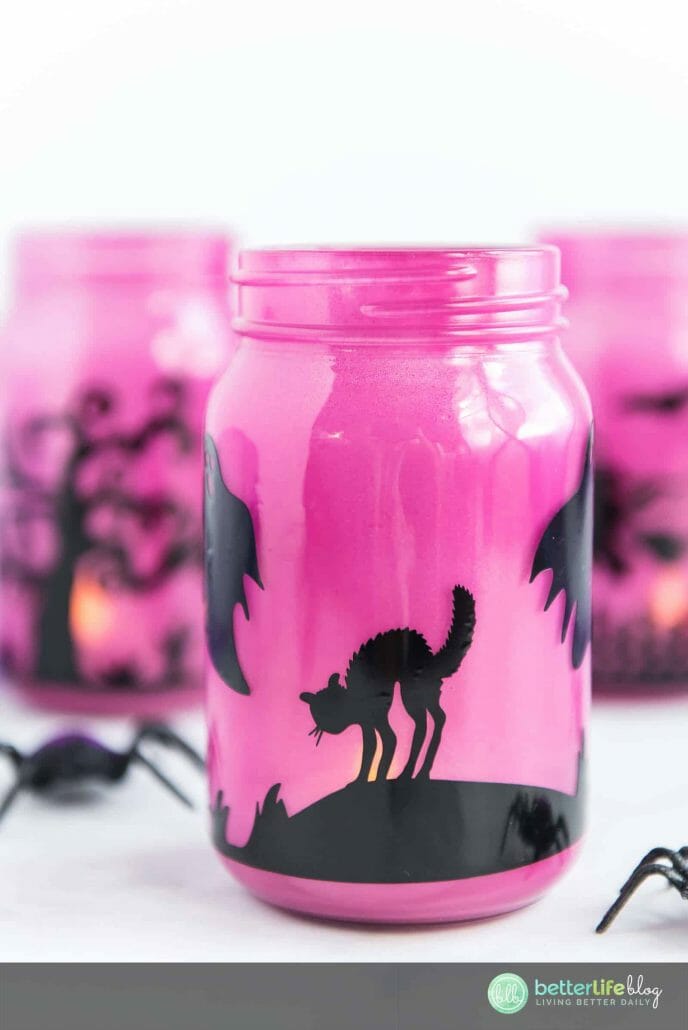
Place a battery-powered tea light in each jar to illuminate your new Halloween lanterns! Enjoy!

Notes:
When you are spray painting inside the jars, be careful not to get too close to the sides, as this will bounce off the glass and overspray back onto your hands. You can wear gloves to prevent any staining on your hands.
It is always important to spray paint in a well ventilated area.
It is extremely important that you do not use regular tea light with an actual fire flame. Spray paint is flammable, and since it is painted on the inside, low powered battery operated lights are the only acceptable ways to light the inside of these jars.
Since you are placing vinyl on a curved surface, it is important to start in the middle and work your way outwards. The bottom of the jars are curved also, so you may need to smooth it out more after you remove your tape.

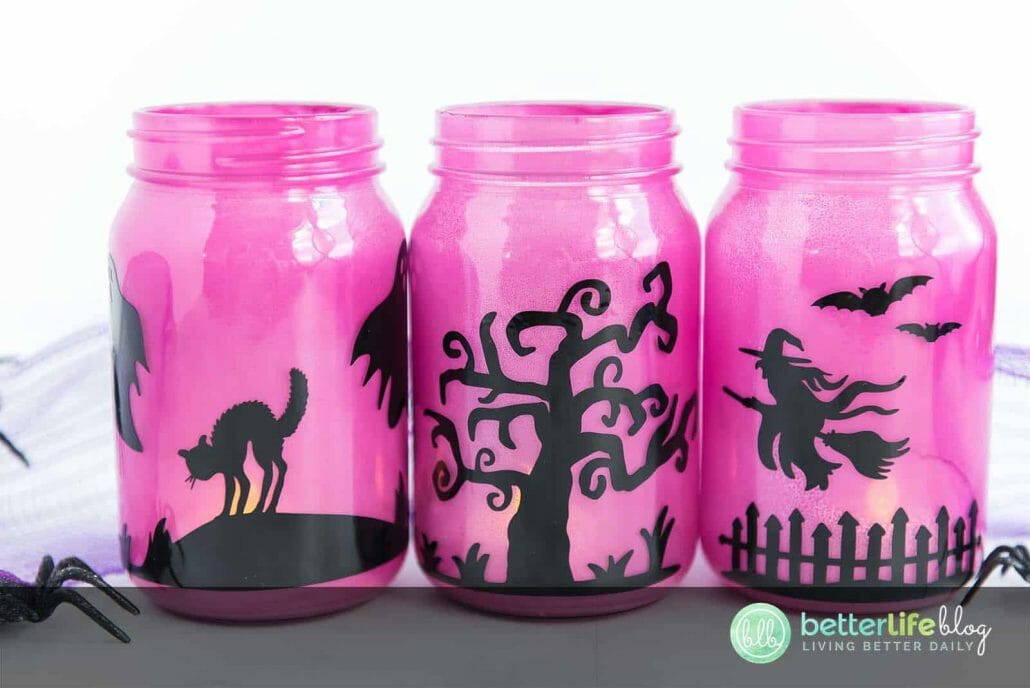
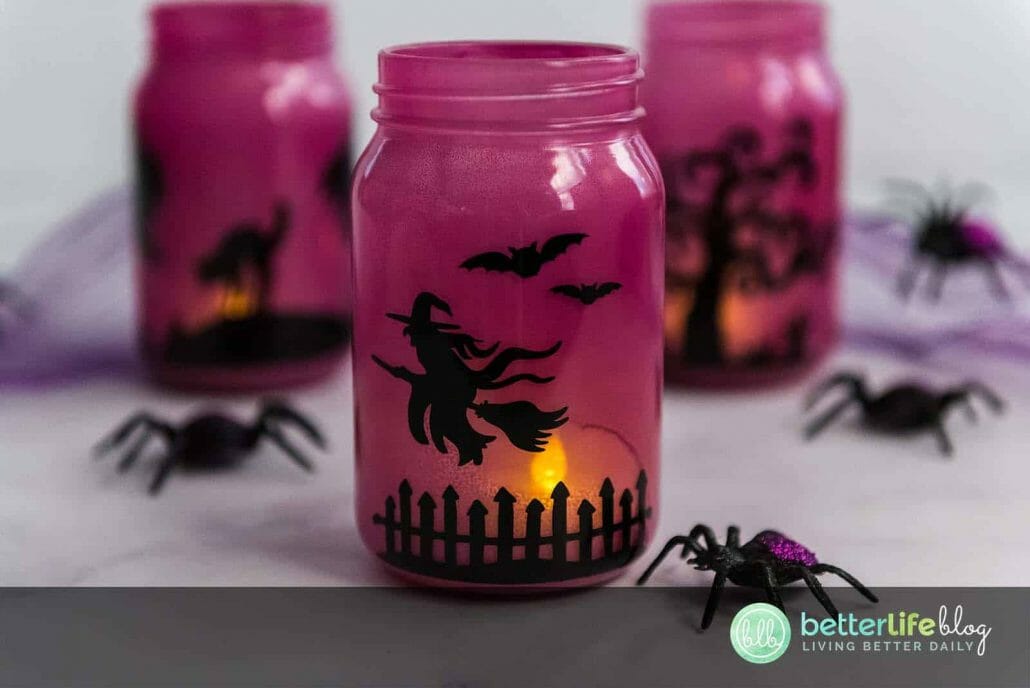

Cricut Halloween Luminaries
My Cricut Luminaries provide a perfect glow. Its colored glass and Cricut-made design give it the perfect feel for October 31st. Learn how to make it with our easy-to-follow step-by-step instructions.
Materials
- Cricut machine
- Weeding and scraper tools
- Painter’s tape
- Cutting mat
- Scissors
- Plastic sandwich bags
- Black permanent vinyl
- Krylon Fusion All-in-One Spray paint in the color Gloss Icy Grape
- Battery-powered tea light candles
- 16 oz Smooth Glass Mason Jars
- Cardboard box or other surface that can be painted on
- Spooky Silhouette SVG file from the October 2018 VIP Cut Files
Instructions
- Open your plastic sandwich bags and place one mason jar inside each bag. Take your painters tape and attach the bag evenly around the top rim of the jar.
- Place your taped jars inside a cardboard box or other surface that can be painted on. Take outside to paint where there is a lot of ventilation. Following the directions on the back of your spray paint, lightly spray inside each jar all the way around the inside. Allow to dry completely.
- Once all of your jars are dry, remove the painters tape and plastic sandwich bags.
- Gather your black vinyl and other supplies for your Cricut. Open Cricut Design Space and upload the “Spooky Silhouette” svg file from the October 2018 VIP Cut Files. Select all and ungroup. Remove any image groupings that you aren’t cutting. Select each image grouping and change the height to 3.5”. Next select the “Make it” button and proceed to the next screen. Select premium vinyl for your materials and proceed to cut on the next screen.
- Once your material is cut, weed your vinyl on each image set. Place strips of blue painters tape over each image set until they are covered completely. Remove the backing sheet from the vinyl.
- Place your vinyl onto your glass jar, starting in the middle and pressing out towards the edges. Press down over your
entire image to adhere your vinyl well. Peel off your painters tape on layer at a time, starting at the top and work your way down to the bottom of the jar. Repeat this for all image sets on each jar. - Place a battery-powered tea light in each jar to illuminate your new Halloween lanterns! Enjoy!
Notes
When you are spray painting inside the jars, be careful not to get too close to the sides, as this will bounce off the glass and overspray back onto your hands. You can wear gloves to prevent any staining on your hands.
It is always important to spray paint in a well ventilated area.
It is extremely important that you do not use regular tea light with an actual fire flame. Spray paint is flammable, and since it is painted on the inside, low powered battery operated lights are the only acceptable ways to light the inside of these jars.
Since you are placing vinyl on a curved surface, it is important to start in the middle and work your way outwards. The bottom of the jars are curved also, so you may need to smooth it out more after you remove your tape.