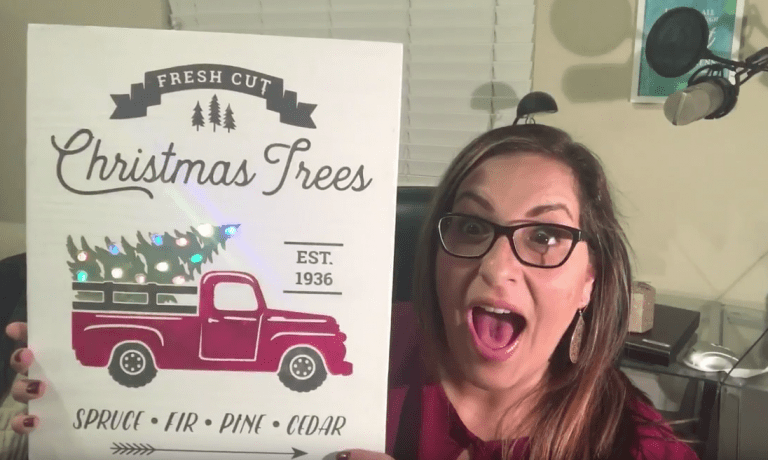
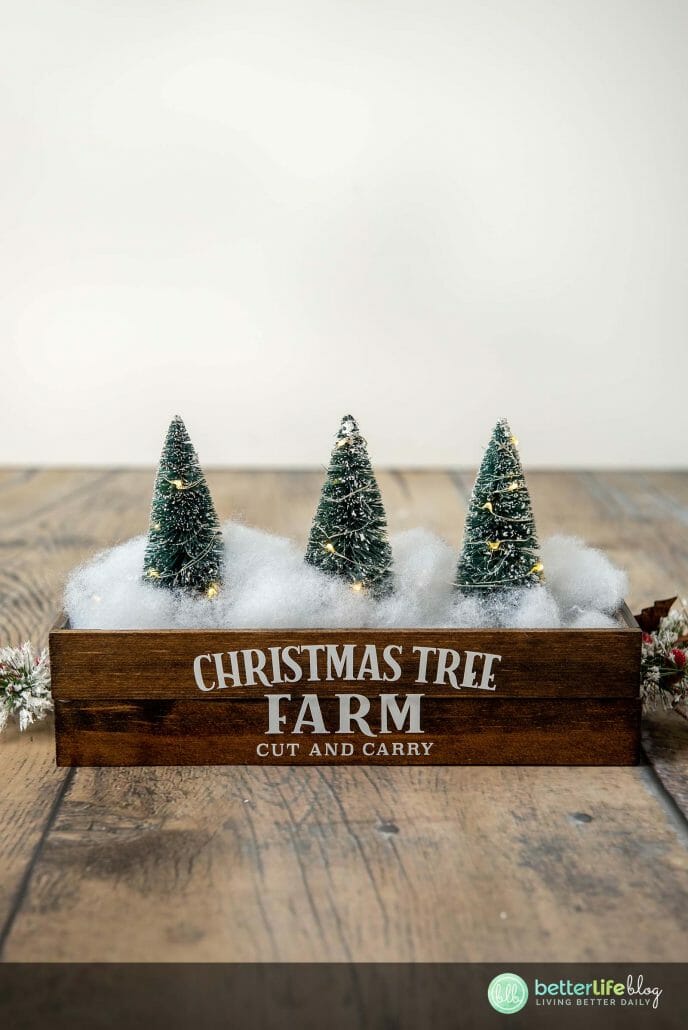
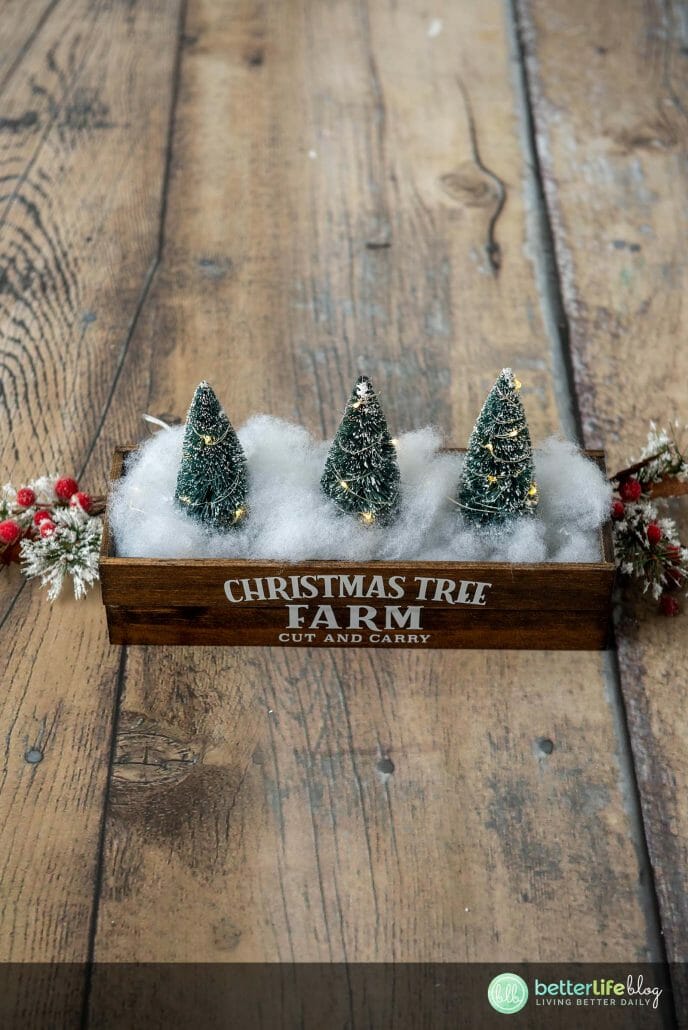
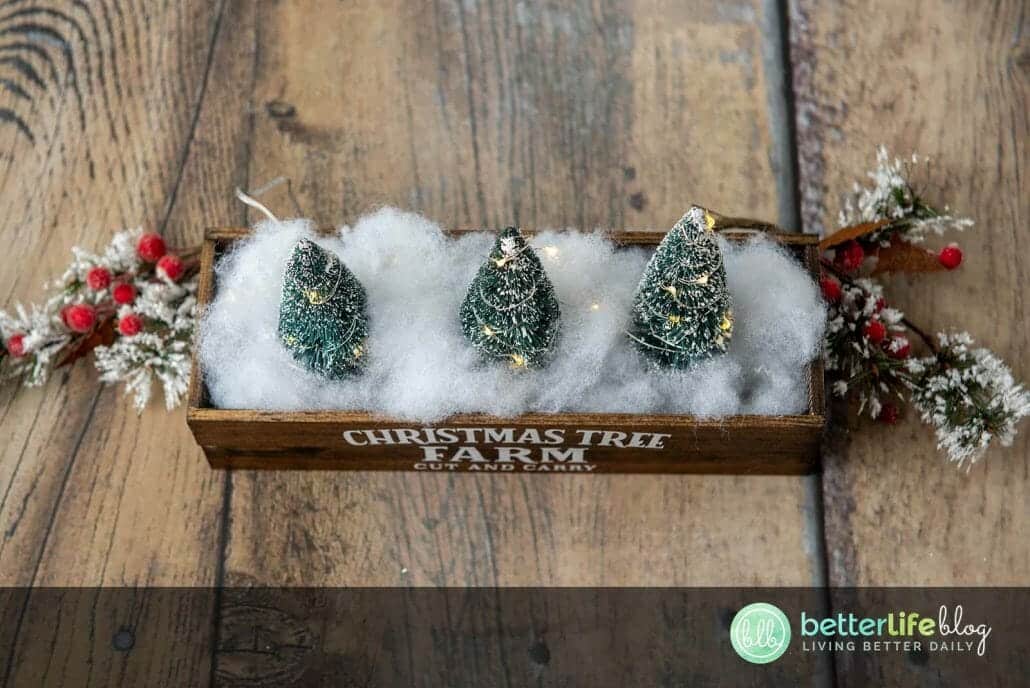
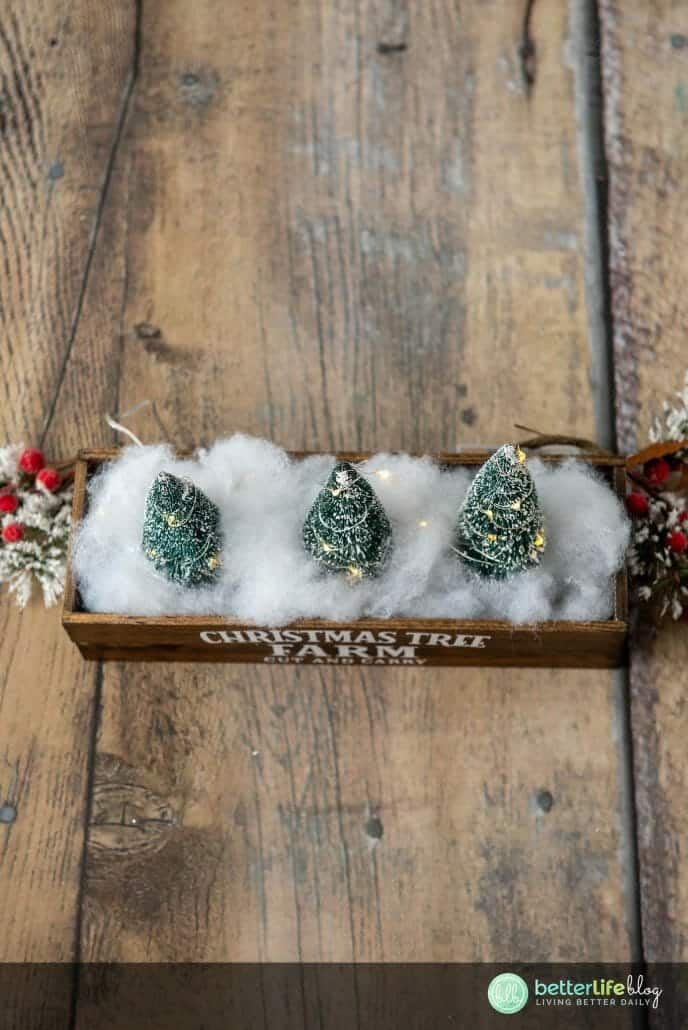
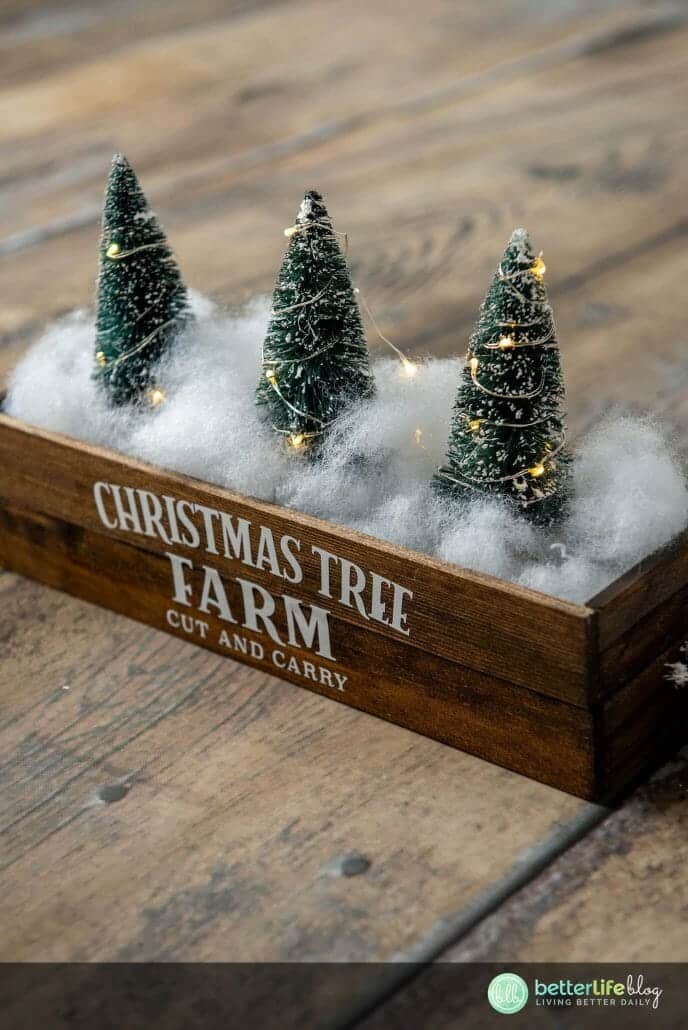
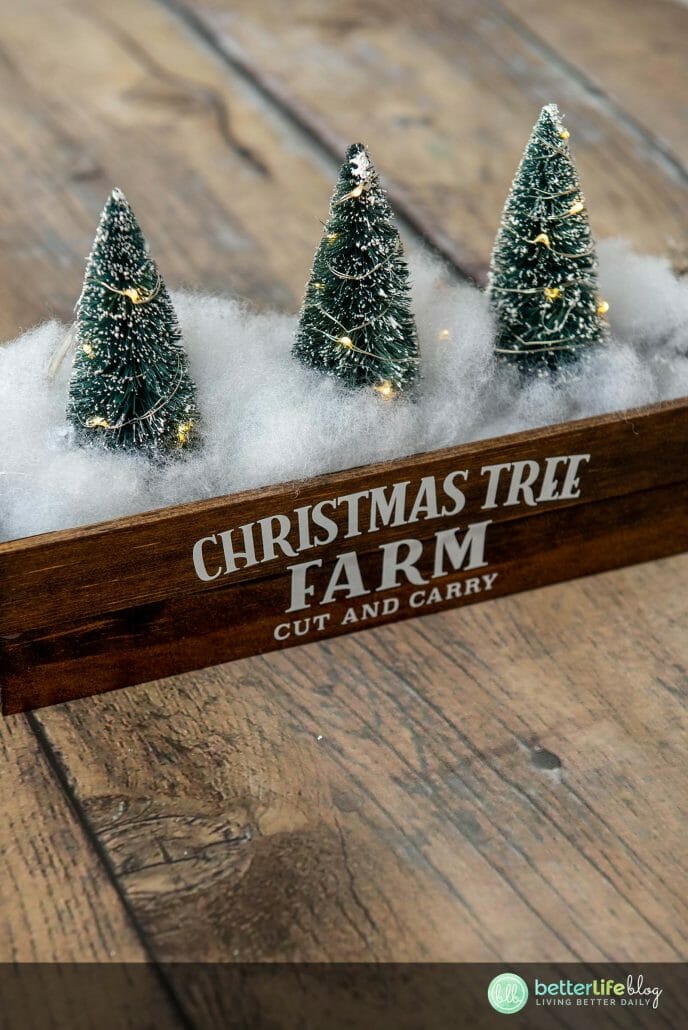
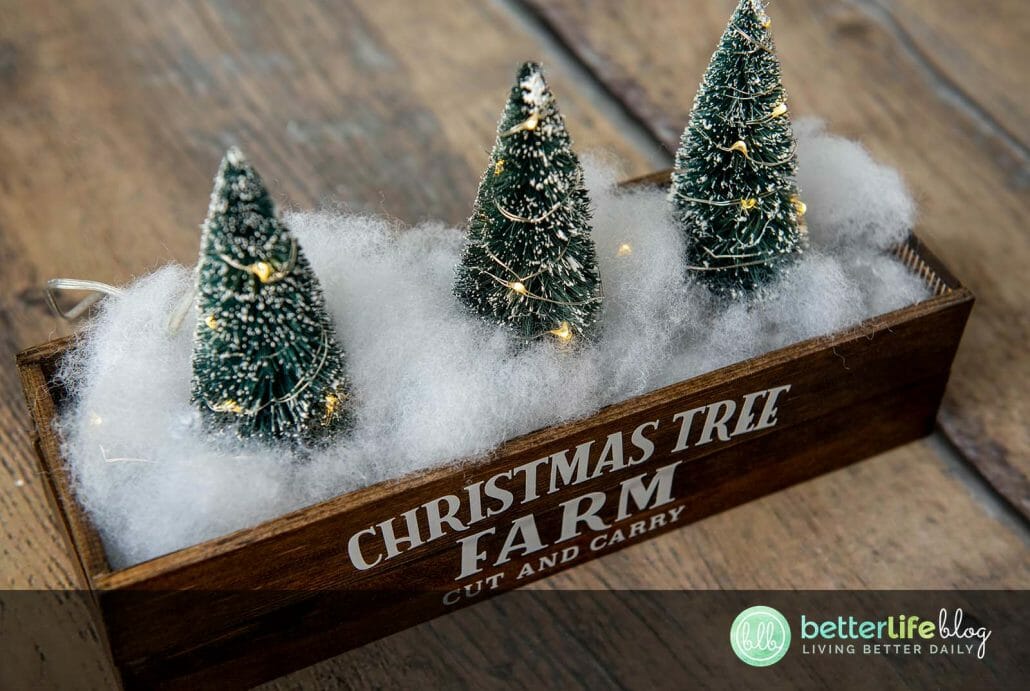
Hey everyone! Today I’m going to show you how to make this easy and beautiful Christmas Tree centerpiece. This is a perfect piece to go on your dining table or your coffee table, or anywhere in your home you’d like to make an elegant statement.
This tutorial comes with a FREE Christmas Tree Farm SVG Cut file just for you! So be sure to go grab it and then follow my simple Cricut DIY instructions below so that you can complete this project for your home décor!


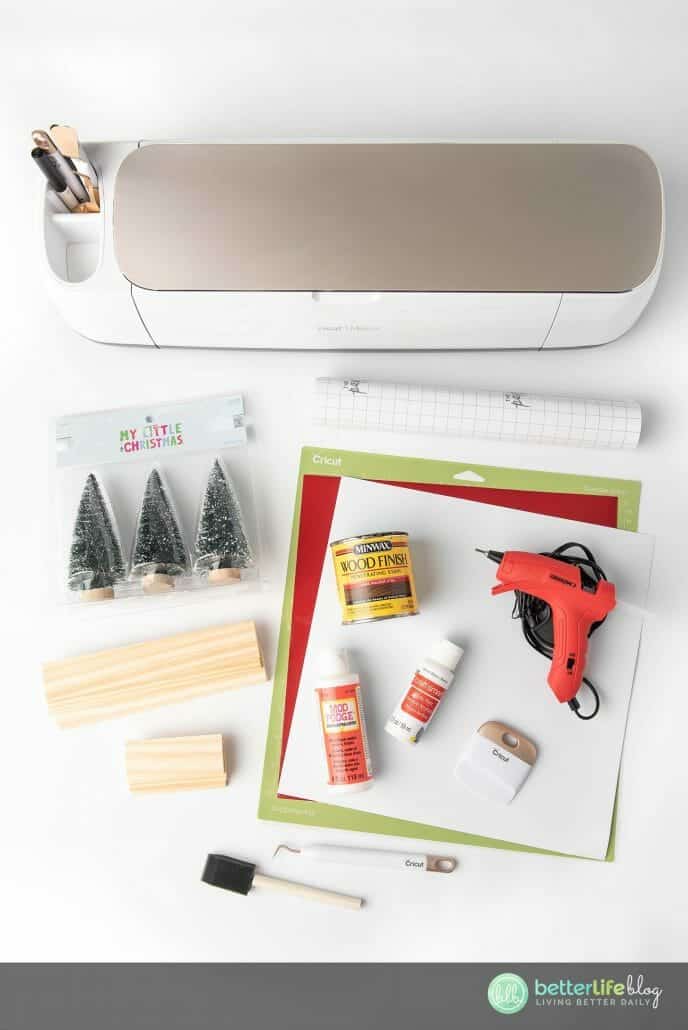
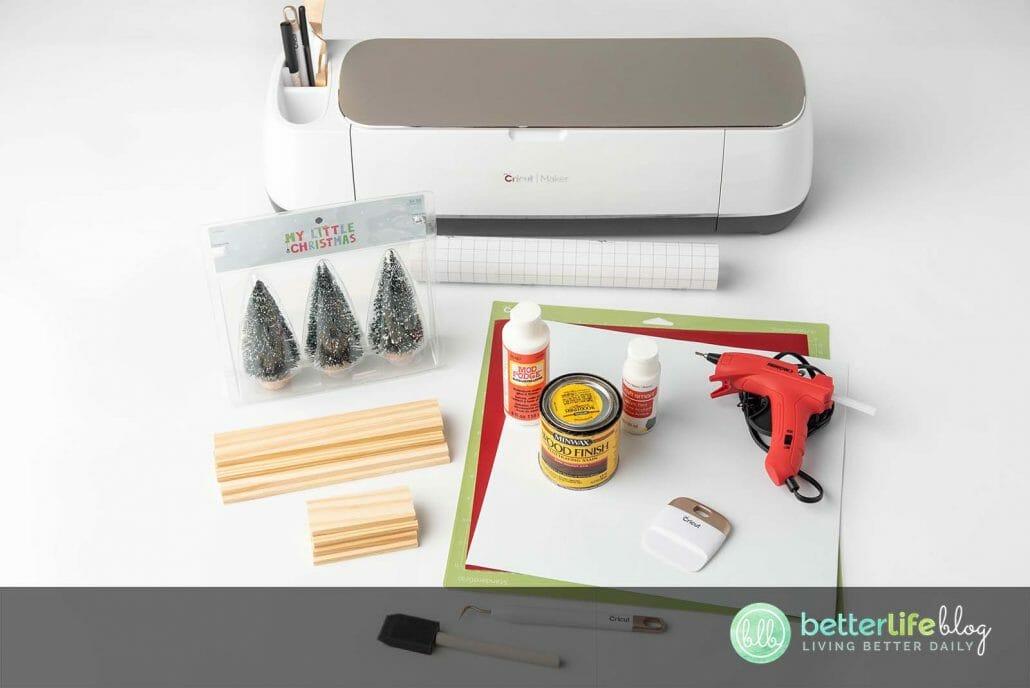
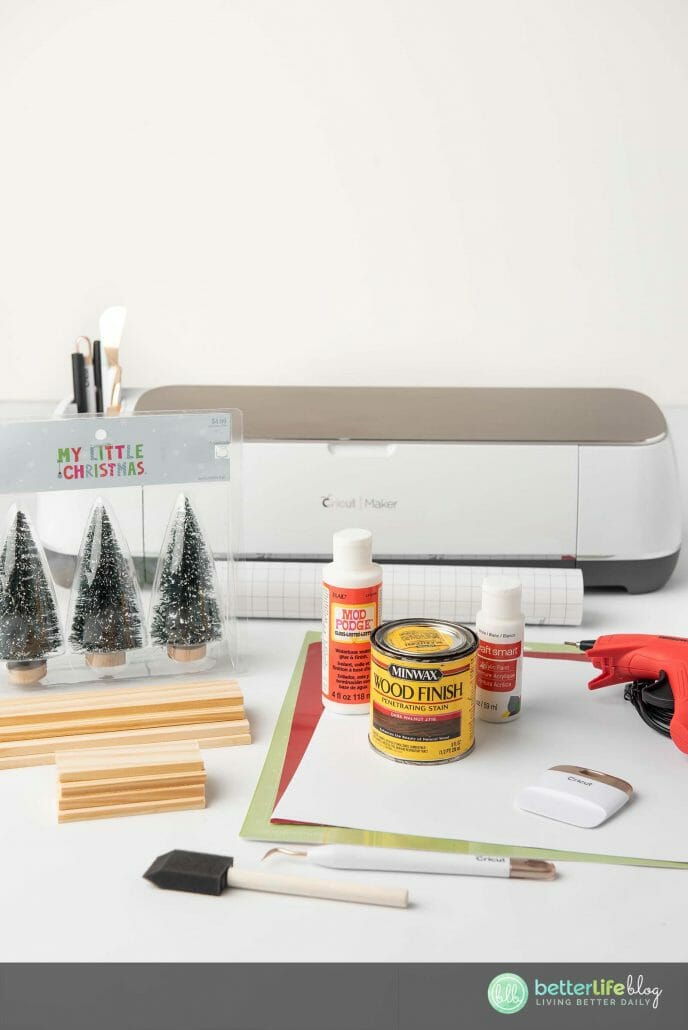
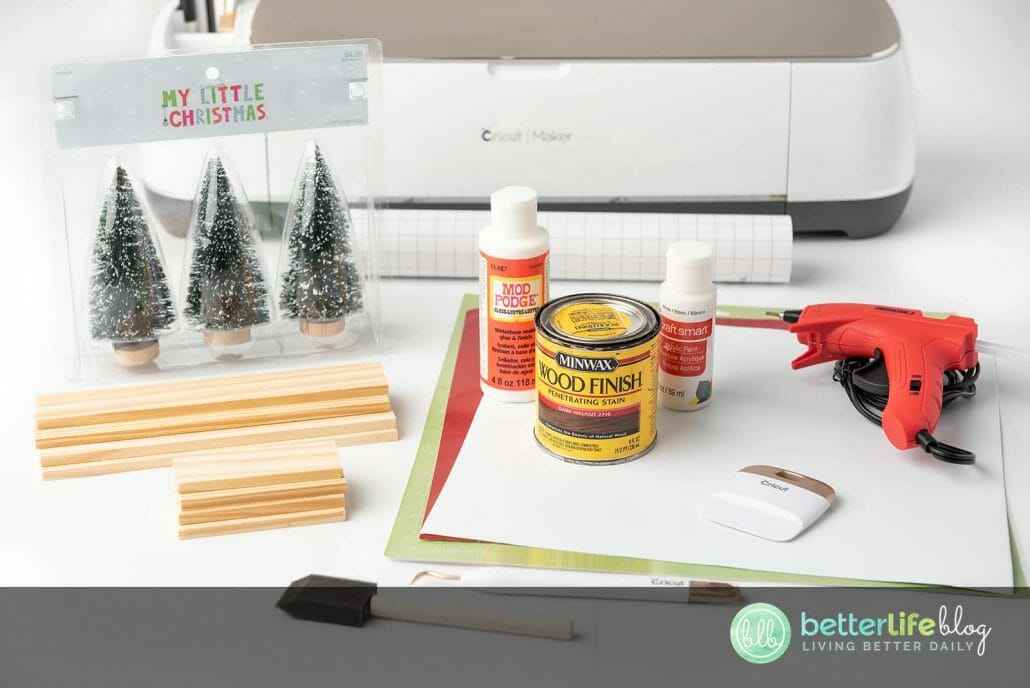
Materials:
- Cricut or other cutting machine
- Cricut blue light or green standard grip mat
- Oracal 651 vinyl or permanent vinyl of your choice
- Transfer tape
- Paint sticks (2 packs)
- Paint or stain
- Paint brush or foam brush
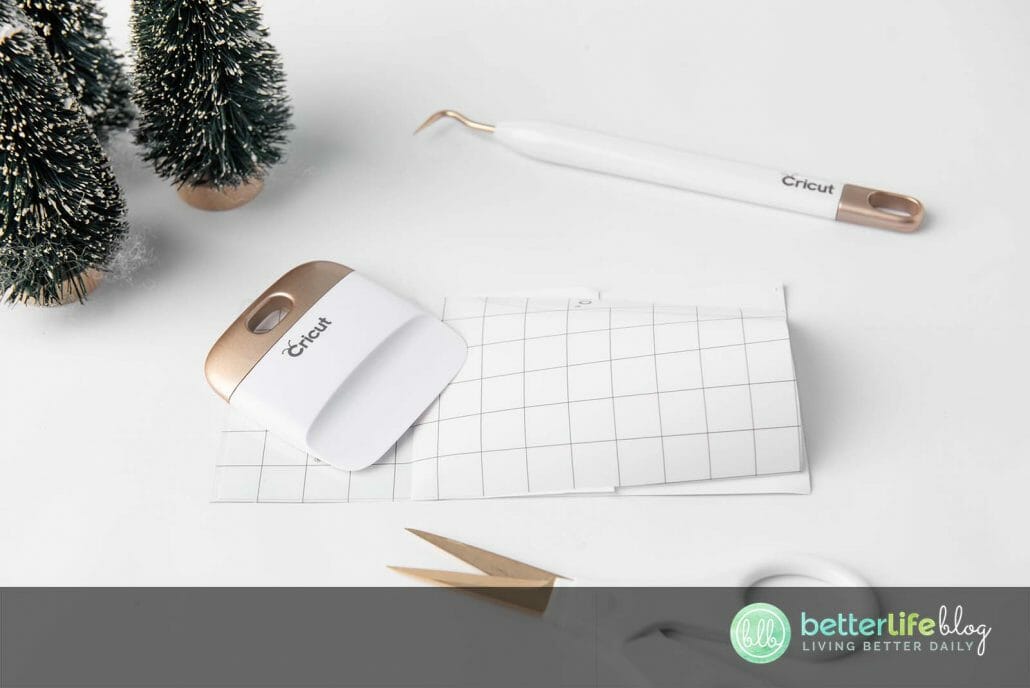
- Cricut weeding tool
- Cricut scraper tool or old credit card
- Optional – Mod podge (if staining)
- High heat hot glue gun with industrial grade glue sticks (alternative E6000 or wood glue)
- Bottle brush trees (at least 3)
- Faux snow and fairy lights for added décor
- Christmas Tree Farm SVG Cut file (FREE Cut File)


Directions:
Start by cutting down the paint sticks to size. The size will all depend on how big or small your box is. You may cut either by hand or by automatic saw. We used the following sizes:
- Front & back of box (longest) – 12” x 4
- Sides of box (shortest) – 3.5” x 4
- Bottom of box – 11.5” x 2
Next, use a glue gun to glue 1 of the side sticks (3.5”) to the inside edge of one of the front sticks (12”). This will create an L-shape wall.

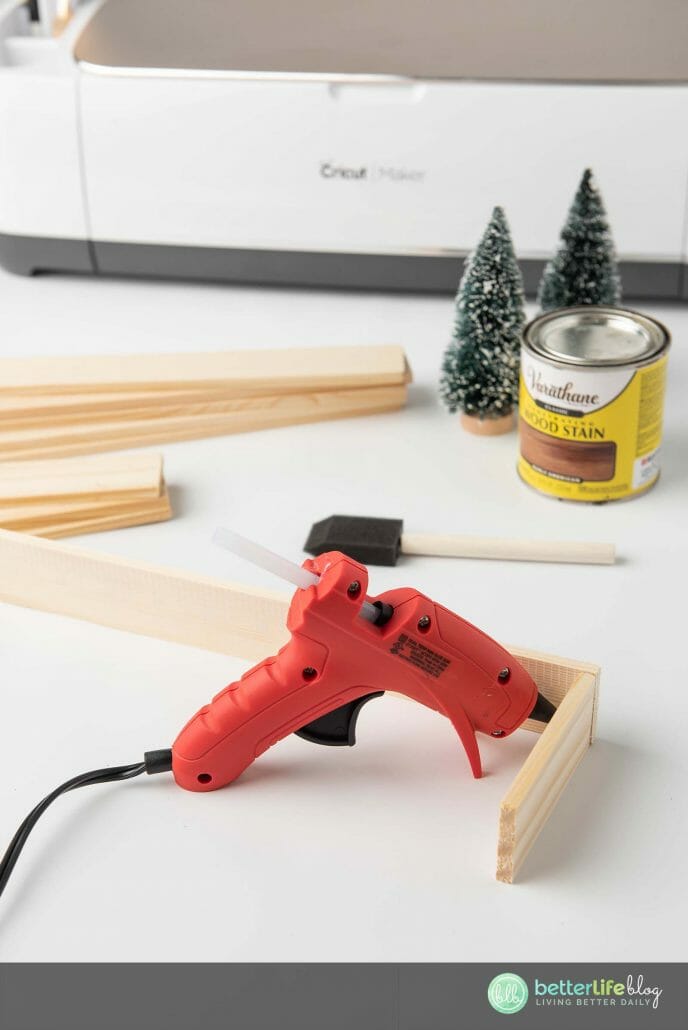


Repeat previous steps to create a second L-shape wall.
Line both L-shaped walls up reversed and glue both edges of the shortest sides together. This will create a continuous rectangle.
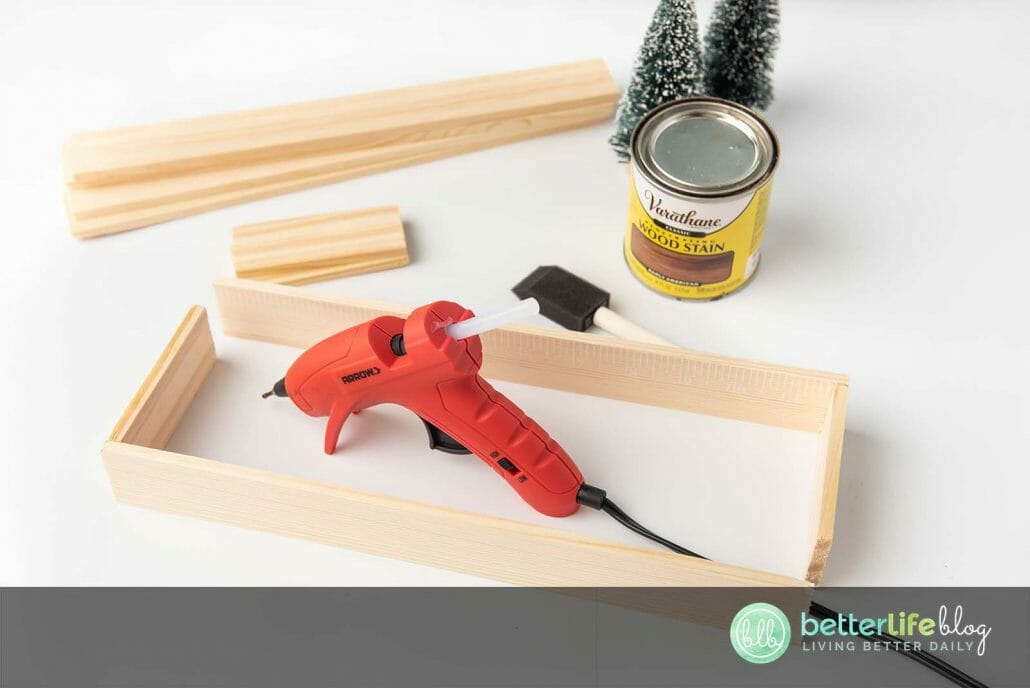
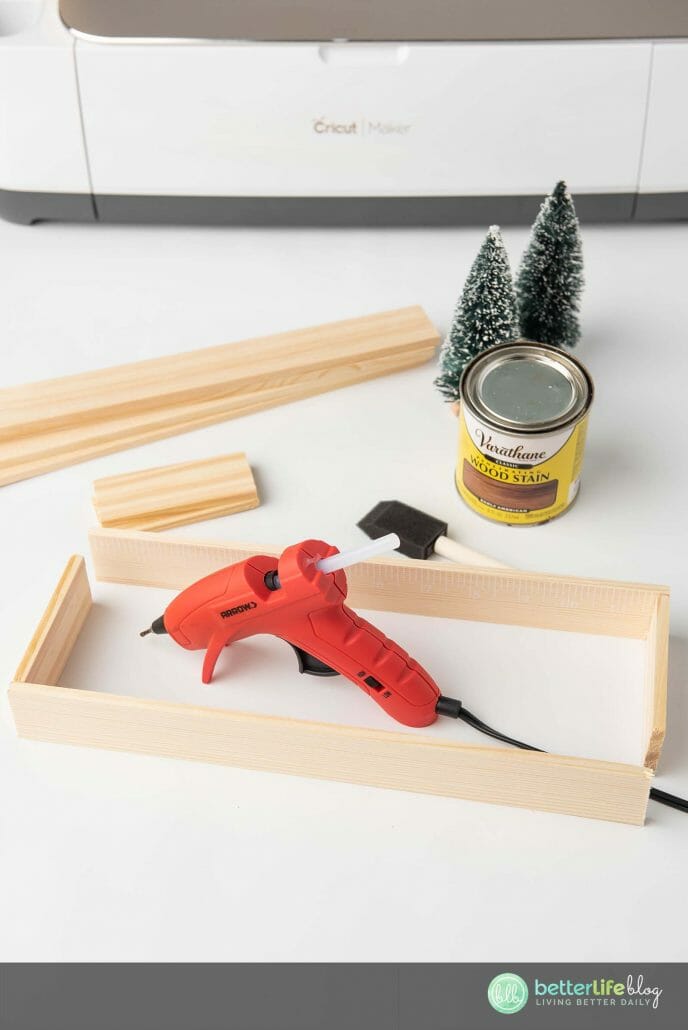
Repeat the previous steps to create a second rectangle.
Line the top of the first completed rectangle with glue while stacking the second completed rectangle. Apply pressure until dry.

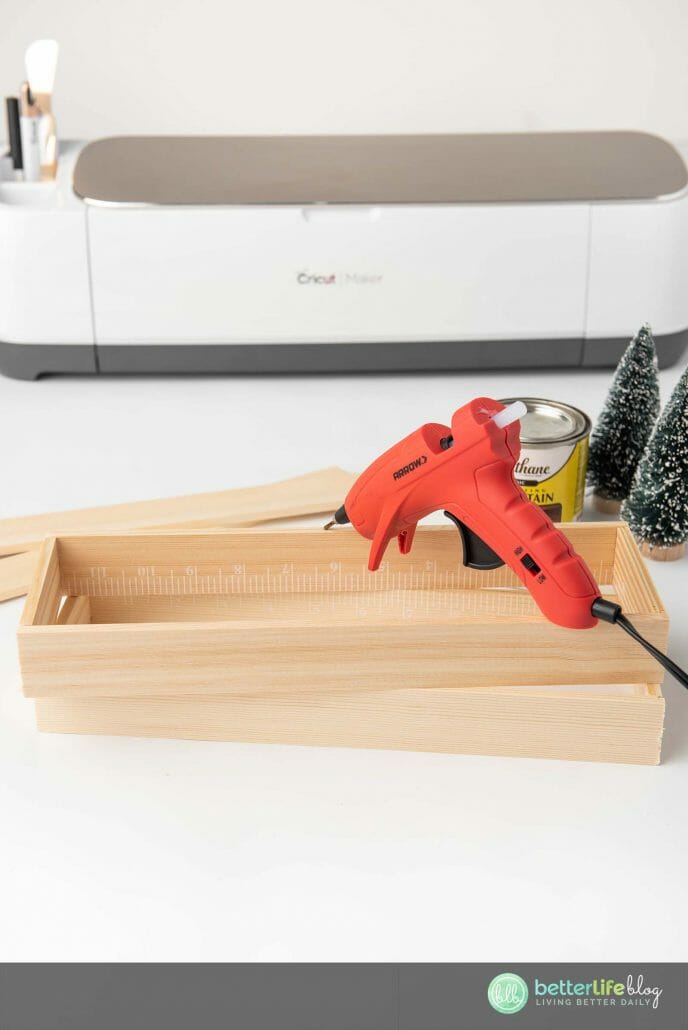
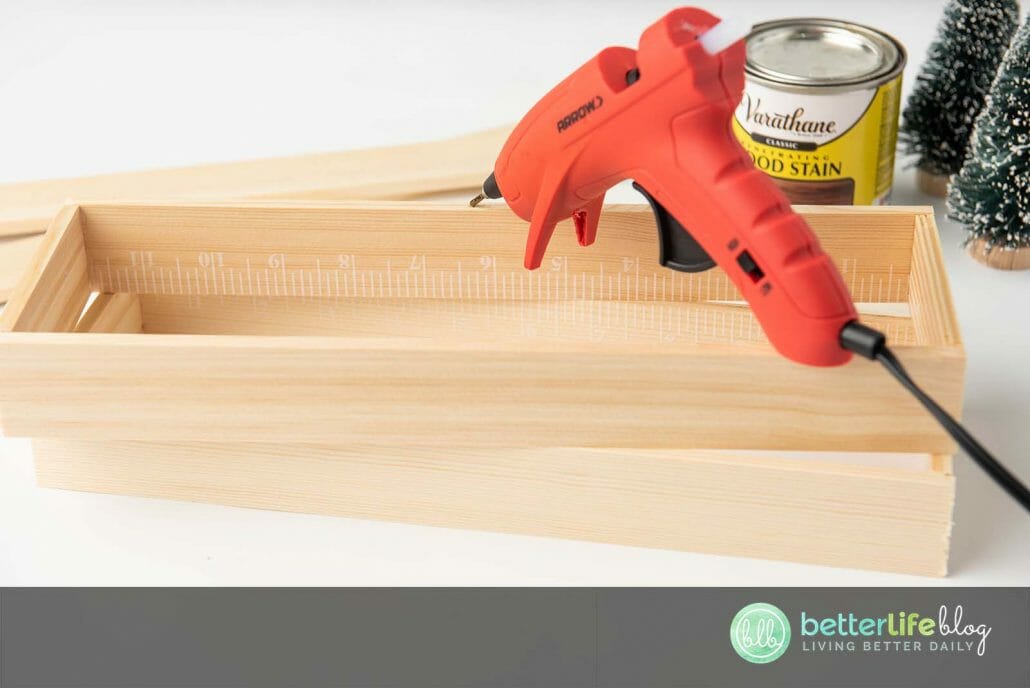

Complete the box by gluing the last to pieces (11.5”) to the inside walls, evenly-spaced to create the bottom of the box.
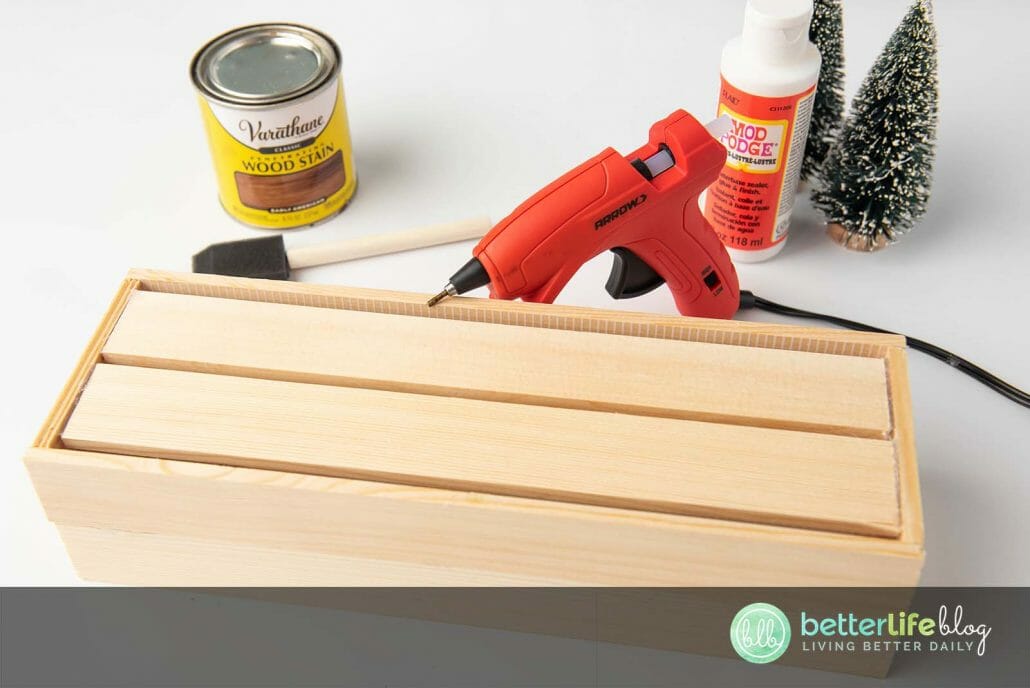

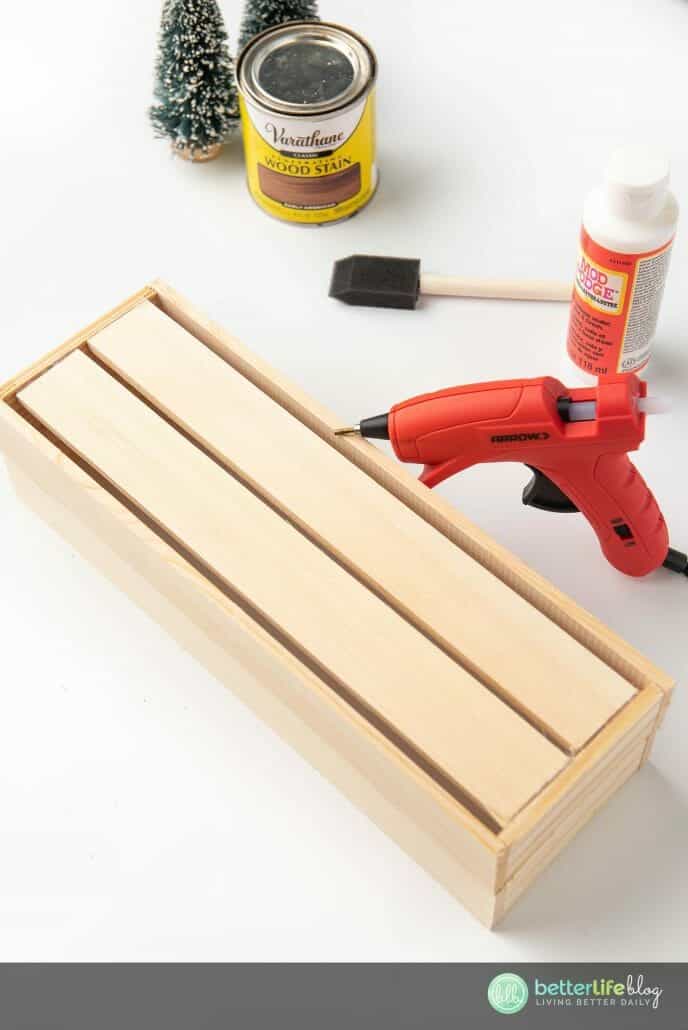


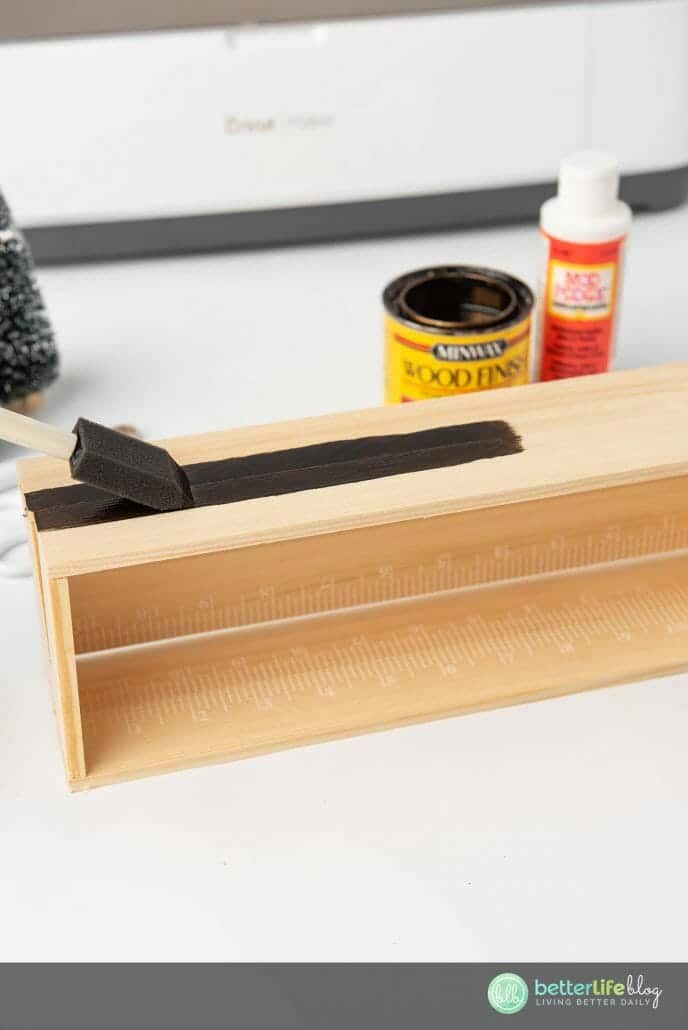
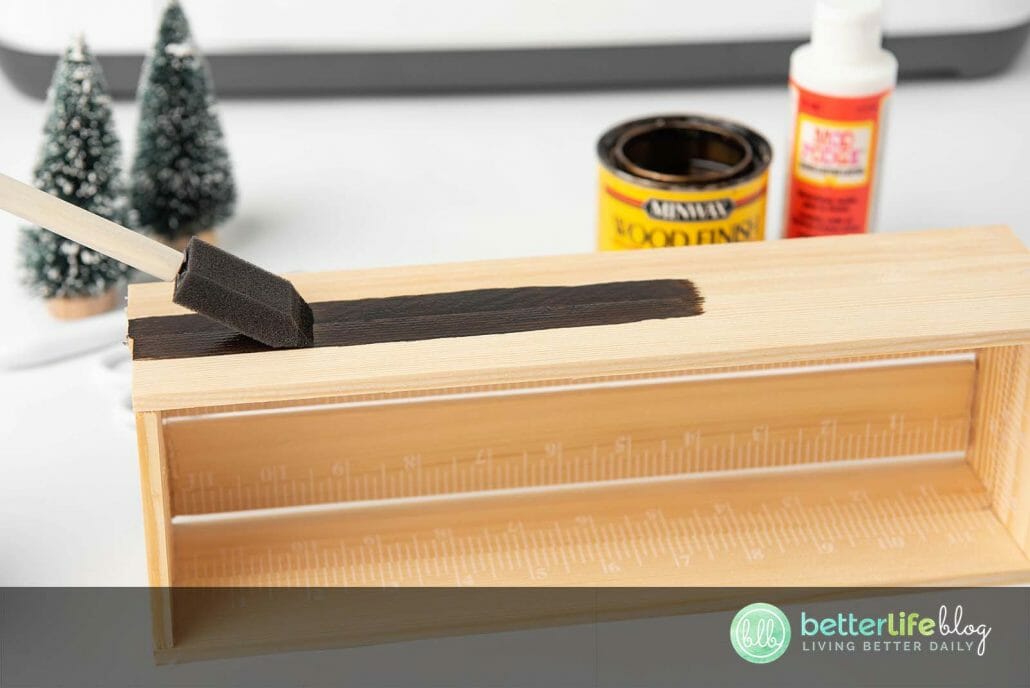
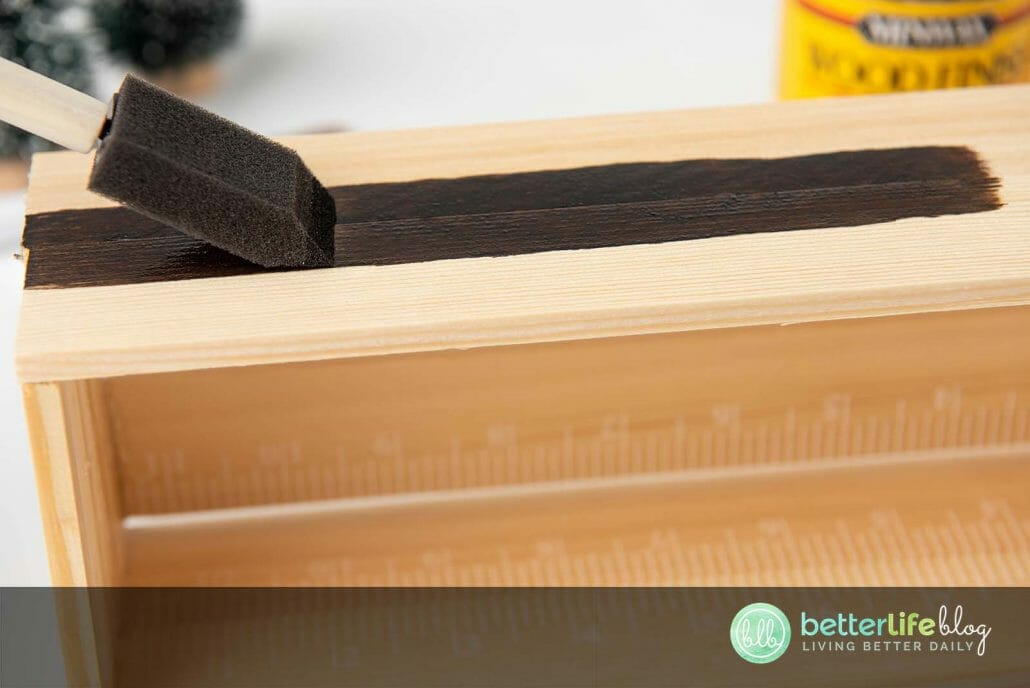
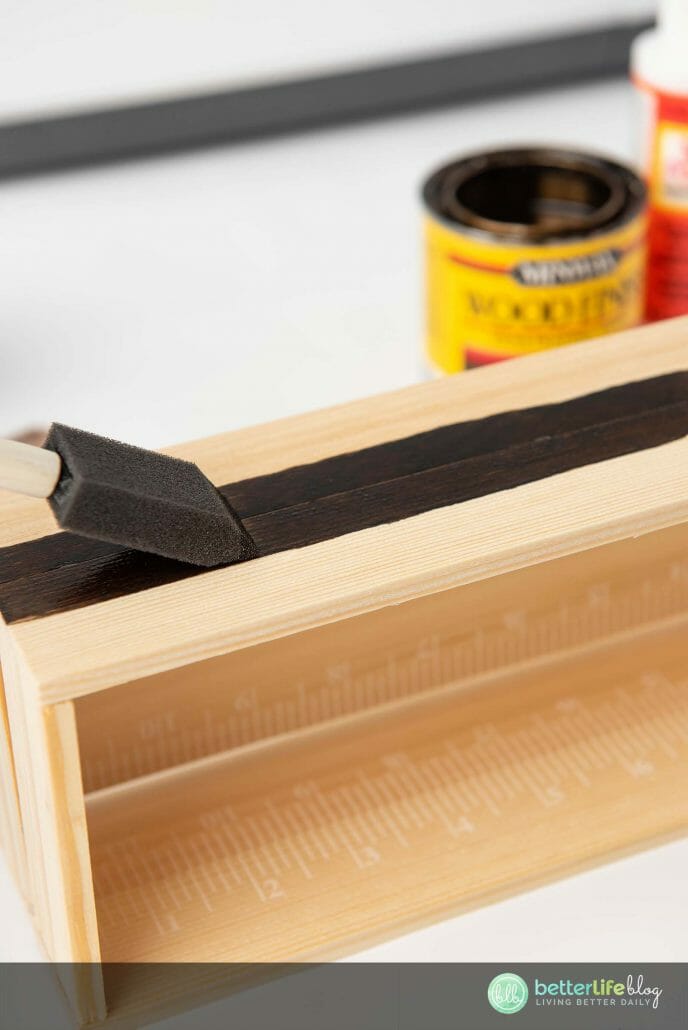
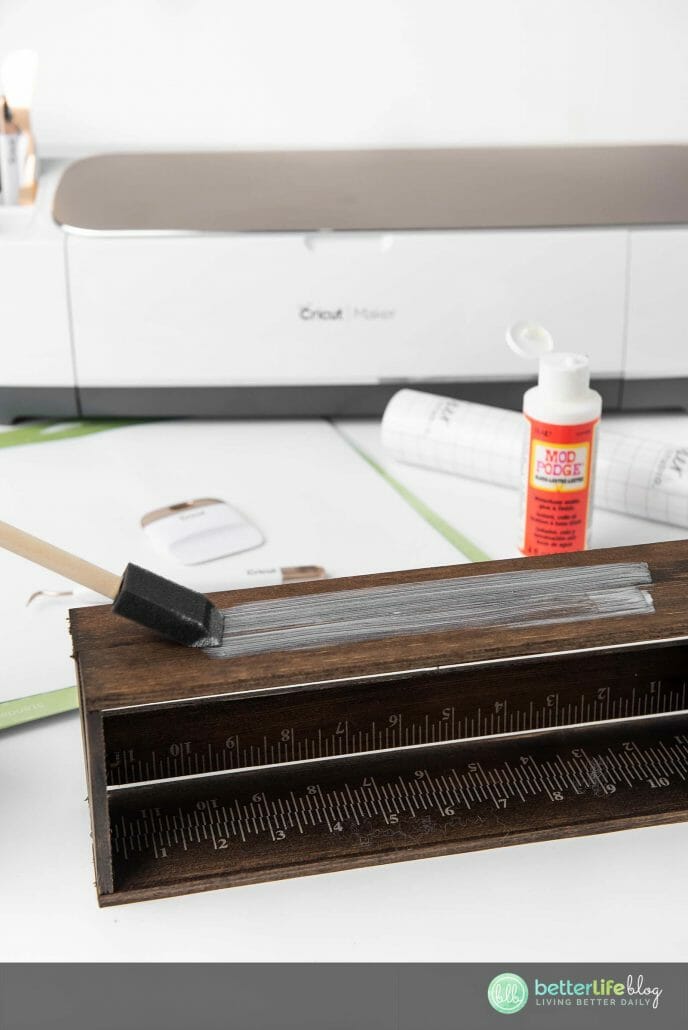
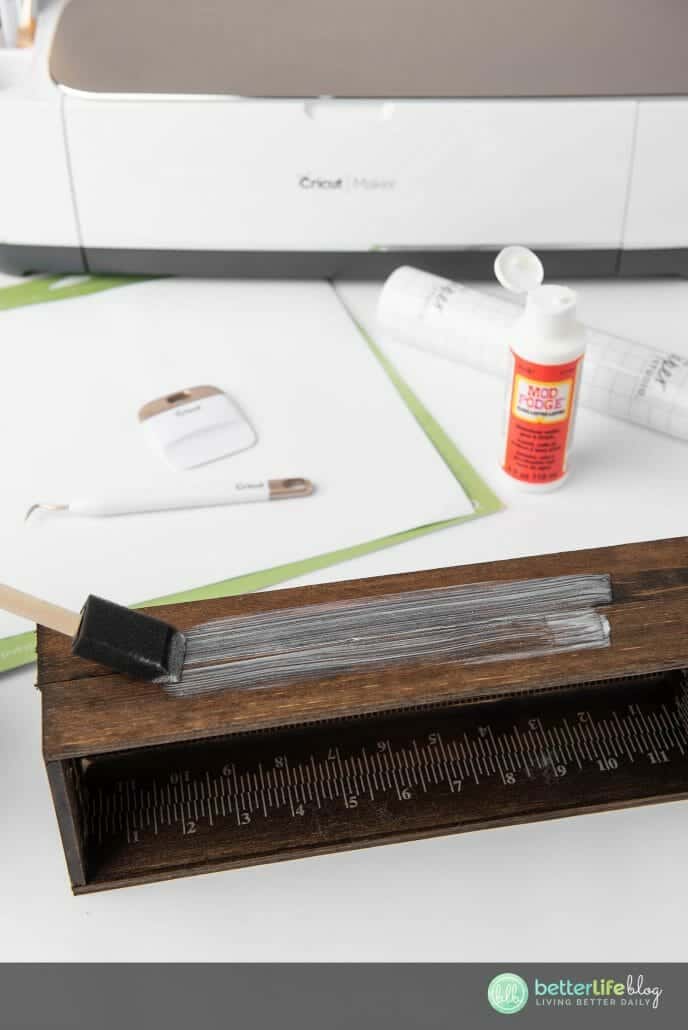
Once the box is completely assembled, apply paint or stain. If opting to stain, be sure to add a layer of Mod Podge as a sealant. Allow for paint/stain to completely dry before proceeding to the next step.


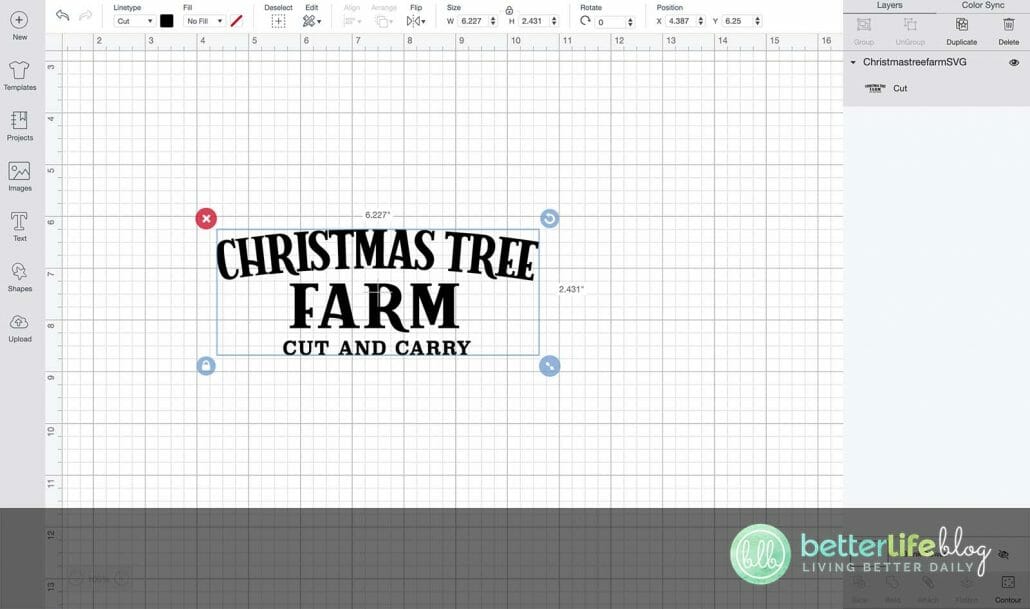
Once the box is dried, prepare SVG in Design Space. The SVG file included in this blog post is sized for the box measurements indicated above. If using different measurements, be sure to size the SVG accordingly.
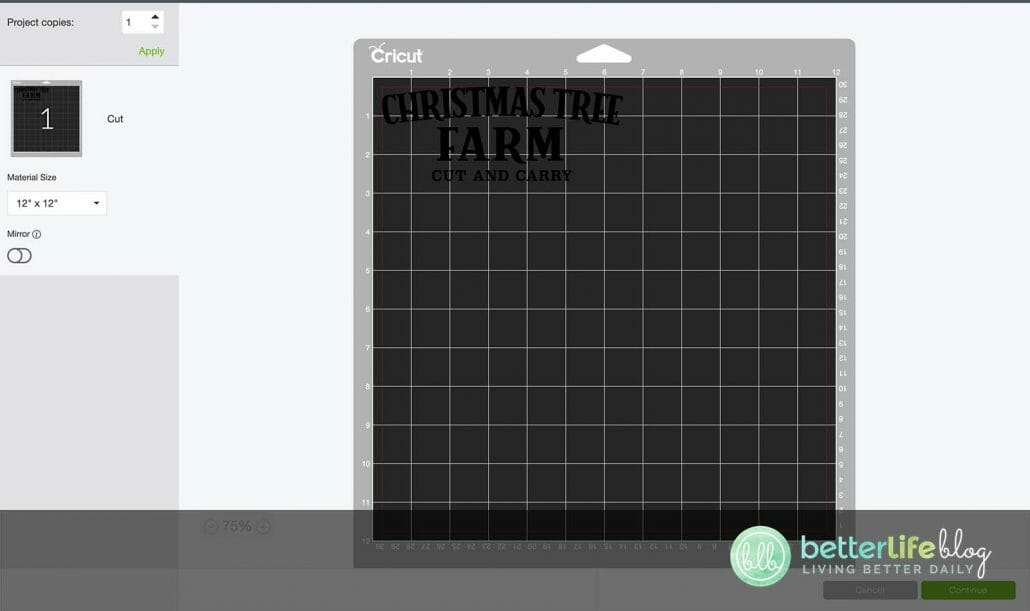
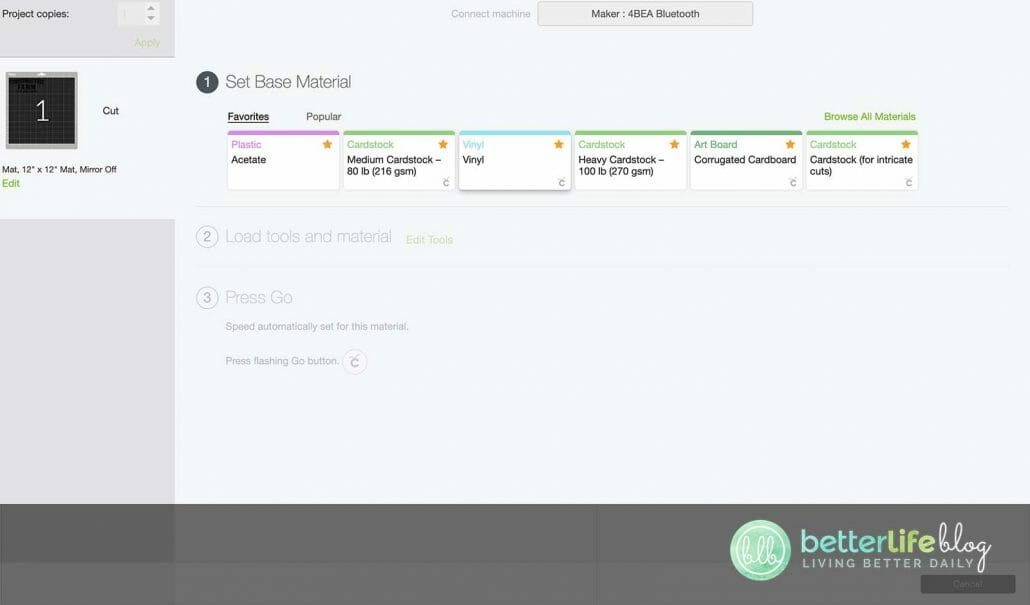
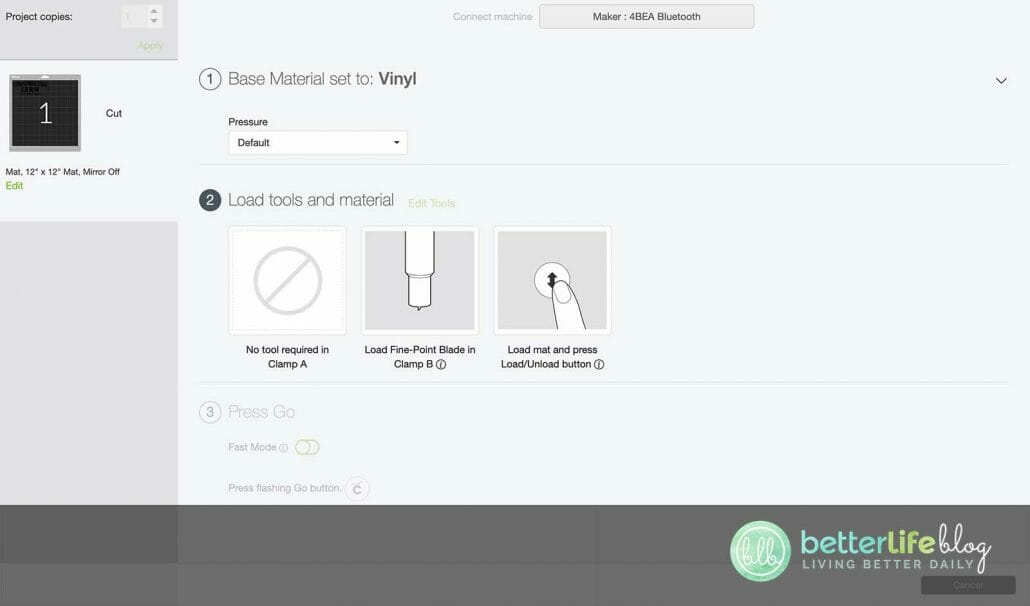
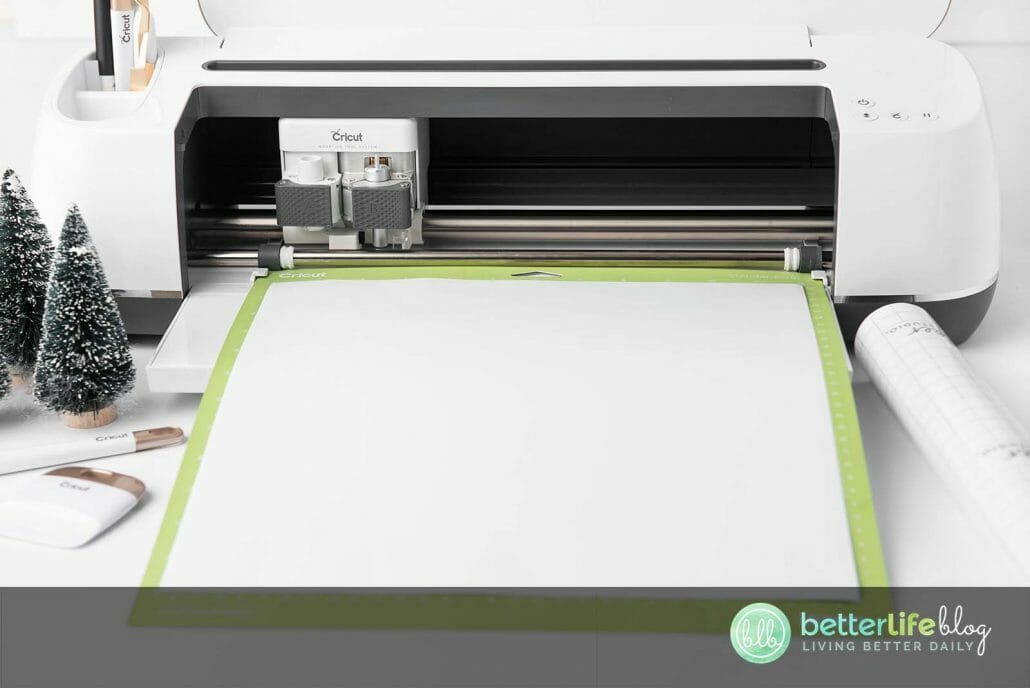
Once sized, hit “Make It.” Adjust the machine’s setting to “Vinyl.” Load the permanent vinyl into the machine on the green or blue light grip. Hit on “Go.”


Once it is finished cutting, weed off the vinyl. Don’t forget to weed around the outside of the letters and small parts inside any letter that are enclosed (ex. a,e,o ).


Once the design is weeded, cut a piece of transfer tape the same size as the vinyl. Apply the transfer tape using a scraper tool.

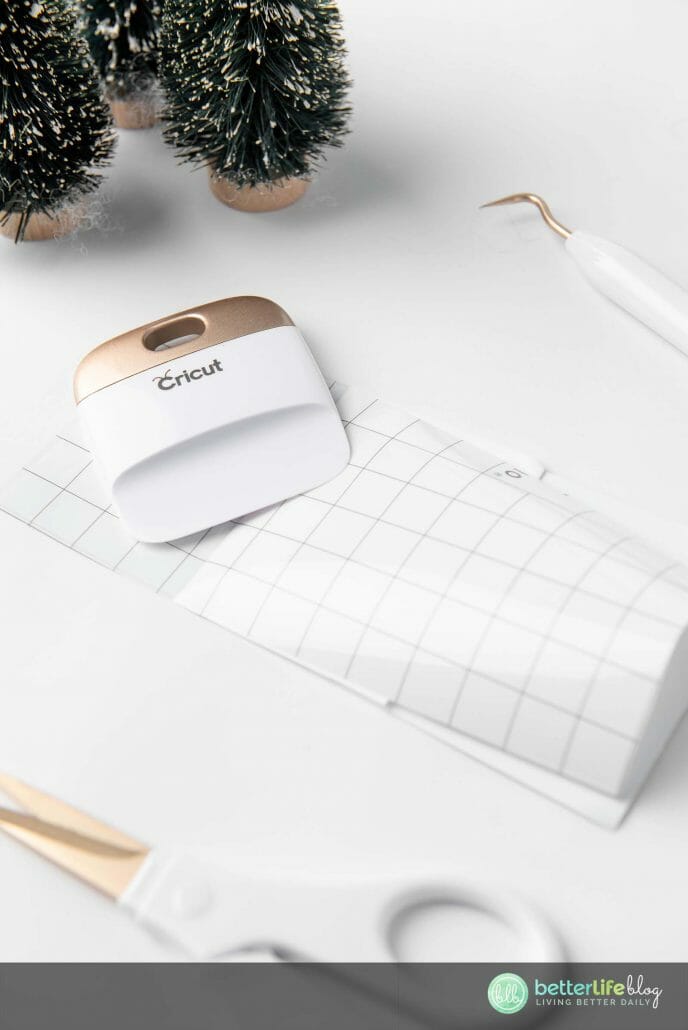

Turn the design face down and apply pressure. Pull the vinyl’s carrier sheet off and away from the transfer tape. This way, the vinyl will be left on the transfer tape.
Center the vinyl design on the front of the box. Apply pressure and smooth over the design using a scraper tool.
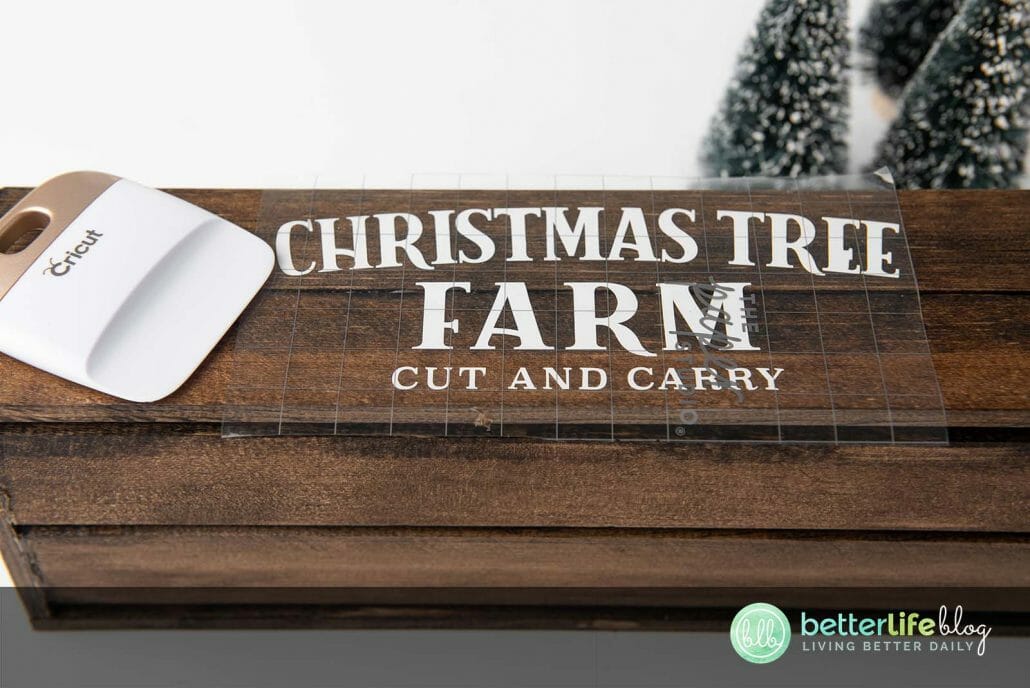

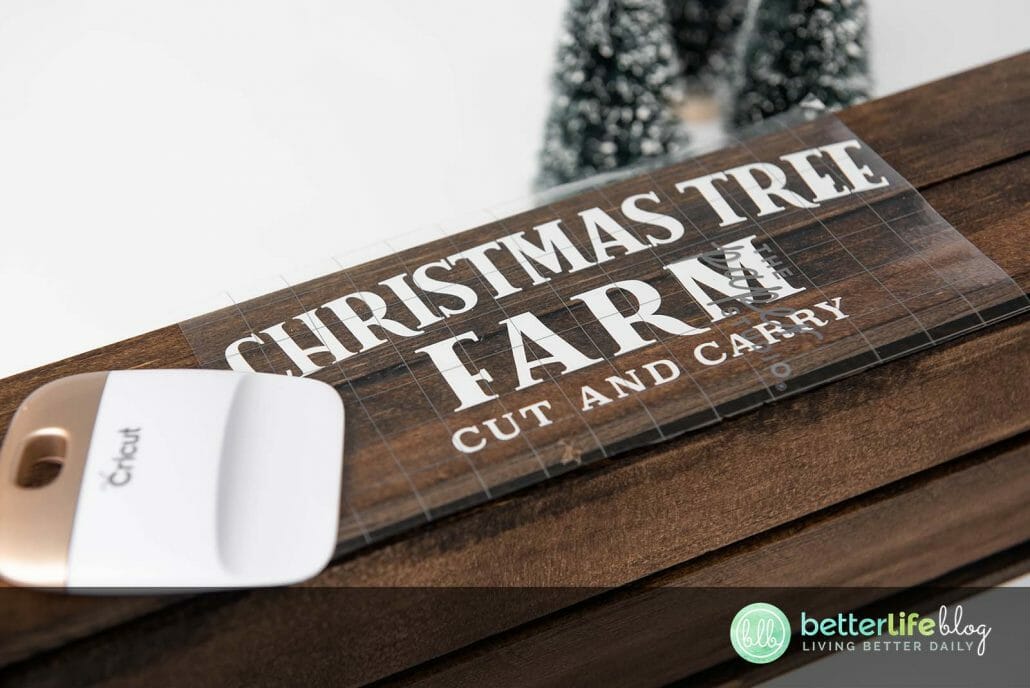
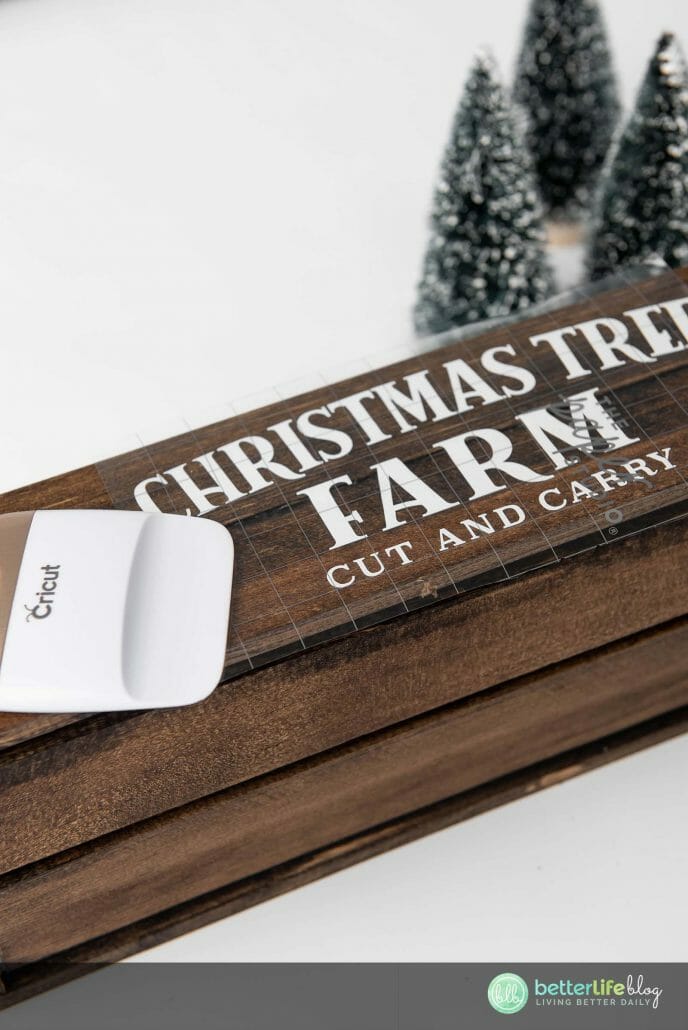
Carefully roll the transfer tape away from the vinyl – the vinyl will remain on the wood.
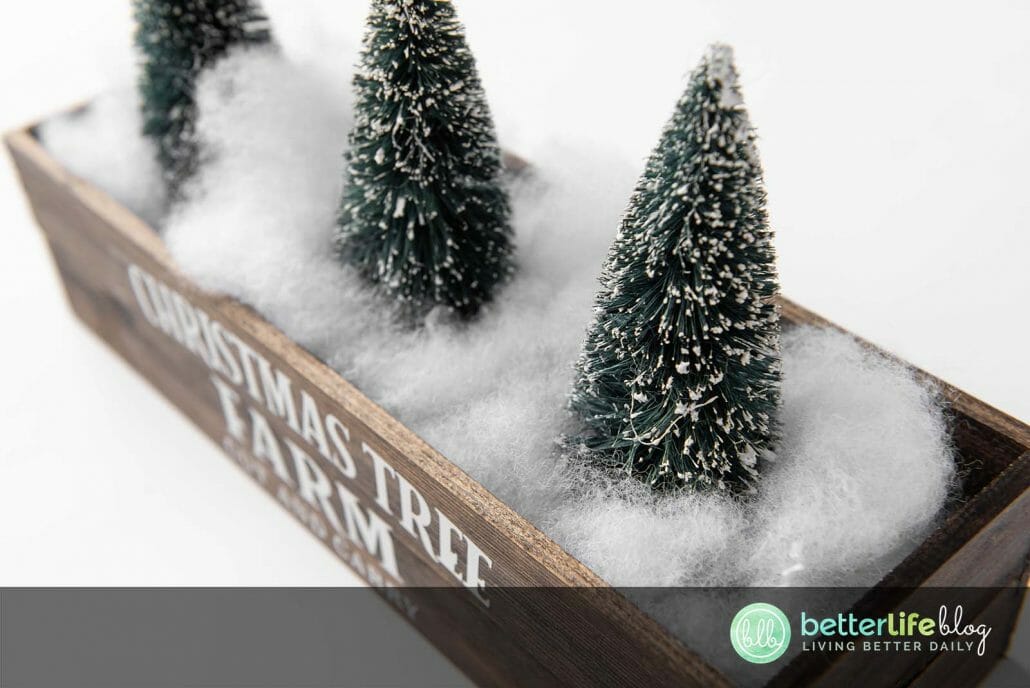
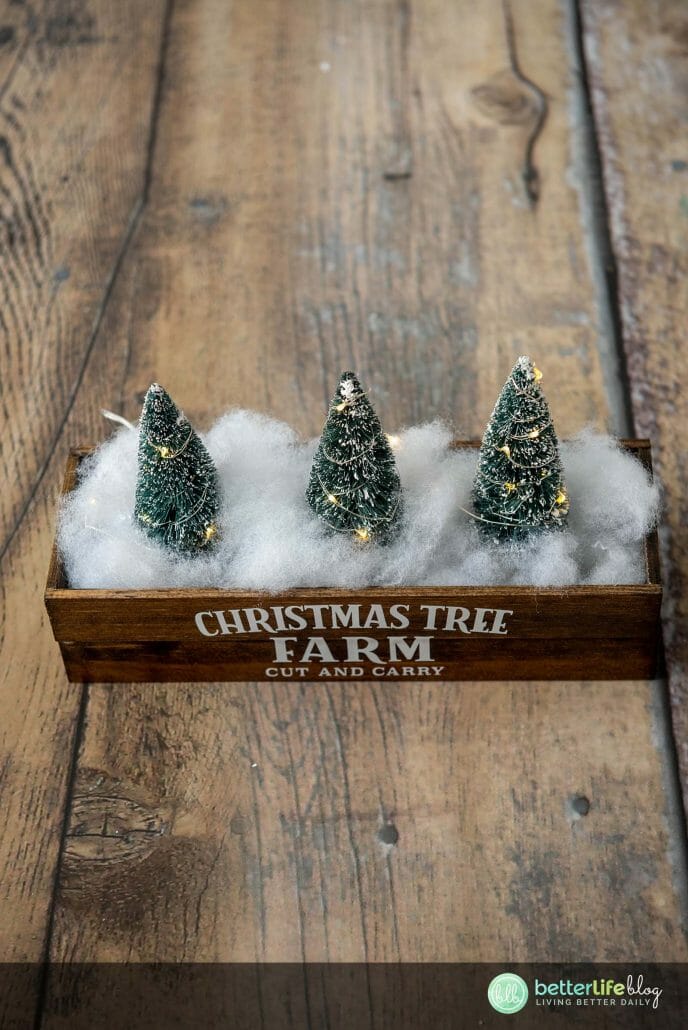
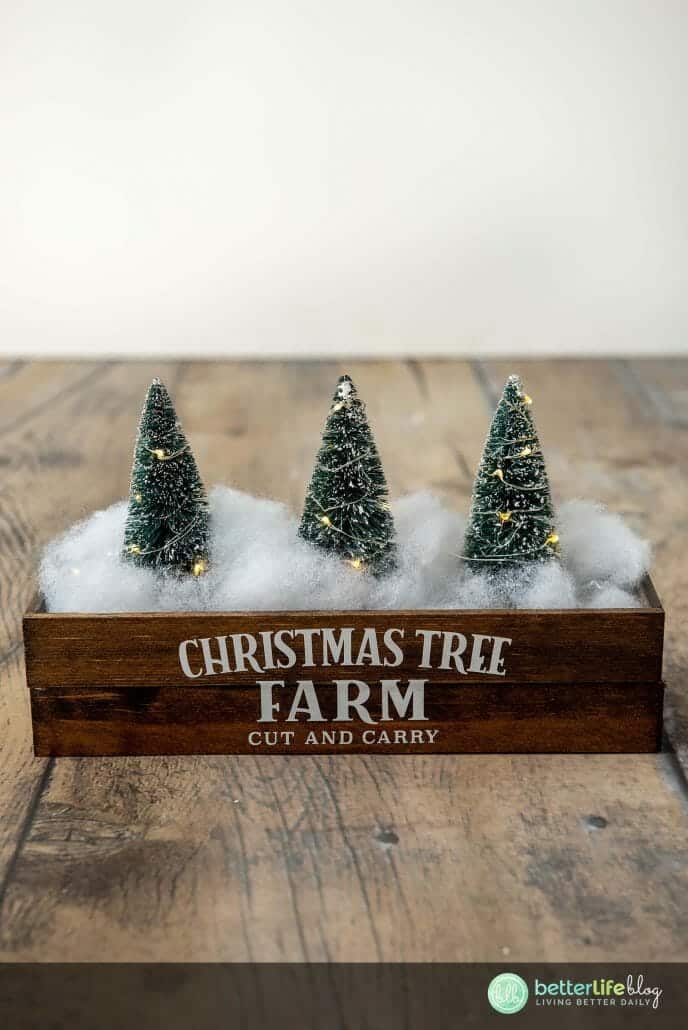
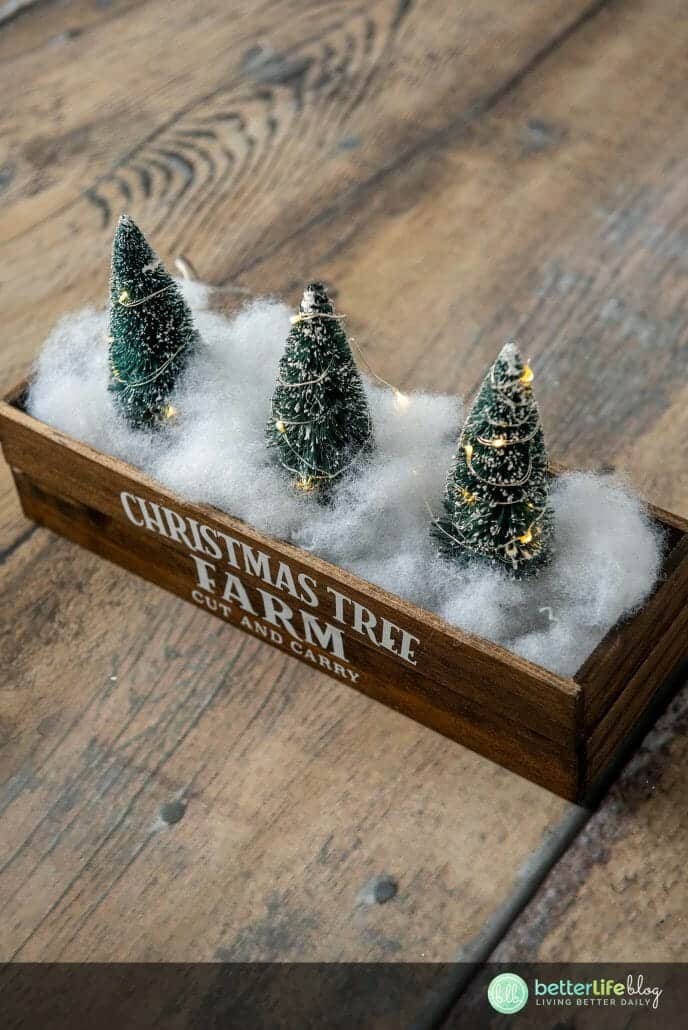
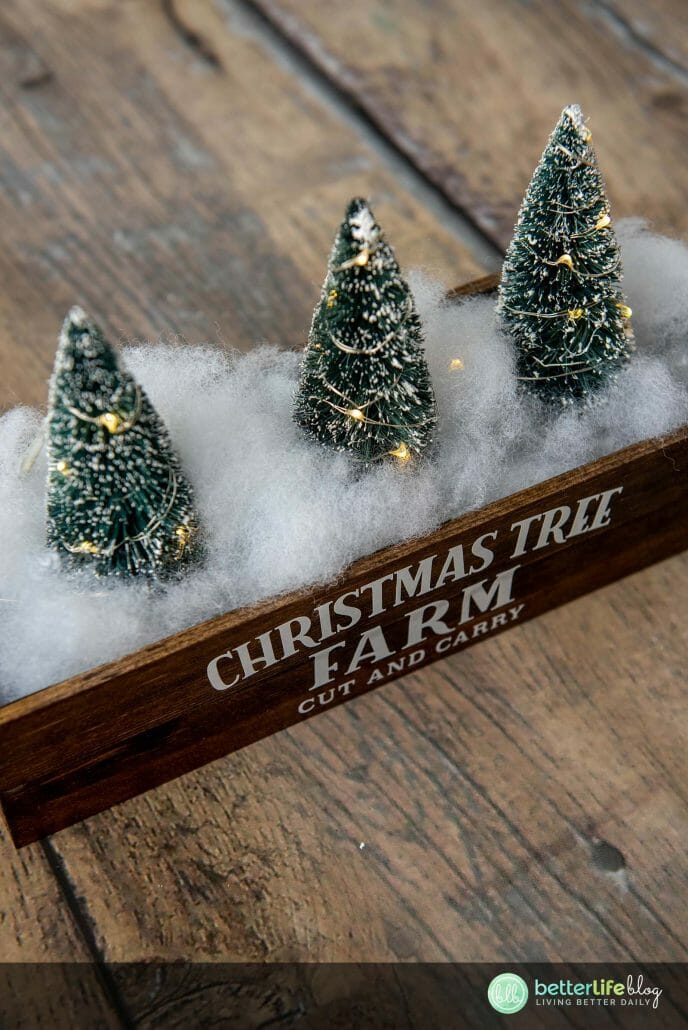
Add faux snow or batting to help keep bottle brush trees in place. You may also add fairy lights to the centerpiece!


Cricut DIY Christmas Centerpiece
This Christmas Centerpiece is a really fun Cricut DIY! It uses permanent vinyl to give it its rustic look - a great way to add elegance to your seasonal décor.
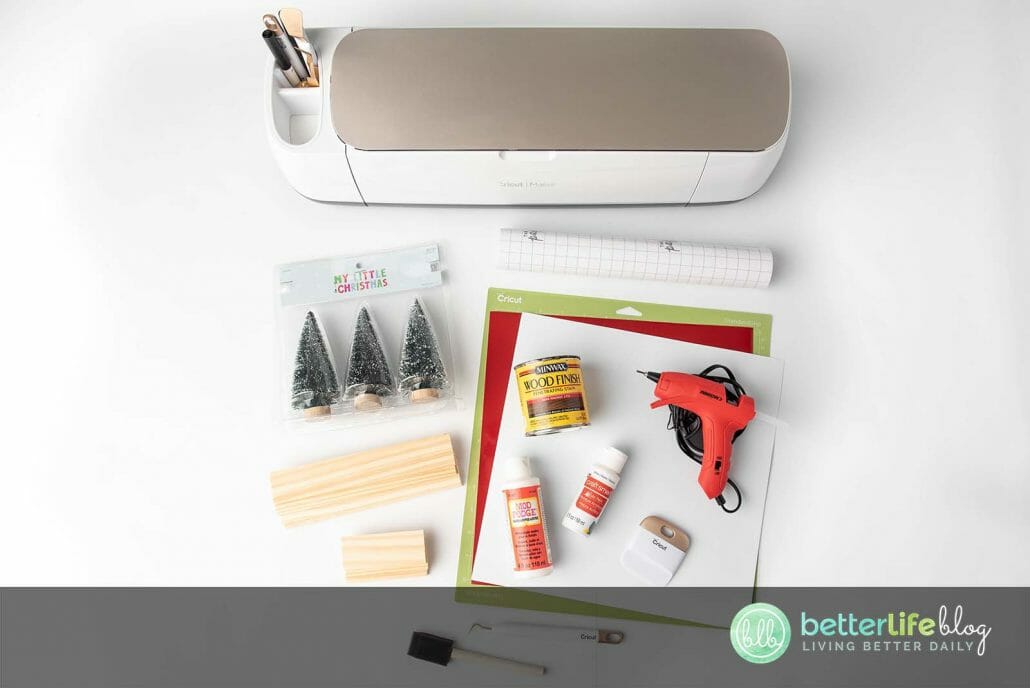
Materials
- Cricut or other cutting machine
- Cricut blue light or green standard grip mat
- Oracal 651 vinyl or permanent vinyl of your choice
- Transfer tape
- Paint sticks (2 packs)
- Paint or stain
- Paint brush or foam brush
- Cricut weeding tool
- Cricut scraper tool or old credit card
- Optional - Mod podge (if staining)
- High heat hot glue gun with industrial grade glue sticks (alternative E6000 or wood glue)
- Bottle brush trees (at least 3)
- Faux snow and fairy lights for added décor
Instructions
- Start by cutting down the paint sticks to size. The size will all depend on how big or small your box is. You may cut
either by hand or by automatic saw. We used the following sizes: Front & back of box (longest) - 12” x 4, Sides of box (shortest) - 3.5” x 4, Bottom of box - 11.5” x 2 - Next, use a glue gun to glue 1 of the side sticks (3.5”) to the inside edge of one of the front sticks (12”). This will create an L-shape wall.
- Repeat previous steps to create a second L-shape wall.
- Line both L-shaped walls up reversed and glue both edges of the shortest sides together. This will create a continuous
rectangle. - Repeat the previous steps to create a second rectangle.
- Line the top of the first completed rectangle with glue while stacking the second completed rectangle. Apply pressure until dry.
- Complete the box by gluing the last to pieces (11.5”) to the inside walls, evenly-spaced to create the bottom of the
box. - Once the box is completely assembled, apply paint or stain. If opting to stain, be sure to add a layer of Mod Podge as a
sealant. Allow for paint/stain to completely dry before proceeding to the next step. - Once the box is dried, prepare SVG in Design Space. The SVG file included in this blog post is sized for the box
measurements indicated above. If using different measurements, be sure to size the SVG accordingly. - Once sized, hit “Make It.” Adjust the machine’s setting to “Vinyl.” Load the permanent vinyl into the machine on the
green or blue light grip. Hit on “Go.” - Once it is finished cutting, weed off the vinyl. Don’t forget to weed around the outside of the letters and small parts inside any letter that are enclosed (ex. a,e,o ).
- Once the design is weeded, cut a piece of transfer tape the same size as the vinyl. Apply the transfer tape using a
scraper tool. - Turn the design face down and apply pressure. Pull the vinyl’s carrier sheet off and away from the transfer tape.
This way, the vinyl will be left on the transfer tape. - Center the vinyl design on the front of the box. Apply pressure and smooth over the design using a scraper tool.
- Carefully roll the transfer tape away from the vinyl - the vinyl will remain on the wood.
- Add faux snow or batting to help keep bottle brush trees in place. You may also add fairy lights to the centerpiece!