This Honeycomb Treat Box is a bee-autiful craft!
Hey crafty friends! Did you hear the BUZZ?! It’s time for a new DIY and you’ll absolutely love our latest one!
Today, I’m showing you how to make an adorable beehive box! You can make this box out of cardstock using your Cricut or Silhouette machine.
How Do I Get the Files I Need to Make My Own Honeycomb Treat Box?
My VIP Crafters Club members received the files to make this box in their March 2022 collection. If you haven’t joined yet, be sure to subscribe so that you can take FULL advantage of the hundreds of cut files that are available to club members!

Now… on to the tutorial! I’ll be highlighting the steps on how to assemble this gorgeous treat box so keep reading!
How Can I Use This Honeycomb Treat Box?
This treat box is perfect for gift-giving occasions. I love filling mine with chocolate and giving it to friends as a random act of kindness.
This Honeycomb Treat Box is also great for gift cards, kind notes written on small pieces of paper, cookies or jewelry. The sky’s the limit for the gifting possibilities with this fun Cricut craft!

What Supplies Will I Need?
To make this fun treat box, you’ll need the following supplies:
- Cricut or other cutting machine
- Standard grip mat
- Cardstock (I used black, white and yellow/orange)
- Crafter’s glue
- Pen-tip liquid glue
- Scoring stylus (for Cricut users only – Silhouette users don’t need any special scoring tools!)
How To Cut Your Honeycomb Treat Box
Begin by downloading the cut files needed for this Honeycomb Treat Box here. Then, upload to your design software that is compatible with your die cutting machine. You will need to set up the score lines so that they score instead of cut. If you don’t know how to do this, have no fear! I have created videos down below – one for Cricut users and another for Silhouette users – showing you exactly how I set up the project with the score lines. I promise it is not as hard as you think!
Video Tutorial For Cricut Design Space Users
For Silhouette Studio Users
Video Tutorial: How To Assemble Your Honeycomb Treat Box
Below you will find a step-by-step video of me assembling the box. If you’re a little bit more visual, this video could be a big help!
Once you’ve finished cutting out all of the pieces, organize them by size.
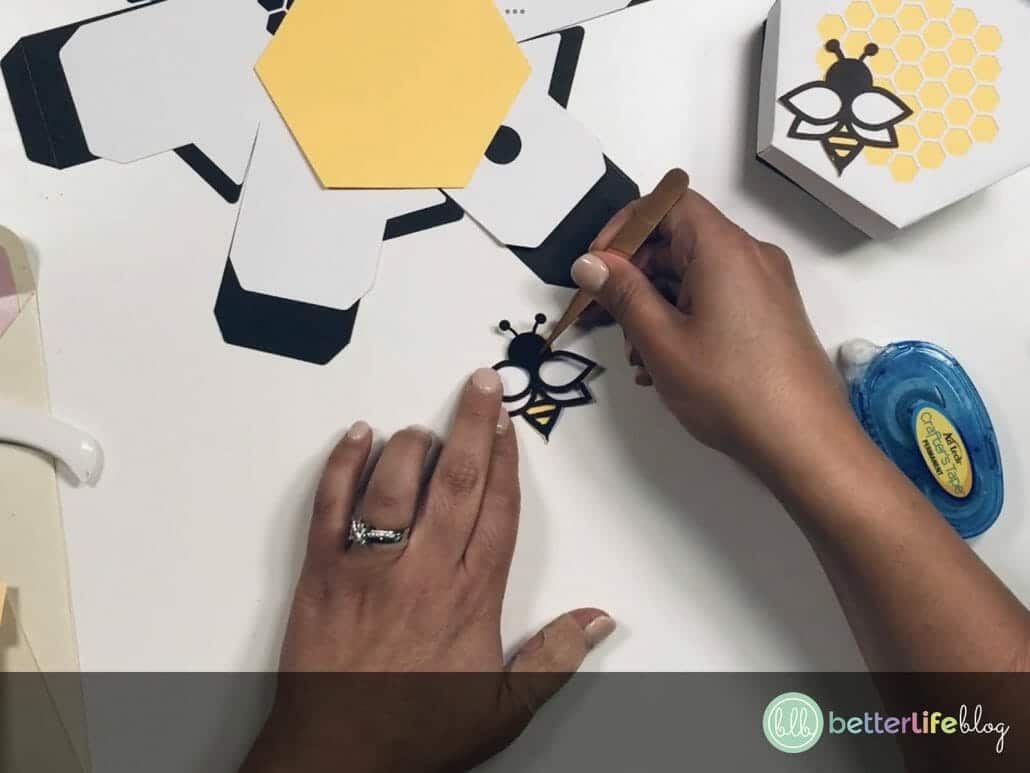
Begin with the bee shapes. There are three different layers to it: the white one goes on the bottom, followed by the yellow, then the black goes on top.
Since the bee is so intricate, I recommend using a pen-tip liquid glue. Glue all the bee’s layers together (as mentioned in the order above).
Move onto the treat box pieces. The large black piece will the base of the box. The white piece is the treat box’s cover. The yellow piece goes under the white lid, giving the honeycomb’s colorful detailing.
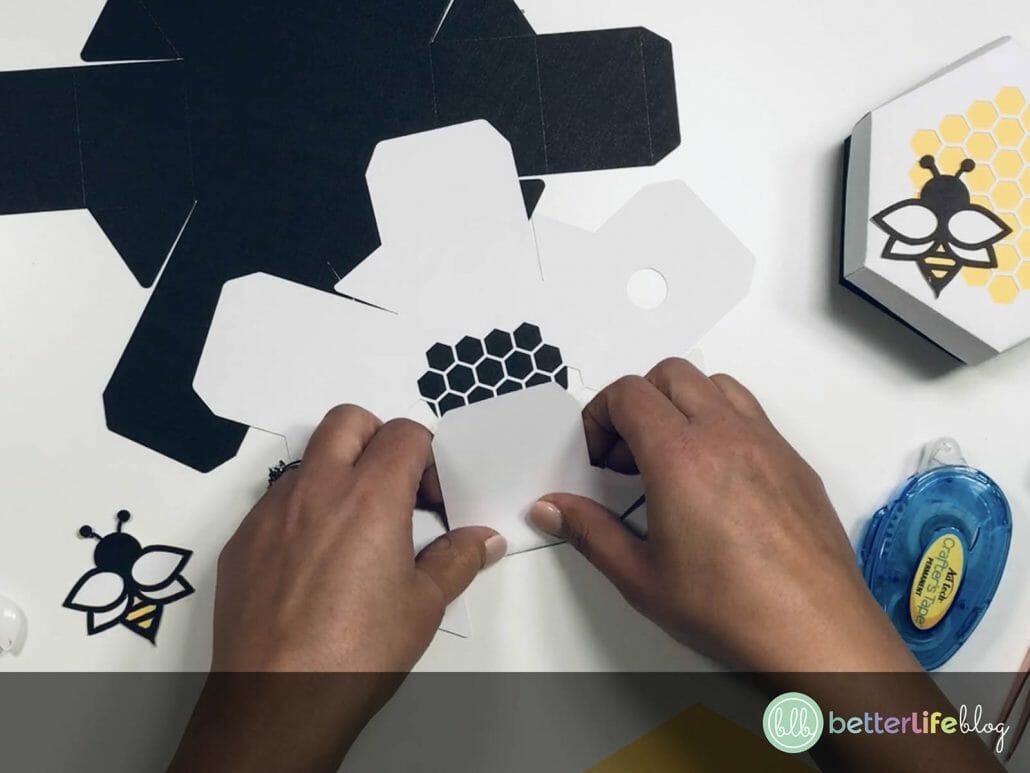
Fold the pieces around the white and black pieces. It is best to use a bone folder to get clean edges.
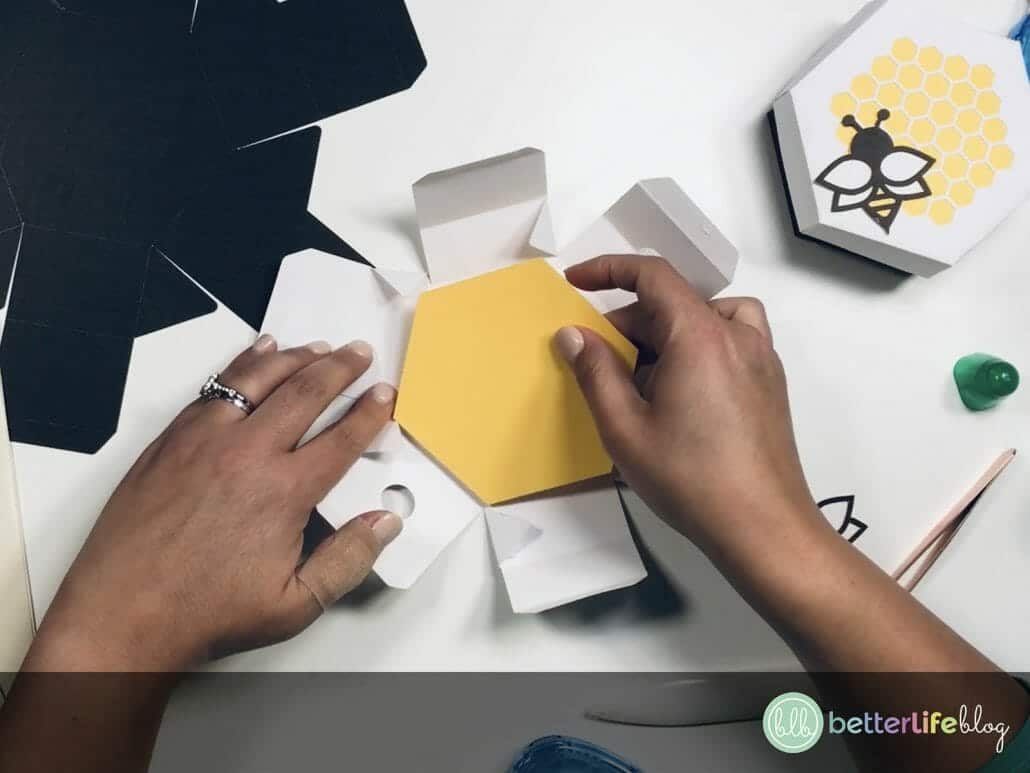
Now, it’s time to glue! Begin with your white piece and use your crafters glue to glue all the long tabs along the cover’s edge You will also add glue to each of the triangular tabs. Finally you will glue the yellow/orange piece in the center.
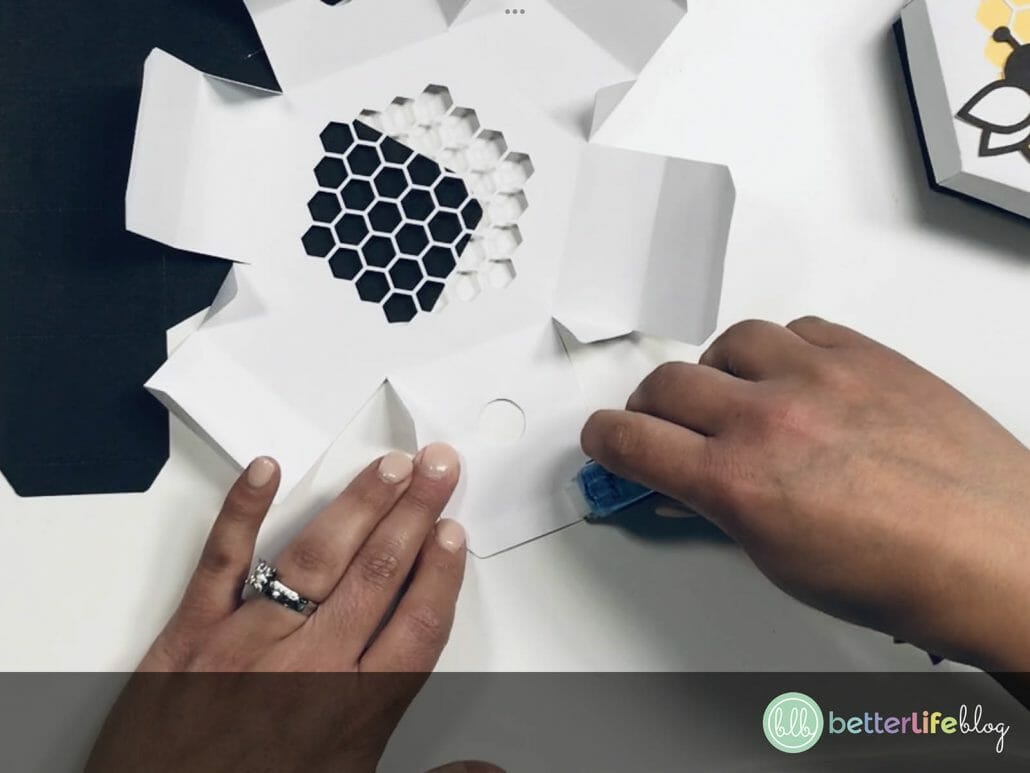
To secure everything together, take one triangular tab and attach it to its adjacent piece to the left. Next fold down the longer pieces to start creating the box top’s edge. Continue along the entire piece.

Repeat the same steps for scoring/folding and gluing and attaching for the black piece.
Once the box top and base are assembled, glue the bee anywhere you want on the box top.
Fill with your gift of choice and present it to a loved one!
Don’t forget to check out our VIP Crafters Club so that you can become a member and do more crafts with us!

How to Make a Honeycomb Treat Box
This Honeycomb Treat Box is a bee-autiful craft! This treat box is perfect for gift-giving occasions. You can fill it with chocolates, candies, a gift card, cookies... the sky's the limit with the gifting possibilities!
Materials
Instructions
- Begin by downloading the cut files. Then, upload them to Cricut Design Space, Silhouette Studio or the program you use for your specific cutting machine.
- Set the red lines in the file to score instead of cut (watch the video tutorial to learn how to do this on Cricut Design Space or Silhouette Srudio)
- Set your cardstock onto your grip mat and cut each shape.
- Gather your cut-outs. Begin with the bee shapes. There are three different layers to it: the white one goes on the bottom, followed by the yellow, then the black goes on top.
- Since the bee is so intricate, I recommend using a pen-tip liquid glue. Glue all the bee’s layers together (as mentioned in the order above).
- Move onto the treat box pieces. The large black piece will the base of the box. The white piece is the treat box’s cover. The yellow piece goes under the white lid, giving the honeycomb’s colorful detailing.
- Fold the pieces around the white and black pieces. It is best to use a bone folder to get clean edges.
- Now, it’s time to glue! Begin with your white piece and use your crafters glue to glue all the long tabs along the cover’s edge. You will also add glue to each of the triangular tabs. Finally you will glue the yellow/orange piece in the center.
- To secure everything together, take one triangular tab and attach it to its adjacent piece to the left. Next fold down the longer pieces to start creating the box top’s edge. Continue along the entire piece.
- Repeat the same steps for scoring/folding and gluing and attaching for the black piece.
- Once the box top and base are assembled, glue the bee anywhere you want on the box top.
- Fill with your gift of choice and present it to a loved one!